Special Tools
J 37228 Seal Cutter
Removal Procedure
- Disconnect the negative battery cable. Refer to Battery Negative Cable Disconnection and Connection.
- Remove the water pump. Refer to Water Pump Replacement.
- Remove the crankshaft front oil seal. Refer to Crankshaft Front Oil Seal Replacement.
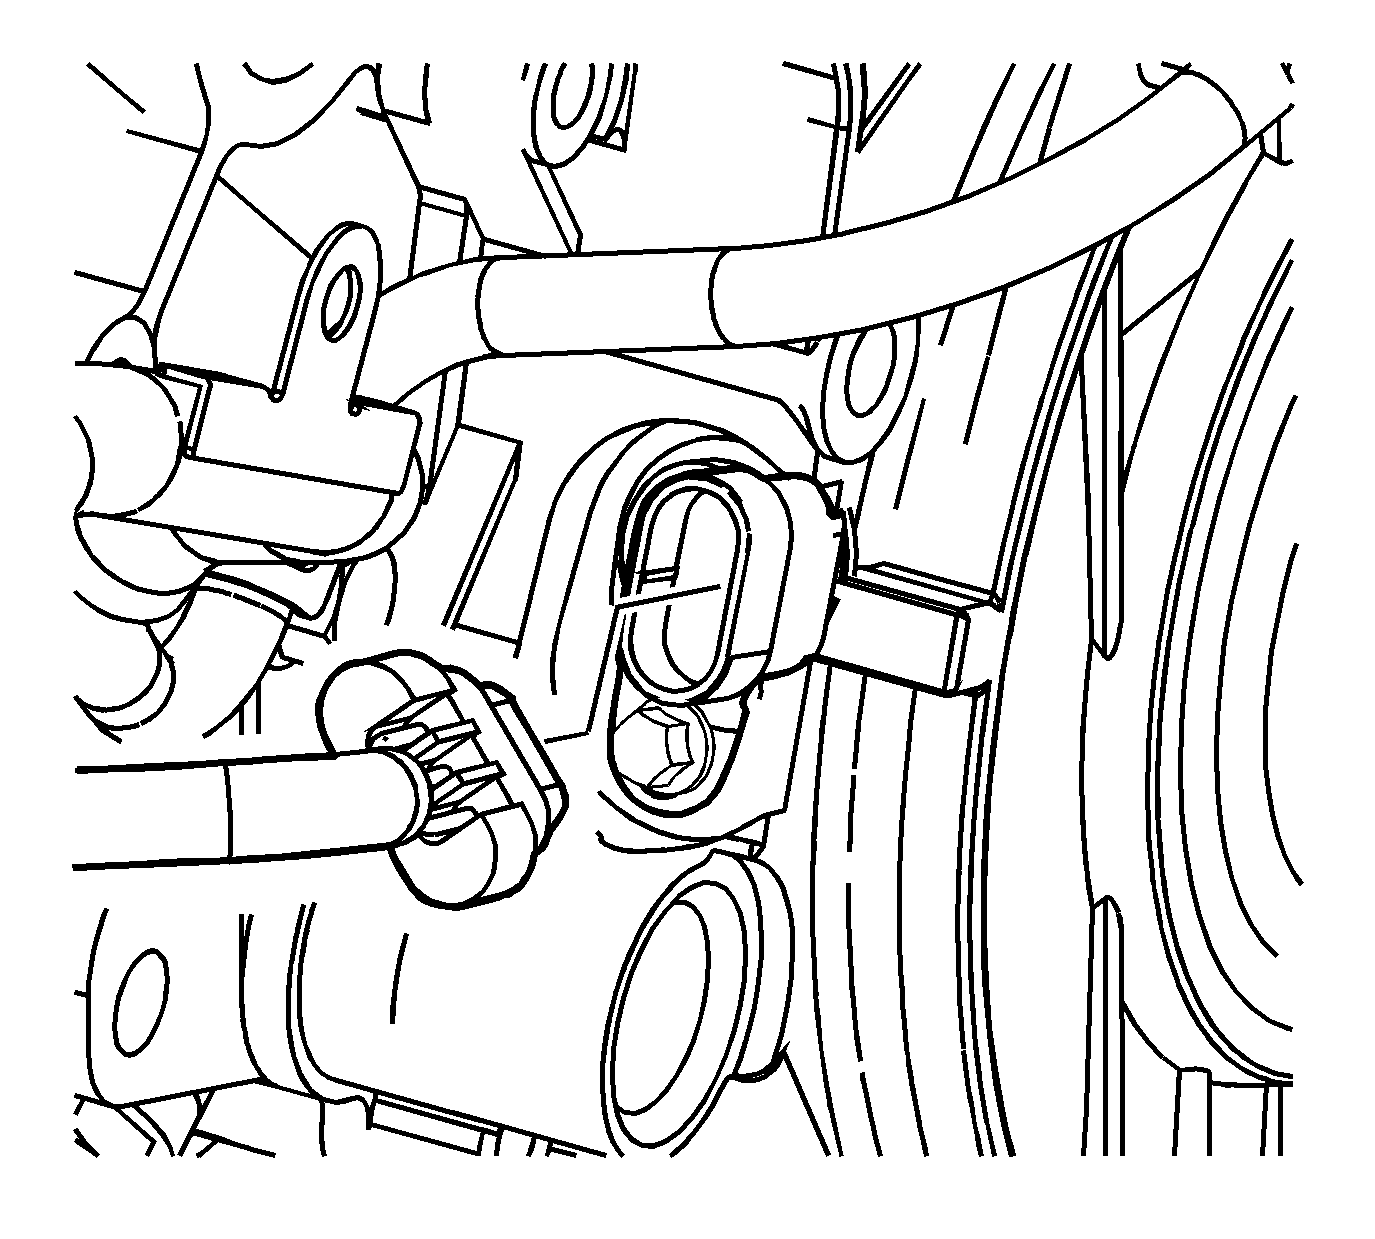
- Disconnect the crankshaft position (CKP) sensor electrical connector.
- Remove the CKP sensor bolt and sensor.
- Remove the CKP sensor spacer bolts and spacer.
- Remove and discard the O-rings from the sensor and the spacer.
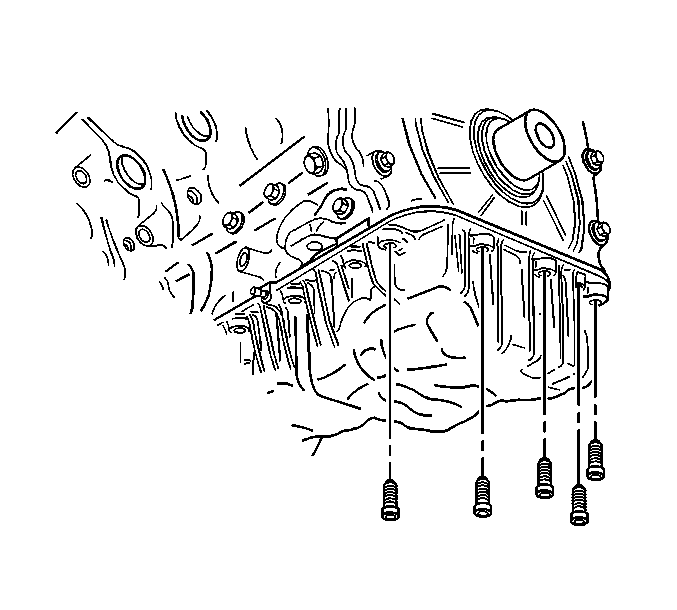
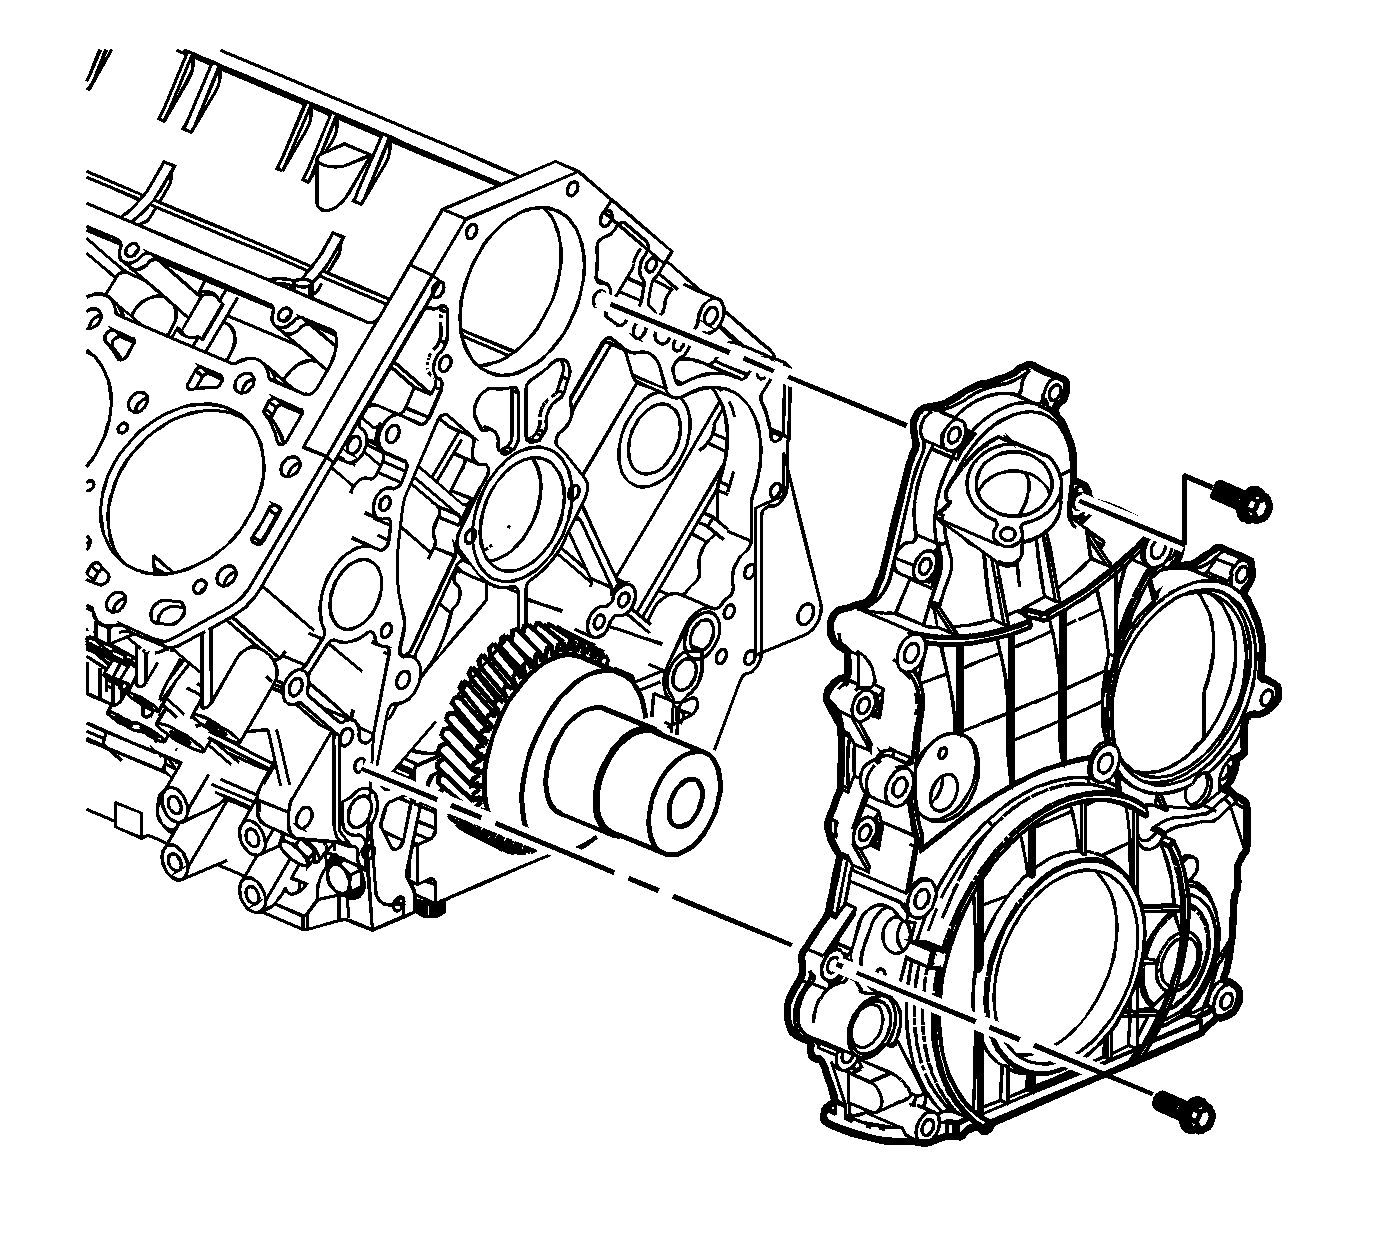
- Remove the upper oil pan to engine front cover bolts.
- Remove the engine front cover bolts.
- Separate the engine front cover from the cylinder block and upper oil pan using J 37228 .
- Remove the engine front cover.
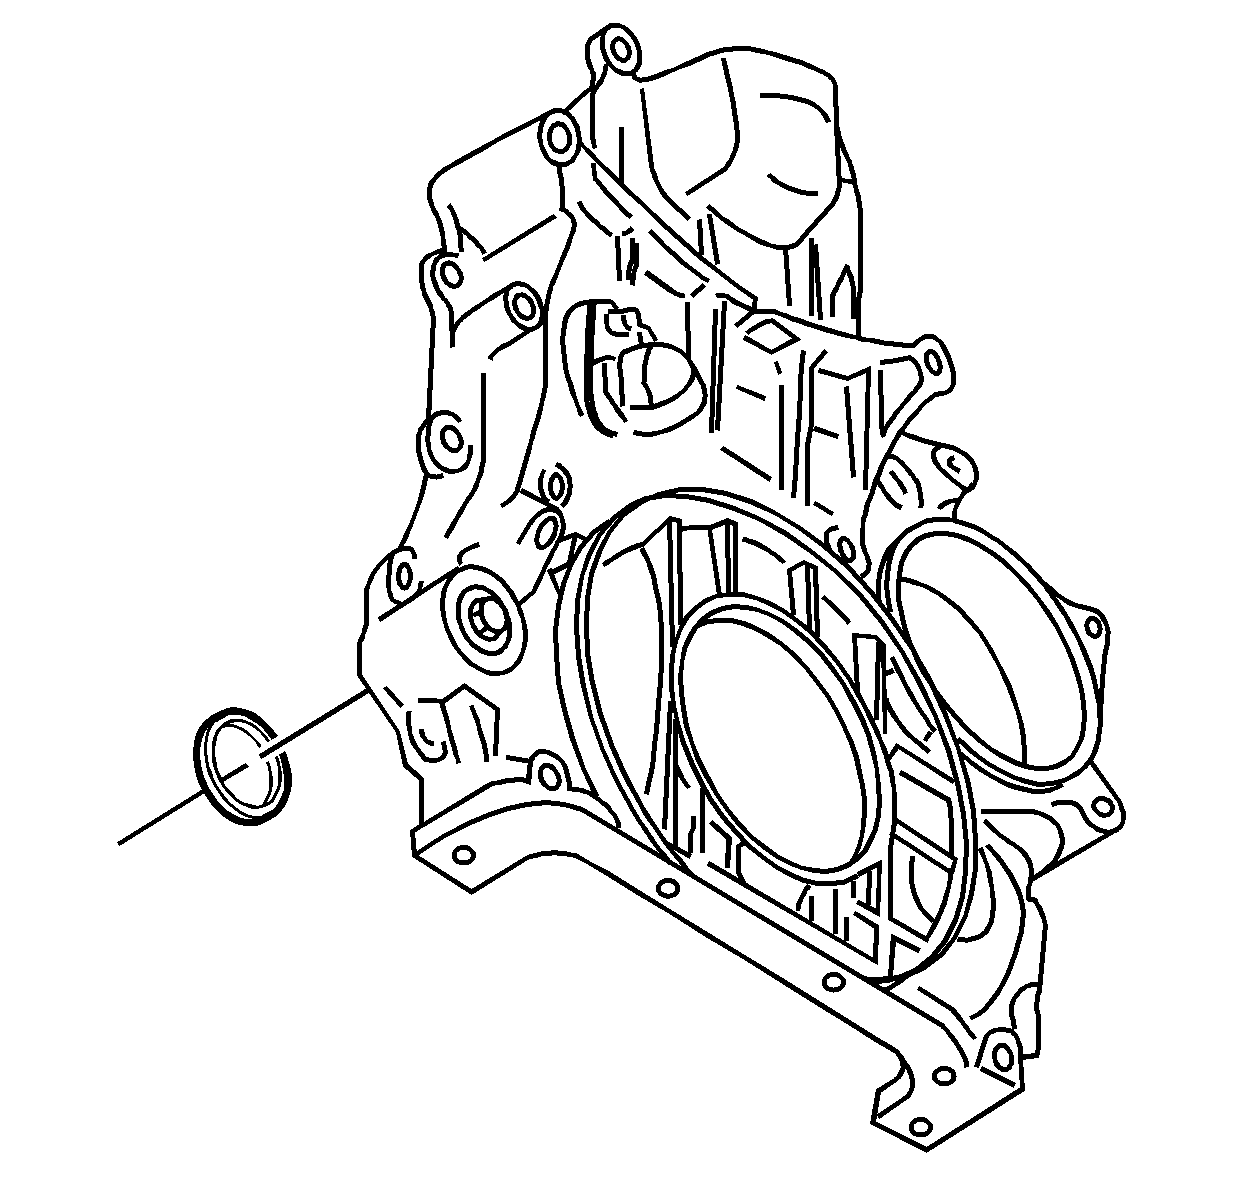
- If necessary, remove the pressure relief valve O-ring.
- Clean and inspect the front cover. Refer to Engine Front Cover Cleaning and Inspection.
Note: The CKP sensor spacers are machined with different timing positions. If the spacer requires replacement, replace it with the same part number spacer. For LLY engines, use C grade spacer when replacing a spacer.
Note: Do not bend the turbocharger coolant pipe.
Installation Procedure
- If necessary, install a NEW pressure relief valve O-ring.
- Lubricate the O-ring with engine oil.
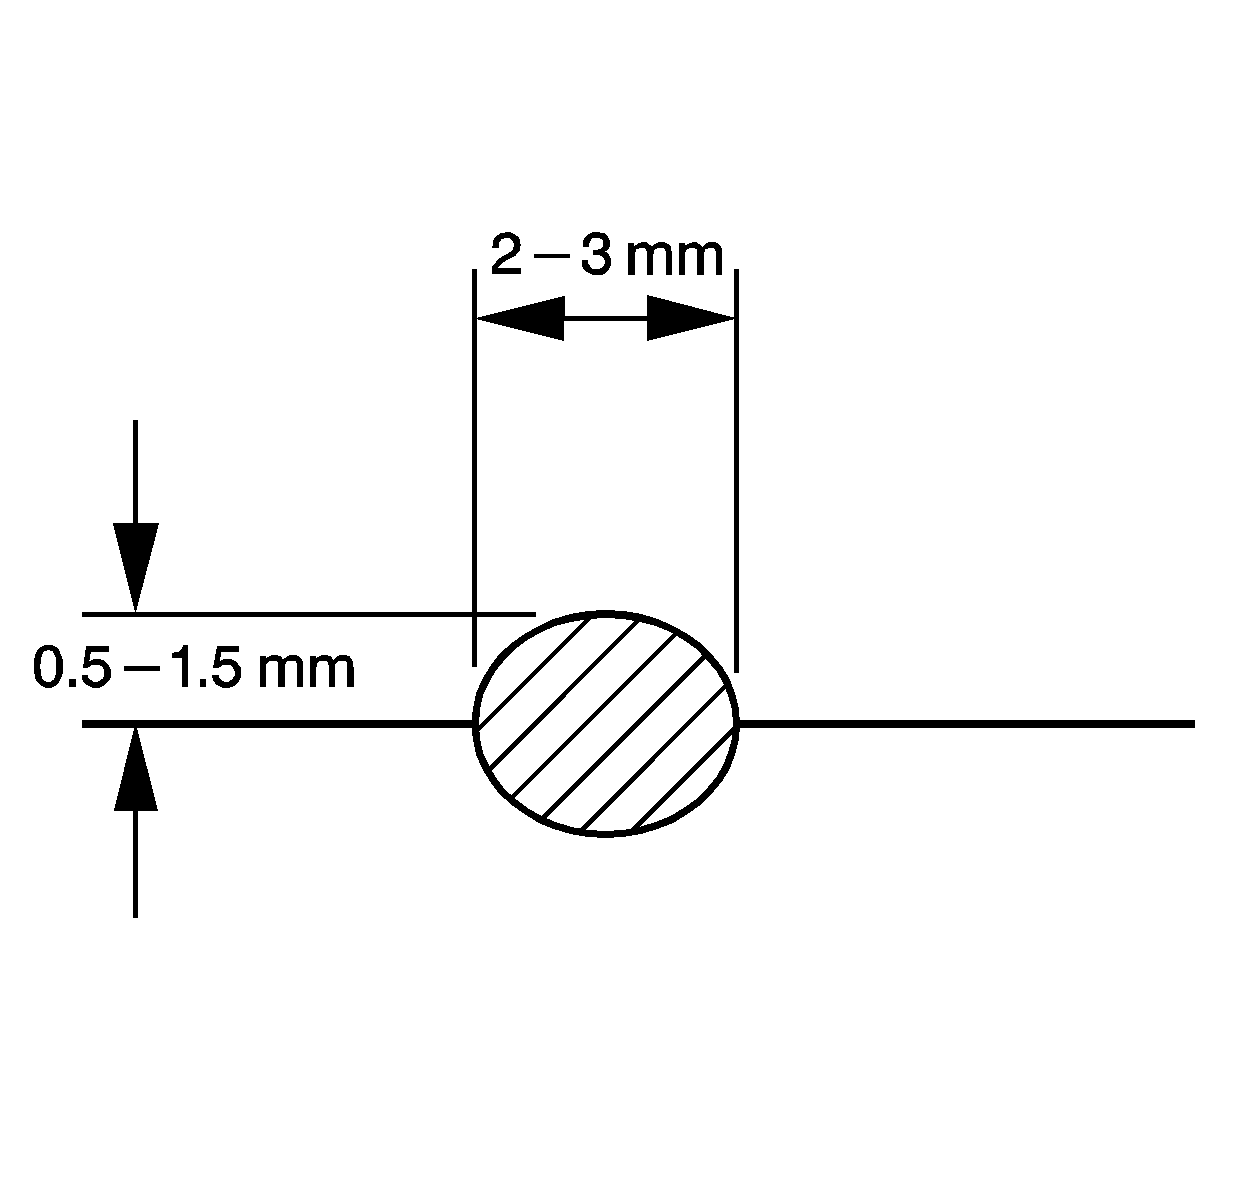
- Apply a 2-3 mm (1/8 in) wide by 0.5-1.5 mm (1/16 in) high, bead of sealant to the engine front cover sealing surface to the engine block. Refer to Adhesives, Fluids, Lubricants, and Sealers for the correct part number.
- Apply a 2-3 mm (1/8 in) wide by 0.5-1.5 mm (1/16 in) high, bead of sealant to the engine front cover sealing surface to the upper oil pan. Refer to Adhesives, Fluids, Lubricants, and Sealers for the correct part number.
- Install the engine front cover.
- Install the engine front cover bolts.
- Install the upper oil pan to engine front cover bolts.
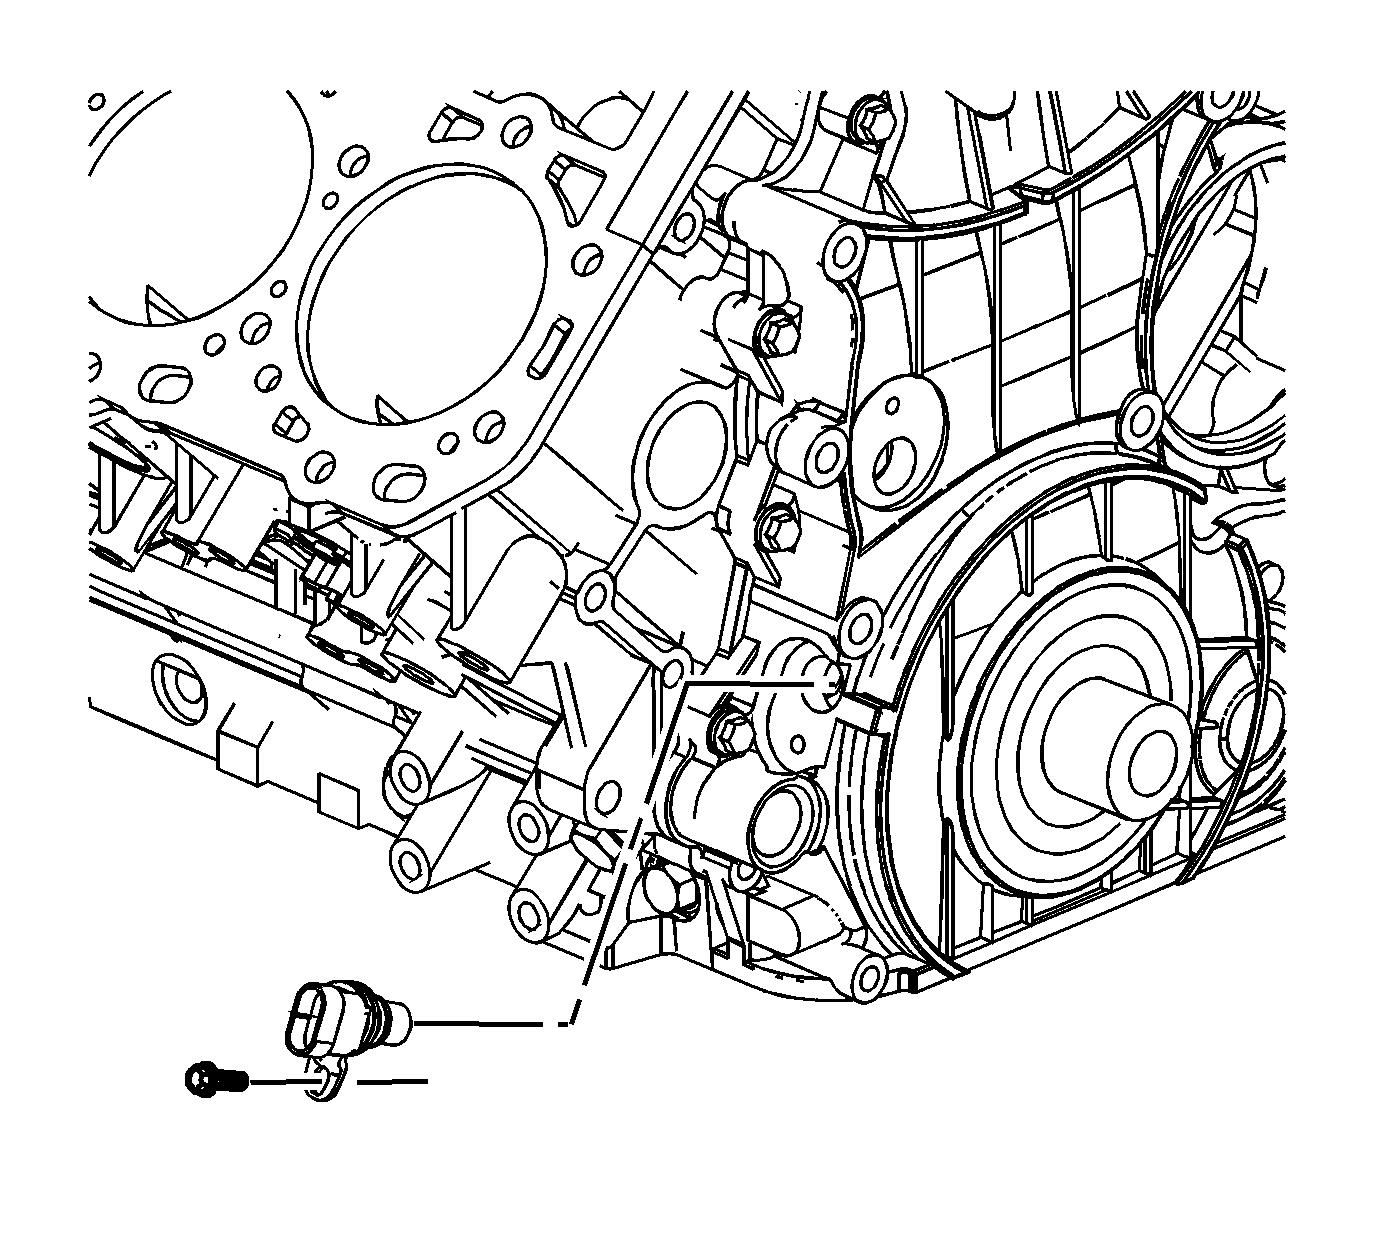
- Install a NEW O-ring to the CKP sensor spacer.
- Lubricate the O-ring with clean engine oil.
- Install the CKP sensor spacer and bolts.
- Install a NEW O-ring to the CKP sensor.
- Lubricate the O-ring with clean engine oil.
- Install the CKP sensor and bolt.
- Connect the CKP sensor electrical connector.
- Install the crankshaft front oil seal. Refer to Crankshaft Front Oil Seal Replacement.
- Install the water pump. Refer to Water Pump Replacement.
- Connect the negative battery cable. Refer to Battery Negative Cable Disconnection and Connection.
Caution: Refer to Fastener Caution in the Preface section.
Tighten
Tighten the valve to 39 N·m (29 lb ft).
Tighten
Tighten the bolts to 2 N·m (15 lb ft).
Tighten
Tighten the bolts to 21 N·m (15 lb ft).
Note: The CKP sensor spacers are machined with different timing positions. If the spacer requires replacement, replace it with the same part number spacer. For LLY engines, use C grade spacer when replacing a spacer.
Tighten
Tighten the bolts to 10 N·m (89 lb in).
Tighten
Tighten the bolt to 10 N·m (89 lb in).
