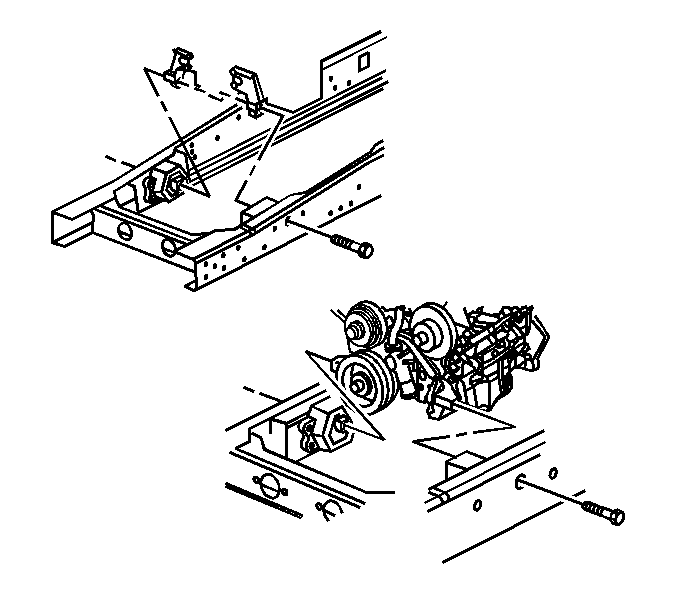
Removal Procedure
- Raise and suitably support the vehicle with safety stands. Refer to
Lifting and Jacking the Vehicle.
- Support the engine using suitable safety stands.
- Disconnect any engine harness clips or line routing on the engine mount.

- Remove the engine mount bracket to engine mount bolts.
- Use a suitable engine hoist to lift weight off the engine mounts.

- Remove the engine mount bracket.
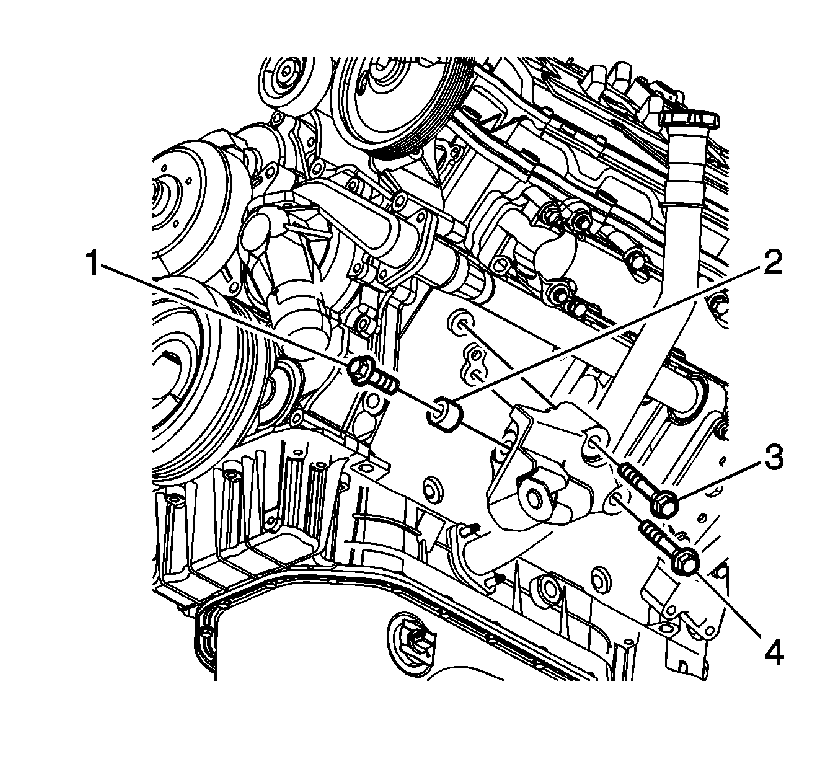
- Remove the engine mount bolts (1, 3, 4).
- Remove the engine mounts and spacer (2).
Installation Procedure
Caution: Refer to Fastener Caution in the Preface section.

- Install the engine mounts and spacer (2).
- Install the engine mount bolts in the following order.
| 2.1. | Loose assemble bracket to engine with 3 bolts and the spacer. |
| 2.2. | Finger tighten the two side position bolts (3, 4). |
| 2.3. | Tighten the front facing bolt (1) with spacer (2) first. |
| 2.4. | Torque the M14 engine mount bolts. |
Tighten
Tighten the M14 engine mount bolts to 160 N·m (118 lb ft).
| 2.5. | Tighten the side facing bolt (3, 4) next. |
| 2.6. | Torque the M12 engine mount bolts. |
Tighten
Tighten the M12 engine mount bolts to 100 N·m (74 lb ft).
- Install the engine mount bracket to the engine mount.
- Lower the engine onto the engine mounts.

- Install the engine mount bracket to engine mount bolts.
Tighten
Tighten the engine mount bracket to engine mount bolts to 240 N·m (178 lb ft).
- Connect any engine harness clips or line routing on the engine mount.
- Remove safety stands and lower the vehicle.


