Tools Required
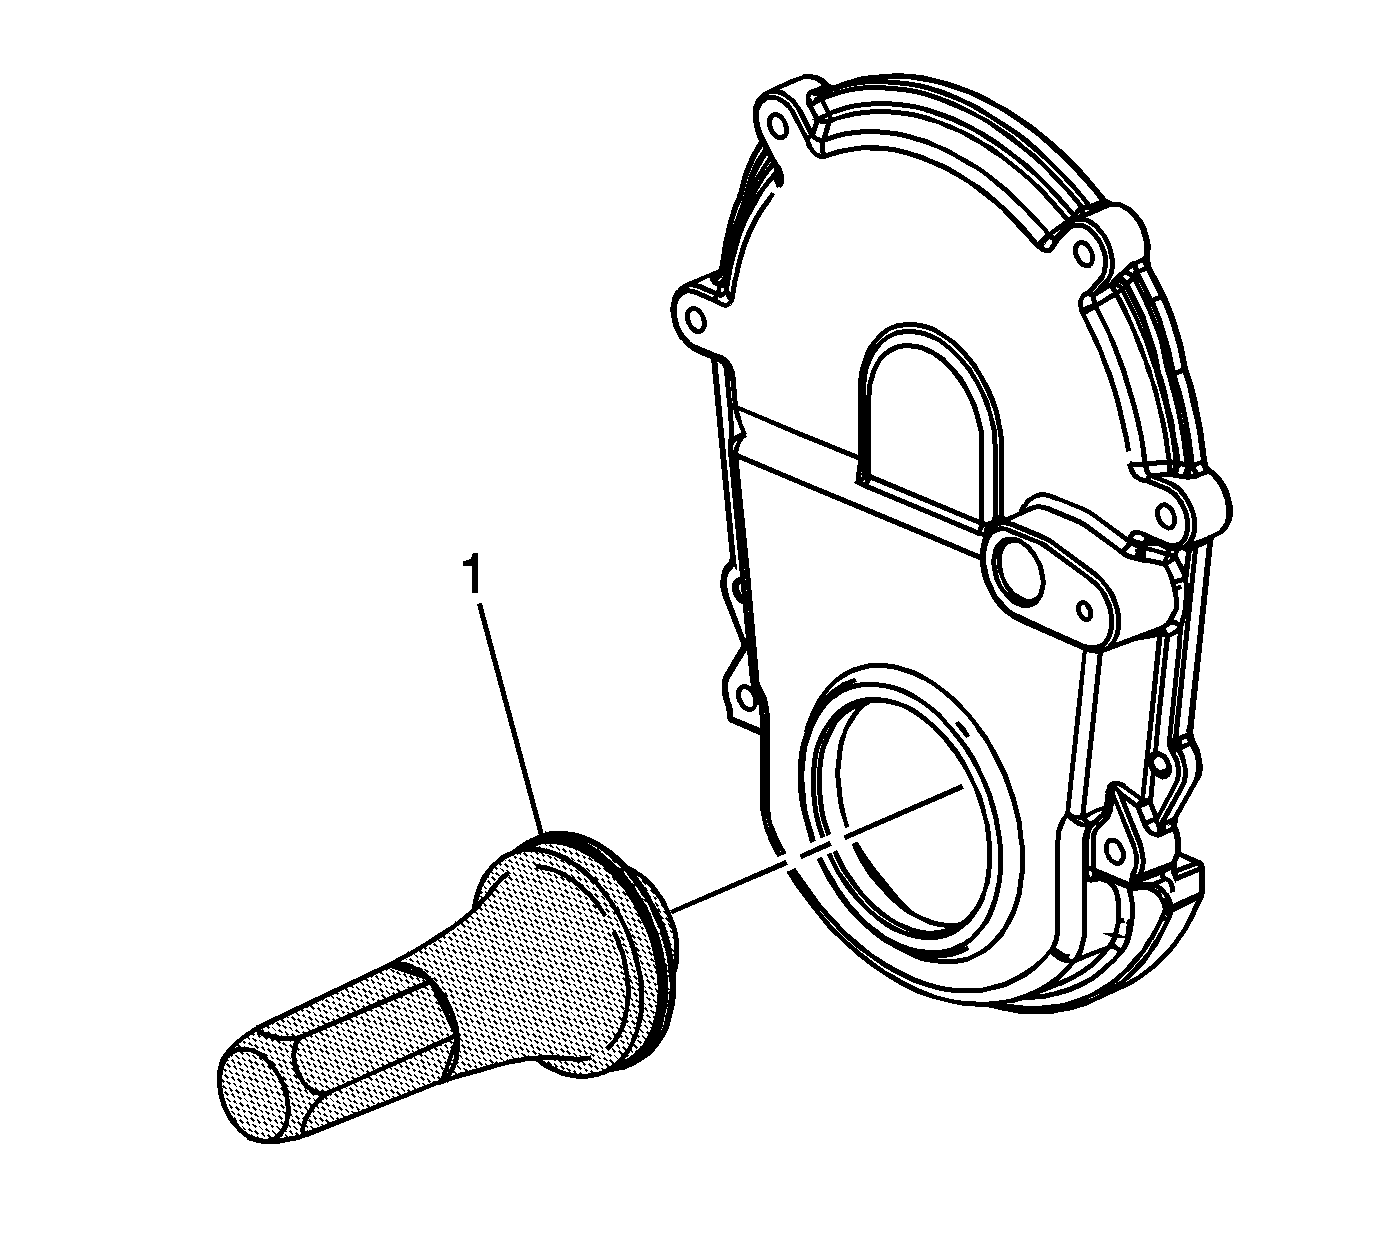
J 42851 Front Cover Oil Seal Installer
- Lubricate the outer sealing surface of the crankshaft front oil seal lightly with clean engine oil. DO NOT lubricate the inner portion of the seal.
- Position the NEW crankshaft front oil seal in the engine front cover so the mark (1) on the rear of the seal is in the 12 o'clock position.
- Using the J 42851 , install the crankshaft front oil seal (1).
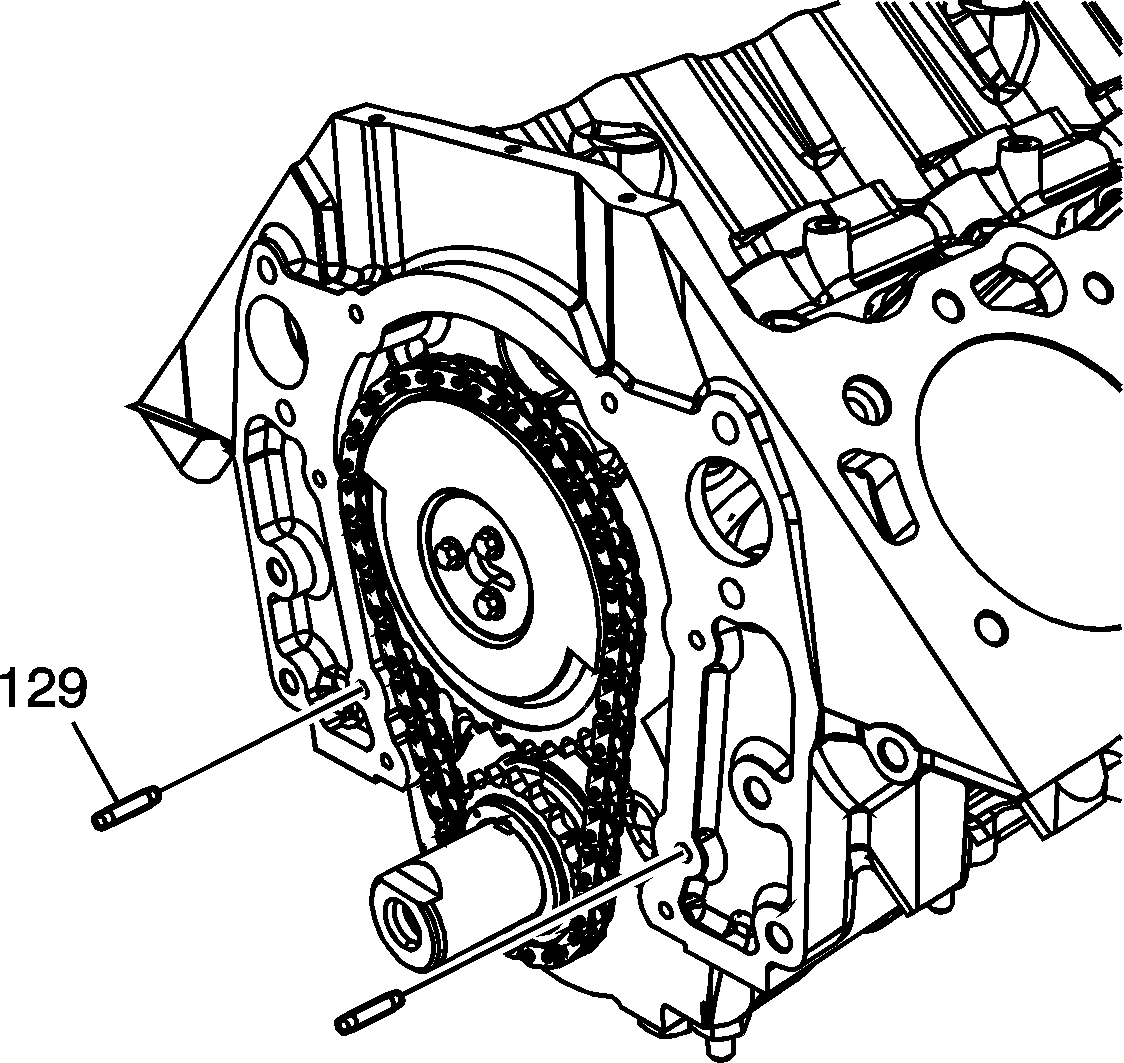
- Install the front cover locating pins (129), if required.
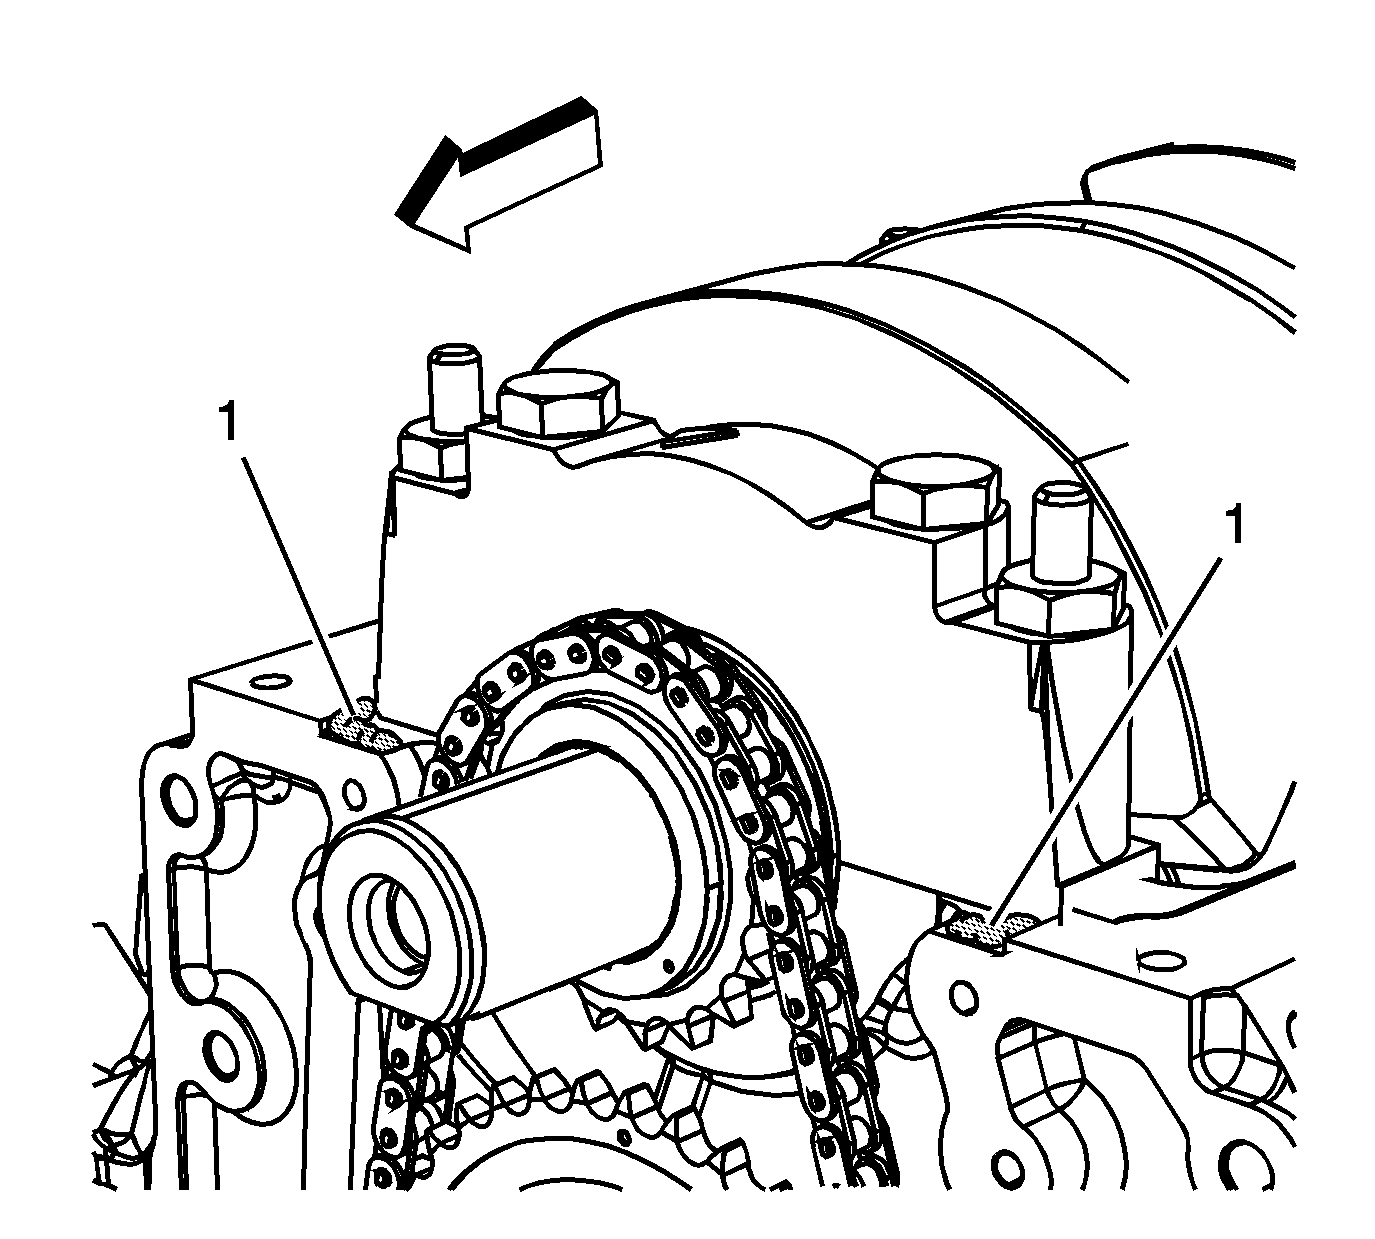
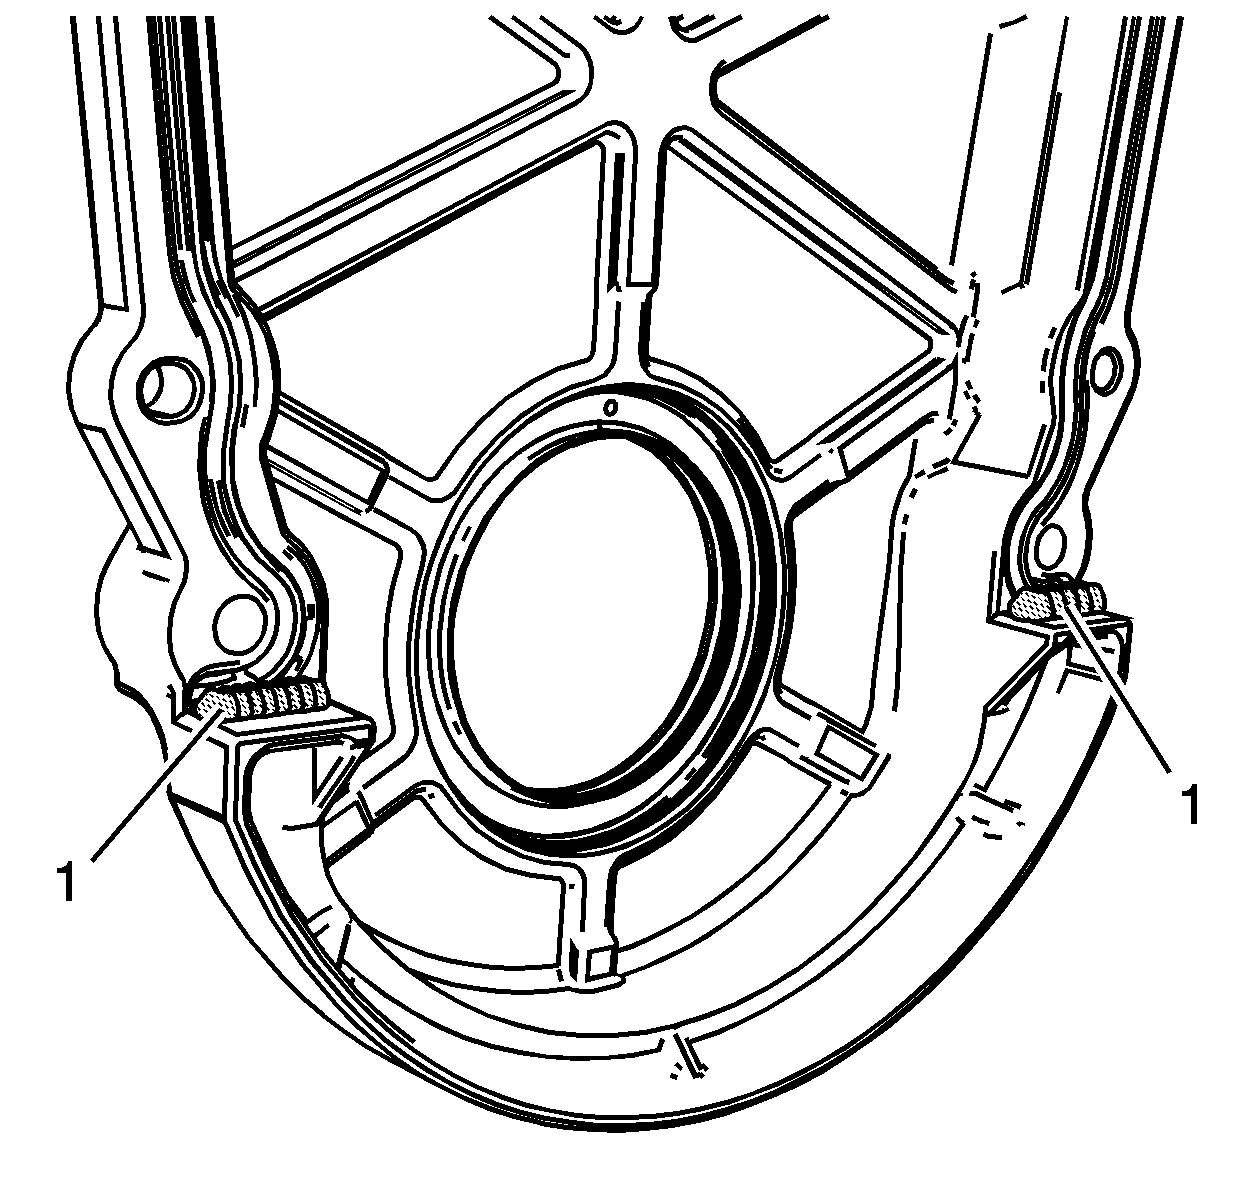
- Apply a 3-4 mm (0.12-0.16 in) bead of sealant GM P/N 12346141 (Canadian P/N 10953433), or equivalent, in 2 sealant points (1) on the engine block where the front cover meets the oil pan.
- Apply a 3-4 mm (0.12-0.16 in) bead of sealant GM P/N 12346141 (Canadian P/N 10953433), or equivalent, in 2 sealant points (1) across the flange where the gasket ends at the bottom of the front cover.
- Install the engine front cover gasket into the front cover.
- Install the engine front cover.
- Install the engine front cover bolts.
- Inspect the camshaft position (CMP) sensor O-ring for cuts, cracks, tears, or damage. Replace the O-ring, as needed.
- Apply a light film of clean engine oil to the CMP sensor O-ring.
- Install the CMP sensor.
- Install the CMP sensor bolt.
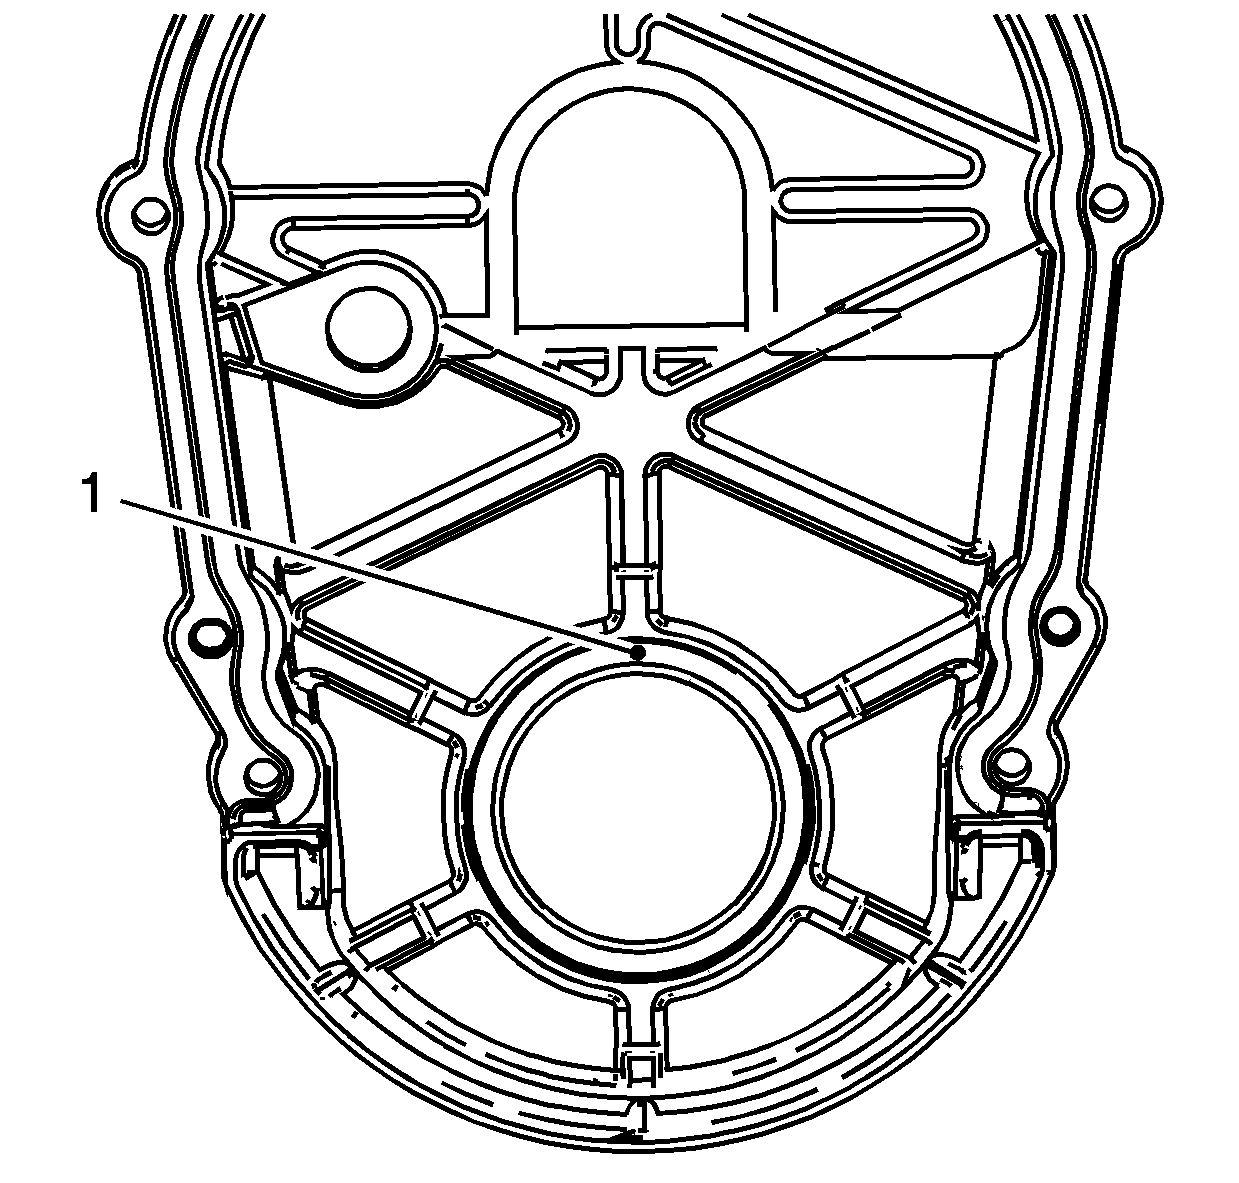
Second design oil seals do not have an alignment mark on the rear face. The seal may be installed in any position.
Important: The engine front cover must be installed and the fasteners tightened while the sealant is still wet to the touch.
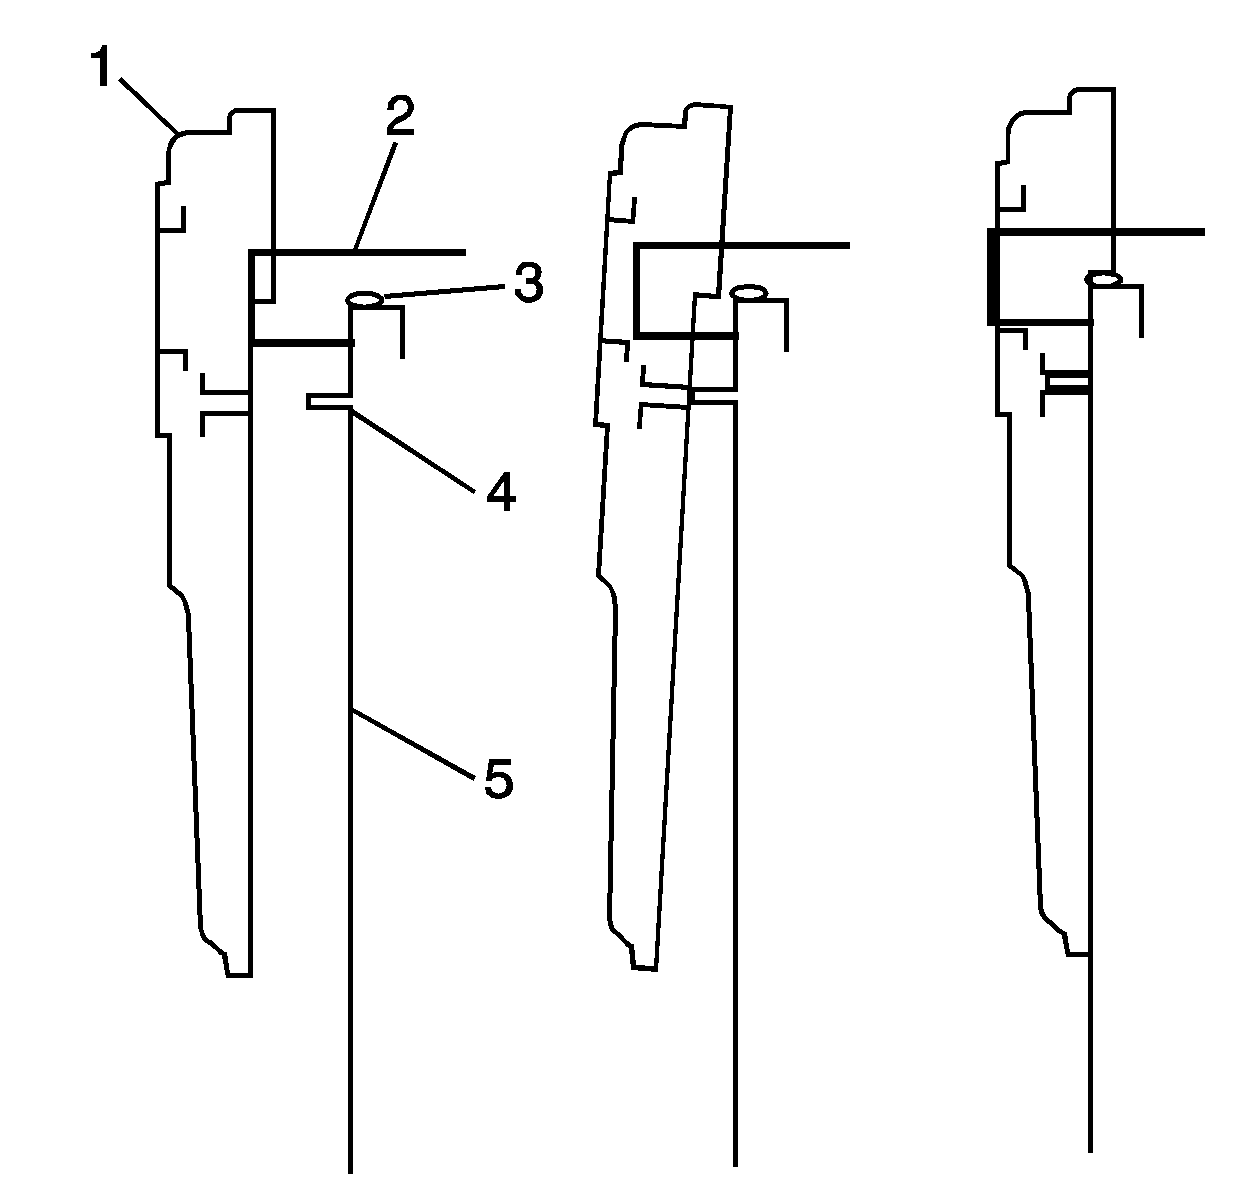
Important: The following method must be used when installing the engine front cover. Failure to follow the instructions will push the sealant out, which may cause an oil leak.
| 8.1. | Hold the front cover (1) up to the crankshaft (2). |
| 8.2. | Lift the front cover (1) while sliding the cover over the crankshaft (2). |
| 8.3. | Slide the front cover towards the engine block (5) while keeping the cover raised. |
| 8.4. | Lower the cover down over the dowel pin (4), allowing the front cover to rest on the sealant (3). |
Notice: Refer to Fastener Notice in the Preface section.
Tighten
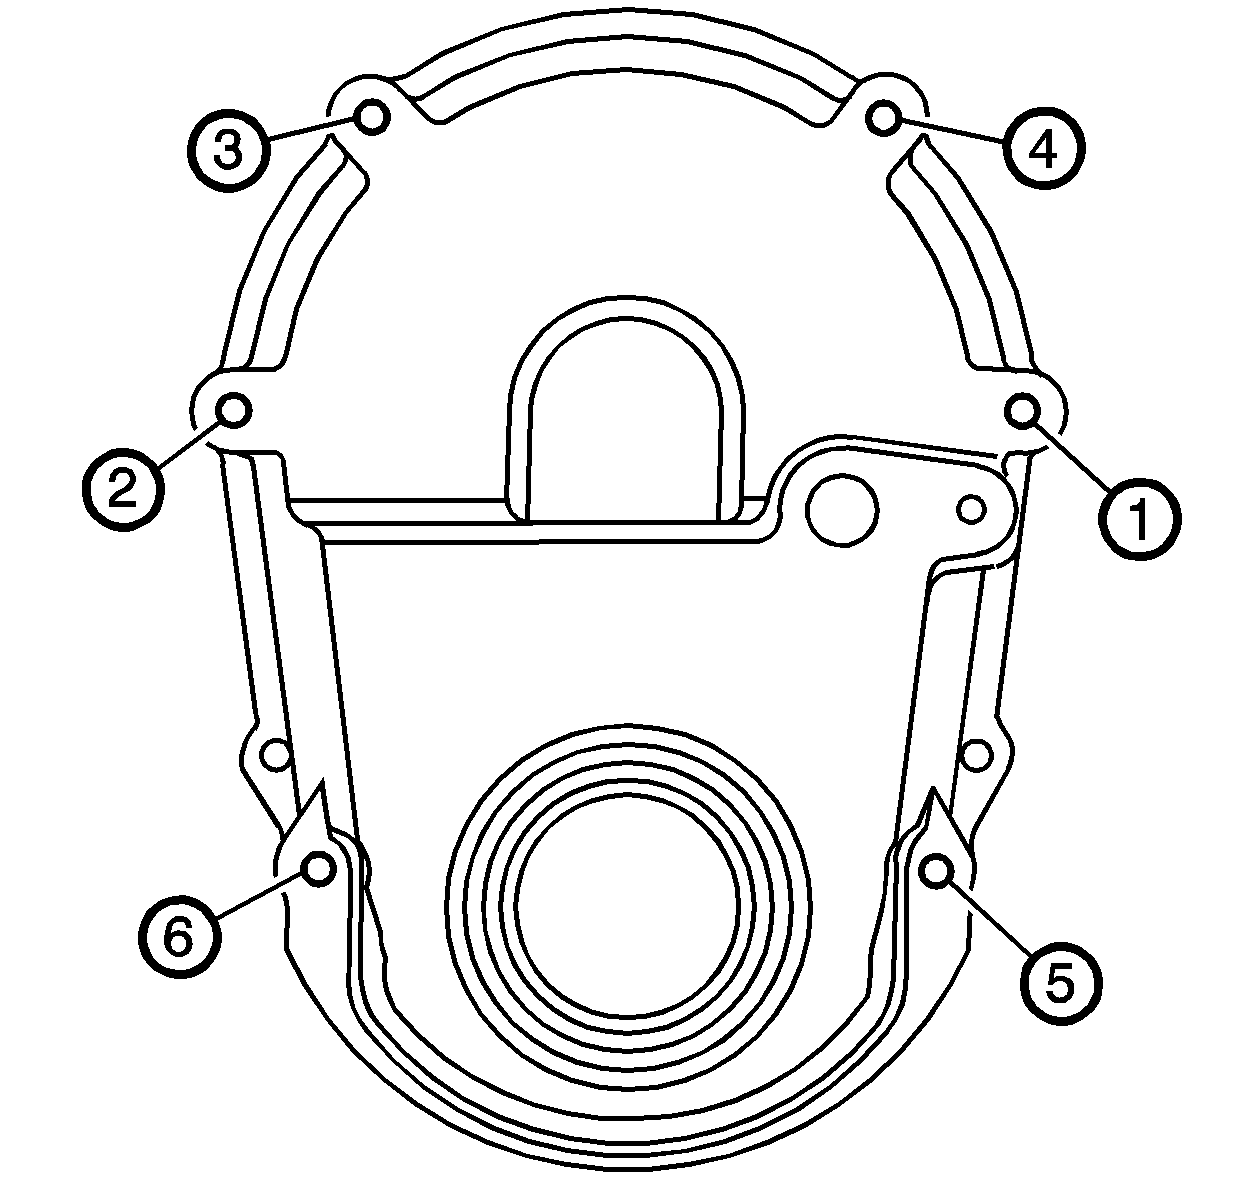
| • | Tighten the engine front cover bolts (1-6) in sequence a first pass to 6 N·m (53 lb in). |
| • | Tighten the engine front cover bolts (1-6) in sequence a final pass to 12 N·m (106 lb in). |
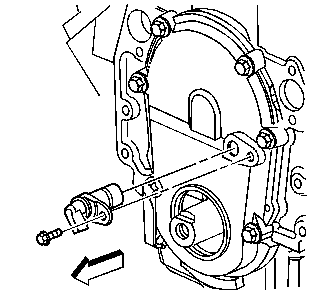
Notice: This bolt is a self-tapping bolt. If installing this bolt into a new component, installation of the bolt may be difficult. Ensure that the bolt is not over-torqued during the initial installation (thread cutting). Failure to limit torque can lead to bolt failure.
Tighten
Tighten the CMP sensor bolt to 12 N·m (106 lb in).
