For 1990-2009 cars only
Removal Procedure
Tools Required
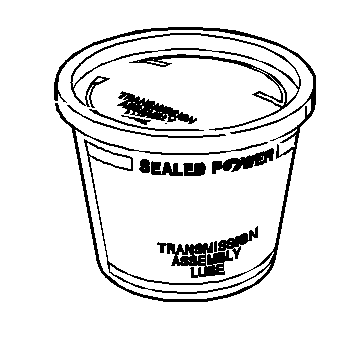
J 36850 Transjel Lubricant
- Remove the engine dress cover.
- Remove the air induction bellows between the throttle body and air cleaner assembly.
- Disconnect the accelerator and cruise cables at throttle valve and remove the accelerator controls cable bracket. Refer to Accelerator Control Cable Bracket Replacement in Engine Controls - 3.4L or Accelerator Control Cable Bracket Replacement in Engine Controls - 3.8L.
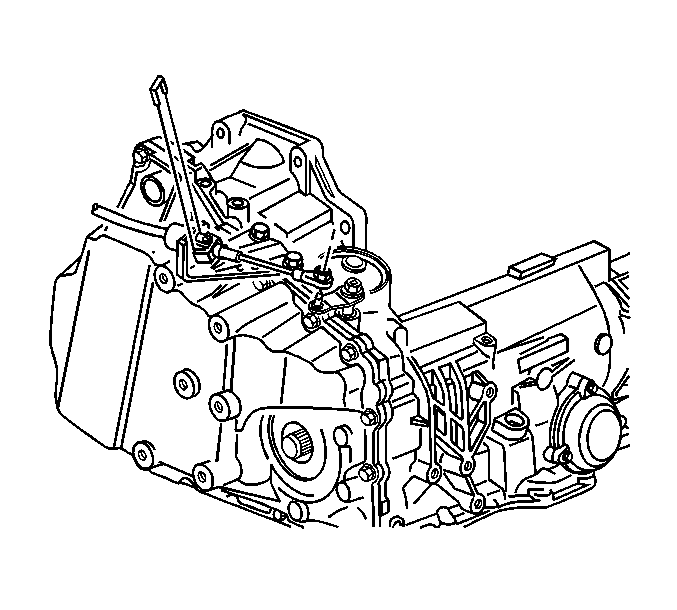
- Remove the transaxle shift cable from lever and bracket from the transaxle.
- Disconnect the transaxle wiring harness connector and disconnect the harness retainer from side cover stud.
- Remove both engine supports from engine and radiator support.
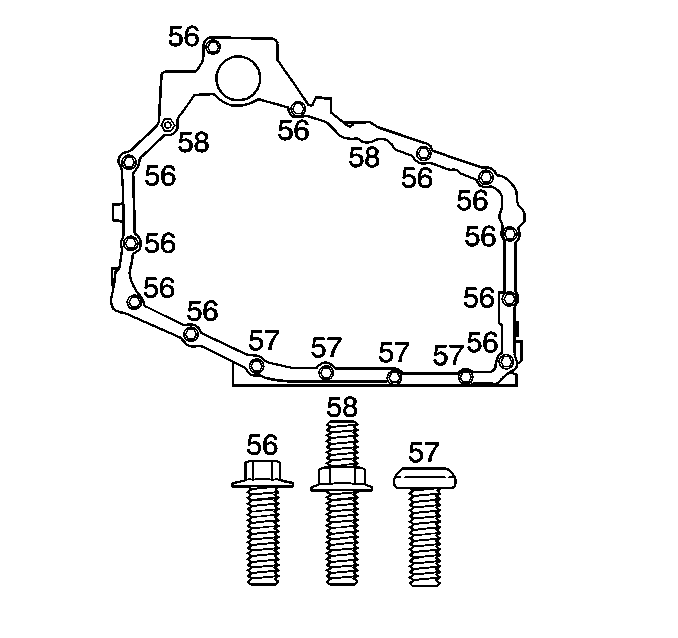
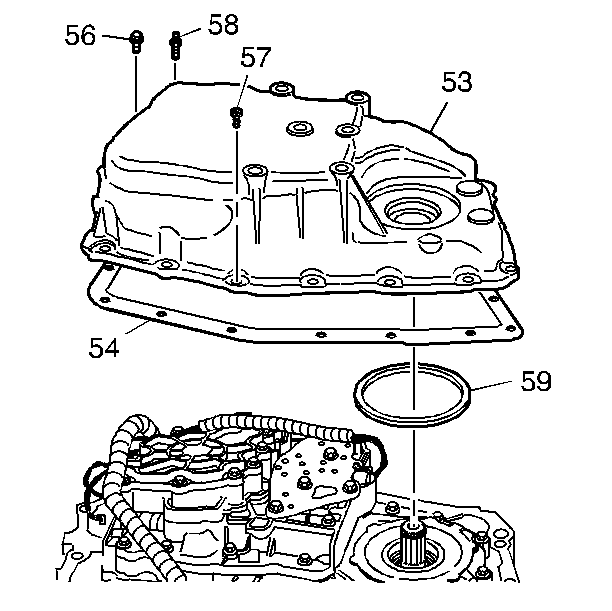
- Remove the top case side cover bolt (56,58).
- Install the engine support fixture and support engine/transaxle assembly. Refer to Engine Support Fixture in Engine Mechanical - 3.4L or Engine Support Fixture in Engine Mechanical - 3.8L.
- Raise and support the vehicle. Refer to Lifting and Jacking the Vehicle in General Information.
- Remove the left front wheel. Refer to Tire and Wheel Removal and Installation in Tires and Wheels.
- Remove the inner fender splash shield.
- Remove the wheel speed sensor harness from 4 retainers on the lower control arm.
- Remove the transmission mount-to-frame nuts (2).
- Remove both stabilizer links and reposition stabilizer to access steering gear- to-frame bolts.
- Remove steering gear-to-frame bolts and support steering gear.
- Remove the front splash shield. Refer to Engine Splash Shield Replacement - Left Side and Engine Splash Shield Replacement - Right Side in Body Front End.
- Remove the positive battery cable center retainer at front frame rail.
- Remove the left side ball joint and support the left frame rail with a jack stand.
- Remove ONLY the left two frame-to-body bolts. DO NOT LOOSEN right side frame-to-body bolts.
- Lower frame with a jackstand and remove jackstand.
- Position the drain pan under the transaxle.
- Remove the left drive axle from the transaxle. Refer to Wheel Drive Shaft Replacement in Wheel Drive Shafts.
- Secure the drive axle to the strut assembly.
- Lower the vehicle.
- Using the engine support fixture lower the engine assembly to access the transaxle case side cover.
- Raise the vehicle.
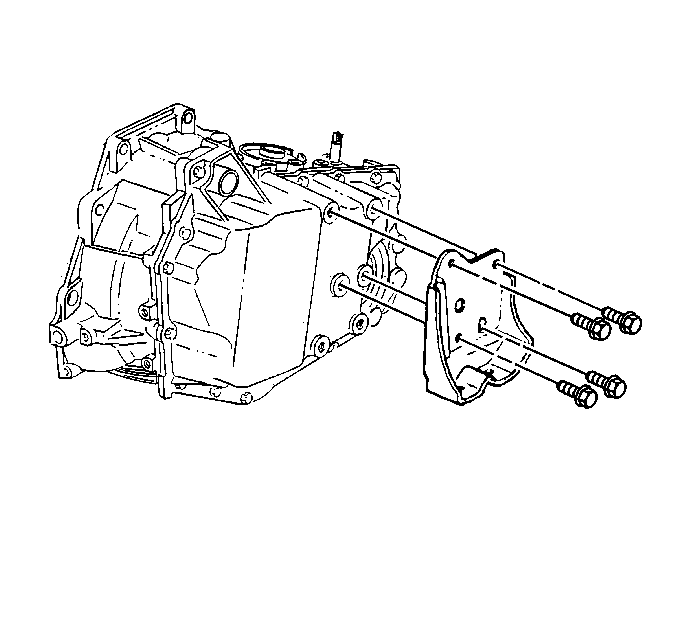
- Remove the transaxle mount bracket bolts and the bracket from the transaxle.
- Remove the remaining case side cover bolts (56,57,58).
- Remove the case side cover (53).
- Remove the case side cover gasket (54).
- Remove the case side cover O-ring (59).
- Clean the side cover gasket mating surfaces.
Installation Procedure
- Install the J 36850 to the case side cover O-ring (59).
- Install the O-ring (59) to the case side cover.
- Install the case side cover gasket (54).
- Install the case side cover (53), by first installing any 2 of the upper case side cover bolts (56, 58).
- Install the case side cover bolts (56,57,58).
- Install the transaxle mount bracket
- Install the transaxle mount bracket bolts.
- Install a jackstand under the left frame rail and raise frame while aligning transaxle mount bolts with frame and ball joint with steering knuckle.
- Install and tighten left side frame-to-body bolts (2).
- Install the drive axle to the transaxle.
- Remove the drain pan from under the transaxle.
- Install transaxle mount nuts (2).
- Install the ball joint nut and cotter pin.
- Install steering gear-to-frame bolts.
- Install the positive battery cable center retainer on the front frame rail.
- Reposition the stabilizer bar and install bolts-to-lower control arms.
- Install the front splash shield. Refer to Engine Splash Shield Replacement - Left Side and Engine Splash Shield Replacement - Right Side in Body Front End.
- Install the wheel speed sensor harness to 4 retainers on the lower control arm.
- Install the inner fender splash shield.
- Install the left front wheel. Refer to Tire and Wheel Removal and Installation in Tires and Wheels.
- Lower the vehicle.
- Remove the engine support fixture.
- Install the top case side cover bolt.
- Install the shift cable to the shift lever and transaxle shift cable bracket bolts to shift cable bracket.
- Connect the transaxle wiring harness connector, and harness retainer to side cover stud.
- Install the engine mount struts. Refer to Engine Mount Strut Replacement - Left Side and Engine Mount Strut Replacement - Right Side in Engine Mechanical - 3.4L or Engine Mount Strut Replacement - Right Side and Engine Mount Strut Replacement - Left Side in Engine Mechanical - 3.8L.
- Install the accelerator cable bracket with the accelerator and cruise control cables. Refer to Accelerator Control Cable Bracket Replacement in Engine Controls - 3.4L or Accelerator Control Cable Bracket Replacement in Engine Controls - 3.8L.
- Install the air induction duct. Refer to Air Cleaner Inlet Duct Replacement in Engine Controls - 3.4L or Air Cleaner Inlet Duct Replacement in Engine Controls - 3.8L.
- Install the engine dress cover.
- Check and fill the transaxle as necessary.
- Inspect for fluid leaks.
Notice: Refer to Fastener Notice in the Preface section.
Tighten
Tighten bolts to 25 N·m (18 lb ft).
Tighten
Tighten the bolts to 95 N·m (70 lb ft)
Tighten
Tighten bolts to 25 N·m (18 lb ft).
Tighten
Tighten bolts to 30 N·m (22 lb ft).
Notice: Do not overfill the transmission. Overfilling will result in foaming, loss of fluid, and possible damage to the transmission.
