For 1990-2009 cars only
Tools Required
| • | J 45059 Torque Angle Meter |
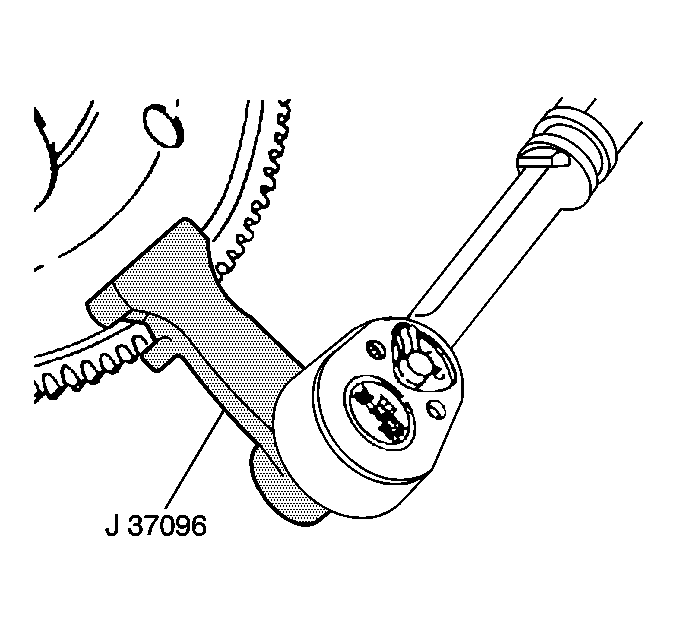
| • | J 37096 Flywheel Holder |
Removal Procedure
- Remove the transaxle. Refer to Transmission Replacement in Automatic Transaxle - 4T65-E.
- Use the J 37096 to prevent the flywheel from rotating.
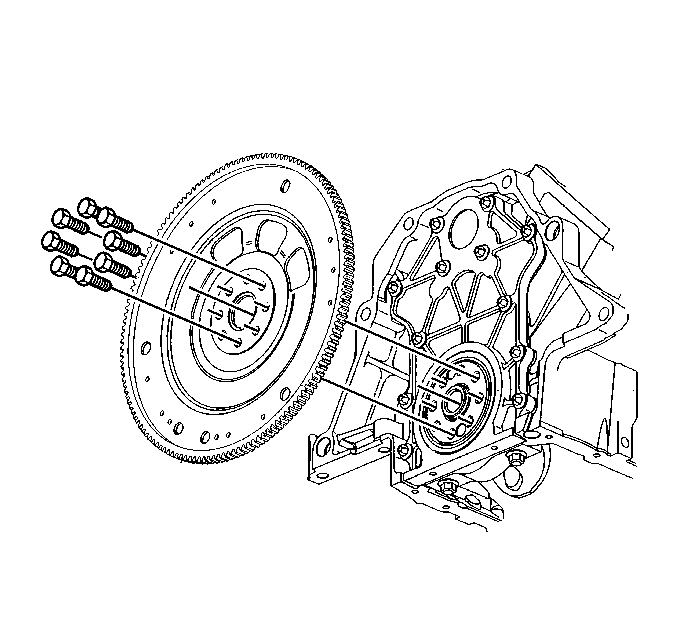
- Loosen the 8 engine flywheel bolts.
- Remove 7 of the 8 engine flywheel bolts, leaving 1 bolt at the top of the crankshaft rotation.
- Firmly grasp the engine flywheel and remove the remaining bolt. Do not drop the engine flywheel when removing the final bolt.
- Remove the engine flywheel.
Installation Procedure
- Install the engine flywheel.
- Use the J 37096 to prevent the flywheel from rotating.
- Install the new engine flywheel bolts.
- Tighten the bolts to 15 N·m (11 lb ft).
- Use theJ 45059 to rotate the bolts an additional 50 degrees.
- Use the following procedure to measure engine flywheel runout:
- Install the transaxle. Refer to Transmission Replacement in Automatic Transaxle - 4T65E.
Notice: Refer to Fastener Notice in the Preface section.
Tighten
Important: The crankshaft end play must be held in one direction during this check.
| 4.1. | Install a dial indicator on the engine block and check the engine flywheel runout at three attaching bosses. Refer to Engine Mechanical Specifications . |
| 4.2. | If the runout is not within the specification and cannot be corrected, replace the engine flywheel. |
