Tools Required
J 38185 Hose Clamp Pliers
Removal Procedure
- Remove the battery. Refer to Battery Replacement in Engine Electrical.
- Remove the right front fender upper diagonal brace. Refer to Front Fender Upper Diagonal Brace Replacement in Body Front End.
- Drain the cooling system. Refer to Cooling System Draining and Filling .
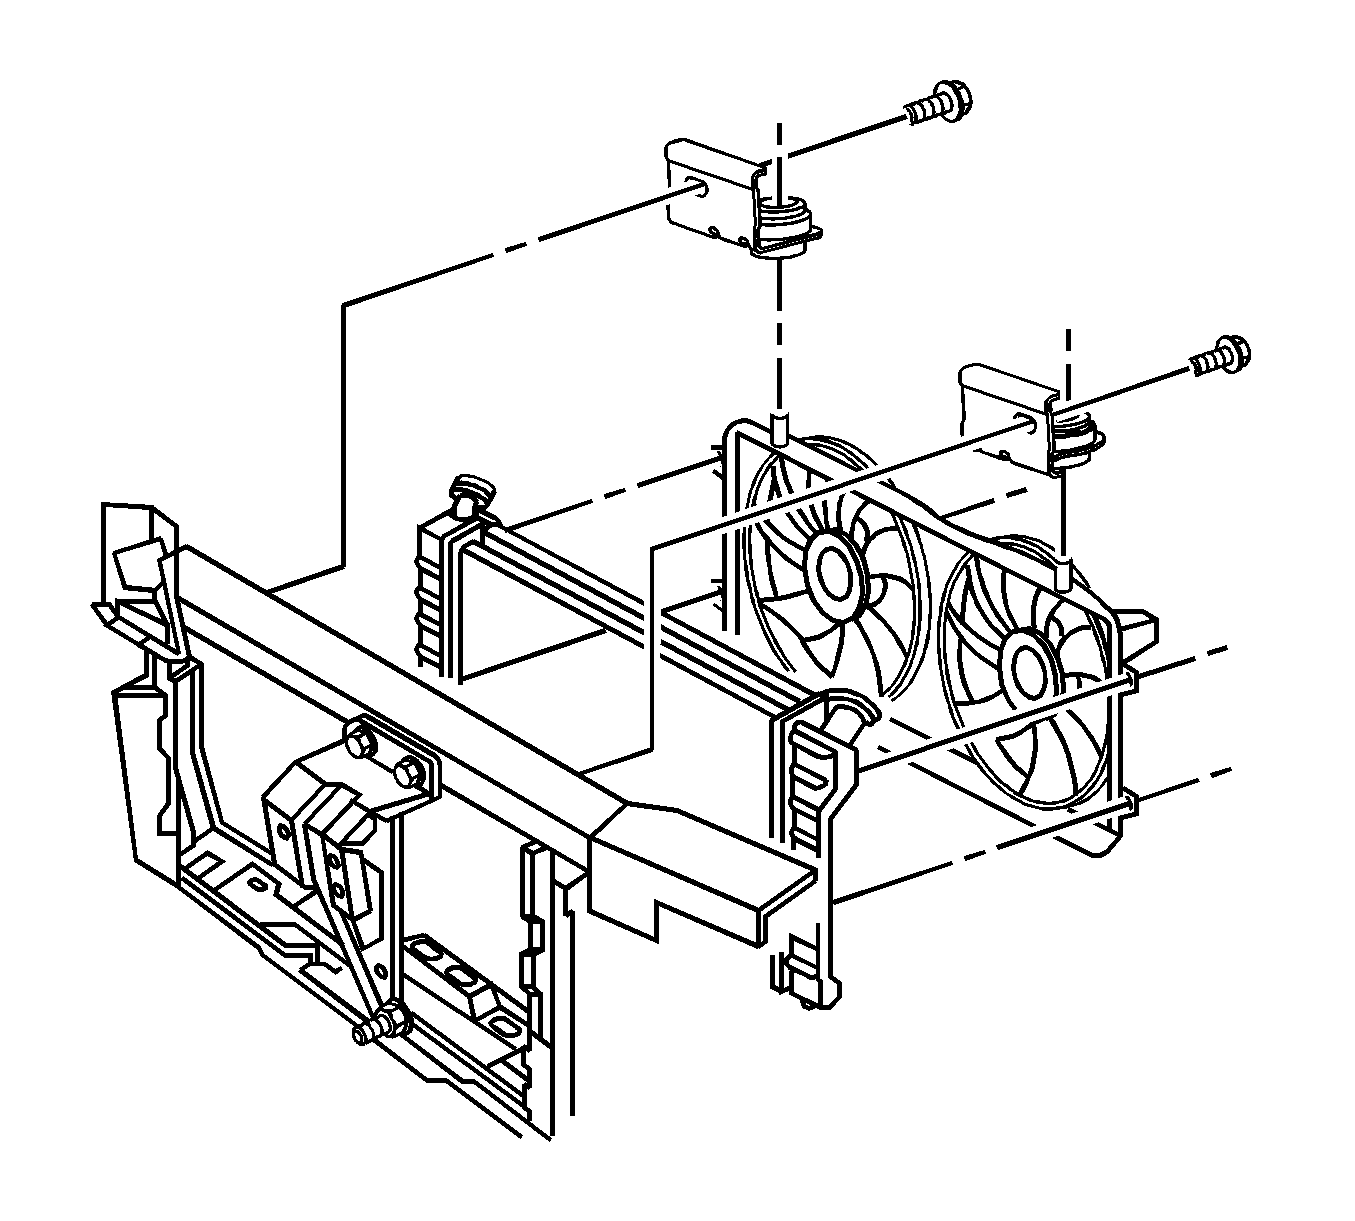
- Remove the fan shroud. Refer to Fan Shroud Replacement .
- Raise and support the vehicle. Refer to Lifting and Jacking the Vehicle in General Information.
- Remove the lower air deflector. Refer to Radiator Air Lower Baffle and Deflector Replacement .
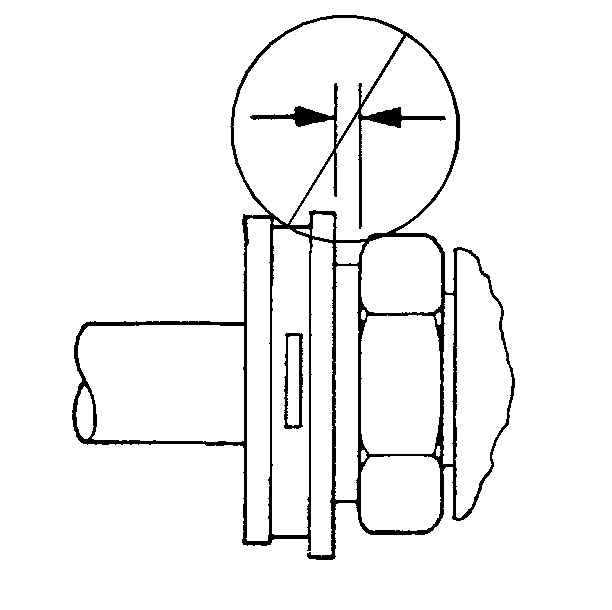
- Use J 38185 to remove the outlet hose clamp from the radiator.
- Remove the outlet hose from the radiator.
- Disconnect the transaxle oil cooler pipes from the radiator.
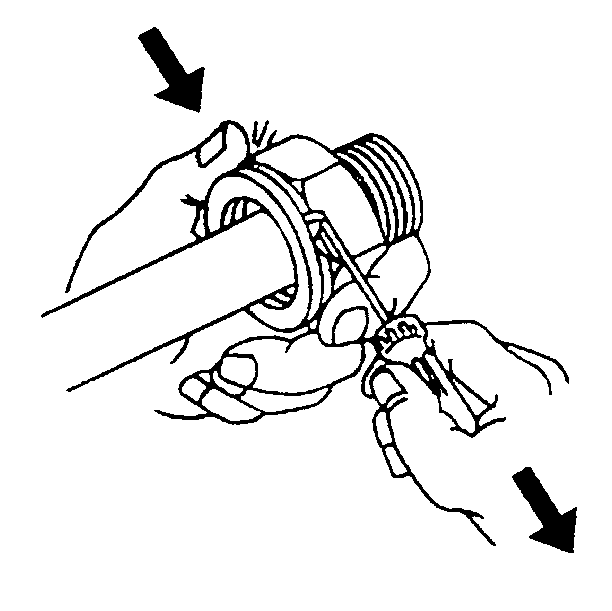
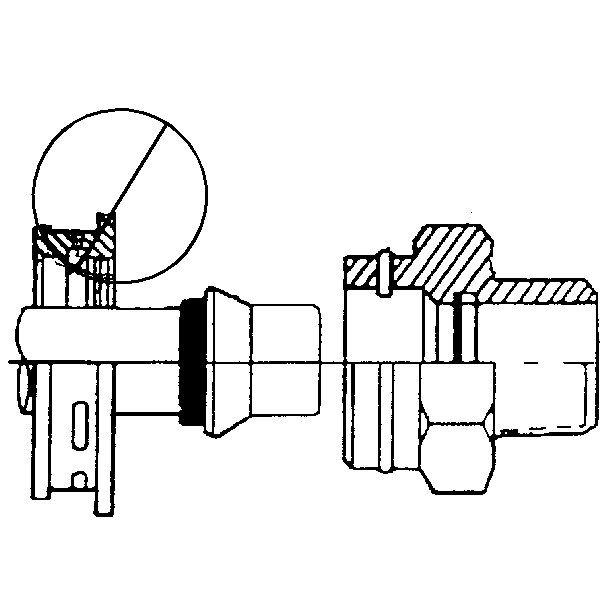
- Pull the plastic cap back from the quick connect fitting and down along the transaxle oil cooler line.
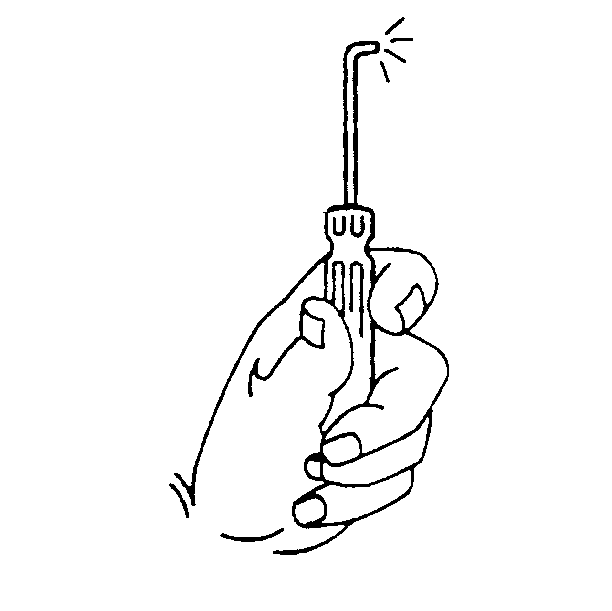
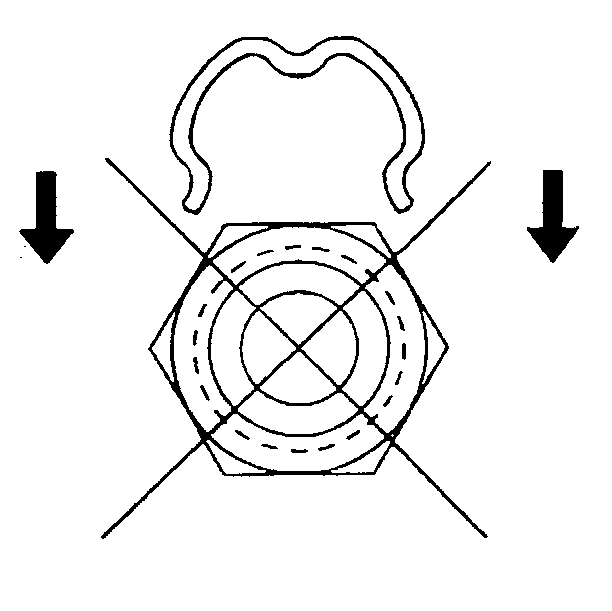
- Using a bent-tip screwdriver, pull on one of the open ends of the retaining ring in order to rotate the retaining ring around the quick connect fitting until the retaining ring is out of position and can be completely removed.
- Remove the retaining ring from the quick connect fitting.
- Discard the retaining ring.
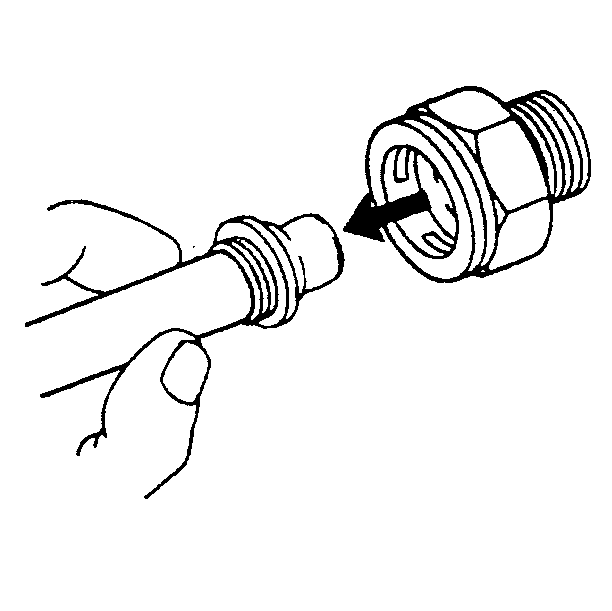
- Pull the transaxle oil cooler pipe straight out from the quick connect fitting.
- Lower the vehicle.
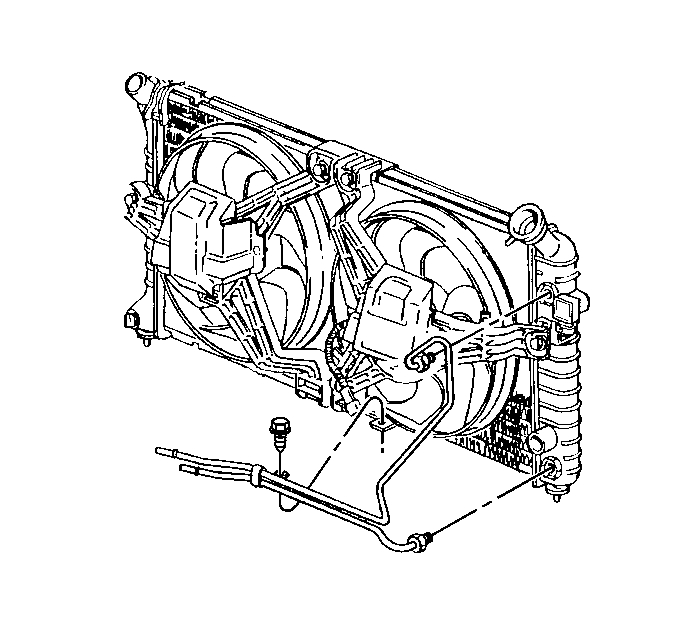
- Disconnect the electrical connector from the coolant level module.
- In order to unlock the coolant level module, lift one leg of the snap clip from its locked position and pull outward with a slight twisting motion.
- Remove the coolant level module.
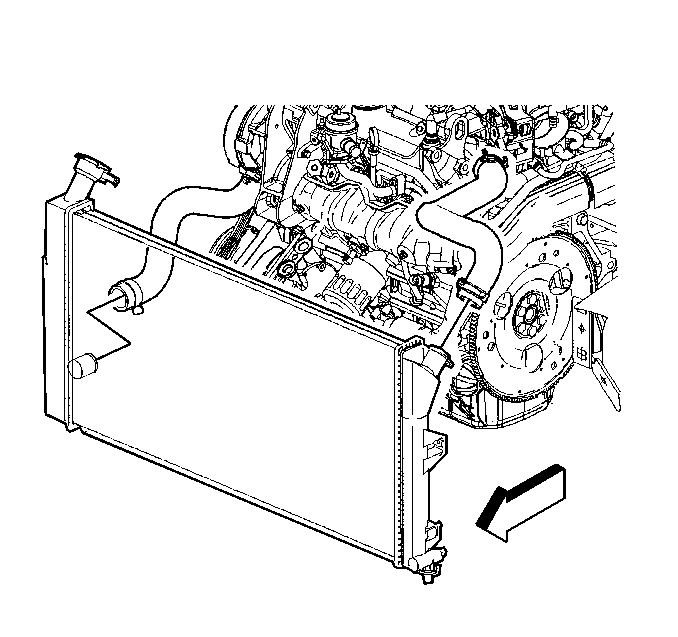
- Remove the radiator.
Caution: Unless directed otherwise, the ignition and start switch must be in the OFF or LOCK position, and all electrical loads must be OFF before servicing any electrical component. Disconnect the negative battery cable to prevent an electrical spark should a tool or equipment come in contact with an exposed electrical terminal. Failure to follow these precautions may result in personal injury and/or damage to the vehicle or its components.
Installation Procedure
- Install the radiator to the lower mounts.
- Lubricate the O-ring seal with coolant.
- Install the coolant level module.
- Install the snap clip in place.
- Connect the electrical connector to the coolant level module.
- Raise the vehicle.
- Install the transaxle oil cooler pipes.
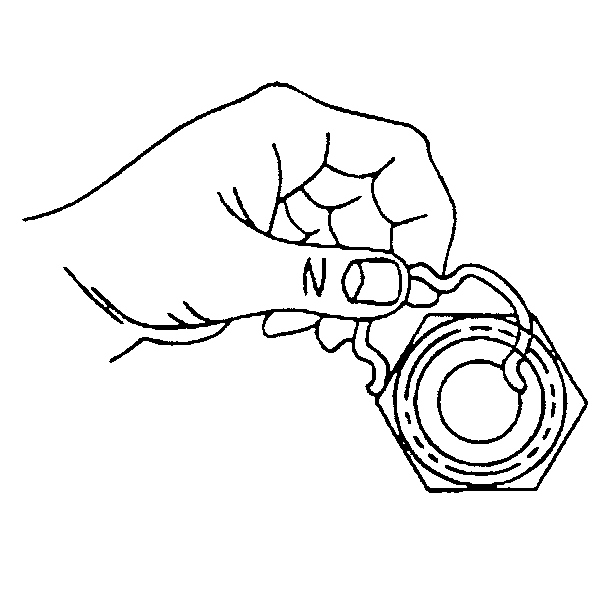
- Ensure the following procedures are performed when installing the new retaining ring onto the fitting.
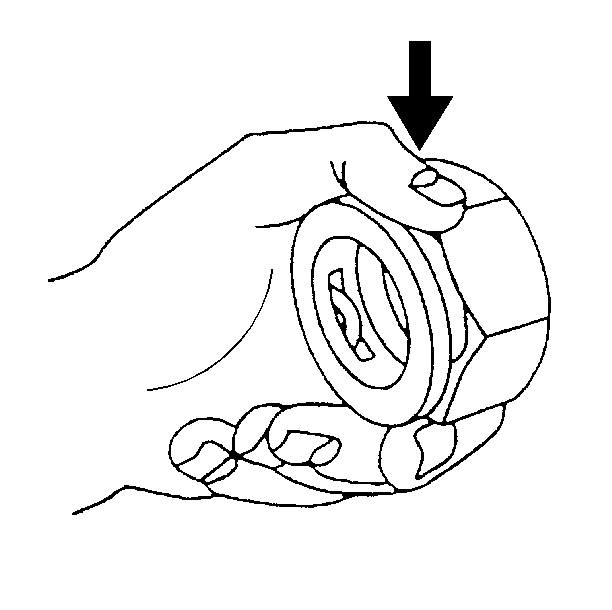
- Hook one of the open ends of the retaining ring in one of the slots in the quick connect fitting.
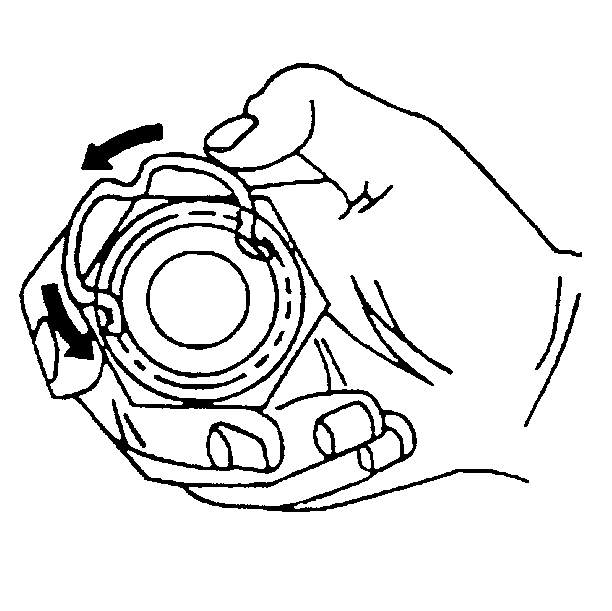
- Rotate the retaining ring around the fitting until the retaining ring is positioned with all three ears through the three slots on the fitting.
- Installing the retaining ring on to the fitting this way will bend the retaining ring.
- Ensure that the three retaining ring ears are seen from inside the fitting and that the retaining ring moves freely in the fitting slots.
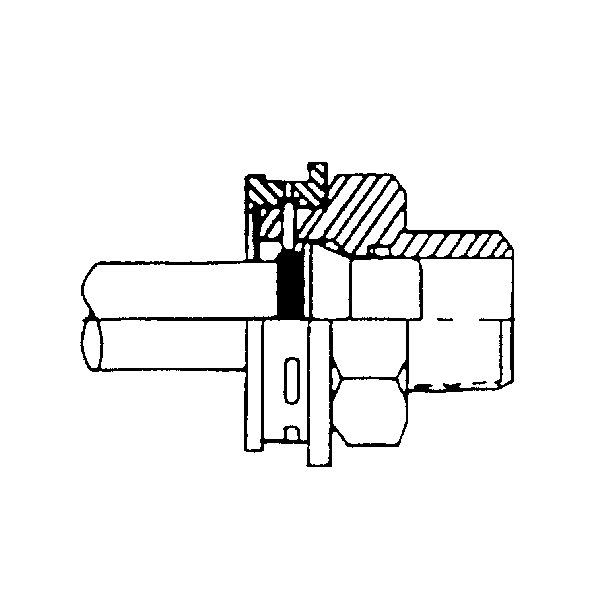
- Install the transaxle oil cooler pipes into the radiator quick connect fitting.
- Insert the transaxle oil cooler pipe ends into the quick connect fitting until you hear or feel a click.
- Do not use the plastic cap on the transaxle oil cooler pipe in order to install the transaxle oil cooler pipe into the fitting.
- Pull back sharply on the transaxle oil cooler pipe in order to ensure that the transaxle oil cooler pipe is fastened into the quick connect fitting.
- Position the plastic cap onto the fitting. Do not manually depress the retaining ring when installing the plastic cap onto the quick connect fitting.
- Fully seat the plastic cap against the fitting.
- Allow no gap between the cap and the fitting.
- Ensure that the yellow identification band on the tube is hidden within the quick connect fitting. A hidden yellow identification band indicates proper joint seating.
- Adjust the fluid level.
- Install the outlet hose to the radiator.
- Use J 38185 to install the outlet hose clamp to the radiator.
- Install the lower air deflector. Refer to Radiator Air Lower Baffle and Deflector Replacement .
- Lower the vehicle.
- Install the fan shroud. Refer to Fan Shroud Replacement .
- Install the battery. Refer to Battery Replacement in Engine Electrical.
- Install the right front fender upper diagonal brace. Refer to Front Fender Upper Diagonal Brace Replacement in Body Front End.
- Fill the cooling system. Refer to Cooling System Draining and Filling .
Important: Install new retaining rings into the quick connect fittings.
Important: DO NOT Push the new retaining ring onto the fitting.

Notice: Do NOT overfill the transaxle. The overfilling of the transaxle causes foaming, loss of fluid, shift complaints, and possible damage to the transaxle.
