Removal Procedure
- Remove the engine front cover. Refer to Engine Front Cover Replacement .
- Remove the oil pump cover screws.
- Remove the oil pump cover.
- Remove the oil pump gear set.
- Inspect the oil pump gear set and housing. Refer to Oil Pump Cleaning and Inspection in Engine Mechanical - 3.8L Unit Repair.
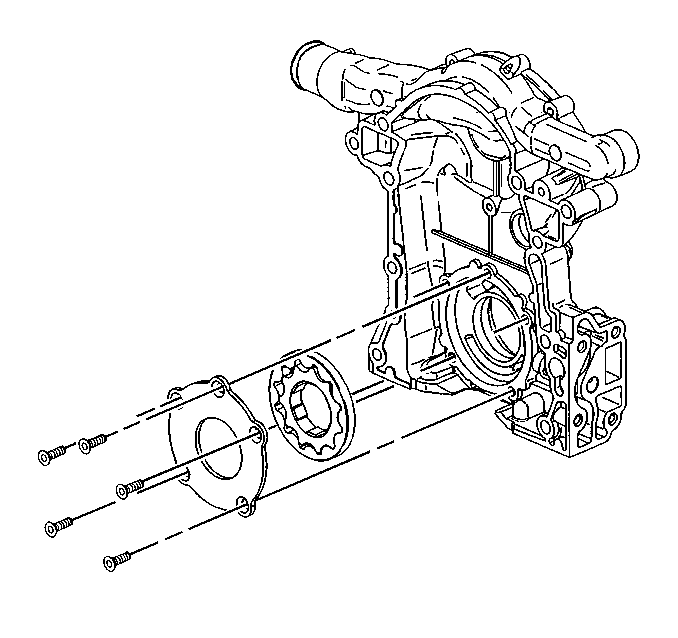
Installation Procedure
- Lubricate the oil pump gear set with petroleum jelly.
- Install the oil pump gear set.
- Pack the oil pump gears with petroleum jelly.
- Install the oil pump cover.
- Install the oil pump cover screws.
- Install the engine front cover. Refer to Engine Front Cover Replacement .
- Inspect the oil pressure.
- Inspect for leaks.
Notice: Use the correct fastener in the correct location. Replacement fasteners must be the correct part number for that application. Fasteners requiring replacement or fasteners requiring the use of thread locking compound or sealant are identified in the service procedure. Do not use paints, lubricants, or corrosion inhibitors on fasteners or fastener joint surfaces unless specified. These coatings affect fastener torque and joint clamping force and may damage the fastener. Use the correct tightening sequence and specifications when installing fasteners in order to avoid damage to parts and systems.
Tighten
Tighten the screws to 11 N·m (98 lb in).
Notice: Do not run the engine until the oil pressure is tested. Running the engine without measurable oil pressure will cause extensive damage.
Notice: Stop the engine and remove the oil pan if the oil pressure does not build up immediately. Check the oil pump pipe and the screen for a clogged screen, damaged pipe, or a damaged gasket. Running the engine without measurable oil pressure will cause extensive damage.
