For 1990-2009 cars only
Removal Procedure
- Disconnect the negative battery cable. Refer to Battery Negative Cable Disconnection and Connection.
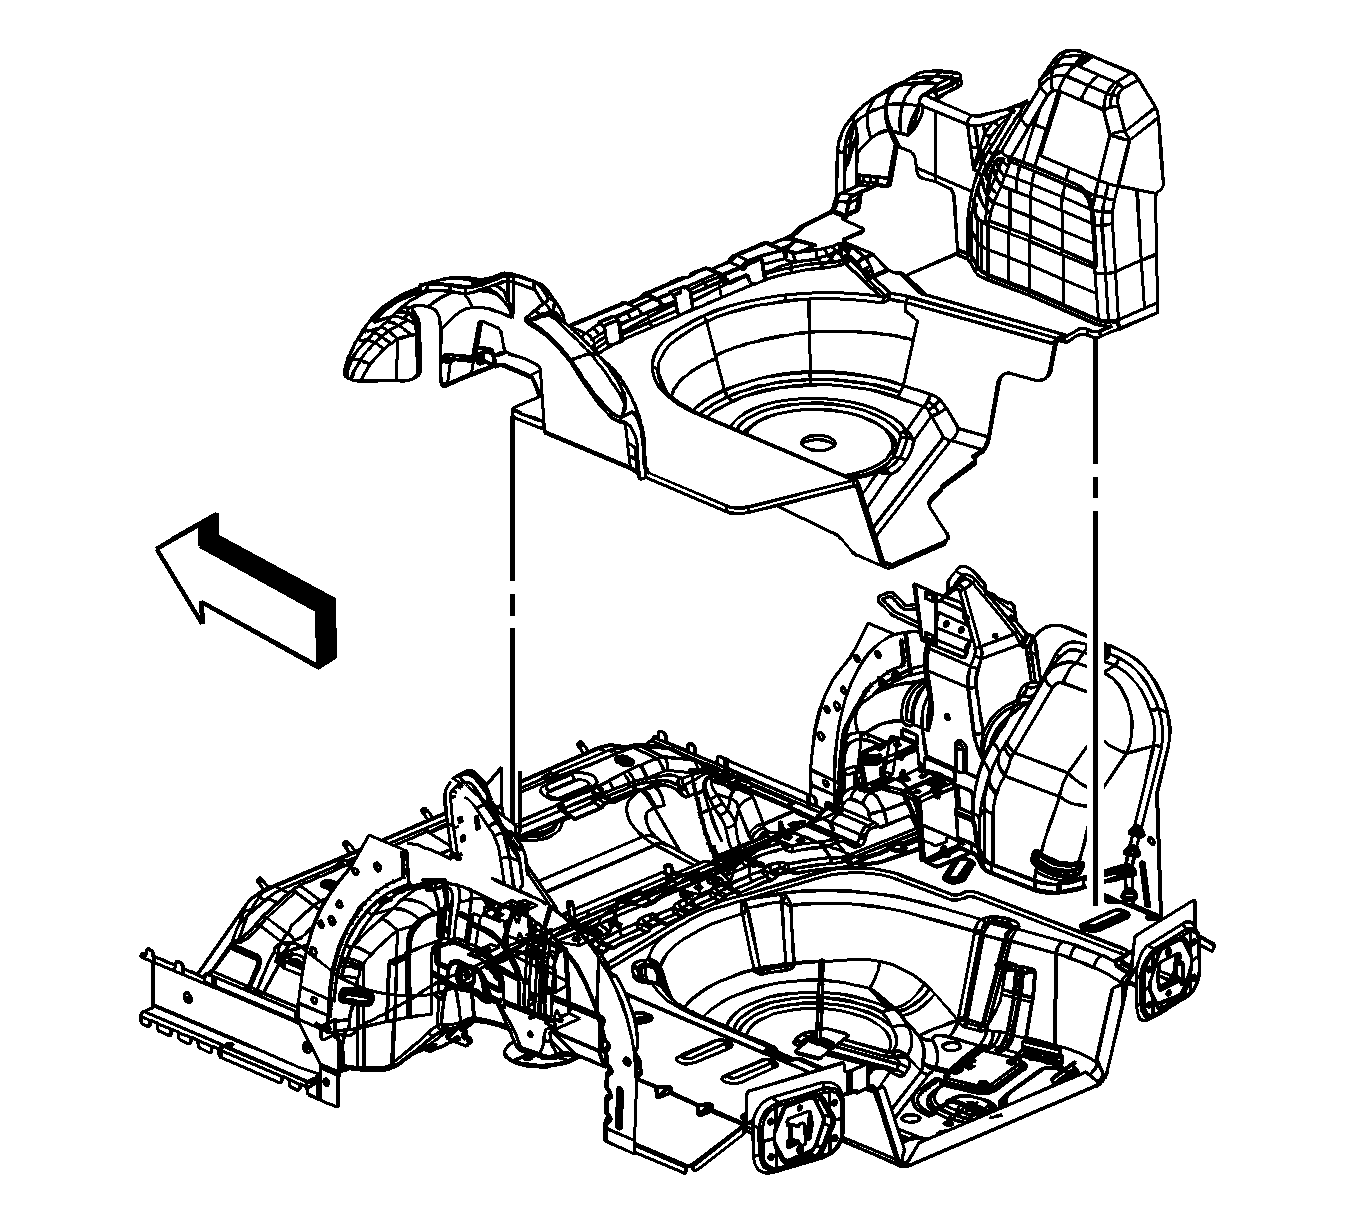
- Remove the carpet. Refer to Floor Panel Carpet Replacement.
- Remove the instrument panel tie bar. Refer to Instrument Panel Tie Bar Replacement.
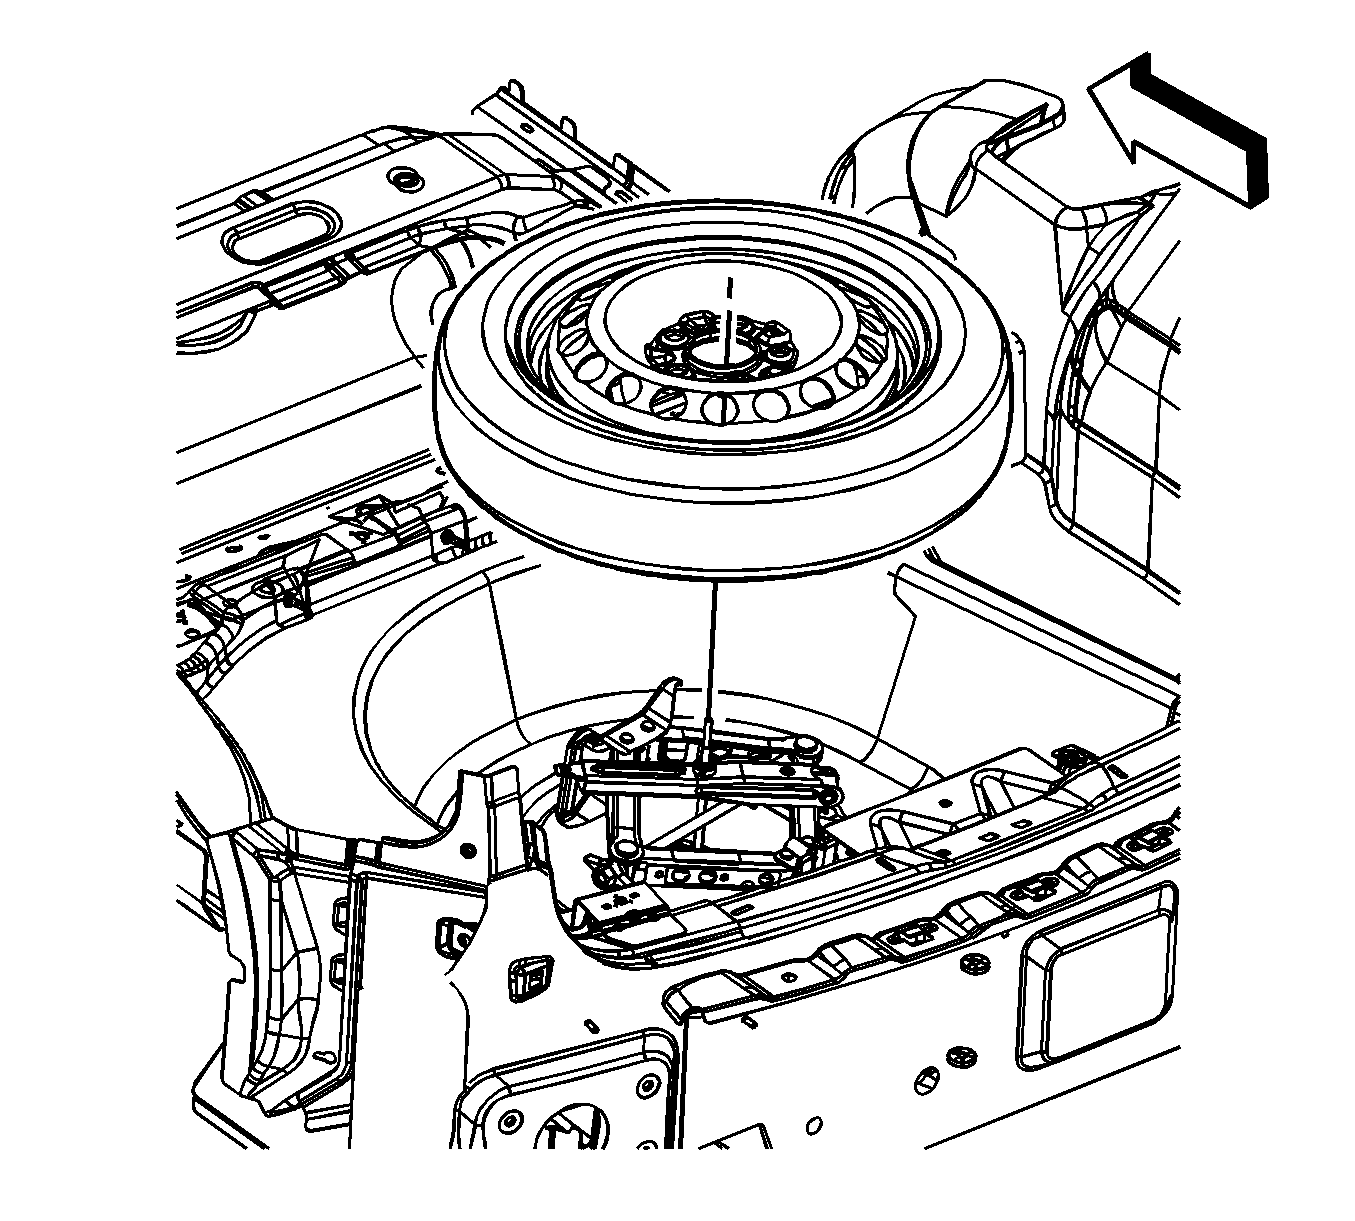
- Remove the spare tire.
- Remove the spare tire insulator.
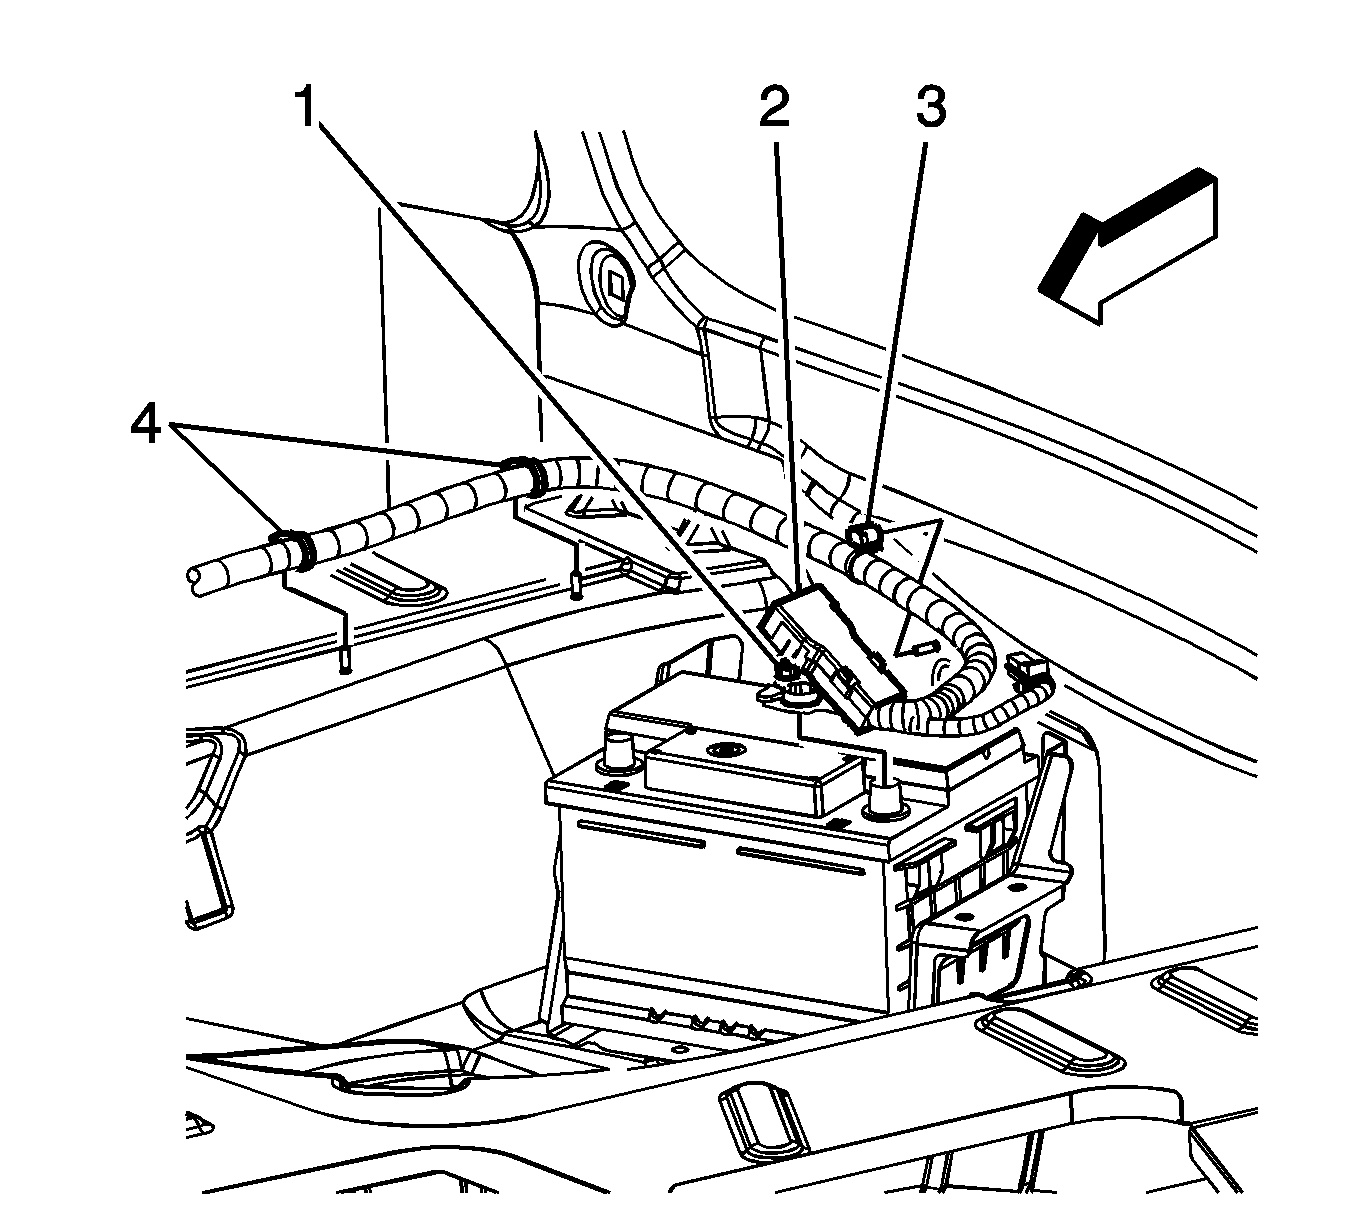
- Open the positive battery cable cover (2).
- Loosen the positive battery cable nut (1).
- Remove the positive battery cable from the battery.
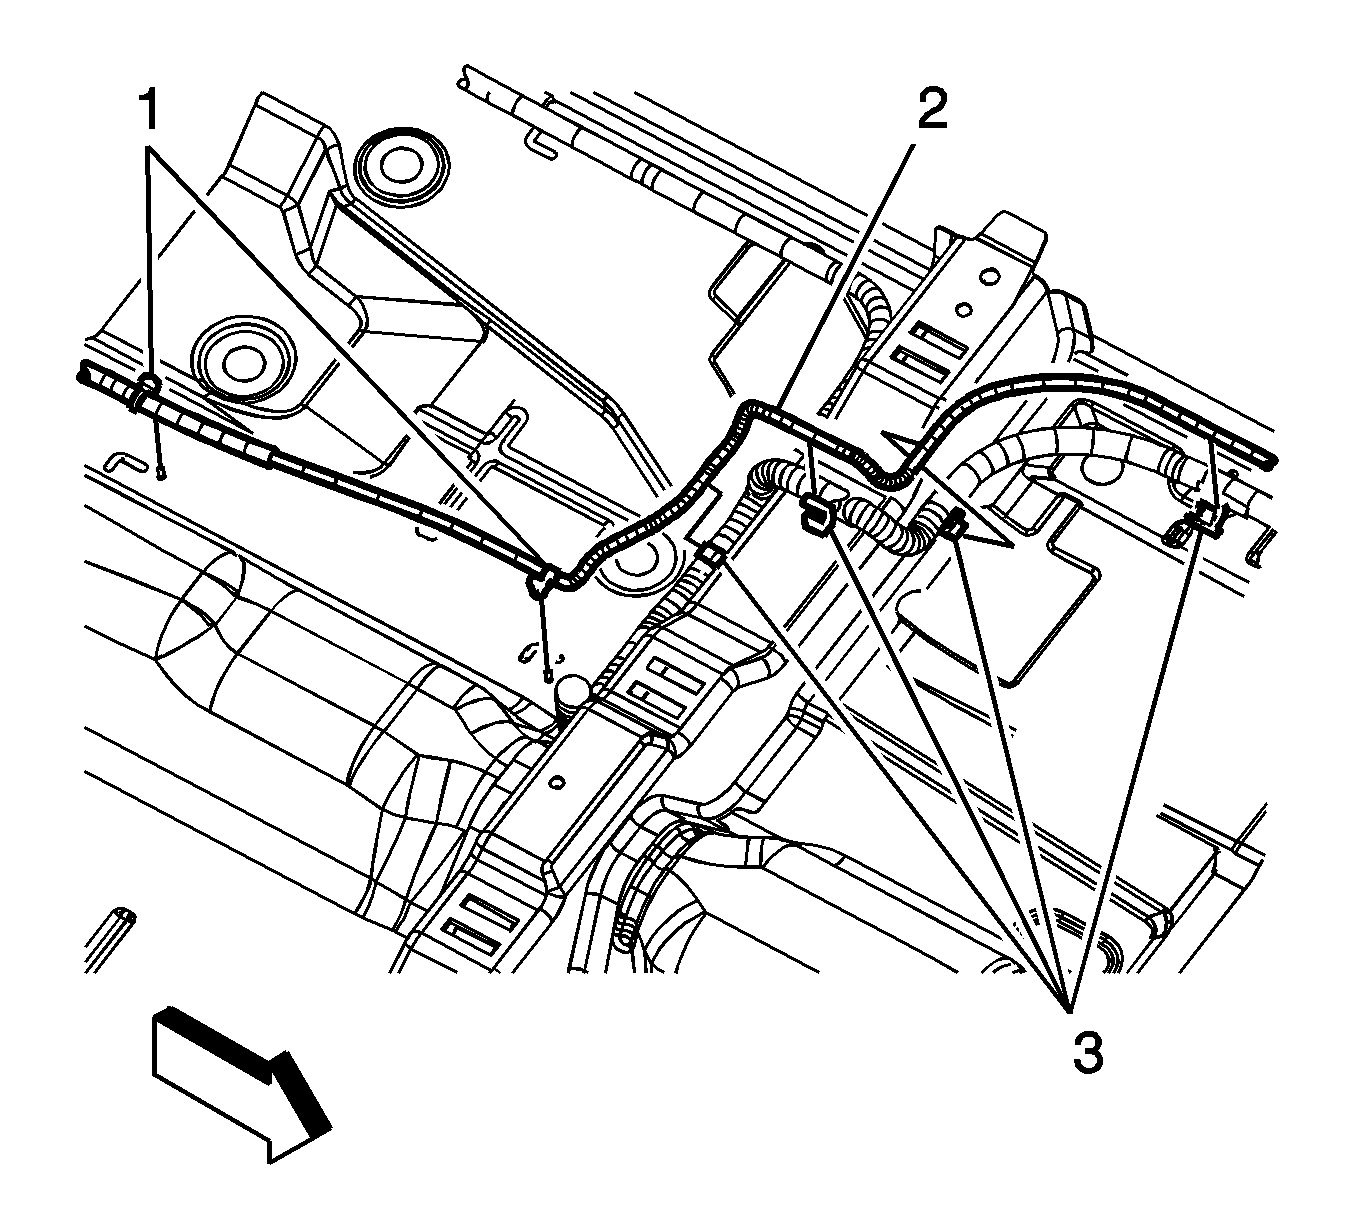
- Remove the positive battery cable clips (3, 4) from the studs.
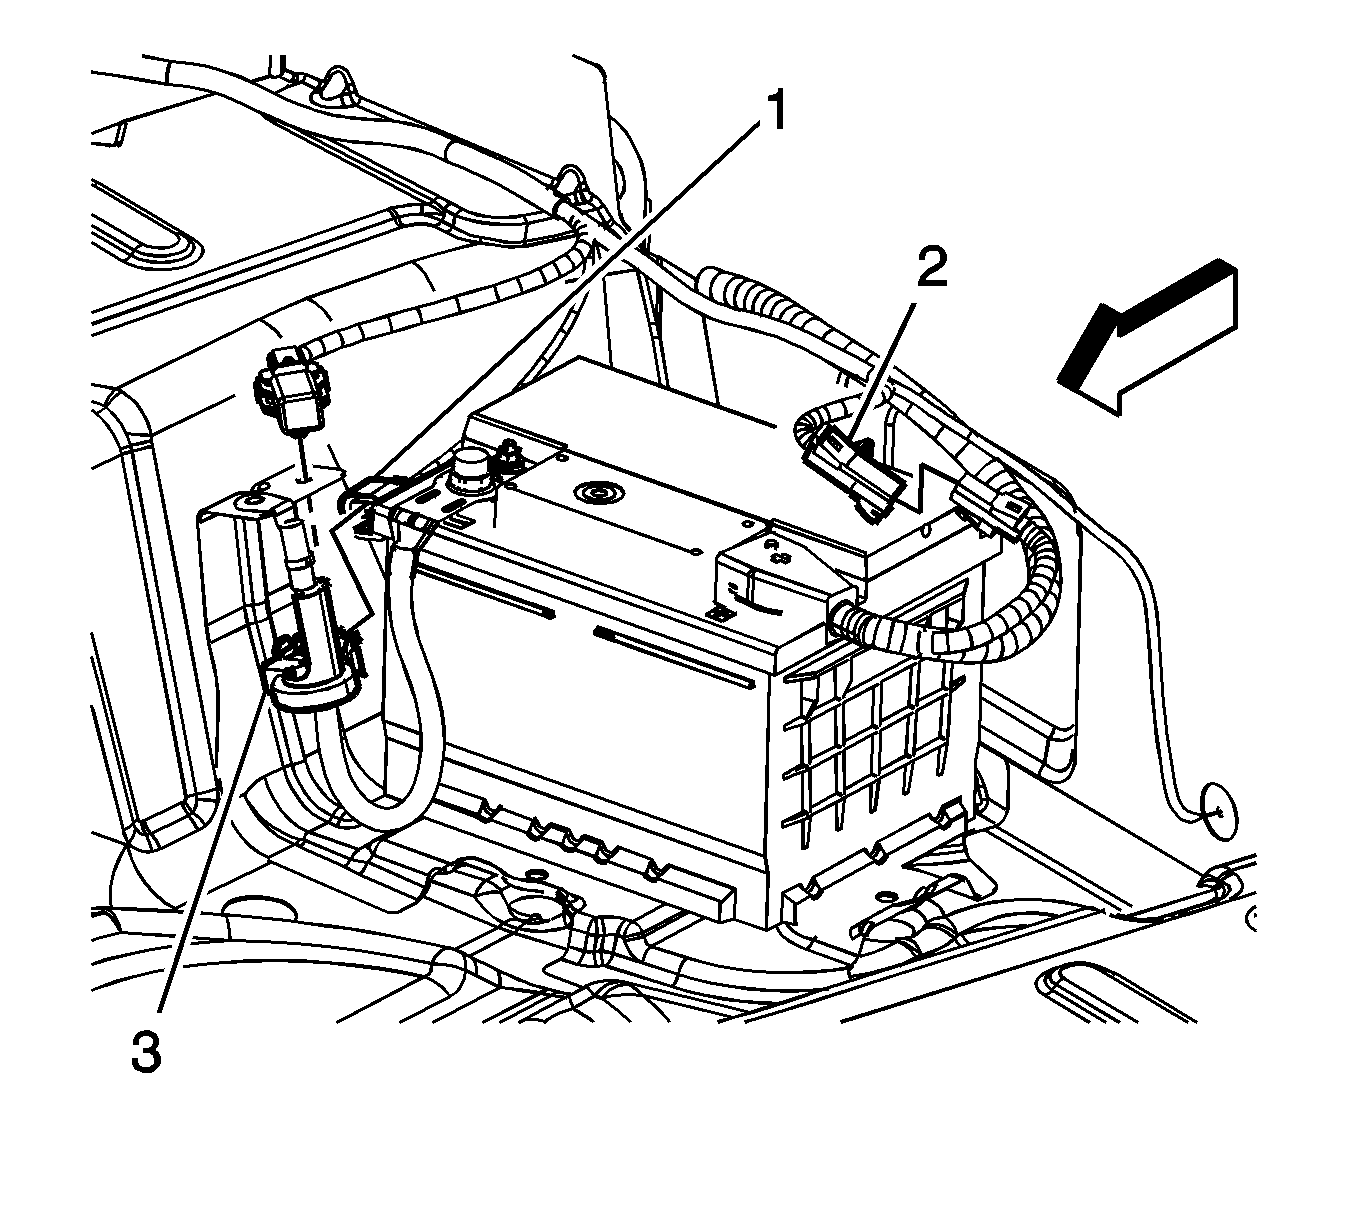
- Disconnect the body harness electrical connector (2) from the positive battery cable connector.
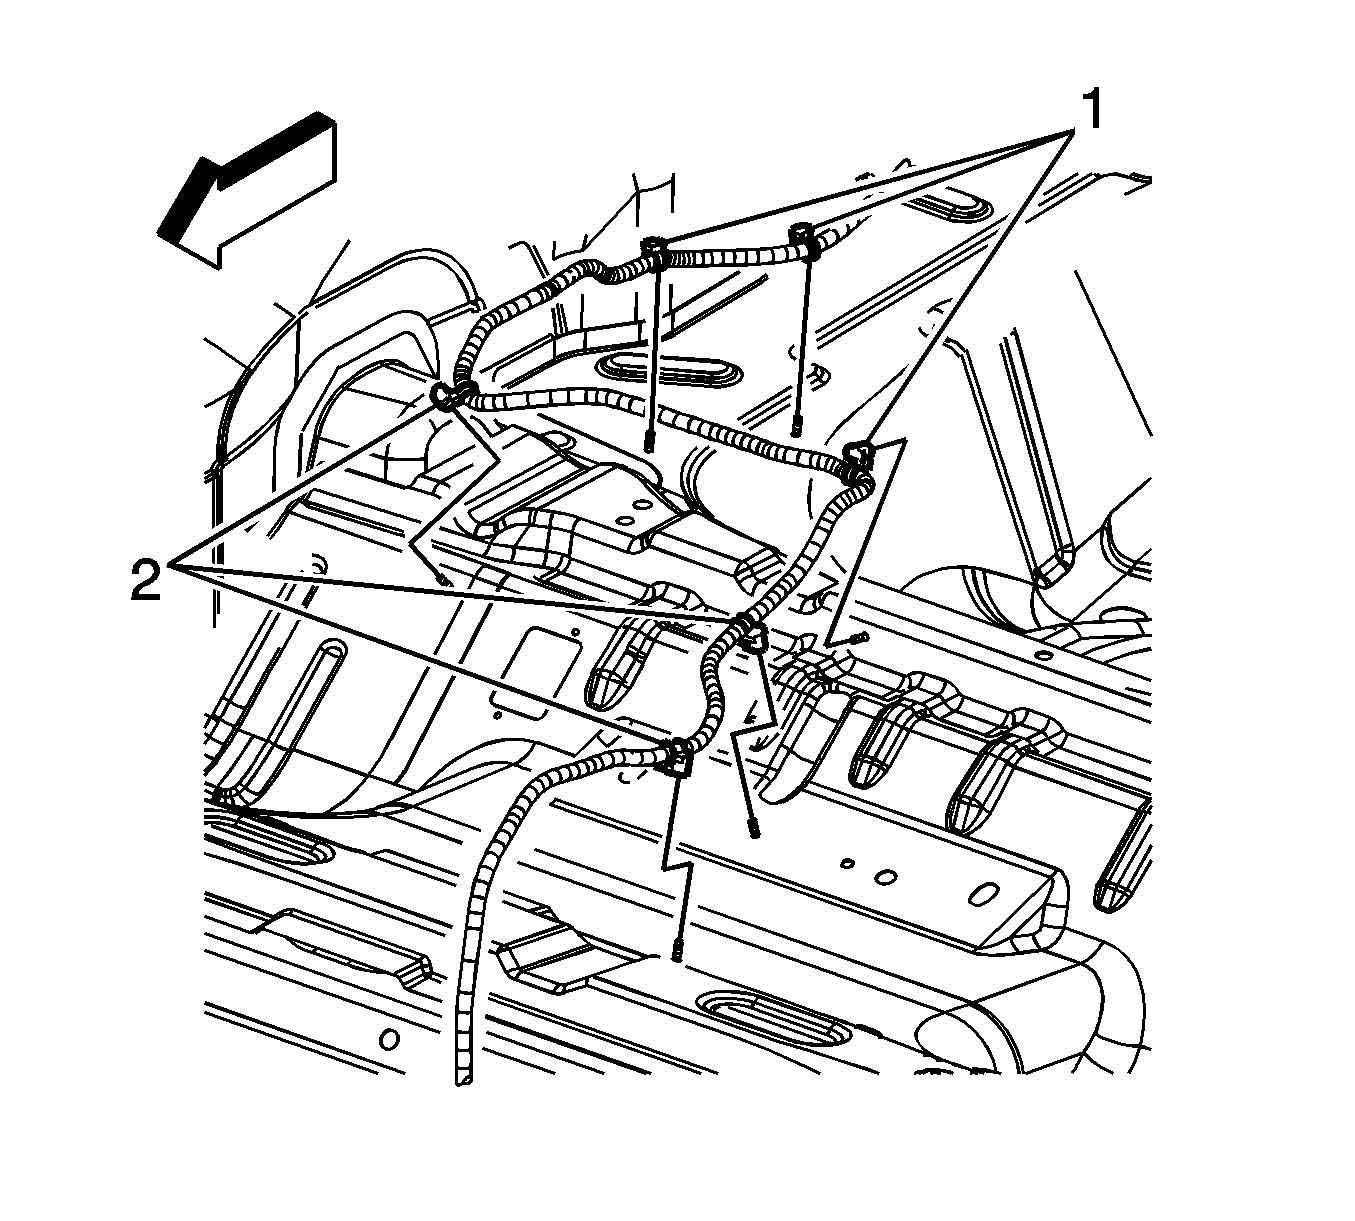
- Remove the positive battery cable clips (1, 2) from the rear compartment panel studs.
- Remove the positive battery cable (2) from the clips (3) on the body harness.
- Remove the positive battery cable clips (1) from the floor panel studs.
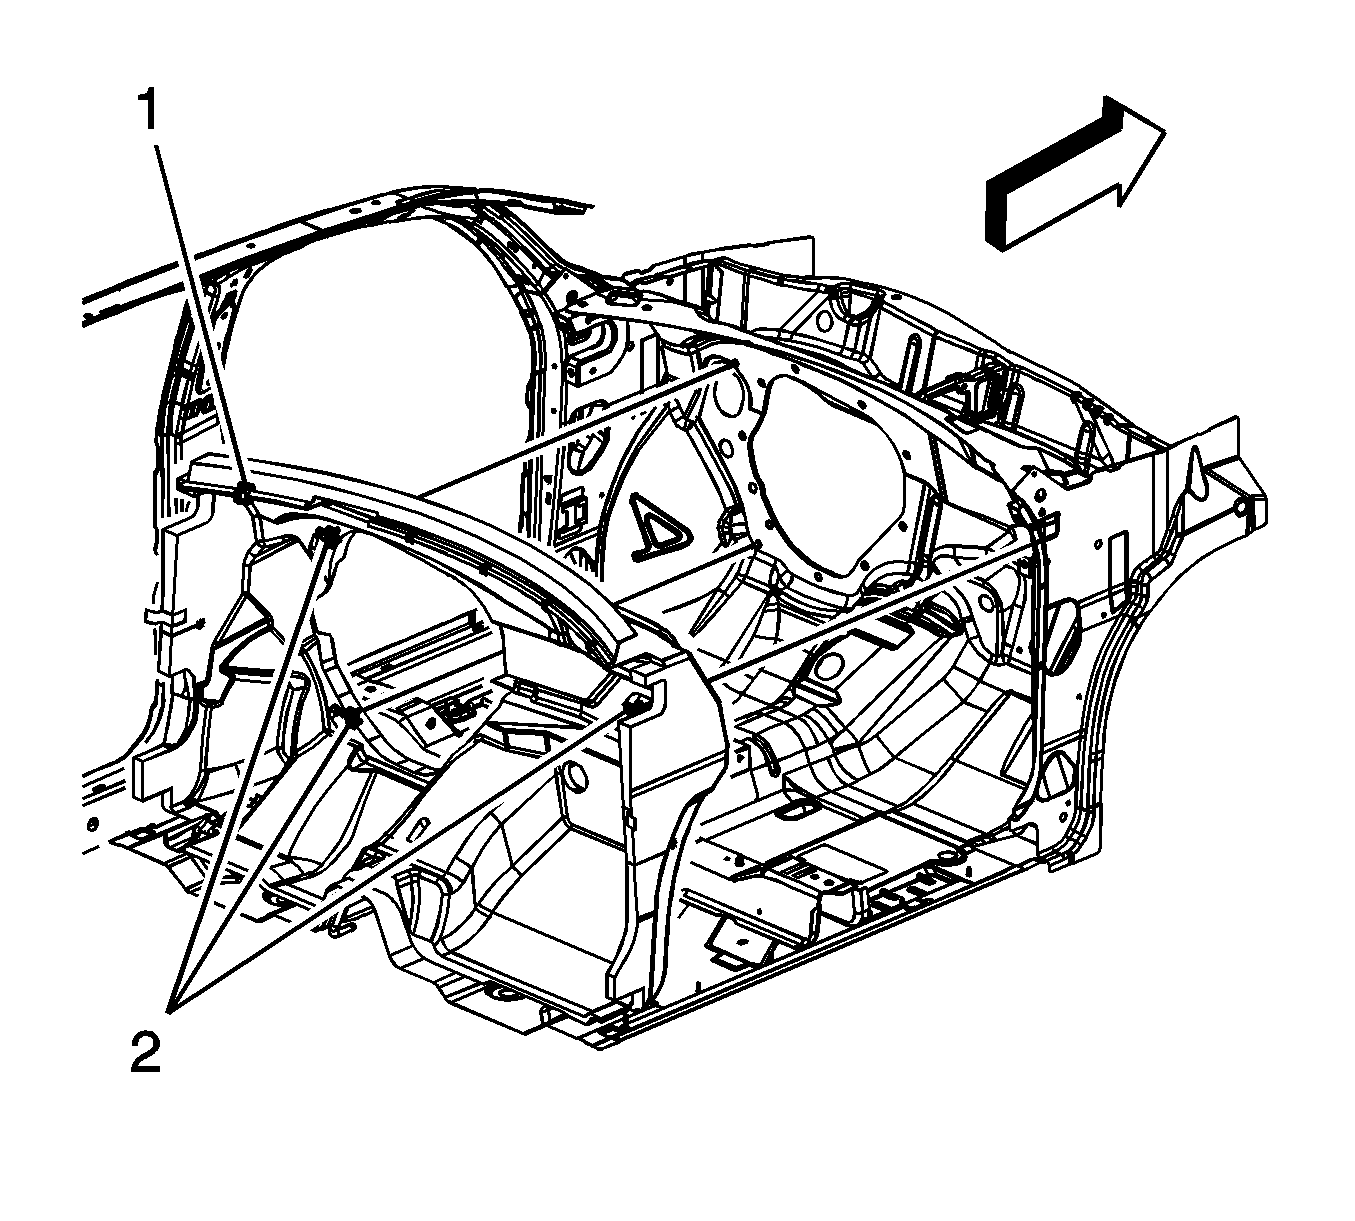
- Disengage the driver side upper metal clip (1) securing the sound barrier to the dash panel.
- Disengage the driver side only retainer (2) securing the sound barrier to the dash panel.
- Reposition the driver side of the dash panel sound barrier until the positive battery cable is accessible.
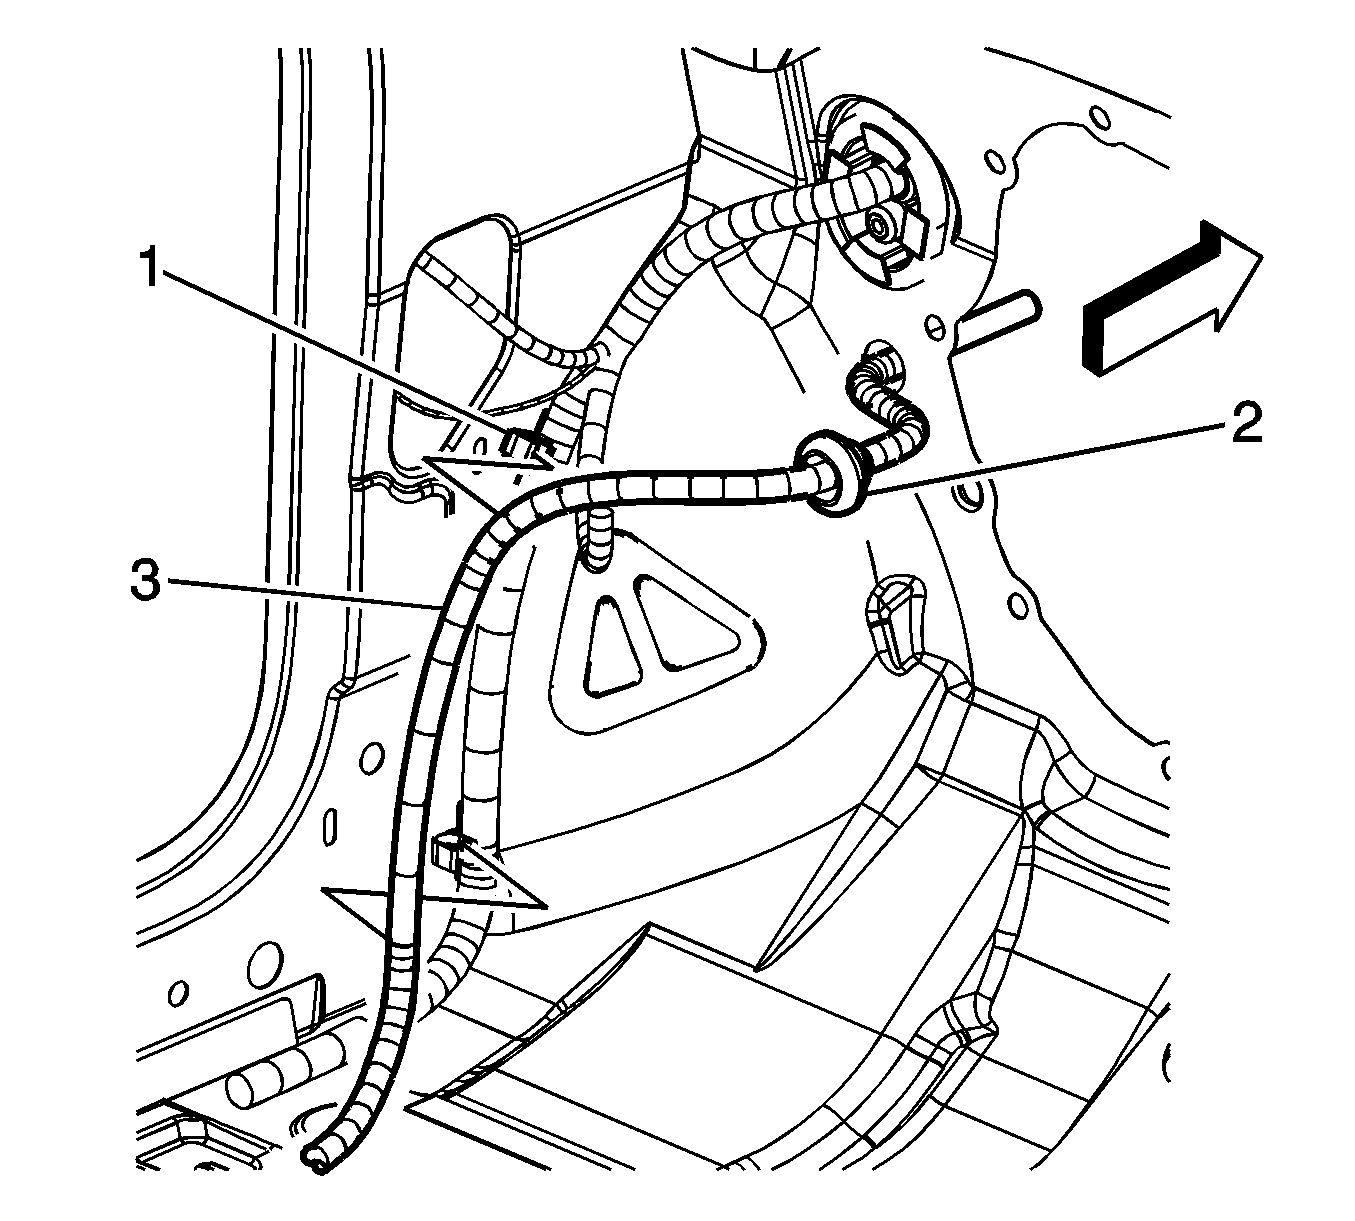
- Remove the positive battery cable (3) from the clips (1) on the body harness.
- Remove the rubber grommet (2) from the front of dash.
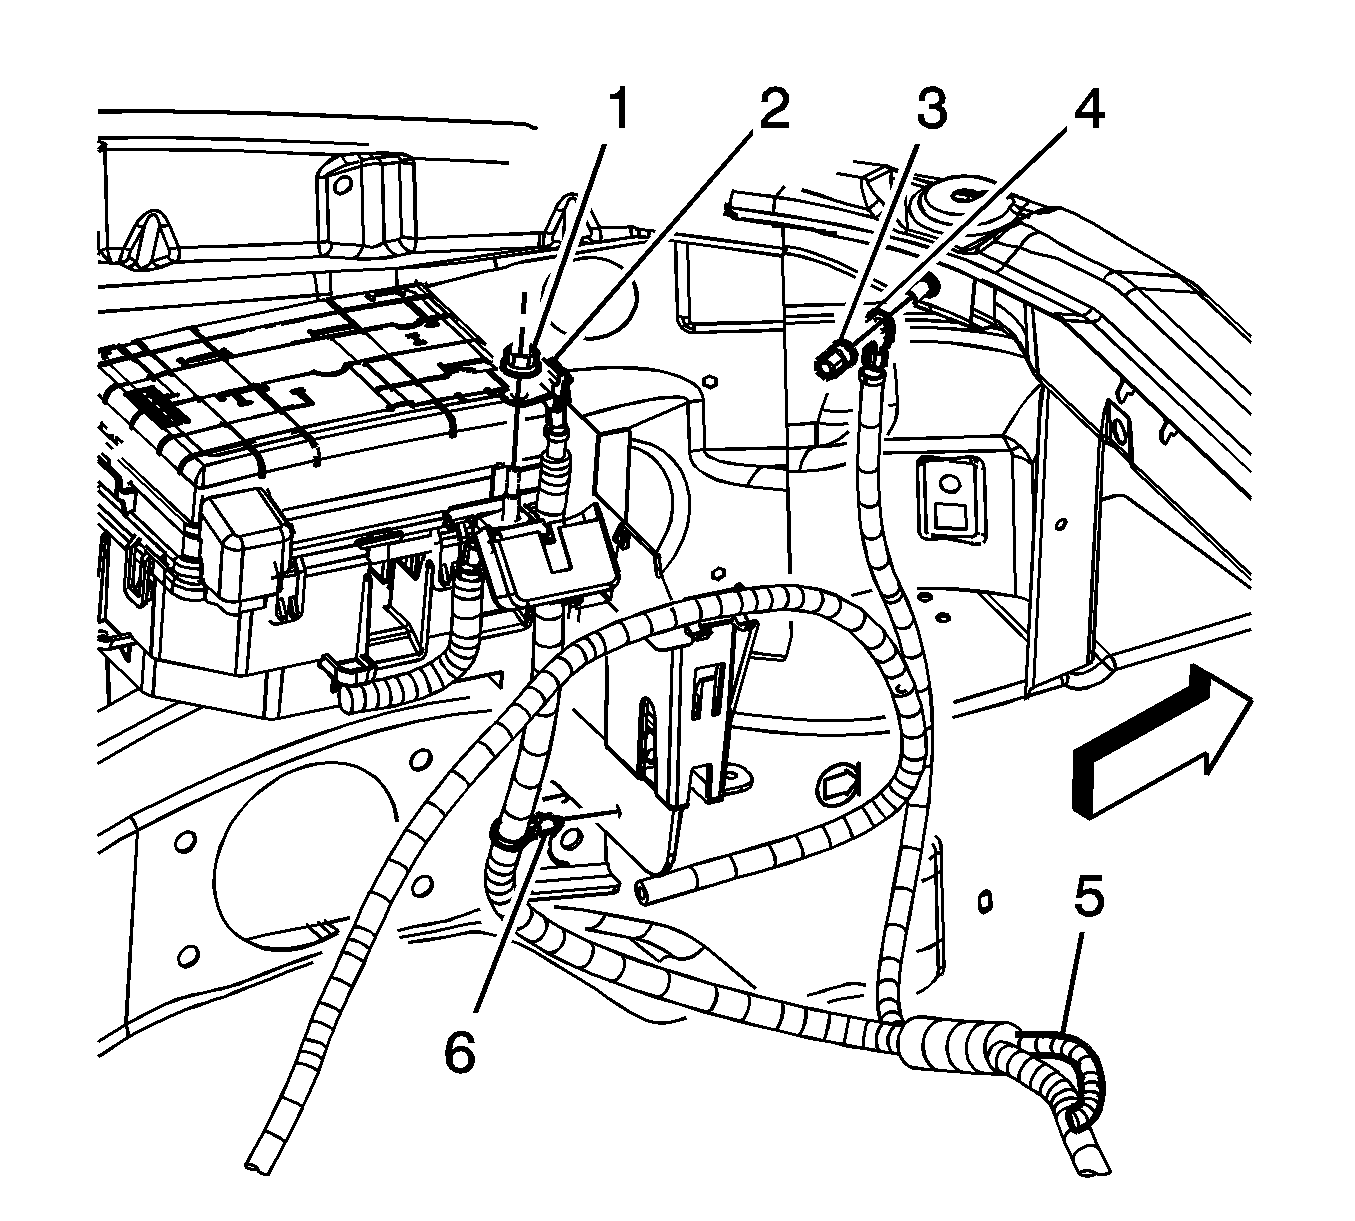
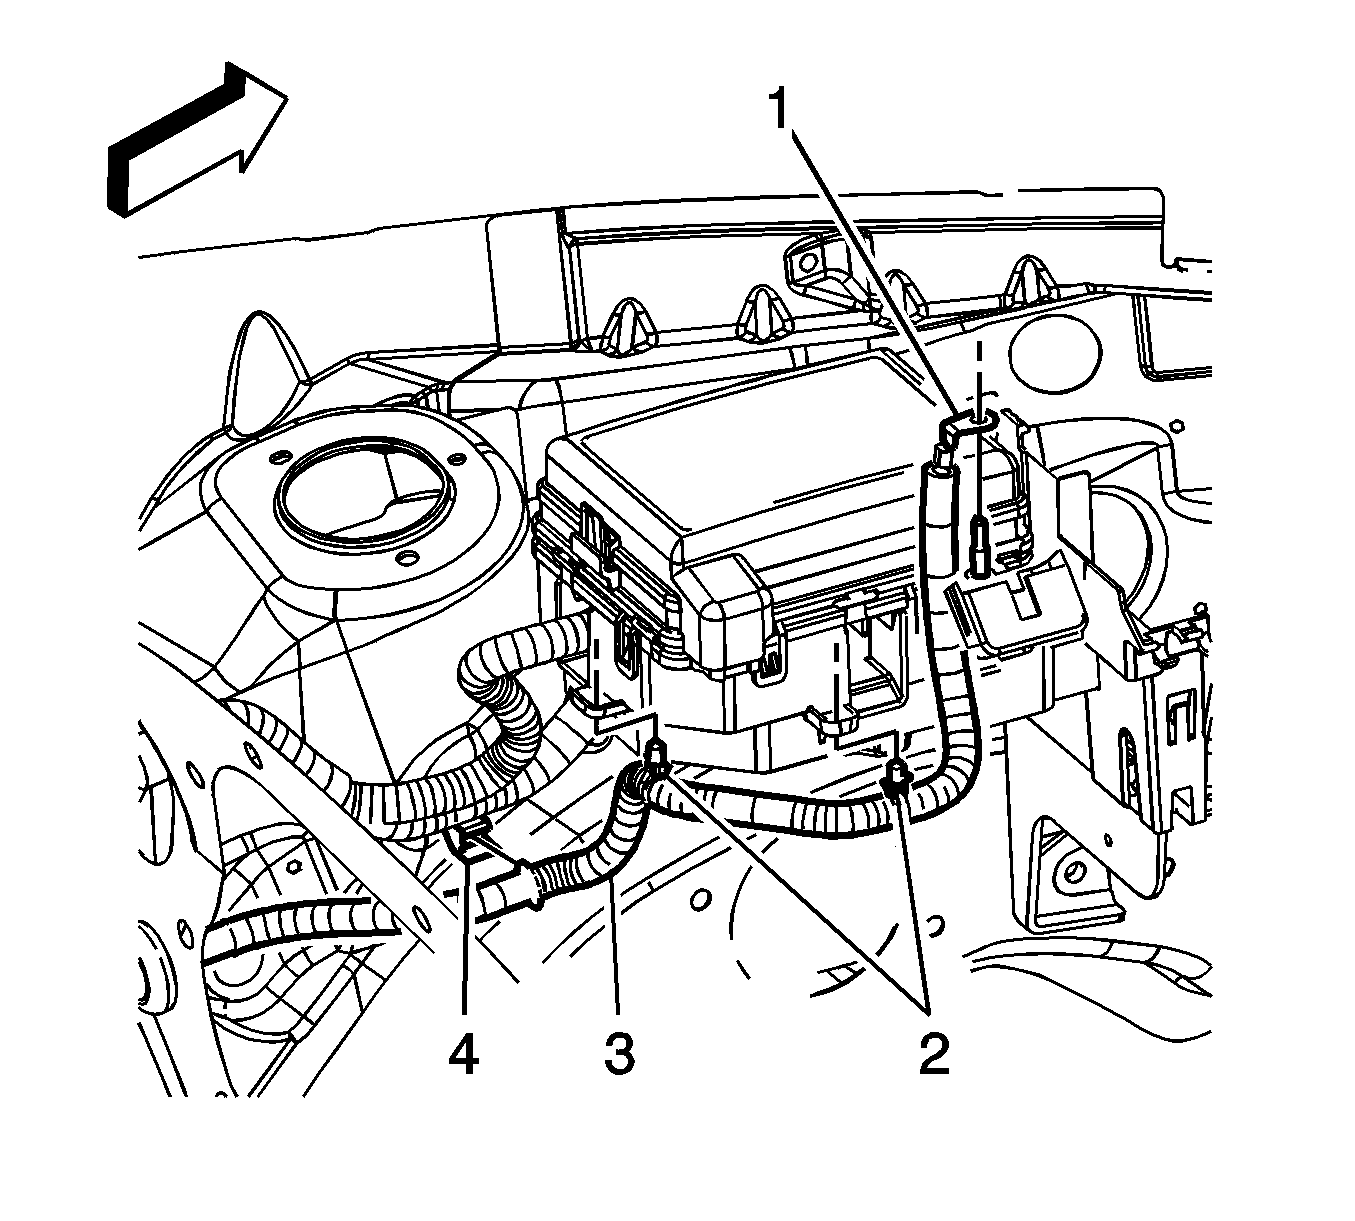
- Open the junction block terminal cover.
- Remove the junction block terminal nut (1).
- Remove the positive/negative battery cable terminal (2) from the stud.
- Remove the positive battery cable terminal (1) from the junction block stud.
- Remove the positive battery cable clips (2) from the engine control module (ECM)/transaxle control module (TCM) bracket.
- Remove the positive battery cable from the body harness clip (4).
- From inside the vehicle, remove the engine compartment portion of the positive battery cable through the front of dash.
- Remove the positive battery cable from inside the vehicle.
Installation Procedure
- Install the positive battery cable to the inside the vehicle.
- From inside the vehicle, route the engine compartment portion of the positive battery cable through the front of dash.
- Install the positive battery cable to the body harness clip (4).
- Install the positive battery cable clips (2) to the ECM/TCM bracket.
- Install the positive battery cable terminal (1) to the junction block stud.
- Install the positive/negative battery cable terminal (2) to the stud.
- Install the junction block terminal nut (1).
- Close the junction block terminal cover.
- Install the rubber grommet (2) to the front of dash.
- Install the positive battery cable (3) to the clips (1) on the body harness.
- Position the driver side of the dash panel sound barrier. Ensure to tuck the barrier up and around the instrument panel mounting bracket.
- Engage the drive side only fastener (2) onto the weld stud and actuate the fastener securing the sound barrier to the dash panel.
- Engage the driver side upper metal clip (1) securing the sound barrier to the dash panel.
- Install the positive battery cable clips (1) to the floor panel studs.
- Install the positive battery cable (2) to the clips (3) on the body harness.
- Install the positive battery cable clips (1, 2) to the rear compartment panel studs.
- Connect the body harness electrical connector (2) to the positive battery cable connector.
- Install the positive battery cable clips (3, 4) to the studs.
- Install the positive battery cable from the battery.
- Tighten the positive battery cable nut (1).
- Close the positive battery cable cover (2).
- Install the spare tire insulator.
- Install the spare tire.
- Install the instrument panel tie bar. Refer to Instrument Panel Tie Bar Replacement.
- Install the carpet. Refer to Floor Panel Carpet Replacement.
- Connect the negative battery cable. Refer to Battery Negative Cable Disconnection and Connection.
Caution: Refer to Fastener Caution in the Preface section.
Tighten
Tighten the nut to 15 N·m (11 lb ft).
Tighten
Tighten the nut to 15 N·m (11 lb ft).
