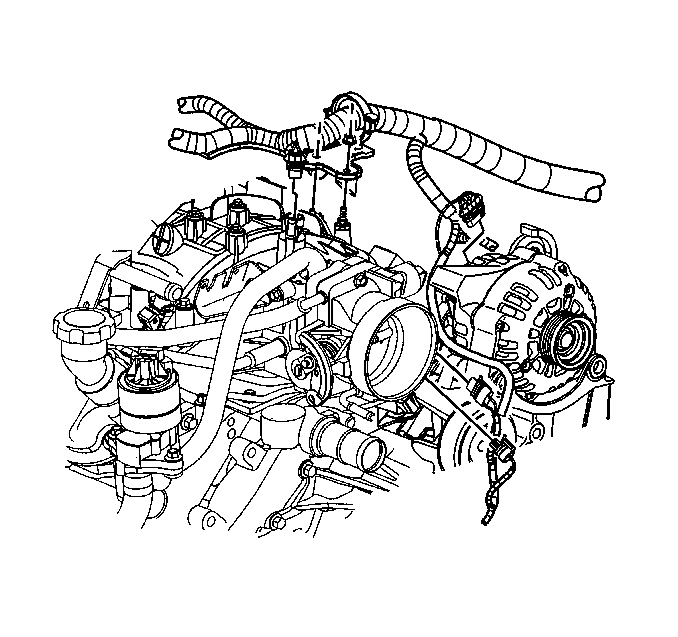
Removal Procedure
- Remove the engine cover. Refer to Engine Cover Replacement .
- Remove the air cleaner resonator outlet duct. Refer to Air Cleaner Resonator Outlet Duct Replacement .
- Before removal, if necessary, clean the fuel rail assembly with a spray type engine cleaner, use GM X-30A or equivalent. Follow the package instructions. Do not soak fuel rail assembly in any liquid cleaning solvent.
- Disconnect the accelerator control cable and the cruise control cable from the cable bracket, if equipped.
- Disconnect the cruise control cable engine-end fitting from the stud on the throttle lever, if equipped.
- Disconnect the accelerator control cable and the cruise control cable from the throttle body, if equipped.
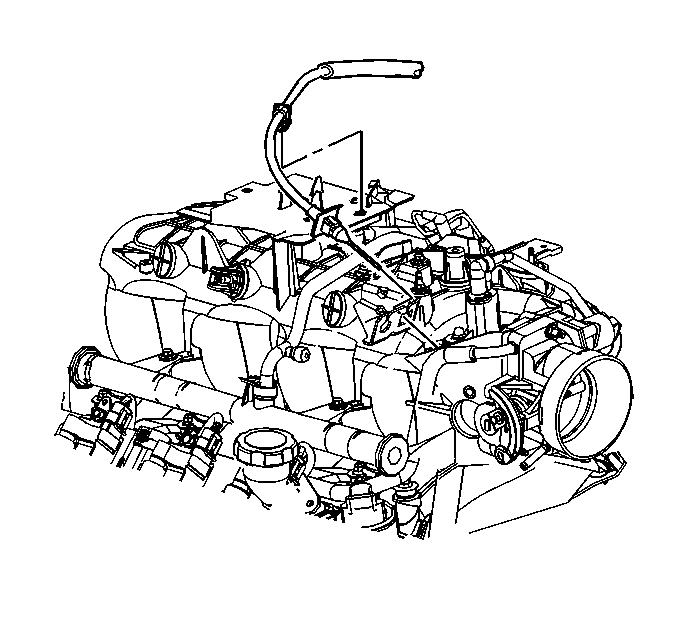
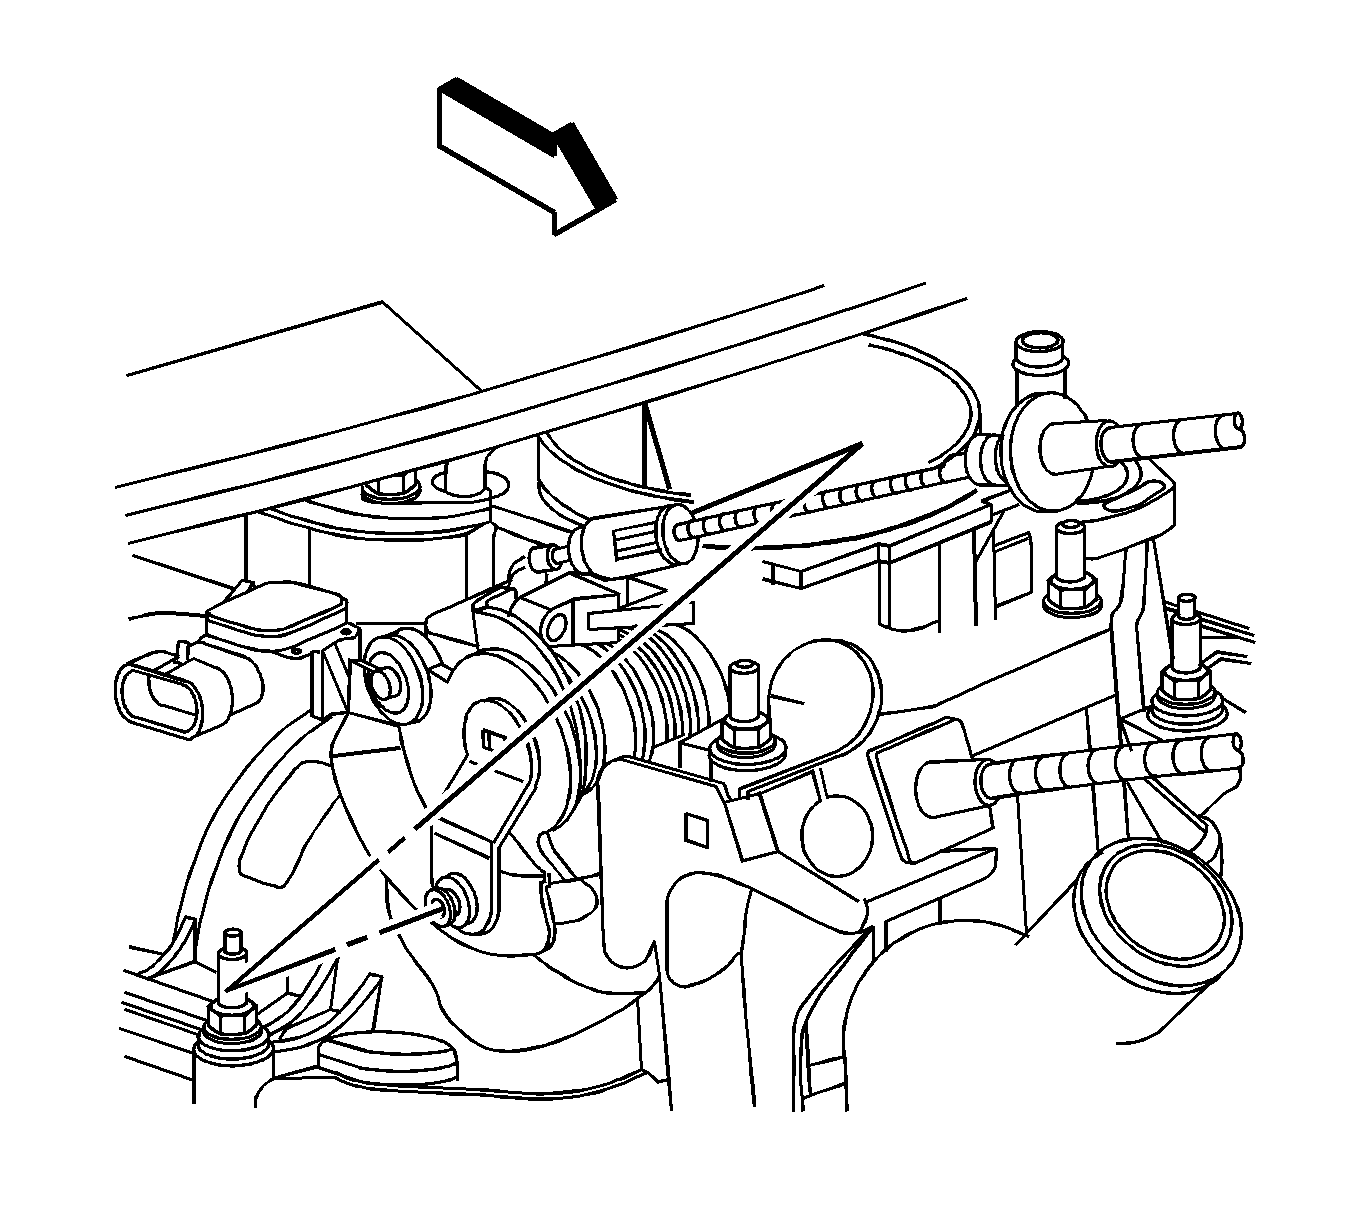
- Remove the upper engine wire harness retainer nut.
- Disconnect the evaporative emission (EVAP) purge valve harness connector.
- Reposition the upper engine wire harness aside.
- Relieve the fuel system pressure. Refer to Fuel Pressure Relief .
- Mark the electrical connectors to their corresponding injectors to ensure correct sequential injector firing order after reassembly.
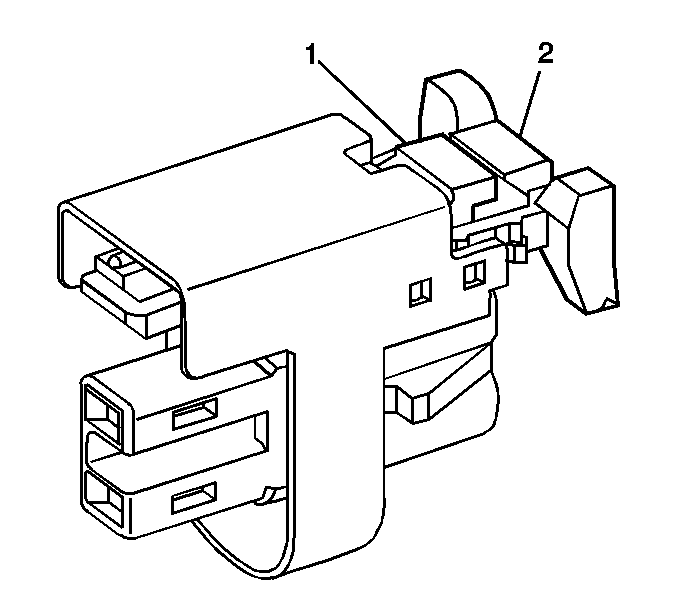
- Pull the connector position assurance (CPA) (2) on the injector connector up.
- Push the tab (1) on the injector connector in.
- While pushing the tab (1) on the injector connector in, release the CPA (2).
- Disconnect the fuel injector connector electrical connector.
- Repeat steps for each injector connector.
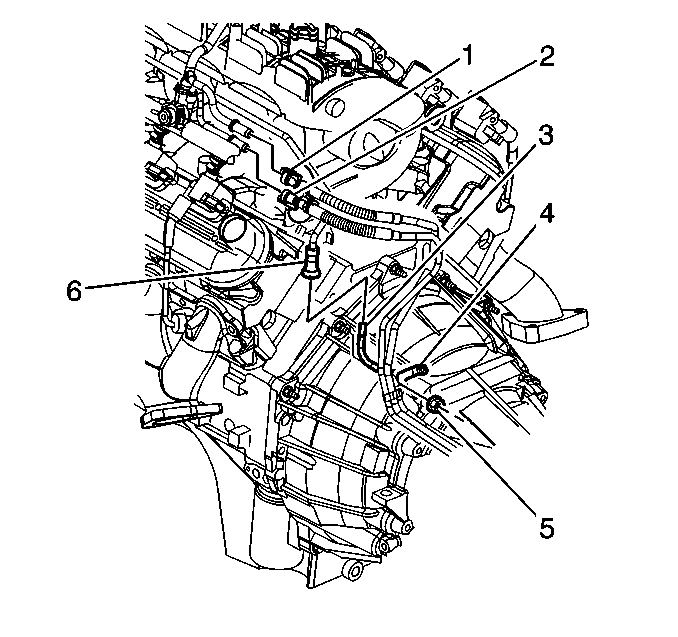
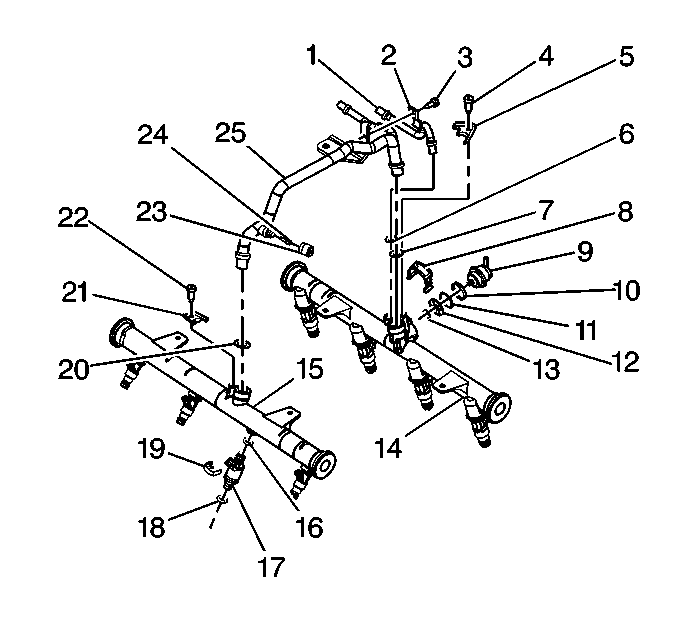
- Disconnect the fuel feed and return pipes (1, 2) from the fuel rail.
- Disconnect the fuel pressure regulator vacuum line.
- Loosen the crossover tube to right fuel rail retainer screw (22).
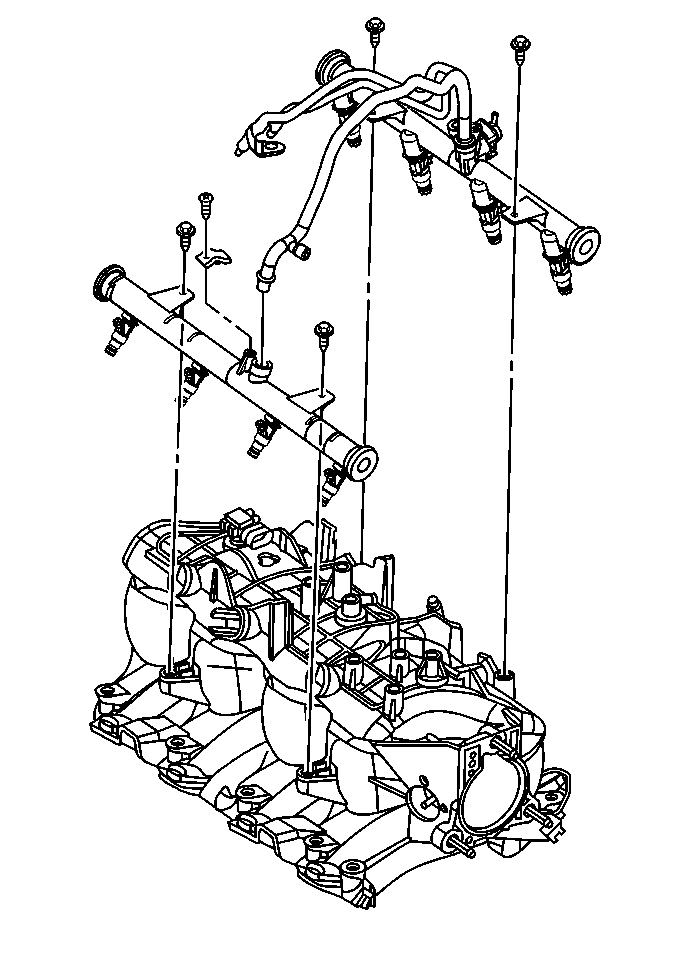
- Remove the fuel rail bolts.
- Remove the fuel rail.
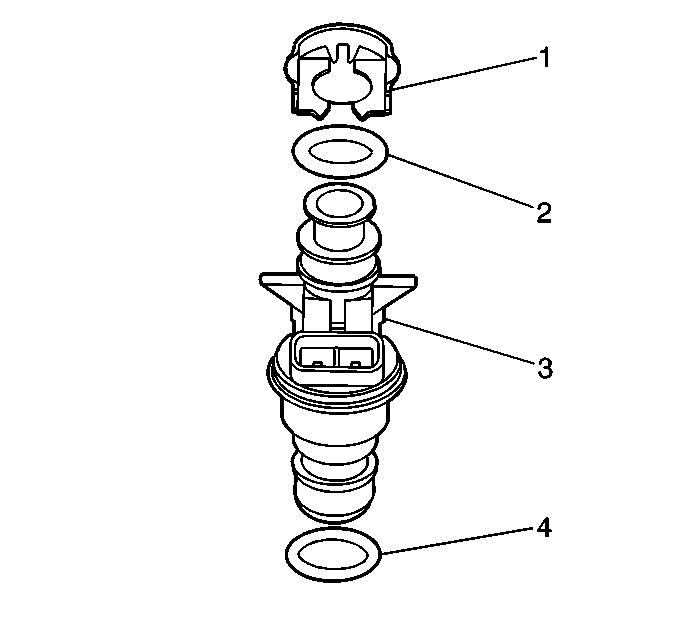
- Remove and discard the fuel injector lower O-ring seals (4) from the injectors (3).
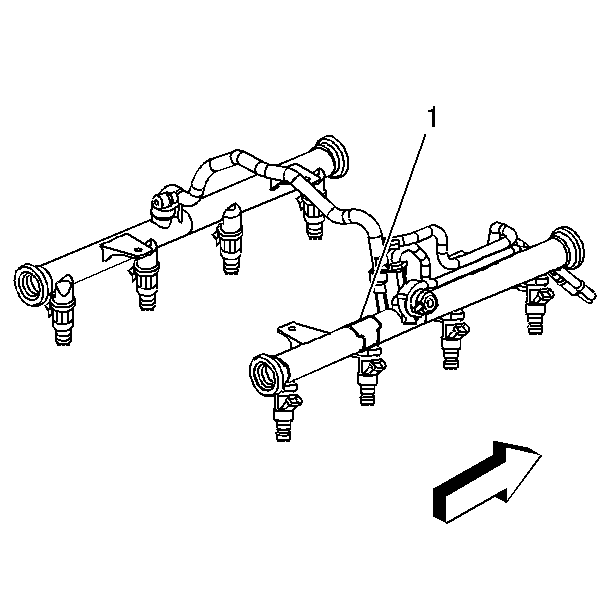
Important: An eight-digit identification number (1) is located on the fuel rail assembly. Refer to this model identification number if servicing or part replacement is required.
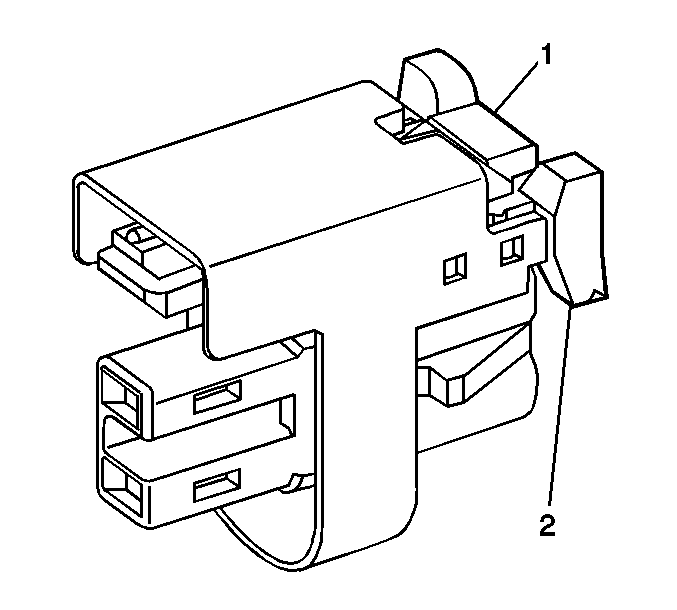
Important: When disconnecting the Multec 2 fuel injector connectors, DO NOT use pliers or other hand tools, as the connector ends may become mangled and be rendered unusable.
Notice:
• Remove the fuel rail assembly carefully in order to prevent damage
to the injector electrical connector terminals and the injector spray tips.
Support the fuel rail after the fuel rail is removed in order to avoid damaging
the fuel rail components. • Cap the fittings and plug the holes when servicing the fuel system
in order to prevent dirt and other contaminants from entering open pipes and
passages.
Installation Procedure
- Lubricate the NEW fuel injector lower O-ring seals (4) with clean engine oil.
- Install the NEW O-ring seals (4) to the end of each injector (3).
- Remove the retaining clip attaching screw (22) and crossover pipe retainer (21) to the right hand fuel rail.
- Remove the crossover pipe rail (25) from the right fuel rail (15).
- Remove the crossover pipe O-ring (20).
- Lubricate a NEW O-ring (20) with clean engine oil.
- Install a NEW crossover pipe O-ring (20) on the crossover pipe (25).
- Install the crossover pipe (25) into the right fuel rail (15).
- Loosely install the crossover pipe retainer (21) and retaining clip attaching screw (22) to the right fuel rail.
- Install the fuel rail.
- Apply a 5 mm (0.020 in) band of GM P/N 12345382 (Canadian P/N 10953489) threadlock, or equivalent, to the threads of the fuel rail bolts.
- Install the fuel rail bolts.
- Tighten the bolts to 10 N·m (89 lb in).
- Tighten the screw to 3.8 N·m (34 lb in).
- Connect the fuel pressure regulator vacuum line.
- Connect the fuel feed and return pipes (1, 2) to the fuel rail.
- Connect the fuel injector electrical connectors.
- Position the upper engine wire harness in place.
- Connect the EVAP purge solenoid connector.
- Install the retainer nut to the upper engine wire harness.
- Connect the accelerator control cable and the cruise control cable to the cable bracket, if equipped.
- Connect the accelerator control cable to the throttle body, if equipped.
- Connect the cruise control cable engine-end fitting to the stud on the throttle lever, if equipped.
- Install the air cleaner resonator outlet duct. Refer to Air Cleaner Resonator Outlet Duct Replacement .
- Install the engine cover. Refer to Engine Cover Replacement .
- Use the following procedure in order to inspect for leaks:
Important: When installing the retaining clip attaching screw for the crossover pipe, always start the screw by hand. This will prevent consequent stripping of the threads in the fuel rail.
Notice: Refer to Fastener Notice in the Preface section.
Tighten
| • | Install each connector onto the correct injector in order to ensure correct sequential injector firing order. |
| • | Rotate the injectors as required in order to avoid stretching the wire harness. |
Tighten
Tighten the nut to 5.5 N·m (49 lb in).
| 24.1. | Turn ON the ignition, with the engine OFF, for 2 seconds. |
| 24.2. | Turn OFF the ignition for 10 seconds. |
| 24.3. | Turn ON the ignition, with the engine OFF. |
| 24.4. | Inspect for fuel leaks. |
