For 1990-2009 cars only
Intake Manifold Tube Replacement LMM
Removal Procedure
- Disconnect the negative battery cable. Refer to Battery Negative Cable Disconnection and Connection .
- Remove the air cleaner outlet duct. Refer to Air Cleaner Outlet Duct Replacement .
- Remove the engine cover. Refer to Engine Cover Replacement .
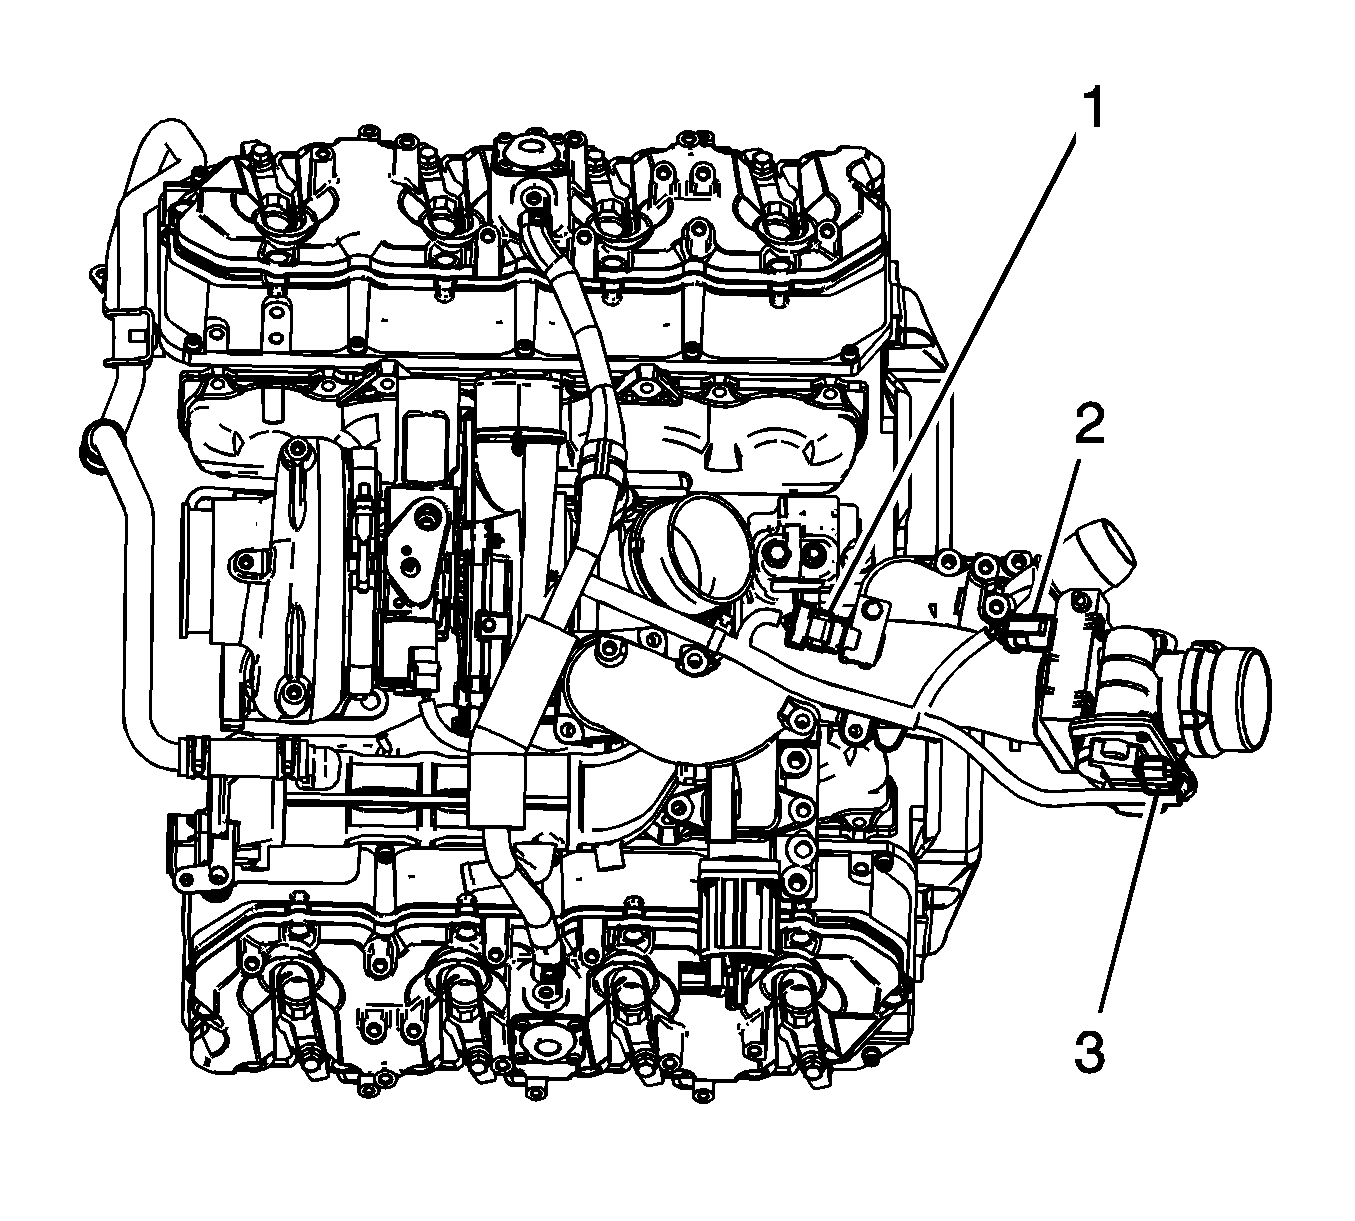
- Disconnect the engine harness electrical connector (1) from the manifold absolute pressure (MAP) sensor.
- Disconnect the engine harness electrical connector (2) from the intake air heater (IAH).
- Disconnect the engine harness electrical connector (3) from the intake air valve.
- Remove the front intake manifold tube nut.
- Reposition the positive battery cable boot.
- Remove the positive battery cable nut at the IAH.
- Remove the positive battery cable from the IAH stud.
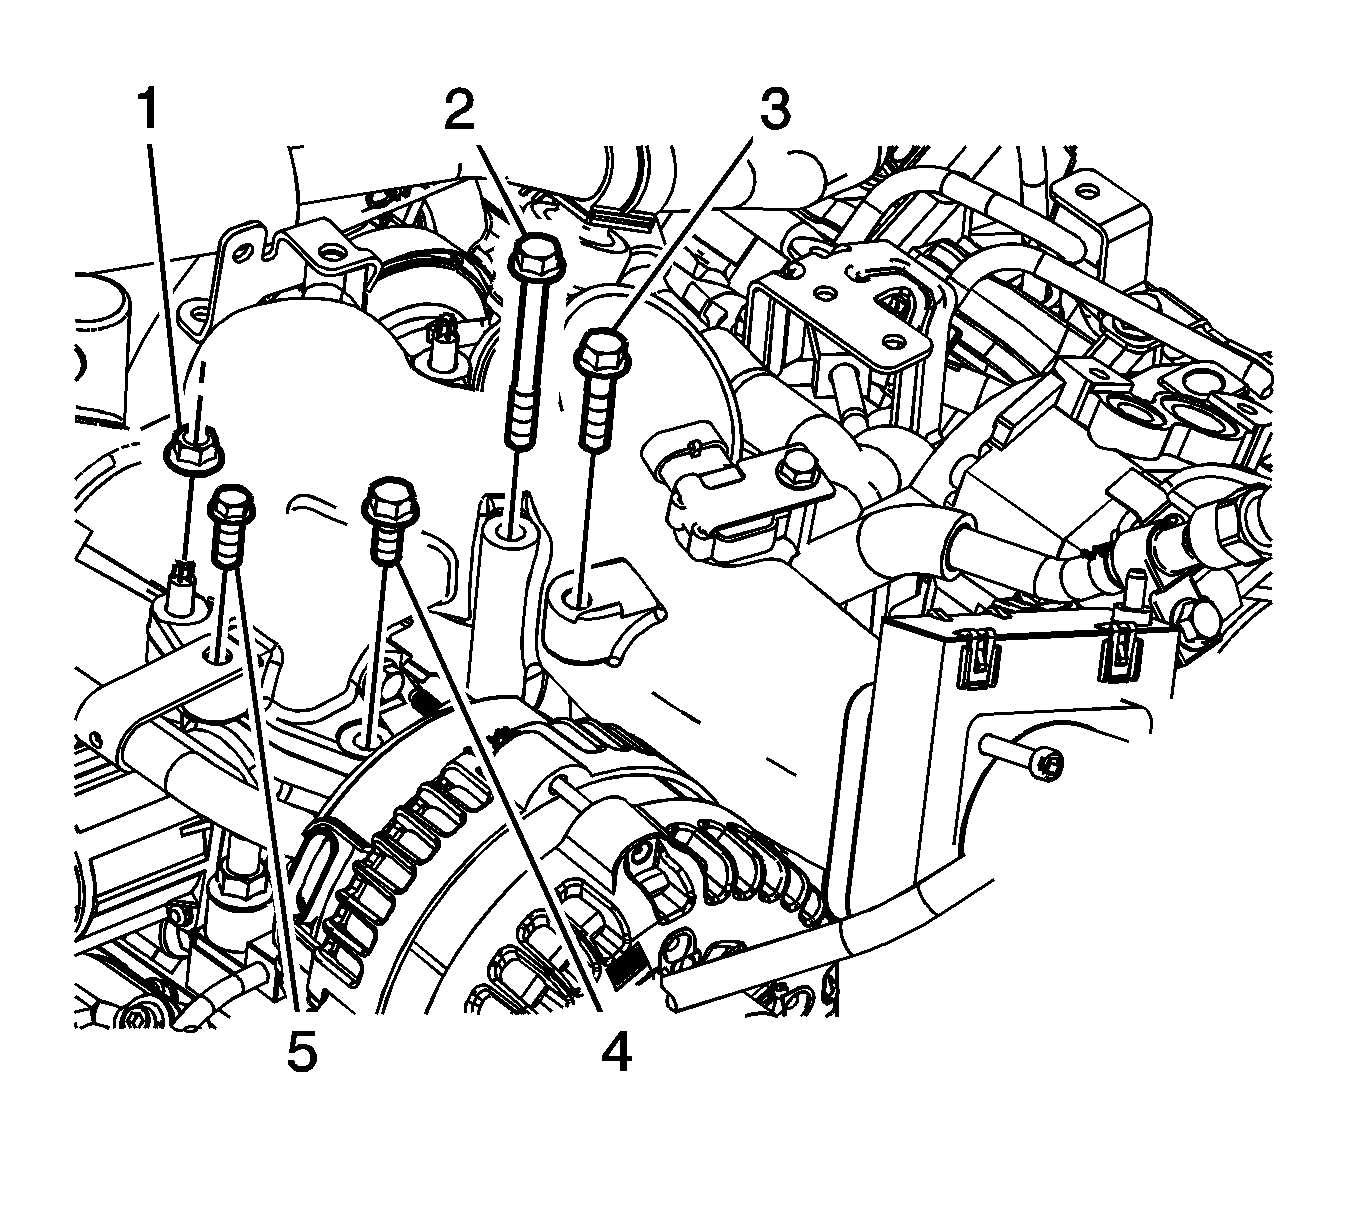
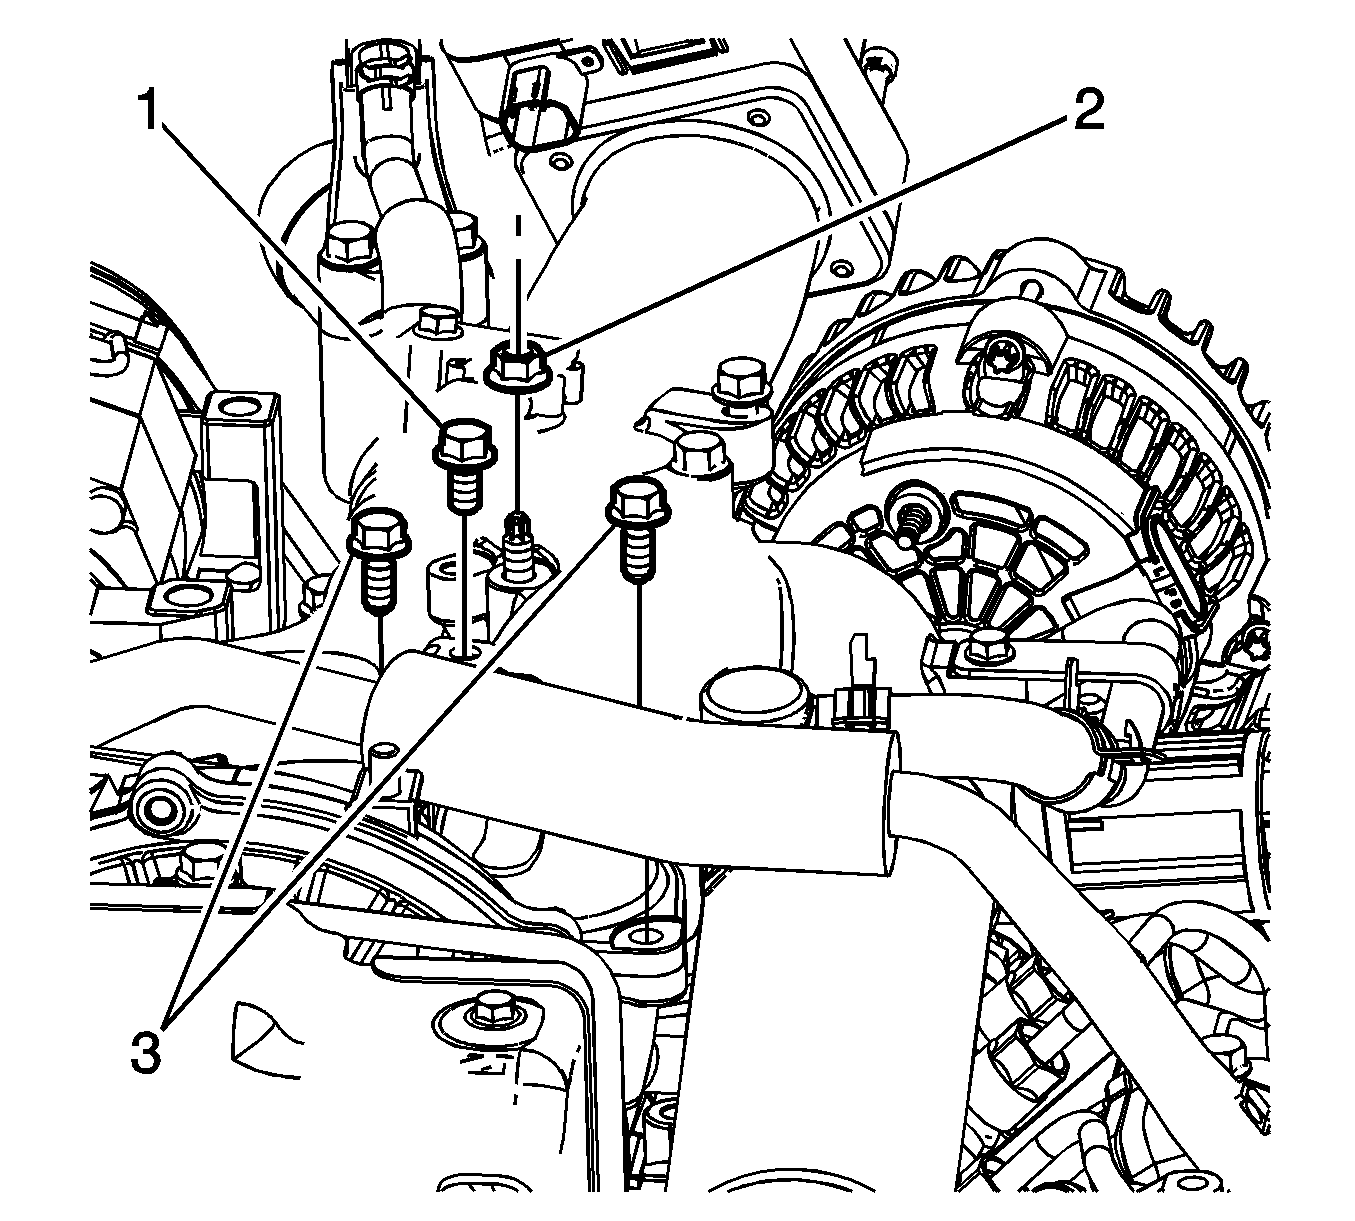
- Remove the engine wiring harness clip bolt (1) at the rear of the intake manifold tube.
- Remove the 2 rear intake manifold tube bolts (3).
- Remove the rear intake manifold tube nut (2).
- Remove the engine wiring harness clip from the intake manifold tube.
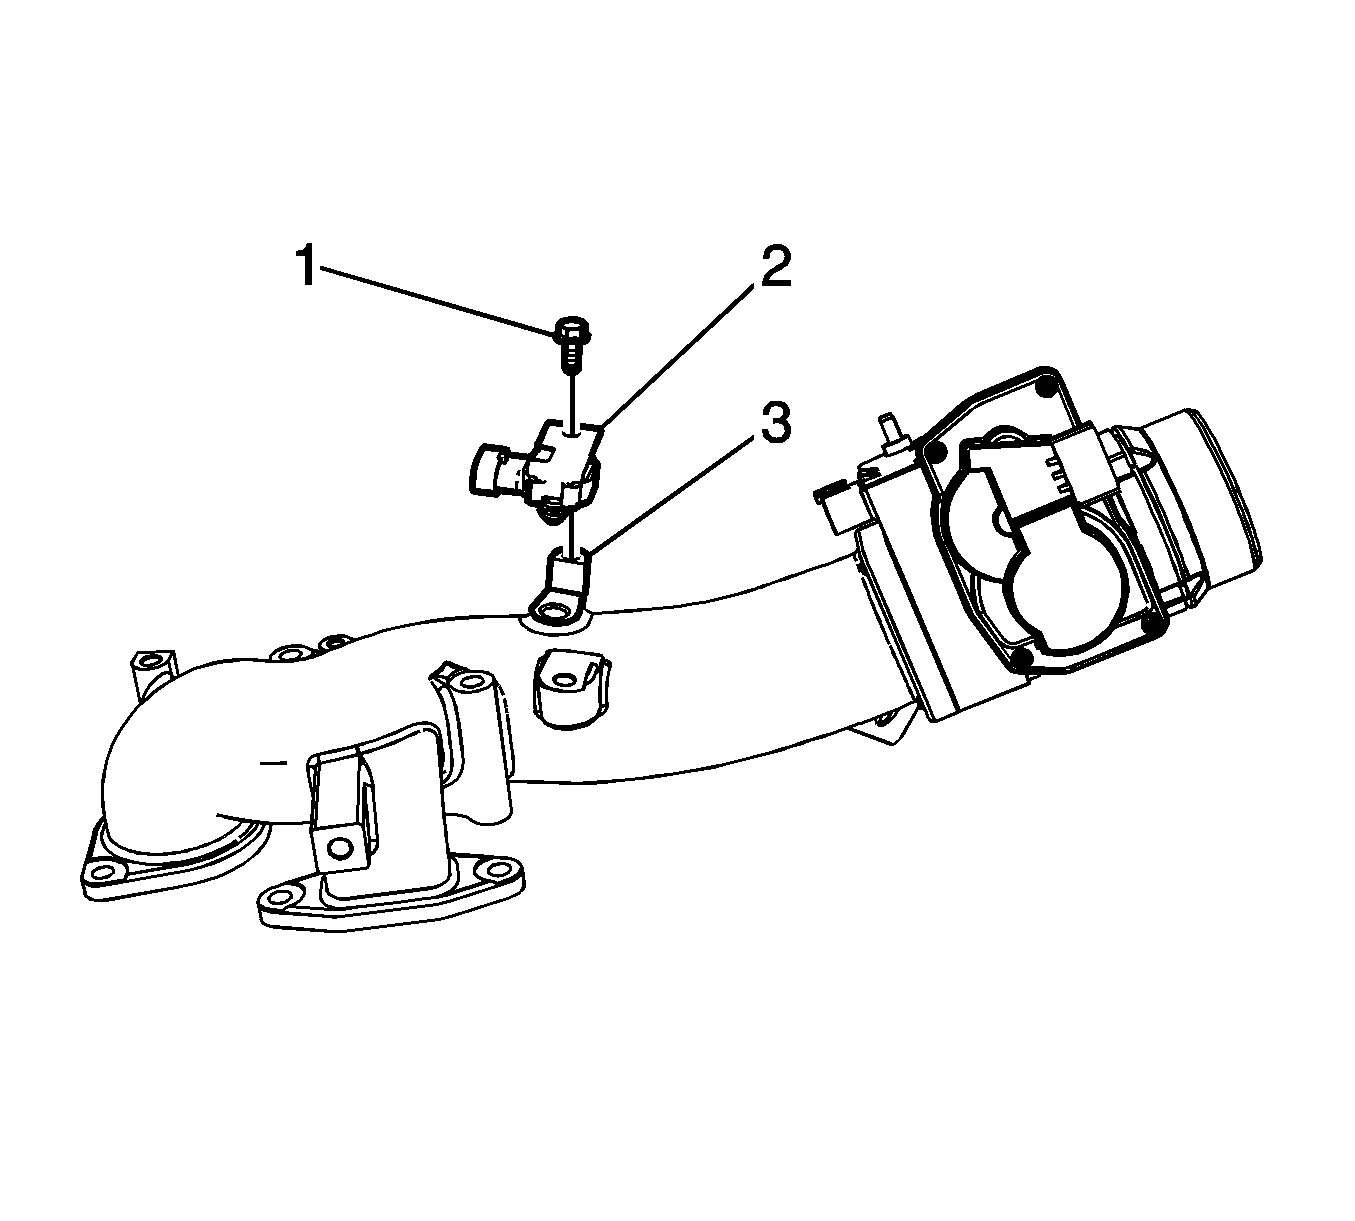
- Remove the engine wiring harness clip bolt (3).
- Remove the intake manifold tube bolts (2, 4) and nut (1).
- Remove the intake manifold tube with the stud.
- Remove and discard the 2 metal EGR gaskets from the EGR valve.
- Remove and discard the O-ring seal from the center intake manifold.
- If replacing the intake manifold tube perform the following steps, otherwise proceed to step 5 in the installation procedure.
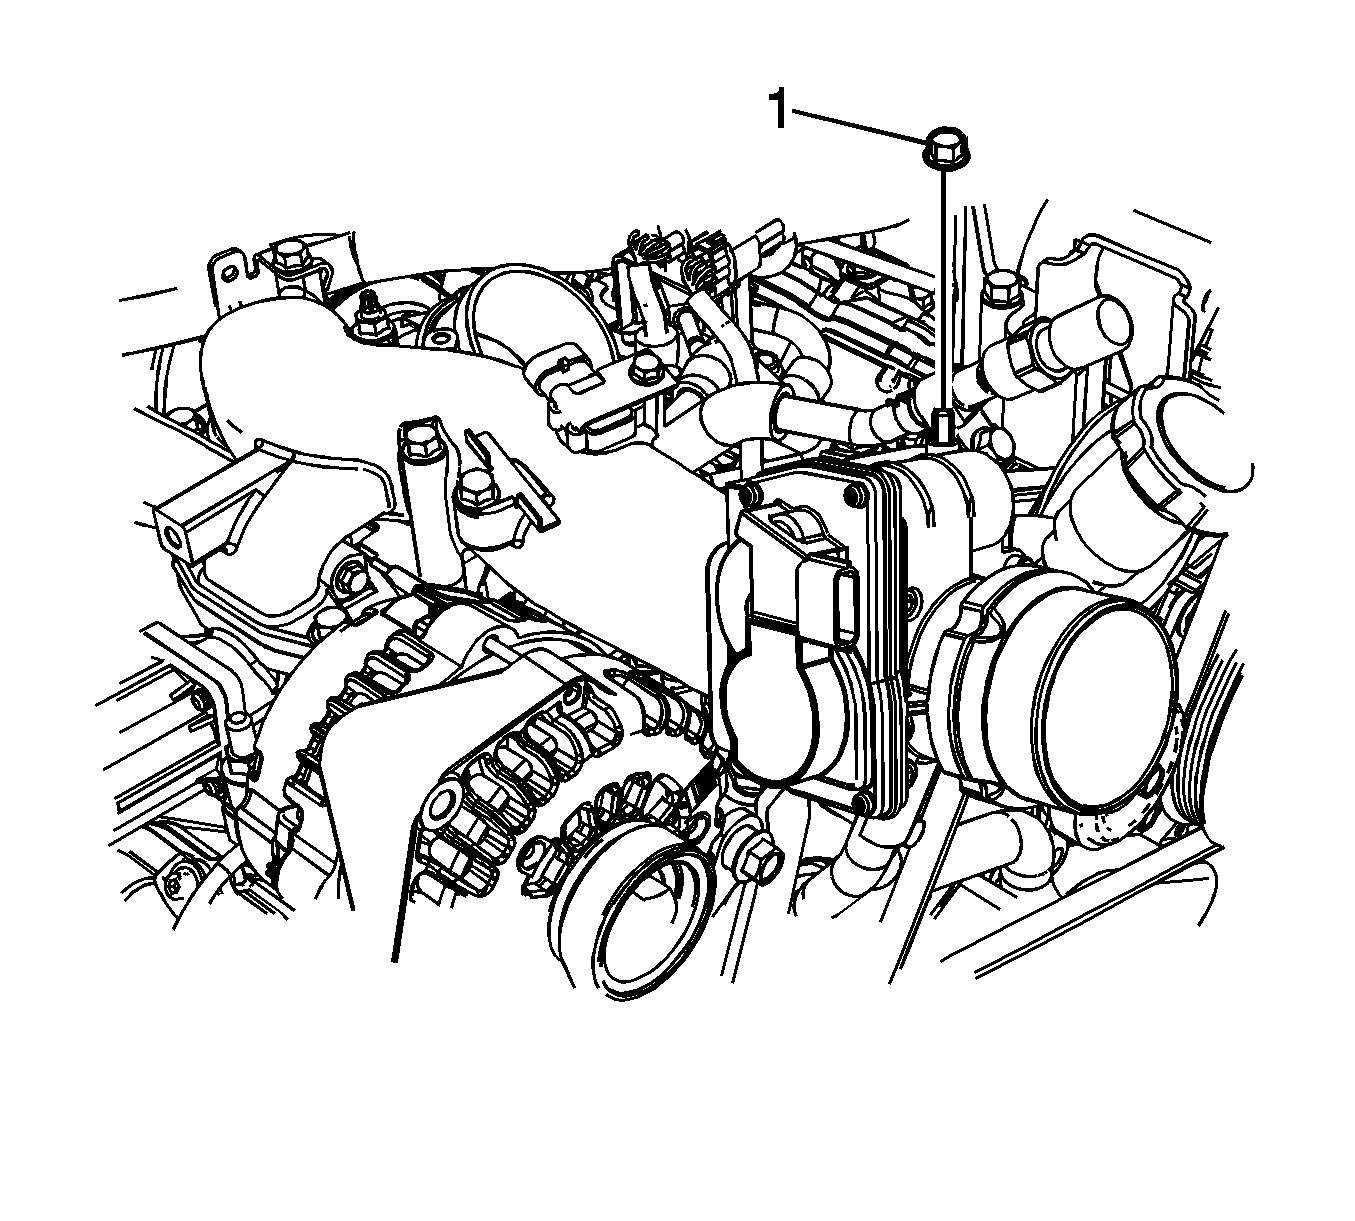
- Remove the MAP sensor bolt.
- Remove the MAP sensor and bracket.
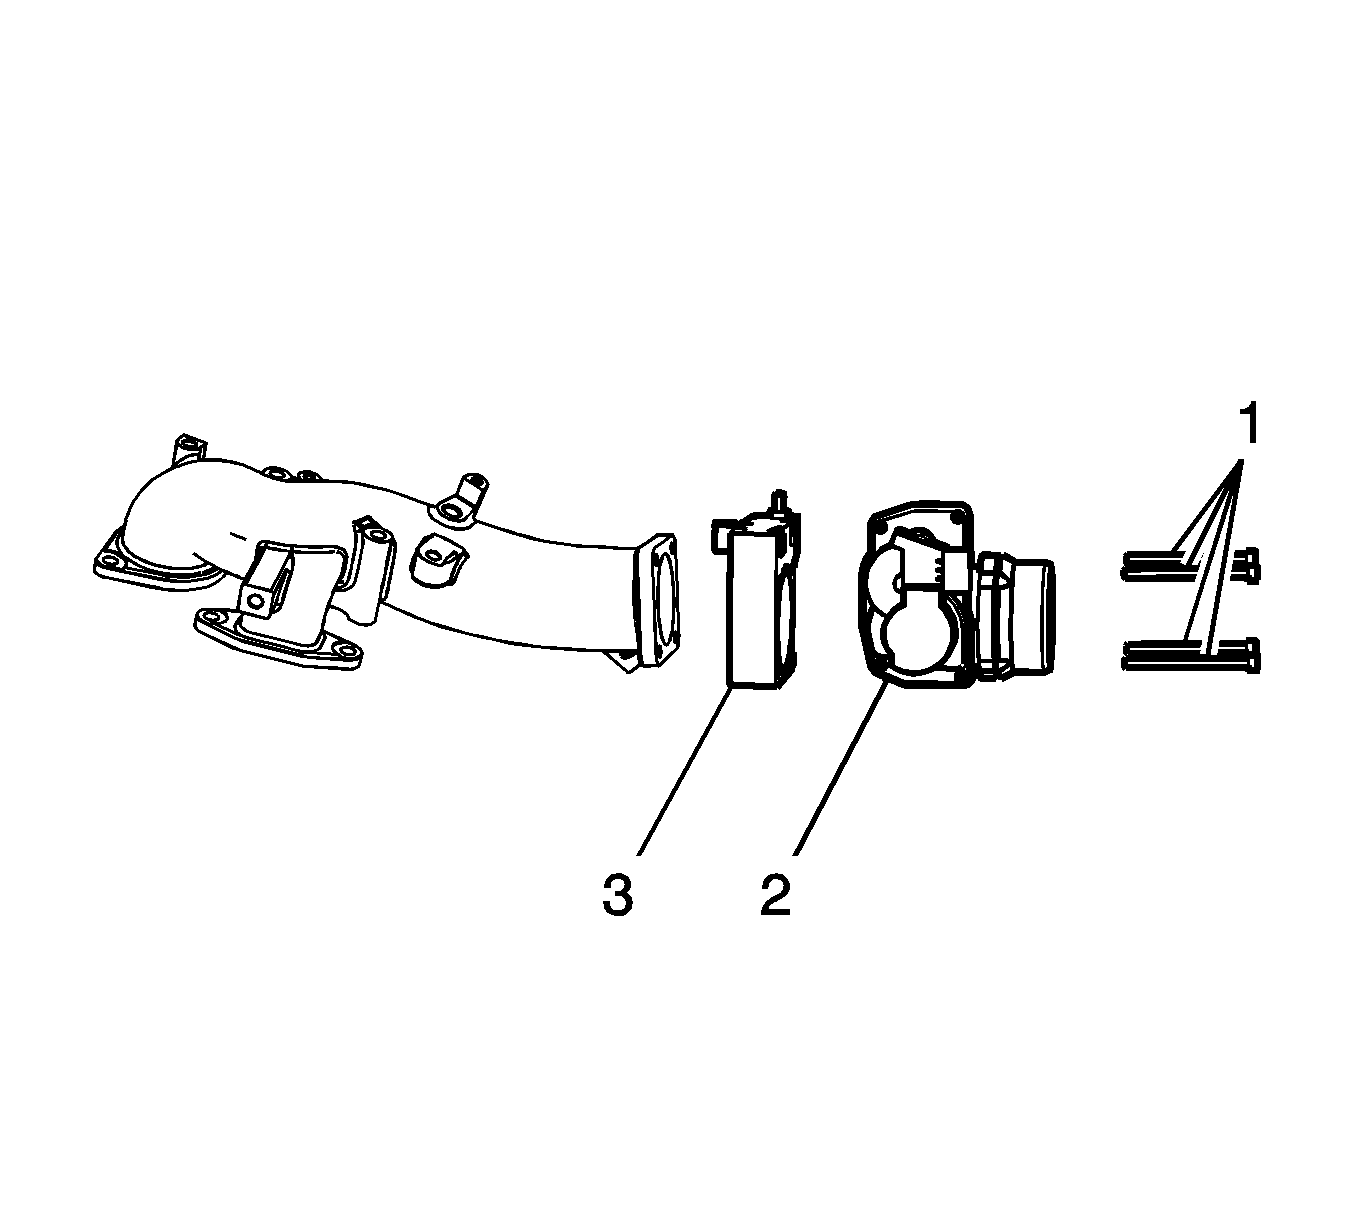
- Remove the air intake valve bolts (1).
- Remove the air intake valve (2) and the IAH (3) from the intake manifold tube.

Installation Procedure
- Position the IAH (3) and the air intake valve (2) to the intake manifold tube.
- Install the air intake valve bolts.
- Install the MAP sensor and bracket.
- Install the MAP sensor bolt.
- Install a NEW the O-ring seal onto the center intake manifold.
- Install NEW metal EGR gaskets onto the EGR valve.
- Install the intake manifold tube with the stud.
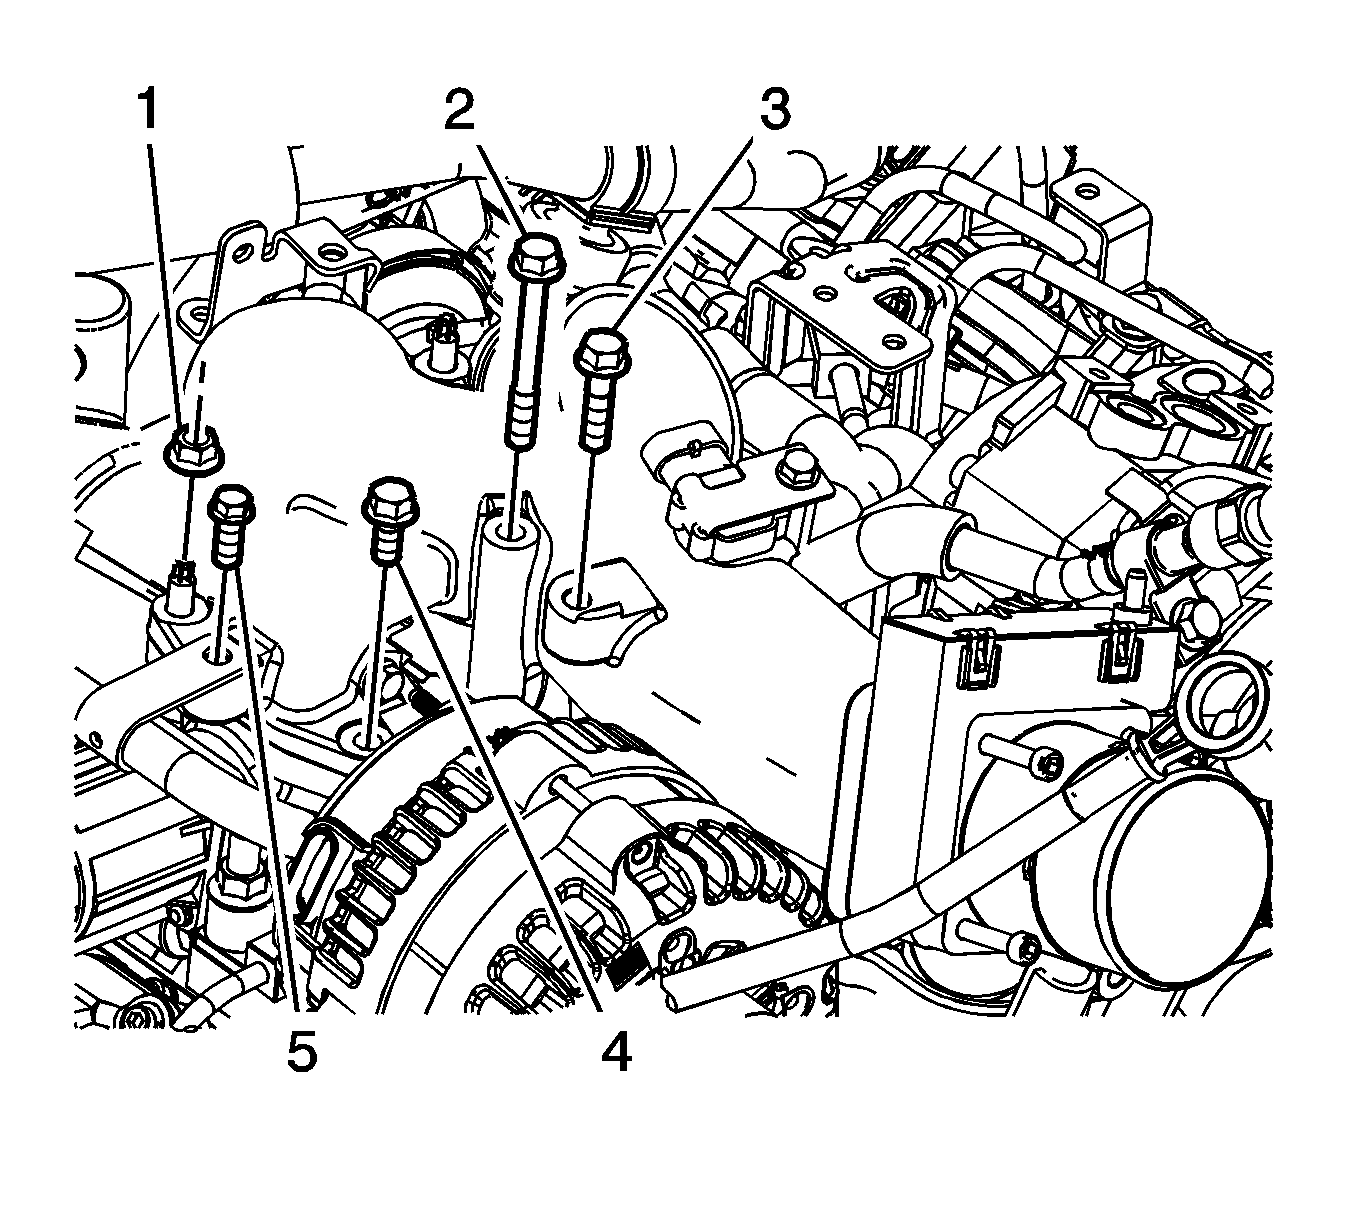
- Install the intake manifold tube bolts (2, 4) and nut (1).
- Install the engine wiring harness clip bolt (3).
- Install the engine wiring harness clip to the intake manifold tube.
- Install the rear intake manifold tube nut (2).
- Install the 2 rear intake manifold tube bolts (3).
- Install the engine wiring harness clip bolt (1) at the rear of the intake manifold tube.
- Install the positive battery cable to the IAH stud.
- Install the positive battery cable nut at the IAH.
- Position the positive battery cable boot.
- Install the front intake manifold tube nut.
- Connect the engine harness electrical connector (3) to the intake air valve.
- Connect the engine harness electrical connector (2) to the IAH.
- Connect the engine harness electrical connector (1) to the MAP sensor.
- Install the engine cover. Refer to Engine Cover Replacement .
- Install the air cleaner outlet duct. Refer to Air Cleaner Outlet Duct Replacement .
- Connect the negative battery cable. Refer to Battery Negative Cable Disconnection and Connection .
Notice: Refer to Fastener Notice in the Preface section.
Tighten
Tighten the bolts to 20 N·m (15 lb ft).
Tighten
Tighten the bolt to 10 N·m (89 lb in).
Tighten
Tighten the stud to 25 N·m (18 lb ft).
Tighten
Tighten the bolt/nut to 25 N·m (18 lb ft).
Tighten
Tighten the bolt to 15 N·m (11 lb ft).
Tighten
Tighten the nut to 25 N·m (18 lb ft).
Tighten
Tighten the bolt to 25 N·m (18 lb ft).
Tighten
Tighten the bolt to 15 N·m (11 lb ft).
Tighten
Tighten the nut to 10 N·m (89 lb ft).
Tighten
Tighten the bolt to 15 N·m (11 lb ft).
