Removal Procedure
Important:
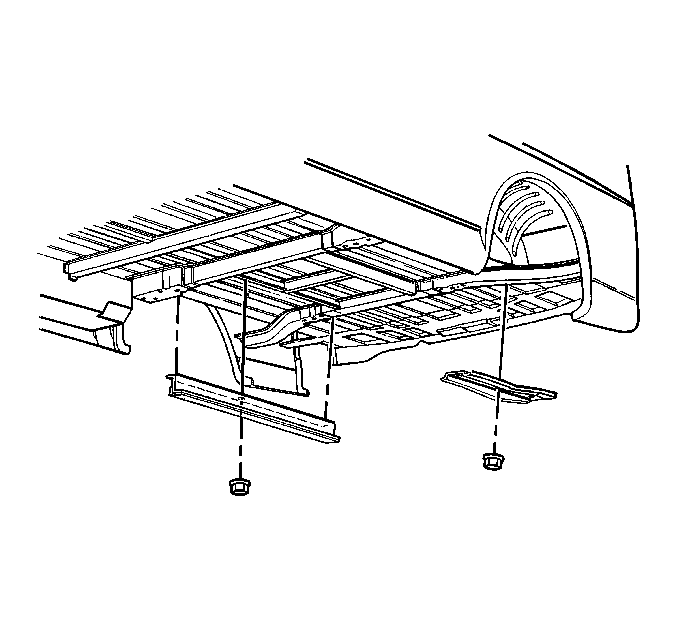
• The nuts that retain the rear passenger seat floor rail on the left hand side of the vehicle can be accessed from underneath the vehicle. • The right hand side rear passenger seat floor rails are similar, but require that the heat shields be removed for access to the floor rail nuts. • The 12 passenger extended van and the 15 passenger van reinforcements are used along with the rear seat floor rails. The reinforcements are installed on the underside of the vehicle to the floor rail studs, and held in place by the floor rail retaining
nuts. If you remove the reinforcements, reinstall the reinforcements.
- Remove the rear passenger seats from the vehicle. Refer to Rear Bench Seat Replacement .
- Raise the vehicle and support the vehicle with safety stands. Refer to Lifting and Jacking the Vehicle .
- Remove the spare tire from the vehicle.
- Remove the heat shields from the vehicle. Refer to Exhaust Heat Shield Replacement - Frame .
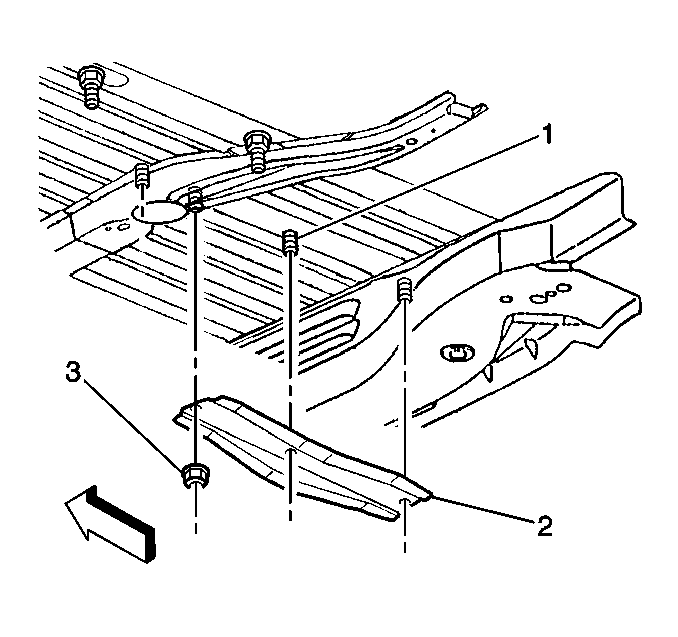
- Remove the nuts (3) that retain the floor rail to the floor of the vehicle.
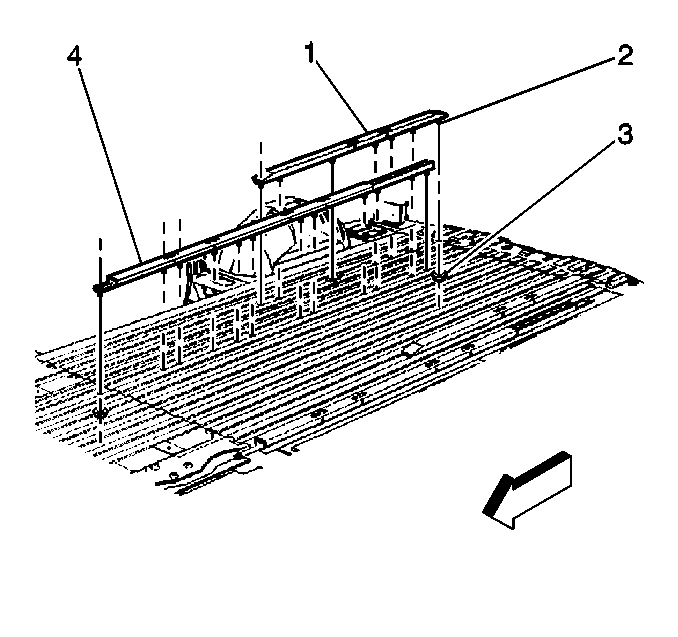
- Remove the rear seat track reinforcements from the seat track studs (12 and 15 Passenger).
- Lower the vehicle.
- Remove the rear floor mat/carpet. Refer to Rear Floor Mat/Carpet Replacement .
- Remove the floor rail (1, 2) from the vehicle.

Installation Procedure
- Position the floor rail (2) to the vehicle.
- Install the rear floor mat/carpet. Refer to Rear Floor Mat/Carpet Replacement .
- Raise the vehicle and support the vehicle with safety stands. Refer to Lifting and Jacking the Vehicle .
- Install the rear seat track reinforcements to the seat track studs (12 and 15 Passenger).
- Inspect the nuts (3) in order to ensure that the sealer is intact.
- If the sealer is not intact, apply a medium bodied sealer to the nuts before installing.
- Install the nuts to retain the floor rail to the vehicle.
- Install the heat shields to the vehicle. Refer to Exhaust Heat Shield Replacement - Frame .
- Install the spare tire to the vehicle.
- Remove the safety stands.
- Lower the vehicle.
- Install the rear passenger seats to the vehicle. Refer to Rear Bench Seat Replacement .
Notice: Use the correct fastener in the correct location. Replacement fasteners must be the correct part number for that application. Fasteners requiring replacement or fasteners requiring the use of thread locking compound or sealant are identified in the service procedure. Do not use paints, lubricants, or corrosion inhibitors on fasteners or fastener joint surfaces unless specified. These coatings affect fastener torque and joint clamping force and may damage the fastener. Use the correct tightening sequence and specifications when installing fasteners in order to avoid damage to parts and systems.
Tighten
Tighten the nuts to 43 N·m (32 lb ft).
