Tools Required
J 36850 Assembly Lubricant (or equivalent)
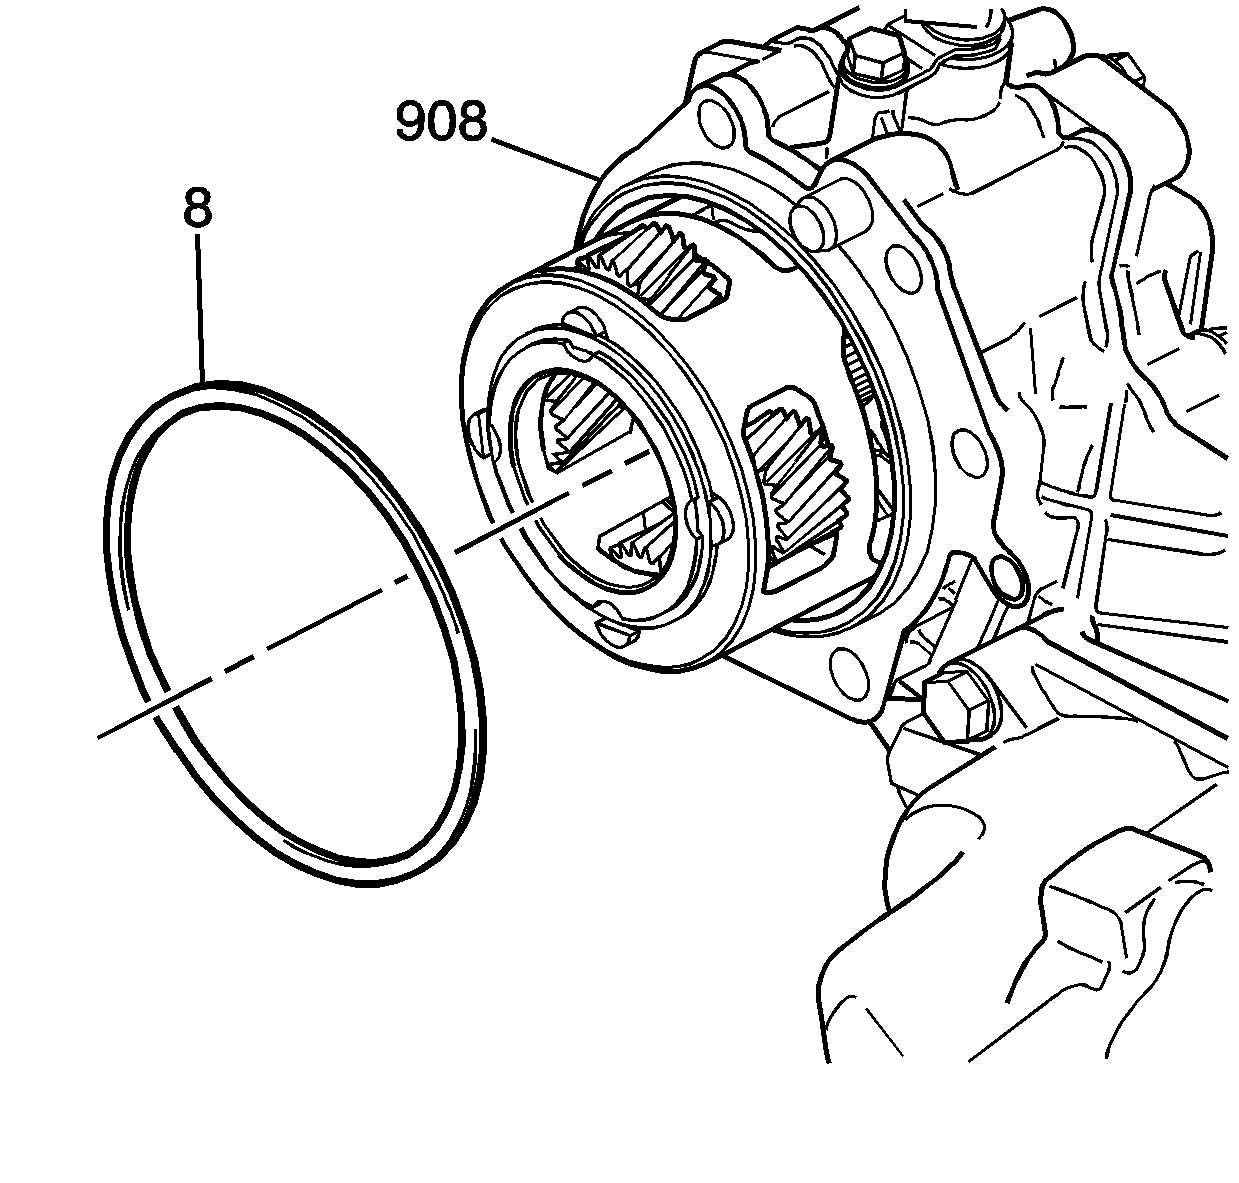
- Install the case extension seal (8) using J 36850 in order to retain.
- Line up the notch (1) to the hole in the case and install the oil dam (901).
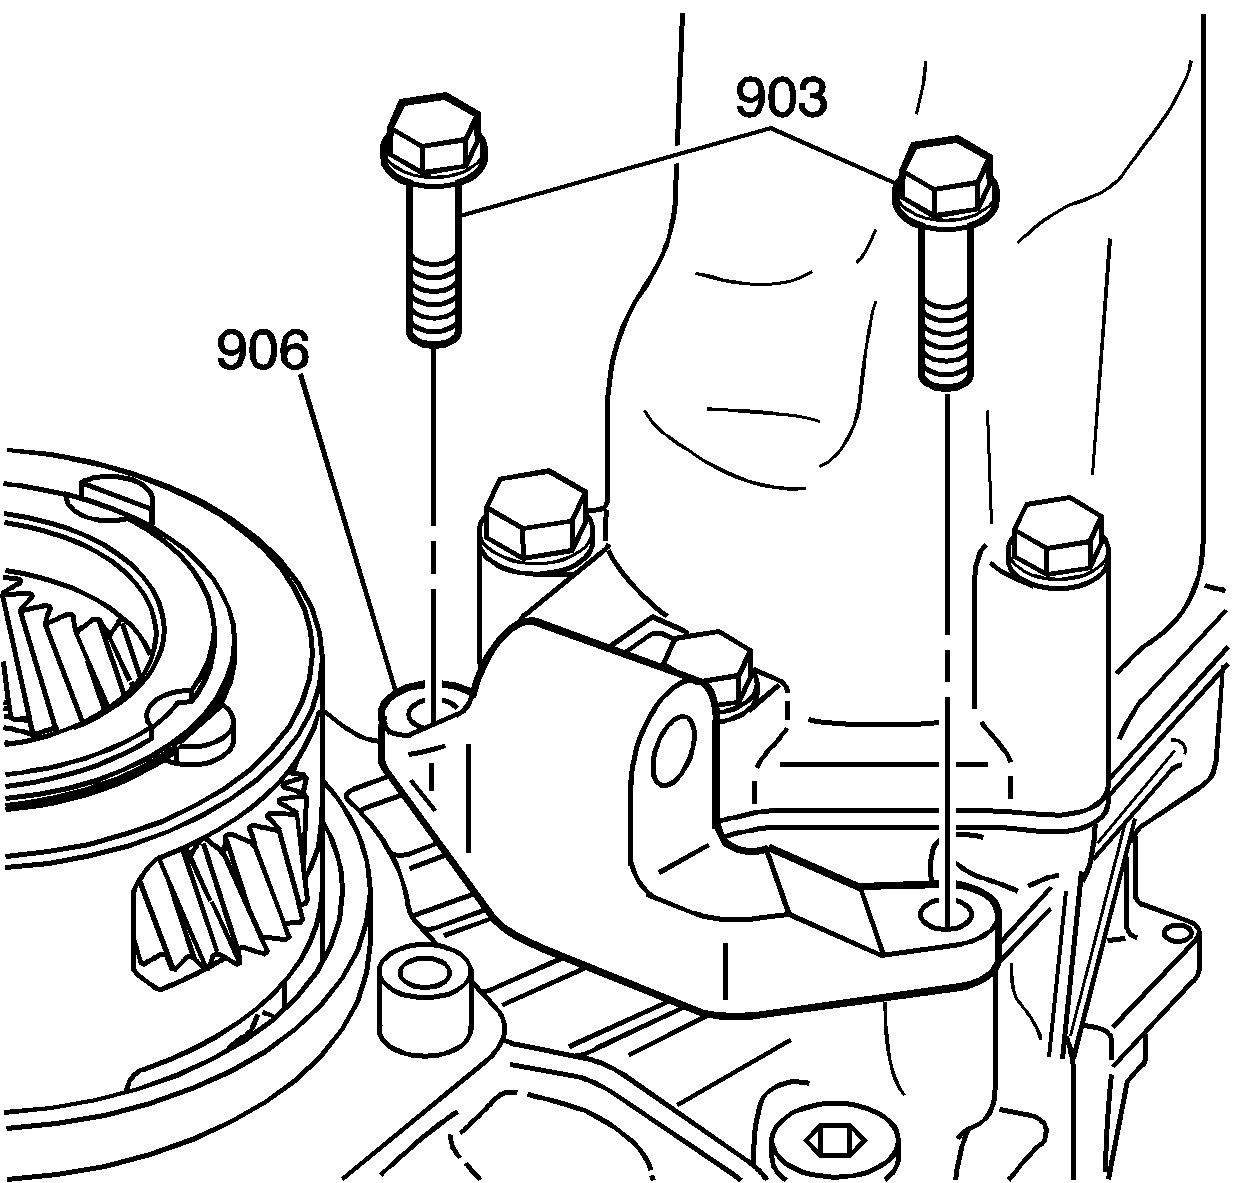
- Install the transfer case lower brace (906).
- Install the transfer case lower brace bolts (903). Hand tighten.
- Install the transfer case assembly (908) onto the transmission case (3).
- Install the 5 transfer case to case bolts (907, 909, 910).
- Torque the bolts in the following sequence:
- Tighten 2 transfer case bolts (1, 2):
- First pass 35 N·m (26 lb ft)
- Final Pass an additional 160 degrees
- Tighten 1 transfer case bolt (3):
- First pass 35 N·m (26 lb ft)
- Final Pass an additional 70 degrees
- Tighten 2 transfer case bolts (4, 5):
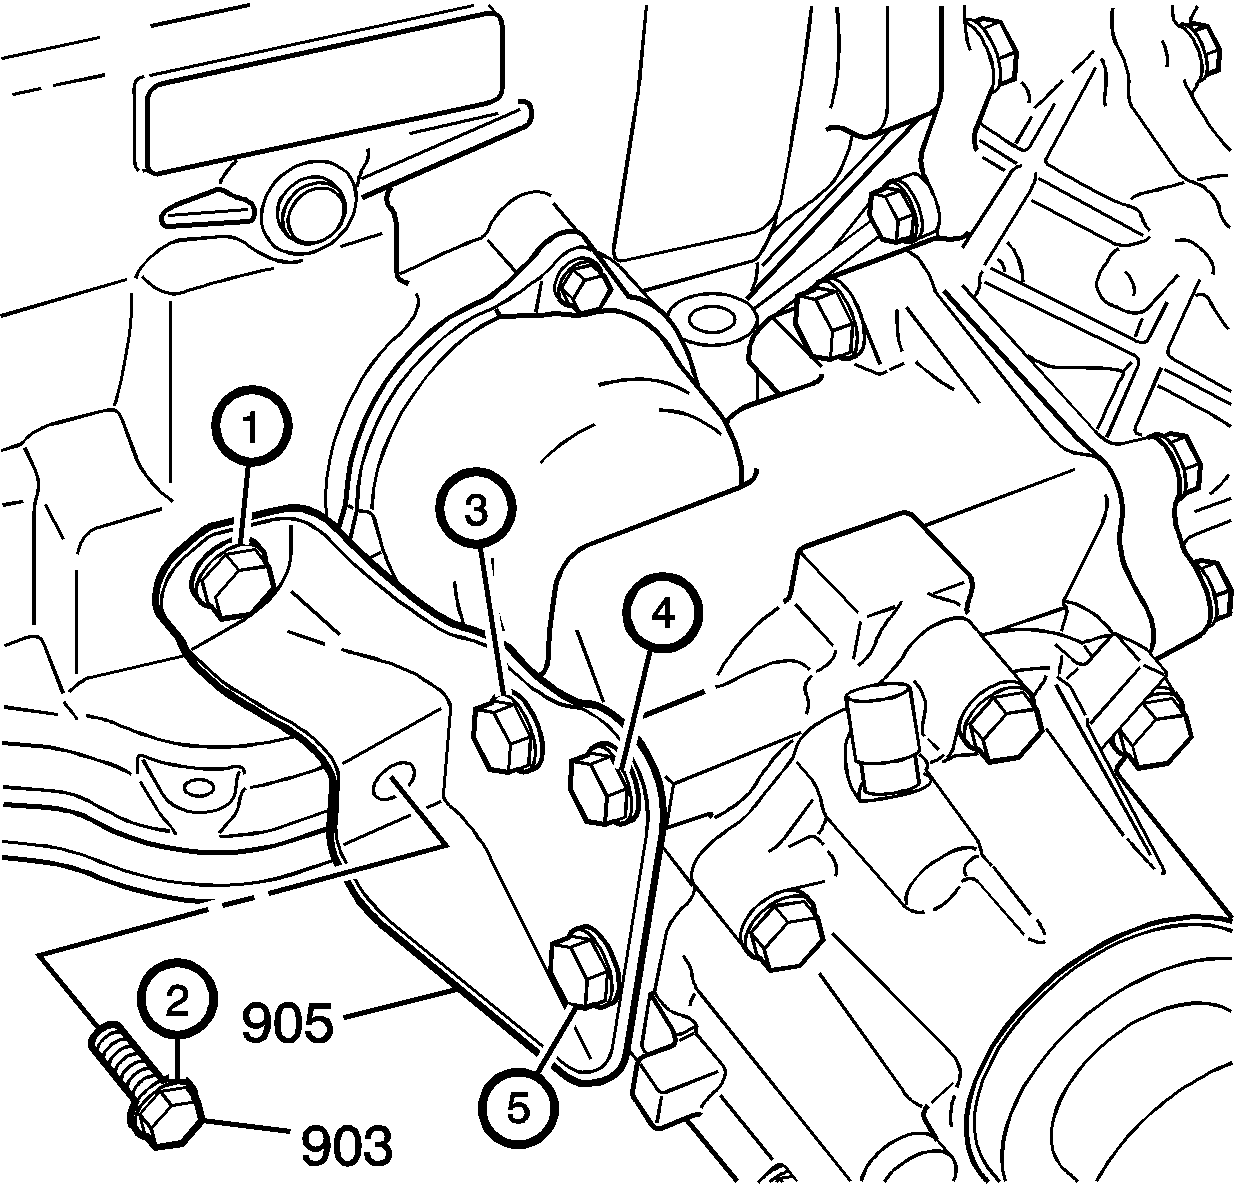
- Install the transfer case side brace (905) to case.
- Install the transfer case side brace to case bolts (903). Hand tighten the bolts.
- Torque the bolts in the following sequence (1, 2, 3, 4, 5).
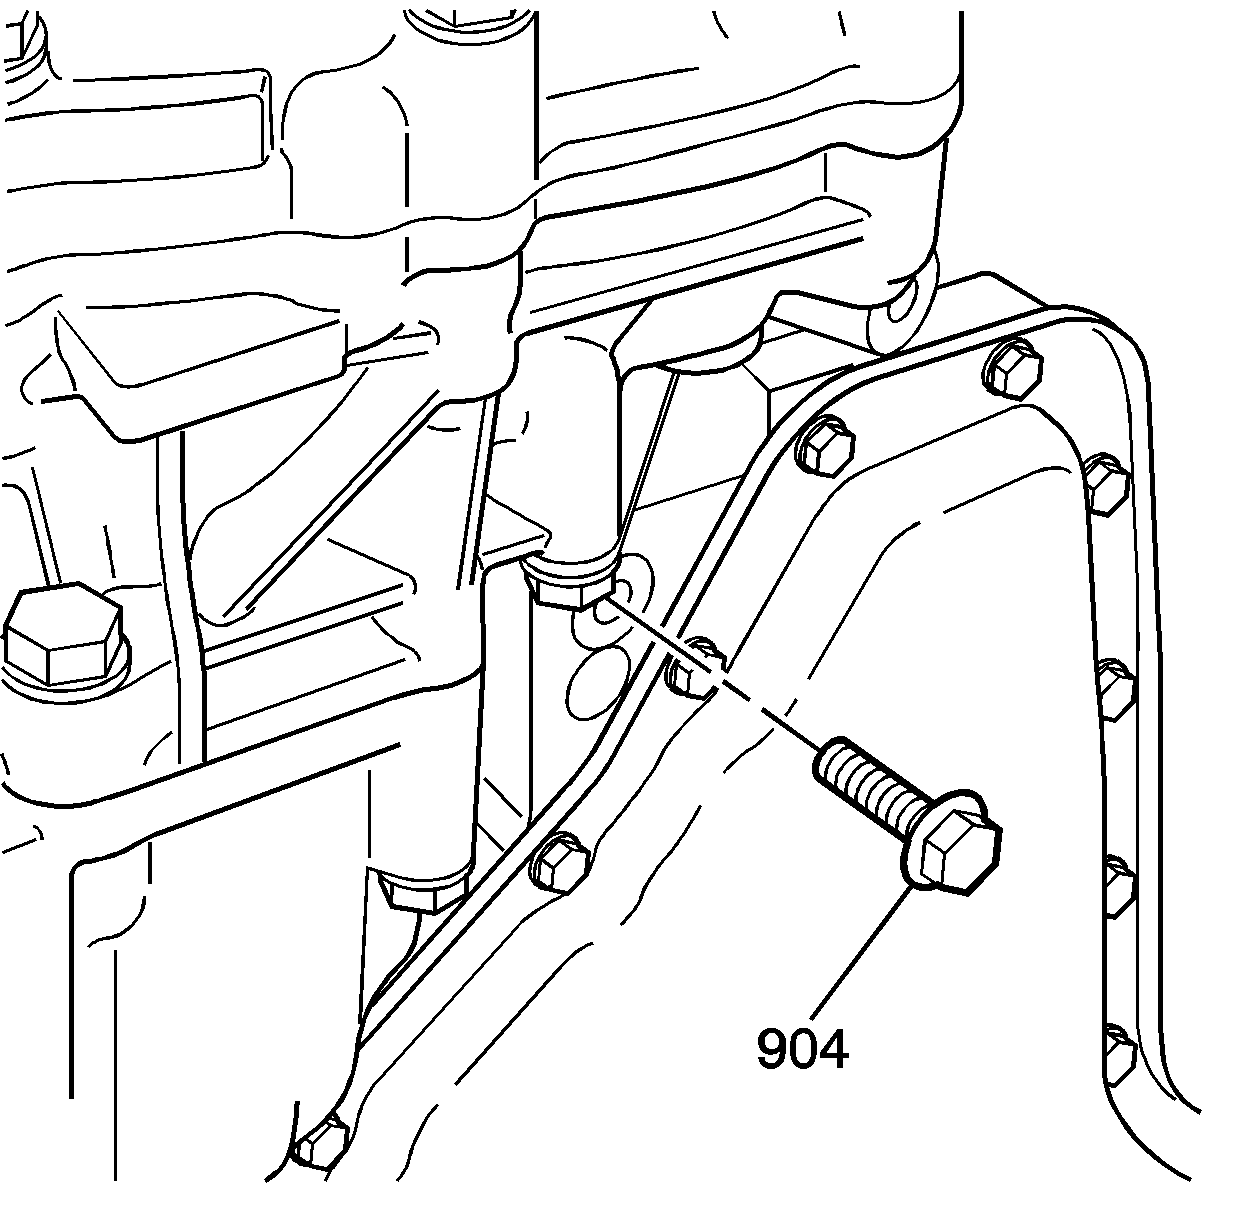
- Install the transfer case lower brace to case bolt (904).
- Tighten the transfer case lower brace to case bolts (903).
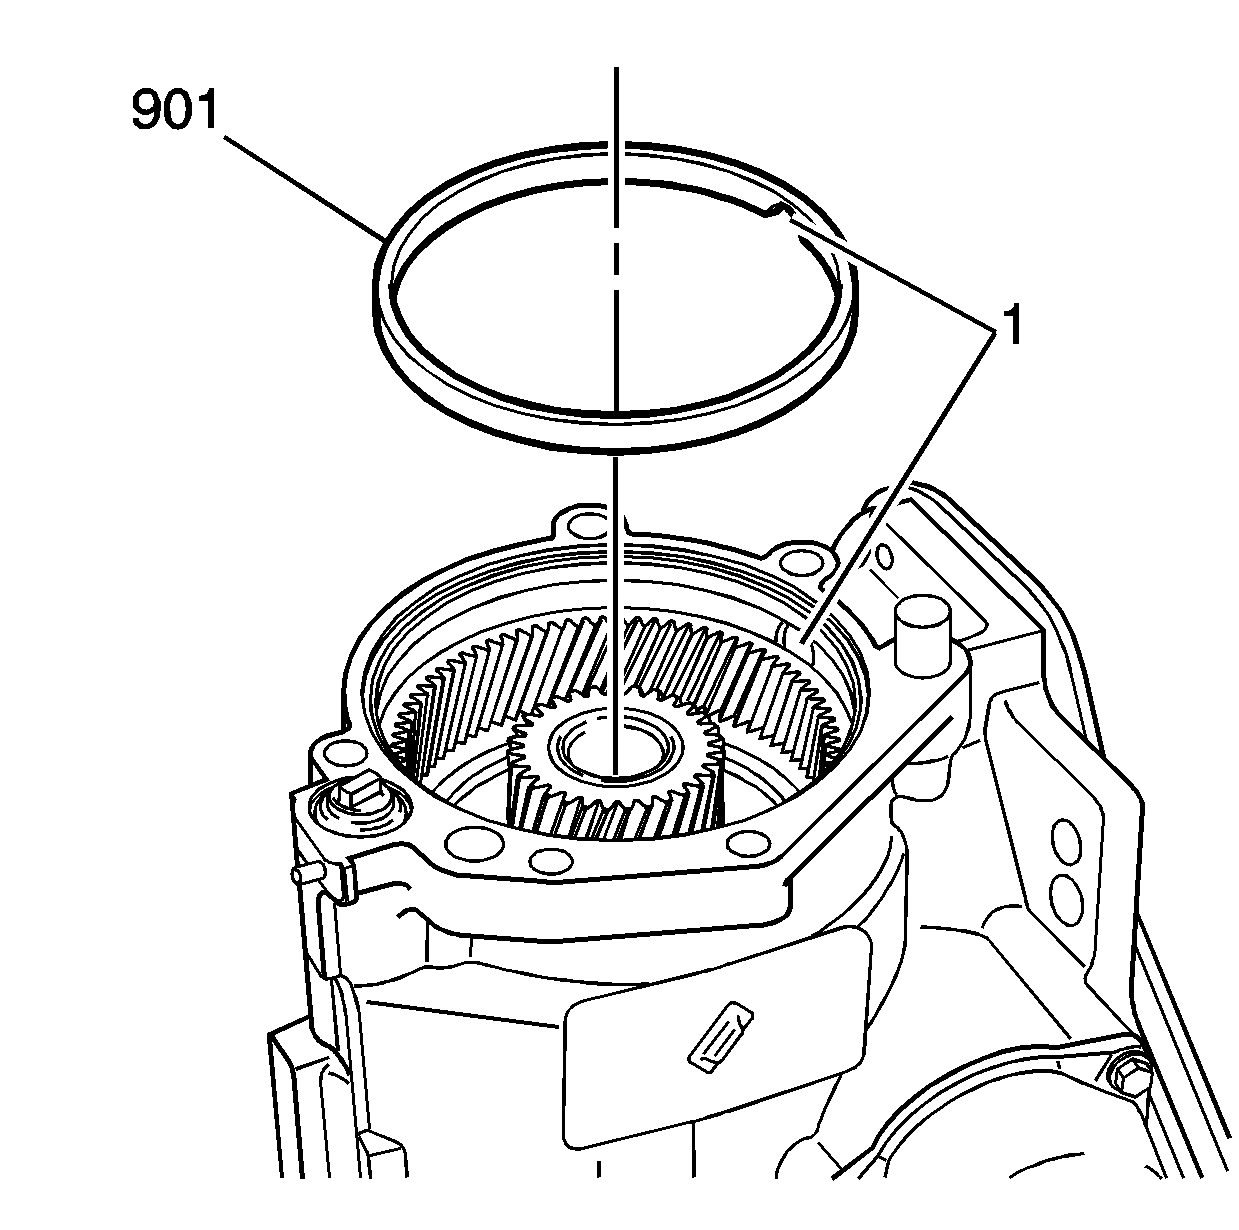
Notice: The oil dam must be installed with the oil passage notch aligned to the passage in the case. Incorrect alignment will cause oil flow stoppage and damage to the transmission.
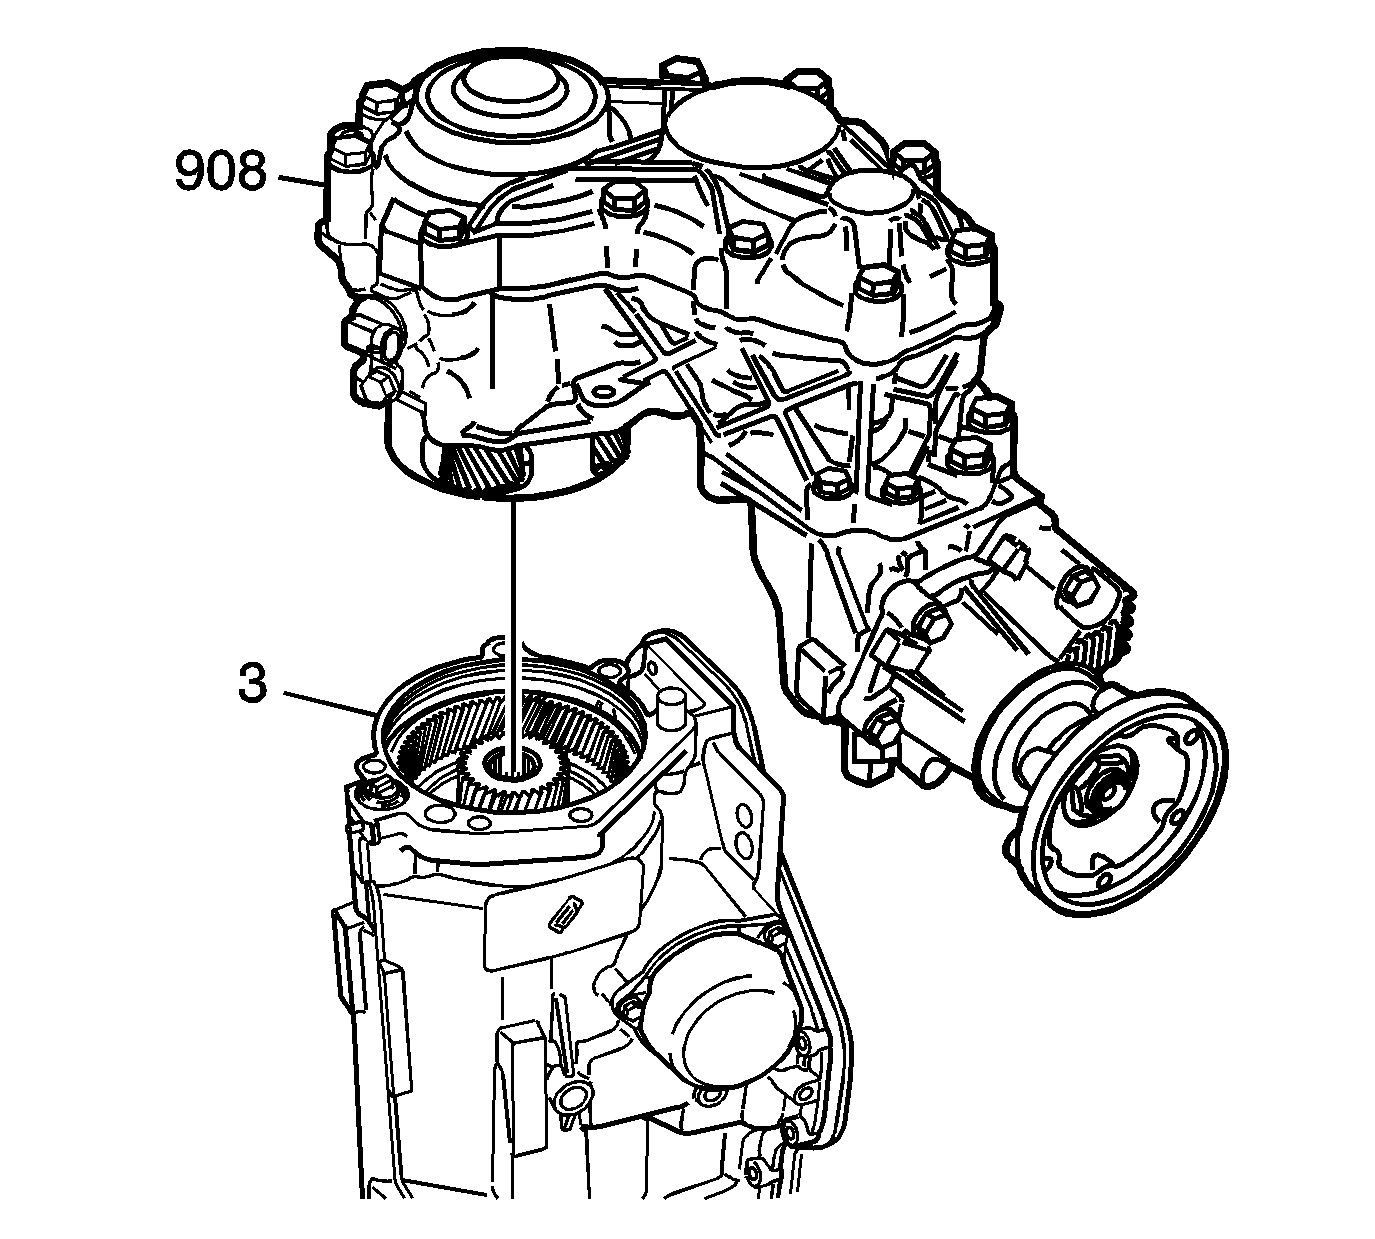
Caution: This component weighs approximately 60 lbs. Personal injury may result if you lift the component improperly.
Notice: The park gear thrust bearing (695) must be retained in the park gear (696) when installing the transfer case to the transmission, or damage may occur.
Important: When the transfer case is installed onto the transmission, there should be no gap between these parts. If a gap exists, check the park gear thrust bearing for proper retention to the park gear.
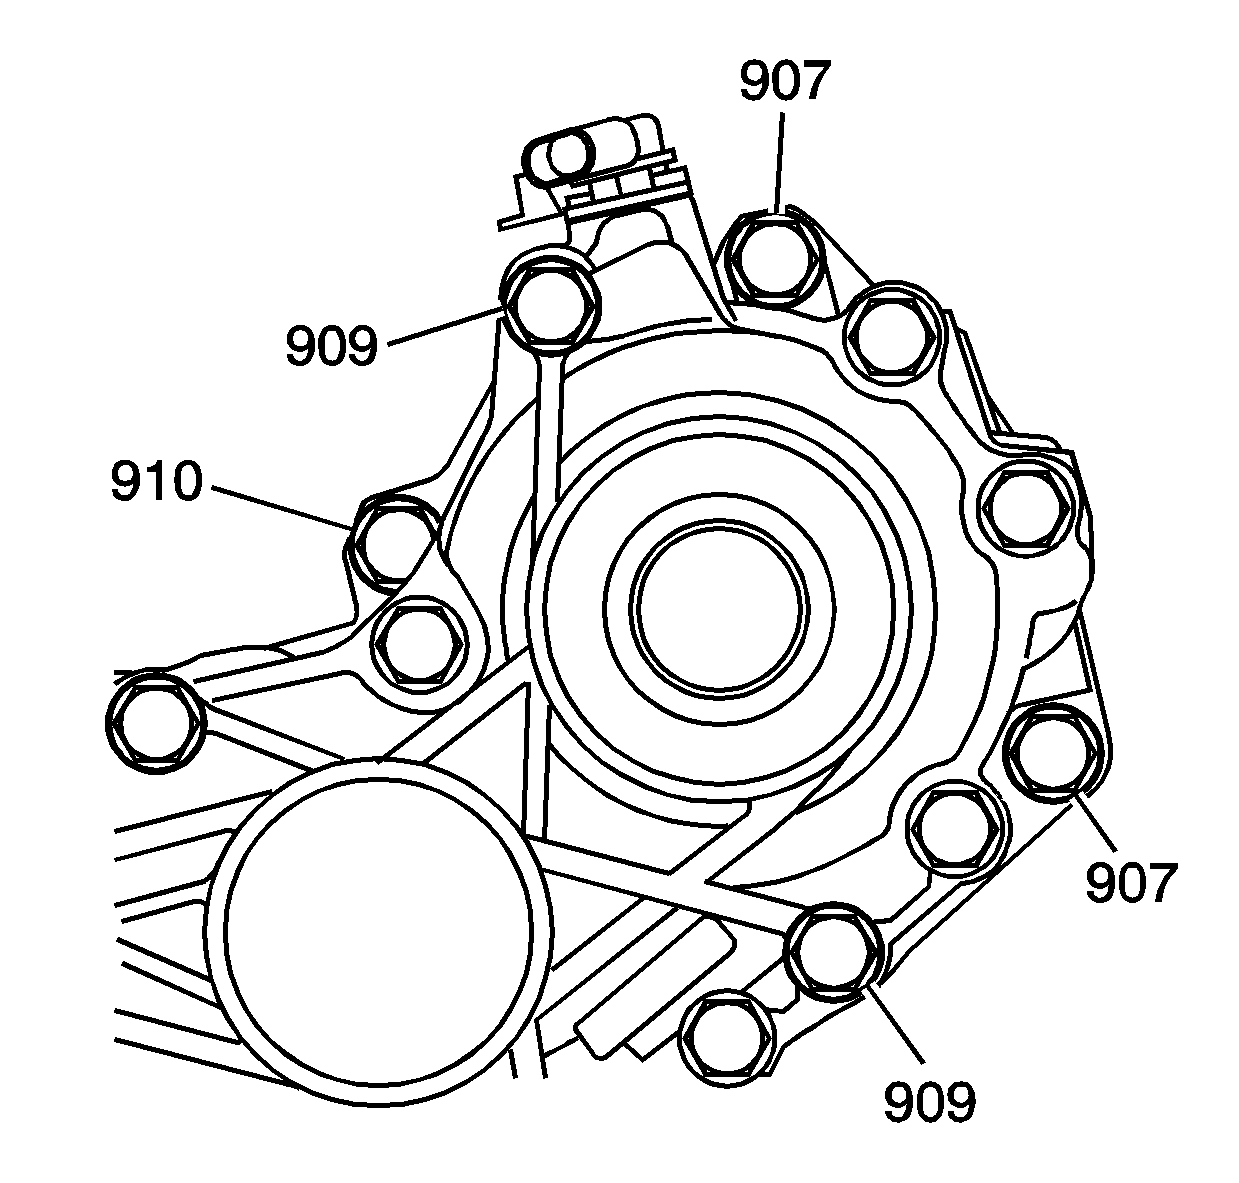
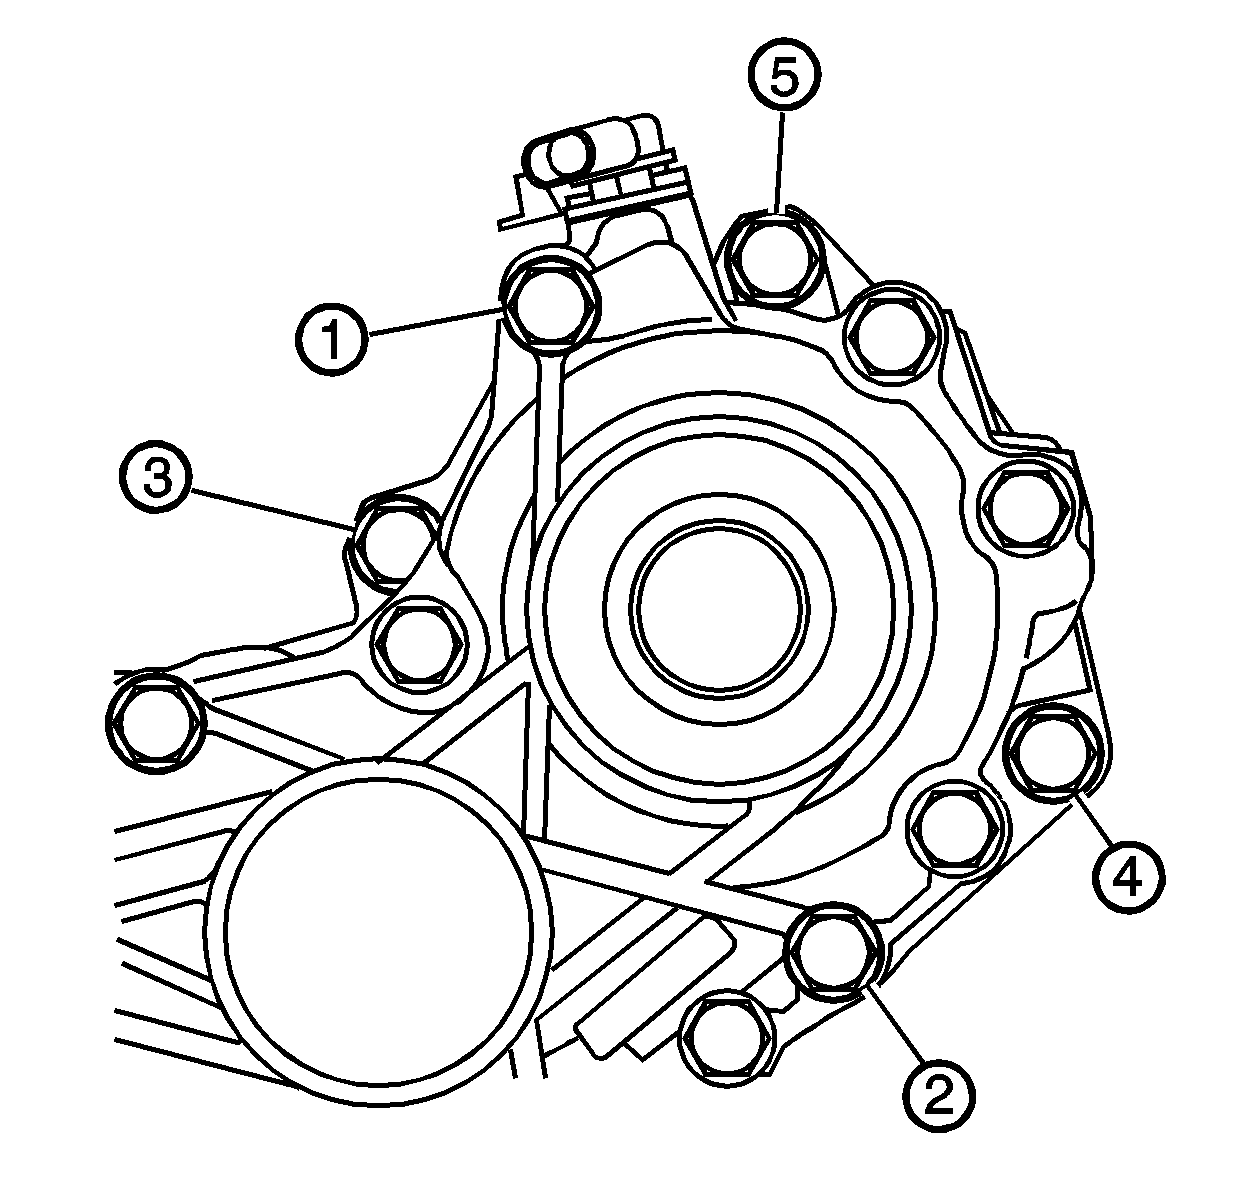
Notice: Do not use air powered tools in order to assemble or disassemble transmissions. Use hand tools in order to properly determine bolt tightness. Improper bolt torque can contribute to transmission repair conditions, and this information, which is vital to diagnosis, can only be detected when using hand tools.
Notice: Use the correct fastener in the correct location. Replacement fasteners must be the correct part number for that application. Fasteners requiring replacement or fasteners requiring the use of thread locking compound or sealant are identified in the service procedure. Do not use paints, lubricants, or corrosion inhibitors on fasteners or fastener joint surfaces unless specified. These coatings affect fastener torque and joint clamping force and may damage the fastener. Use the correct tightening sequence and specifications when installing fasteners in order to avoid damage to parts and systems.
Tighten
Tighten
Tighten
Tighten transfer case bolts (4, 5) to 40 N·m (30 lb ft).
Tighten
Tighten the transfer case side brace bolts to 31 N·m (23 lb ft).
Tighten
Tighten the transfer case lower brace bolt to 56 N·m (42 lb ft).
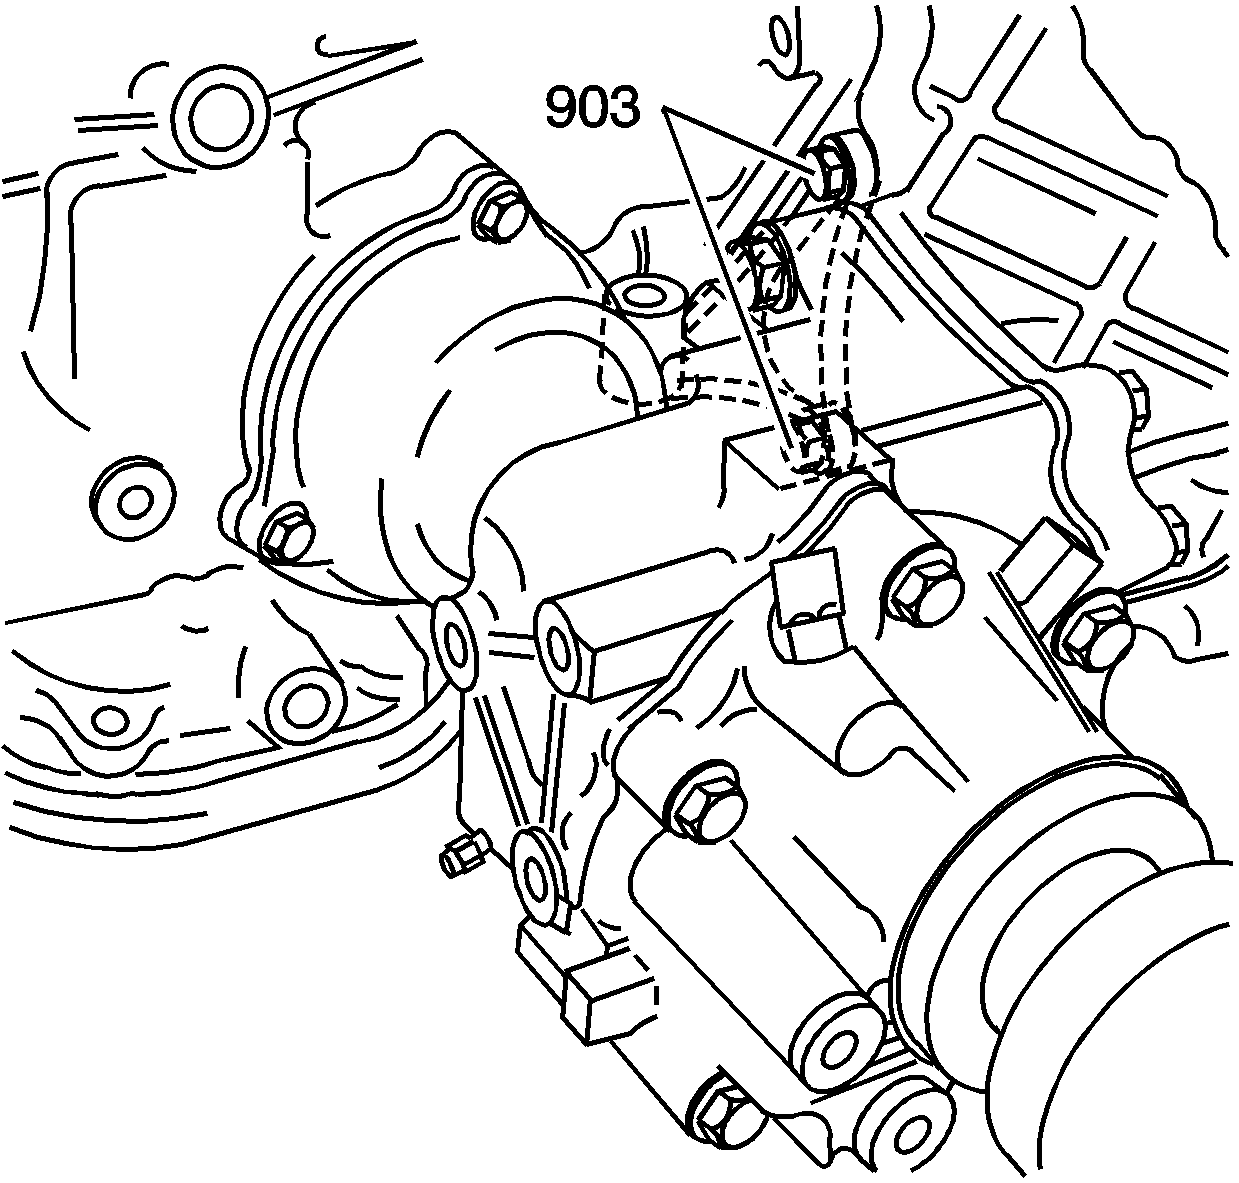
Tighten
Tighten the transfer case lower brace bolts to 31 N·m (23 lb ft).
