Air/Windnoise Around Front Door (Use All Service Procedures)

| Subject: | Air/Windnoise Around Front Door (Use All Service Procedures) |
| Models: | 1996-2000 Chevrolet and GMC G Vans (Plant Code 1) |
| Built prior to September 1, 1999 |
Important: This bulletin contains procedures that should aid in reducing front door air/wind noise. Use ALL of the following procedures in order to obtain the best results.
Condition
Some owners may comment about air/windnoise from inside the vehicle, near either of the front doors, while driving.
Correction
Several procedures have been developed in order to reduce air/windnoise. Use ALL of the following procedures.
Front Side Door Insulator
A new front side door insulator, P/N 15053984, has been developed that installs into the door near the back of the mirror. The window run channel should not need to be removed to install the insulator.
- Open the door.
- Insert the insulator through the larger opening in the door behind the outside rearview mirror. Place the insulator down into position behind the smaller opening as shown above. The insulator should fill the space behind the smaller opening.
Outside Rear View Mirror Grommet (Power Mirrors Only)
A new grommet, P/N 12477913, has been developed that attaches to the cord behind the mirror. This grommet provides a better seal between the mirror and the door. Use the following procedure.
- Open the door.
- Remove the side front door front garnish molding. Refer to the Front Side Door Front Garnish Molding procedure in this bulletin.
- Remove the nuts that retain the mirror to the door.
- Detach the mirror from the door. It should not be necessary to disconnect the mirror harness from the door.
- Cut a slit into the grommet enough to surround the mirror cord.
- Place the grommet around the mirror cord behind the mirror in the area shown above. The grommet will seat between the mirror and the sheet metal when the mirror is installed.
- Place the mirror back into position on the door.
- Install the nuts that retain the mirror to the door.
- Install the front side door front garnish molding. Refer to the Front Side Door Front Garnish Molding procedure in this bulletin.
Tighten
Tighten the nuts to 10 N·m (89 lb in).
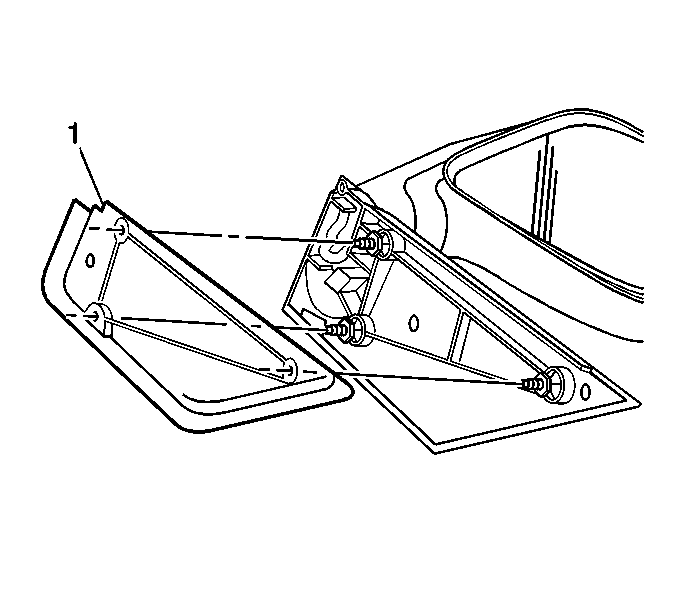
Outside Rear View Mirror Patch Gasket (Manual Mirrors Only)
A revised mirror patch gasket, P/Ns 12477914 (RH) and 124779191 (LH), has been developed that attaches to the back side of the mirror. The shape of the gasket has been revised in order to reduce windnoise. Use the following procedure.
- Open the door.
- Remove the front side door front garnish molding. Refer to the Front Side Door Front Garnish Molding procedure in this bulletin.
- Remove the nuts that retain the mirror to the door.
- Remove the mirror from the door.
- Remove the current gasket from the back of the mirror.
- Install the new gasket (1) onto the back of the mirror.
- Place the mirror back into position on the door.
- Install the nuts that retain the mirror to the door.
- Install the front side door front garnish molding. Refer to Front Side Door Front Garnish Molding procedure in this bulletin.
Tighten
Tighten the nuts to 10 N·m (89 lb in).
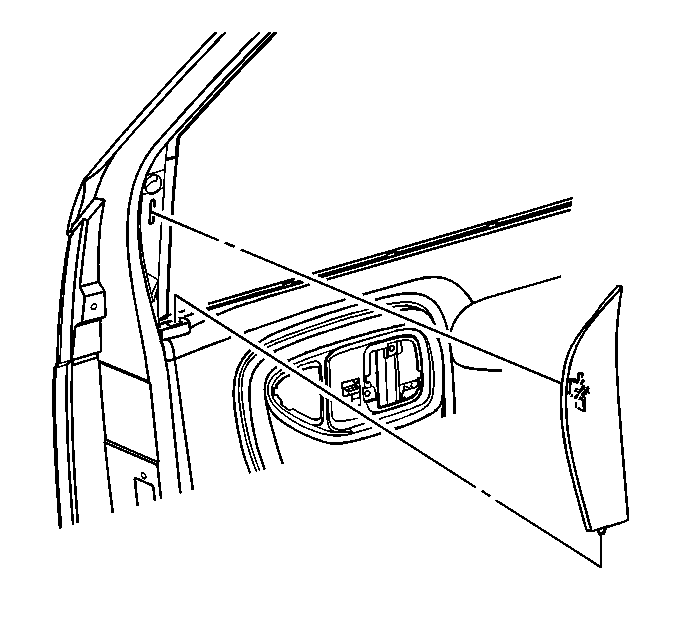
Front Side Door Front Garnish Molding
A revised front side door front garnish molding, which has additional foam added, has been developed to decrease windnoise. Use the following procedure and the appropriate part number listed below.
- Open the door.
- Grasp the front door garnish molding. Gently pull at the top of the molding in order to disengage the retaining clips.
- Lift up the molding in order to disengage the tab on the molding from the slot on the door trim panel and remove the molding from the door.
- Inspect the new garnish for broken or missing retaining clips. Replace the clips if needed.
- Attach the new garnish molding into position by inserting the tab on the bottom of the garnish molding into the slot at the top of the door trim panel.
- Align the retainers on the garnish molding with the slots in the door. Push in on the molding in order to engage the retainers.
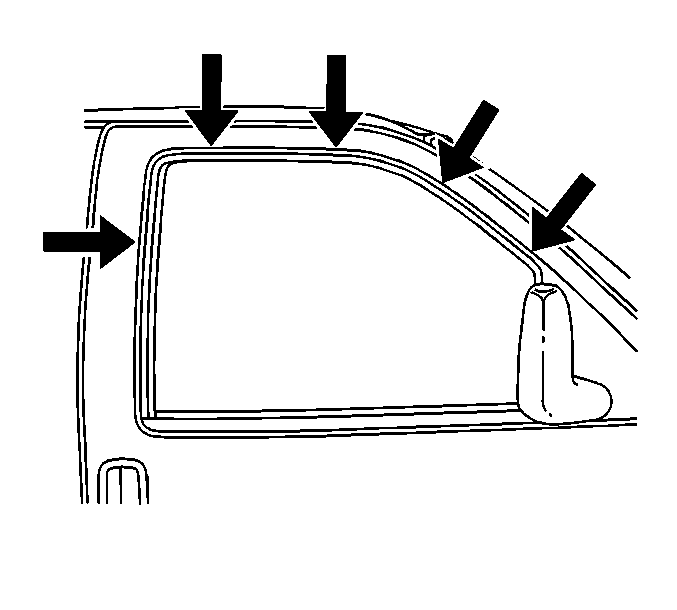
Front Side Door Window Inner Sealing Strip
A revised side door window inner sealing strip, P/N 15759193, has been developed. The length of the sealing lip has been revised to help decrease windnoise.
- Remove the front door trim panel from the door. Refer to the Interior Trim subsection of the applicable Service Manual for trim panel replacement procedures.
- Lower the window.
- Remove the door window inner sealing strip from the pinchweld flange.
- Install the new door window inner sealing strip on the pinchweld flange.
- Raise the window.
- Install the front door trim panel. Refer to the Interior Trim subsection of the applicable Service Manual for trim panel replacement procedures.
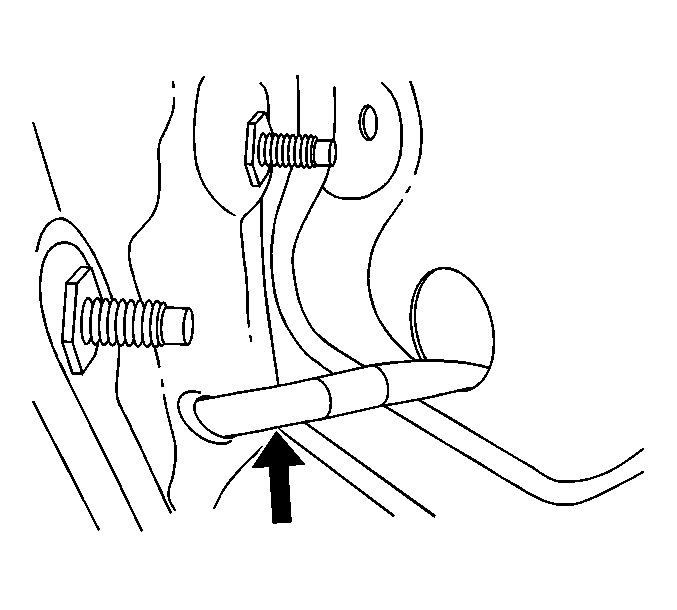
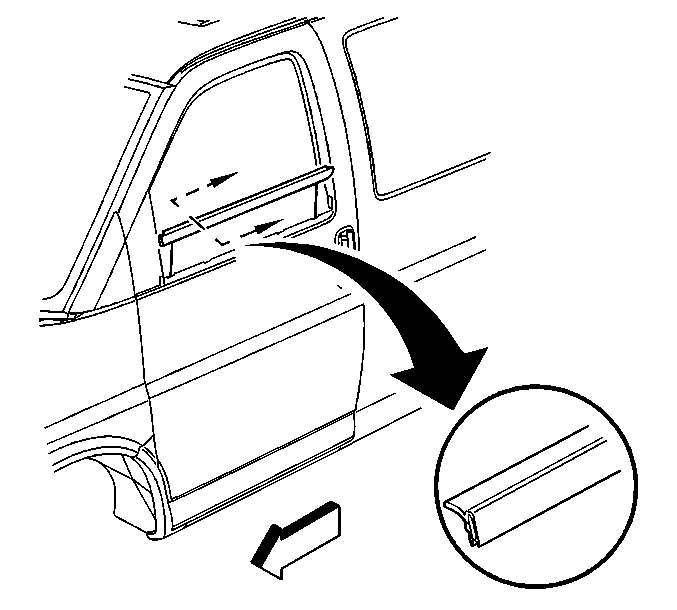
Front Side Door Window Outer Sealing Strip
A revised front side door outer sealing strip, P/Ns 15753759 (LH) and 15753758 (RH), has been developed. The extrusion of the outer beltline and the retaining clips have been revised.
- Lower the window.
- Tilt the top of the door window outer sealing strip away from the vehicle in an outboard direction.
- Gently pull the sealing strip away from the pinchweld flange.
- Attach the new sealing strip to the pinchweld flange by tilting the top edge of the sealing strip slightly outboard. Ensure that the pinchweld flange correctly enters the retaining clips.
- Push down on the sealing strip until all of the clips are fully seated.
- Raise the window.
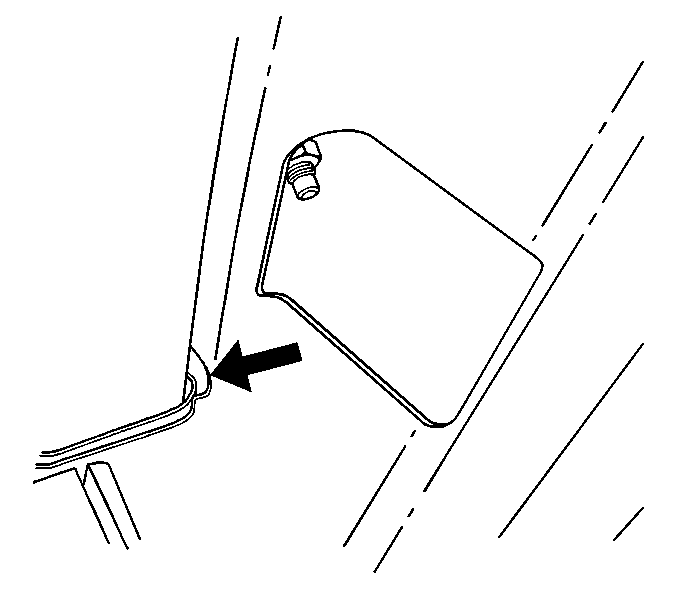
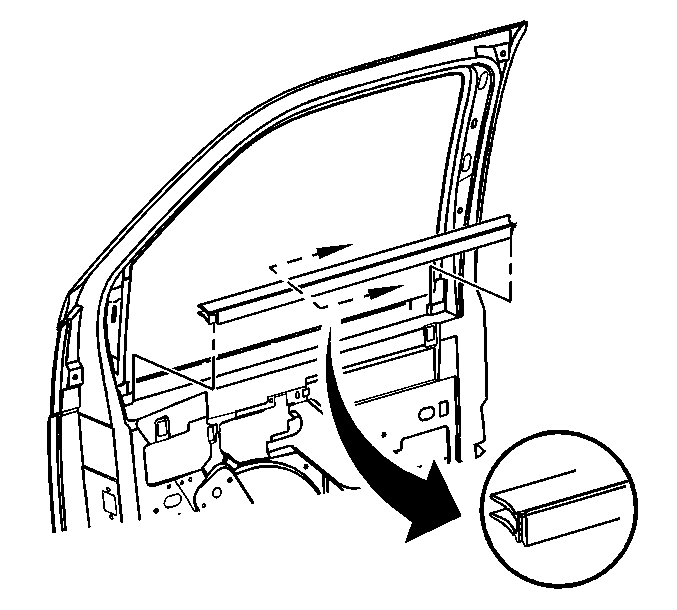
Front Side Door Window Run Channel
In order to help reduce windnoise, apply a thin layer of adhesive such as 3M® #08011 Weatherstrip Adhesive (Black), or equivalent, to the door window run channel. Peel back the door window run channel at the areas shown and apply a thin layer of adhesive.
Parts Information
Part Number | Description |
|---|---|
12477913 | Grommet, O/S Rear View Mirror-Power |
12477914 | Gasket, O/S Rear View Mirror-Manual (RH) |
12477991 | Gasket, O/S Rear View Mirror-Manual (LH) |
15053984 | Insulator-Frt S/D |
15749341 | Molding Asm-Frt S/D Frt Garn (LH)-26l |
15749342 | Molding Asm-Frt S/D Frt Garn (RH)-26l |
15749343 | Molding Asm-Frt S/D Frt Garn (LH)-52l |
15749344 | Molding Asm-Frt S/D Frt Garn (RH)-52l |
15749345 | Molding Asm-Frt S/D Frt Garn (LH)-92l |
15749346 | Molding Asm-Frt S/D Frt Garn (RH)-92l |
15753758 | Sealing Strip Asm-Frt S/D WDO Otr (RH) |
15753759 | Sealing Strip Asm-Frt S/D WDO Otr (LH) |
15759193 | Sealing Strip Asm-Frt S/D WDO Inr |
Parts are currently available from GMSPO.
Warranty Information
For vehicles repaired under warranty, use:
Labor Operation | Description | Labor Time |
|---|---|---|
B4806/B4807 | Windnoise-Right or Left | 0.6 hr |
B4808 | Windnoise-Both Sides | 1.0 hr |
These are unique labor operation numbers for use only with this bulletin. These numbers will not be published in the Labor Time Guide. | ||
