For 1990-2009 cars only
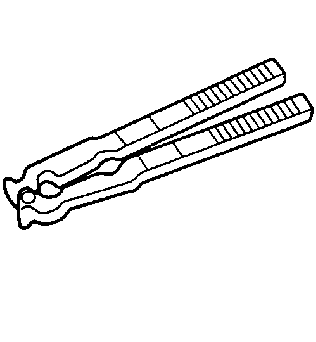
Special Tools
J 22610 Keystone Clamp Pliers
Removal Procedure
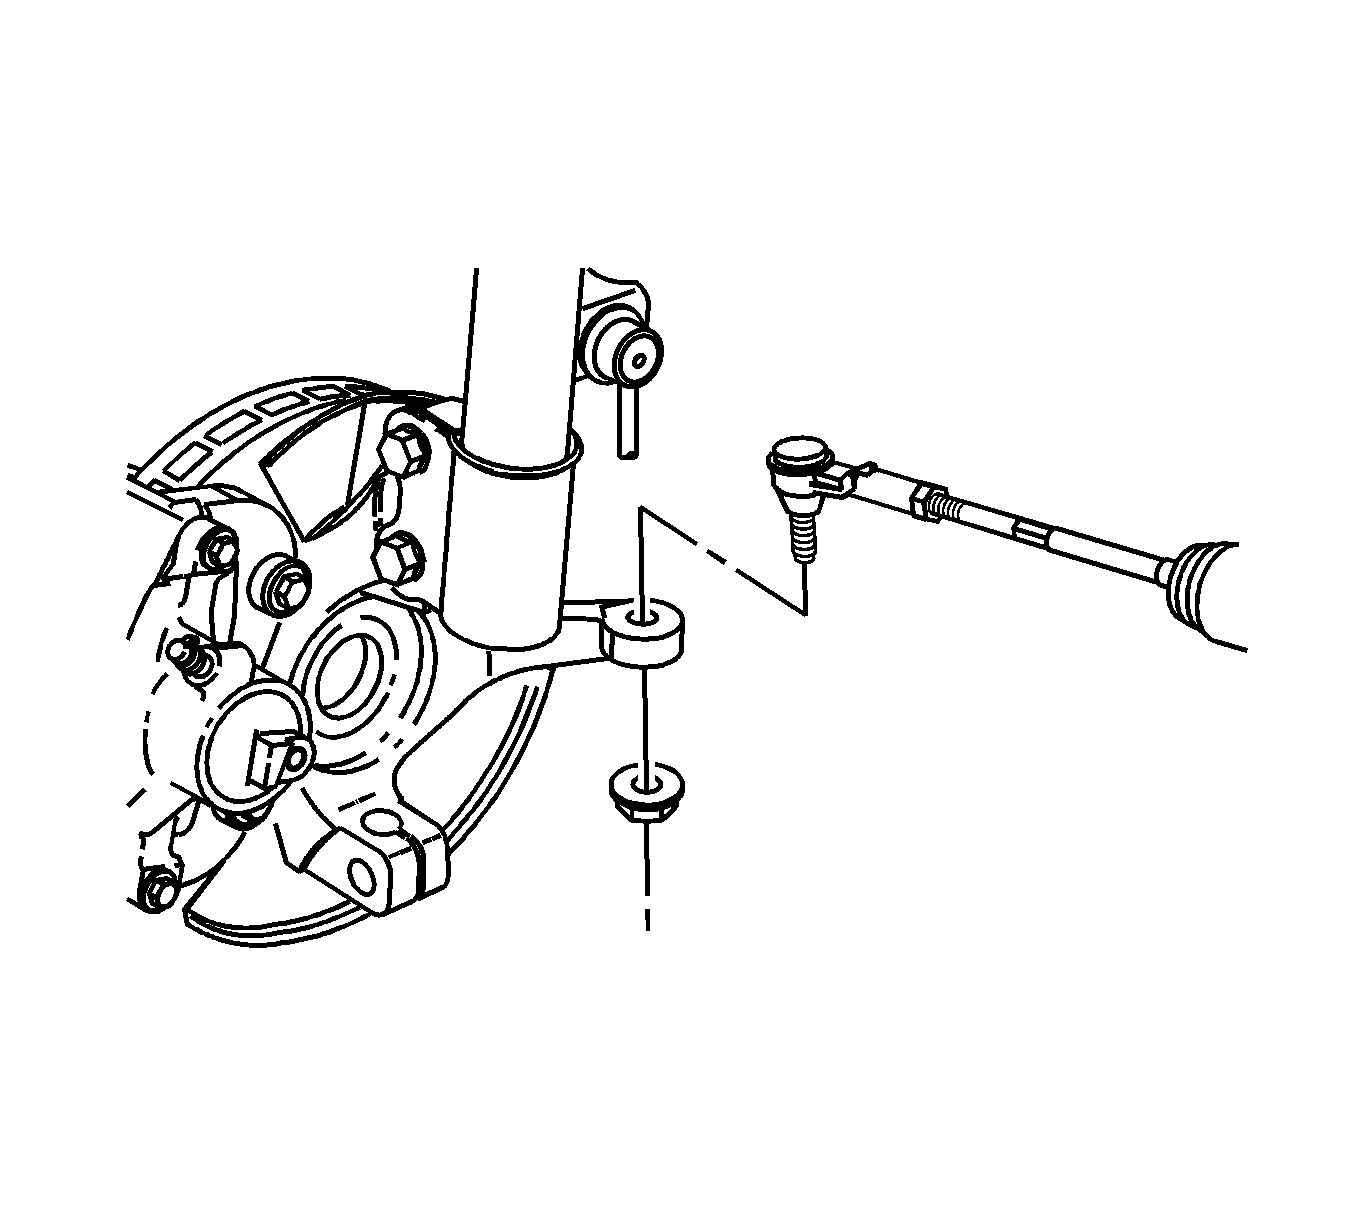
- Raise and support the vehicle. Refer to Lifting and Jacking the Vehicle .
- Remove the tire assembly. Refer to Tire and Wheel Removal and Installation .
- Remove the outer tie rod. Refer to Steering Linkage Outer Tie Rod Replacement .
- Remove the jam nut.
- Remove the spring from the boot, outer end.
- Cut and remove the crimp clamp, inner end. Discard the clamp.
- Unseat the boot from the steering gear and remove.
- Clean the inner tie rod and boot contact area of grease and debris.

Important: After removing the boot, inspect the inner tie rod for evidence of corrosion or contamination. If none is evident, continue with the repair. If corrosion or contamination is evident, replace the steering gear.
Installation Procedure
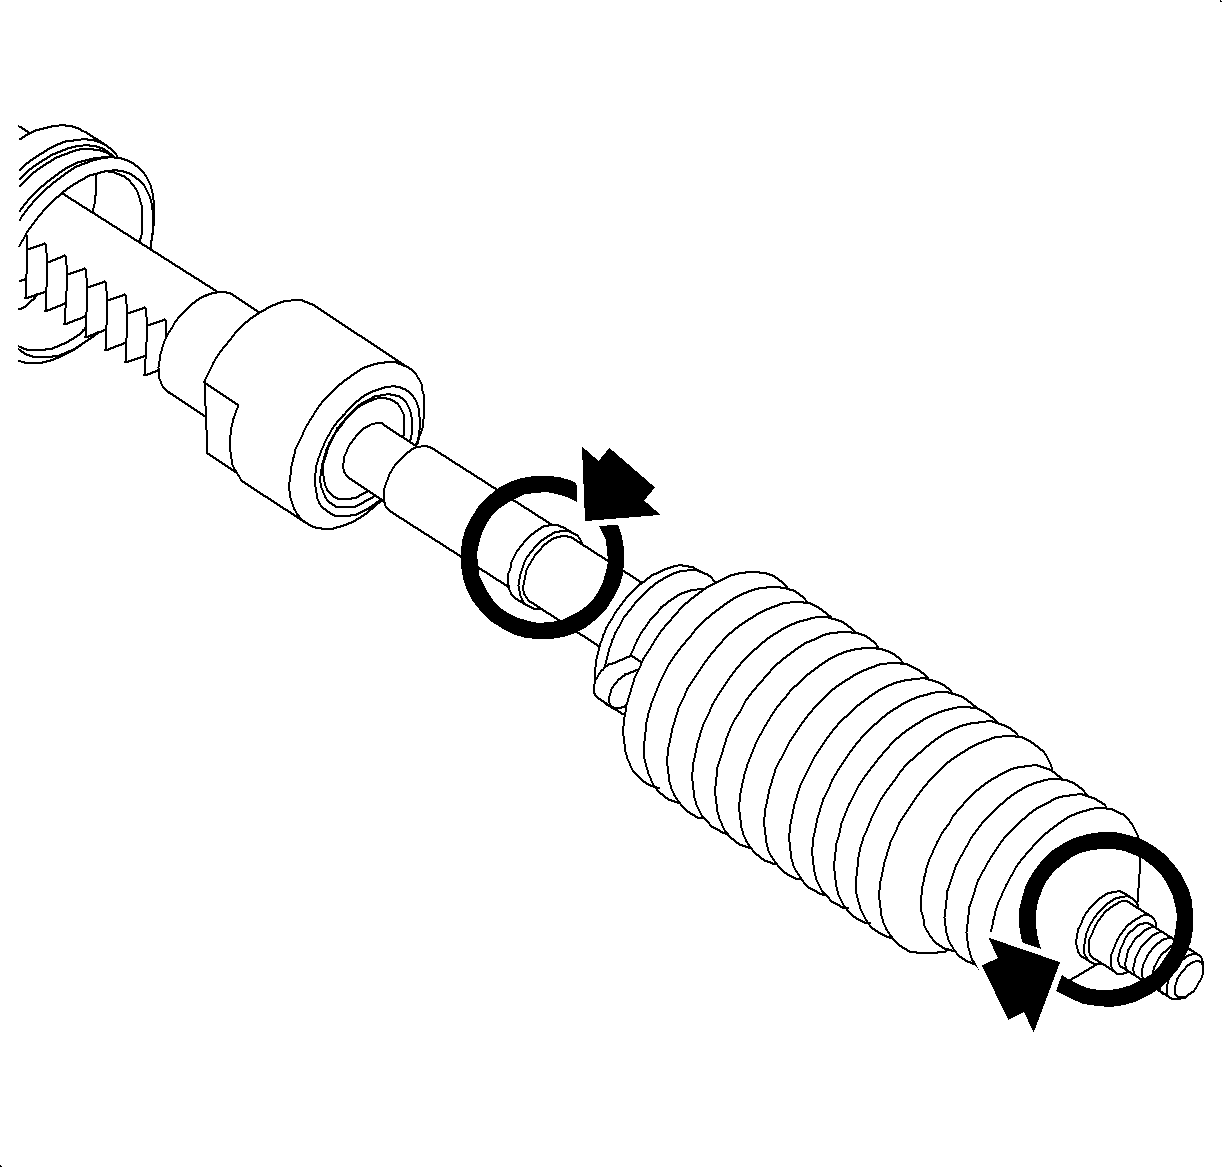
- Apply approximately 3/4 of the supplied grease packet into the small end of the boot cavity. Apply the remainder of the grease on the shaft where the small end of the boot meats the shaft.
- Install the boot with the large clamp loosely attached, not crimped.
- Using the J 22610 , crimp the large clamp.
- Install the spring clamp to the small end of the boot.
- Install the jam nut approximately 174 mm (6.85 in) from the boot clamp.
- Install the outer tie rod. Refer to Steering Linkage Outer Tie Rod Replacement .
- Install the tire assembly. Refer to Tire and Wheel Removal and Installation .
- Check the front wheel alignment and align as necessary. Refer to Wheel Alignment Measurement .
Important: The inner tie rod must be free of debris and moisture. The boot sealing ares must be clean and dry.
Important: Ensure the large end of the boot is firmly seated in the gear housing groove.
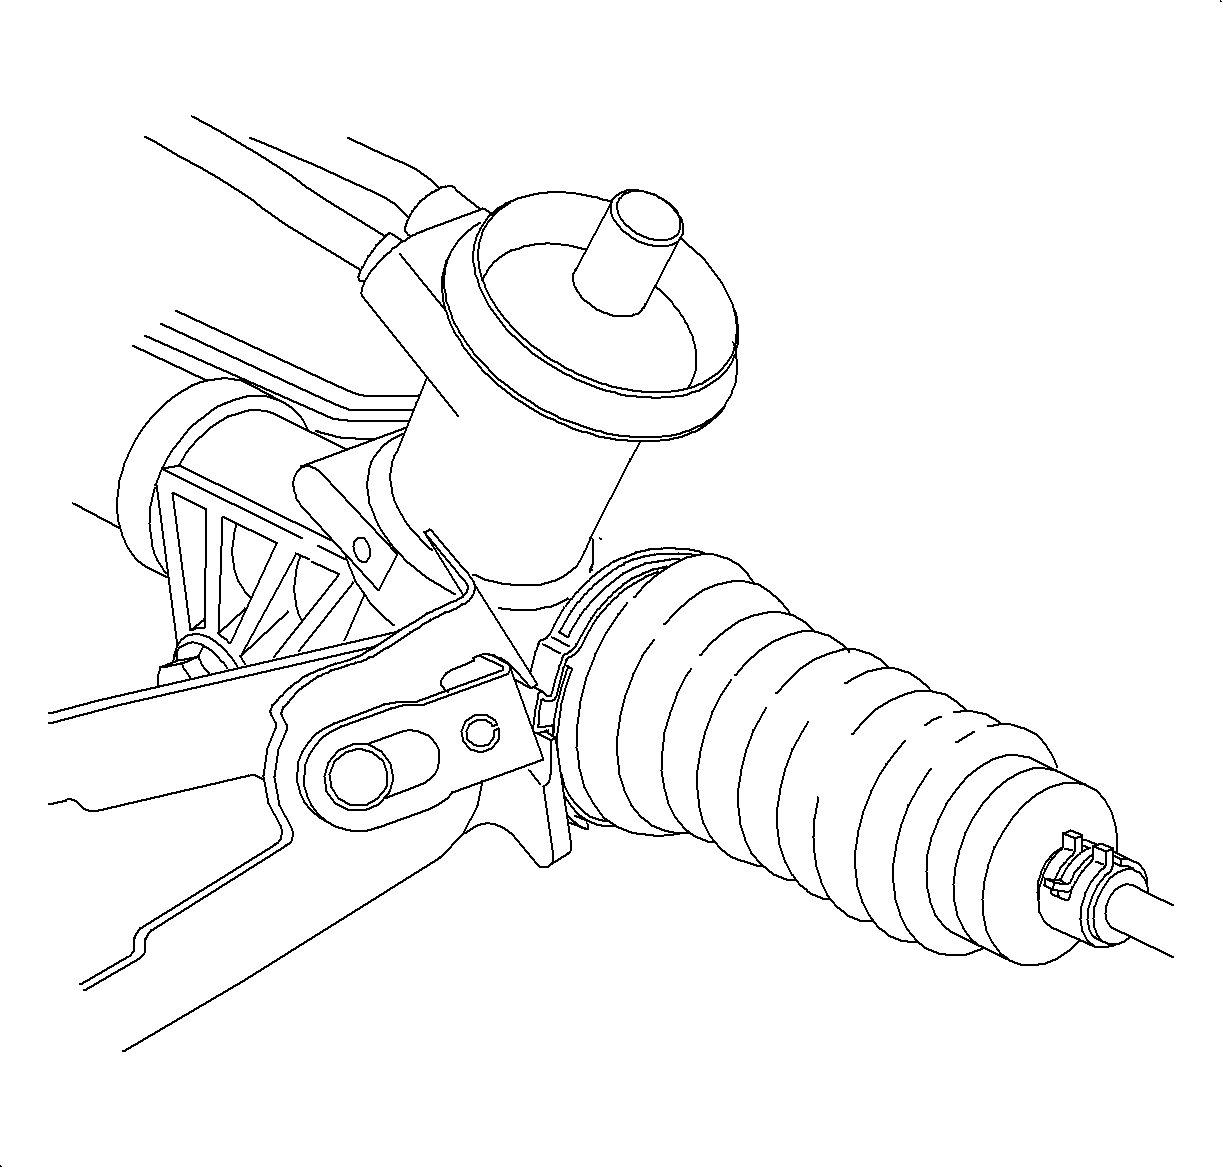
Important: Ensure the small end of the boot is firmly seated in the inner tie rod end groove.

