For 1990-2009 cars only
Special Tools
J-42188-B Ball Joint Separator
Removal Procedure
- Raise and support the vehicle. Refer to Lifting and Jacking the Vehicle .
- Remove the wheel and tire assembly. Refer to Tire and Wheel Removal and Installation .
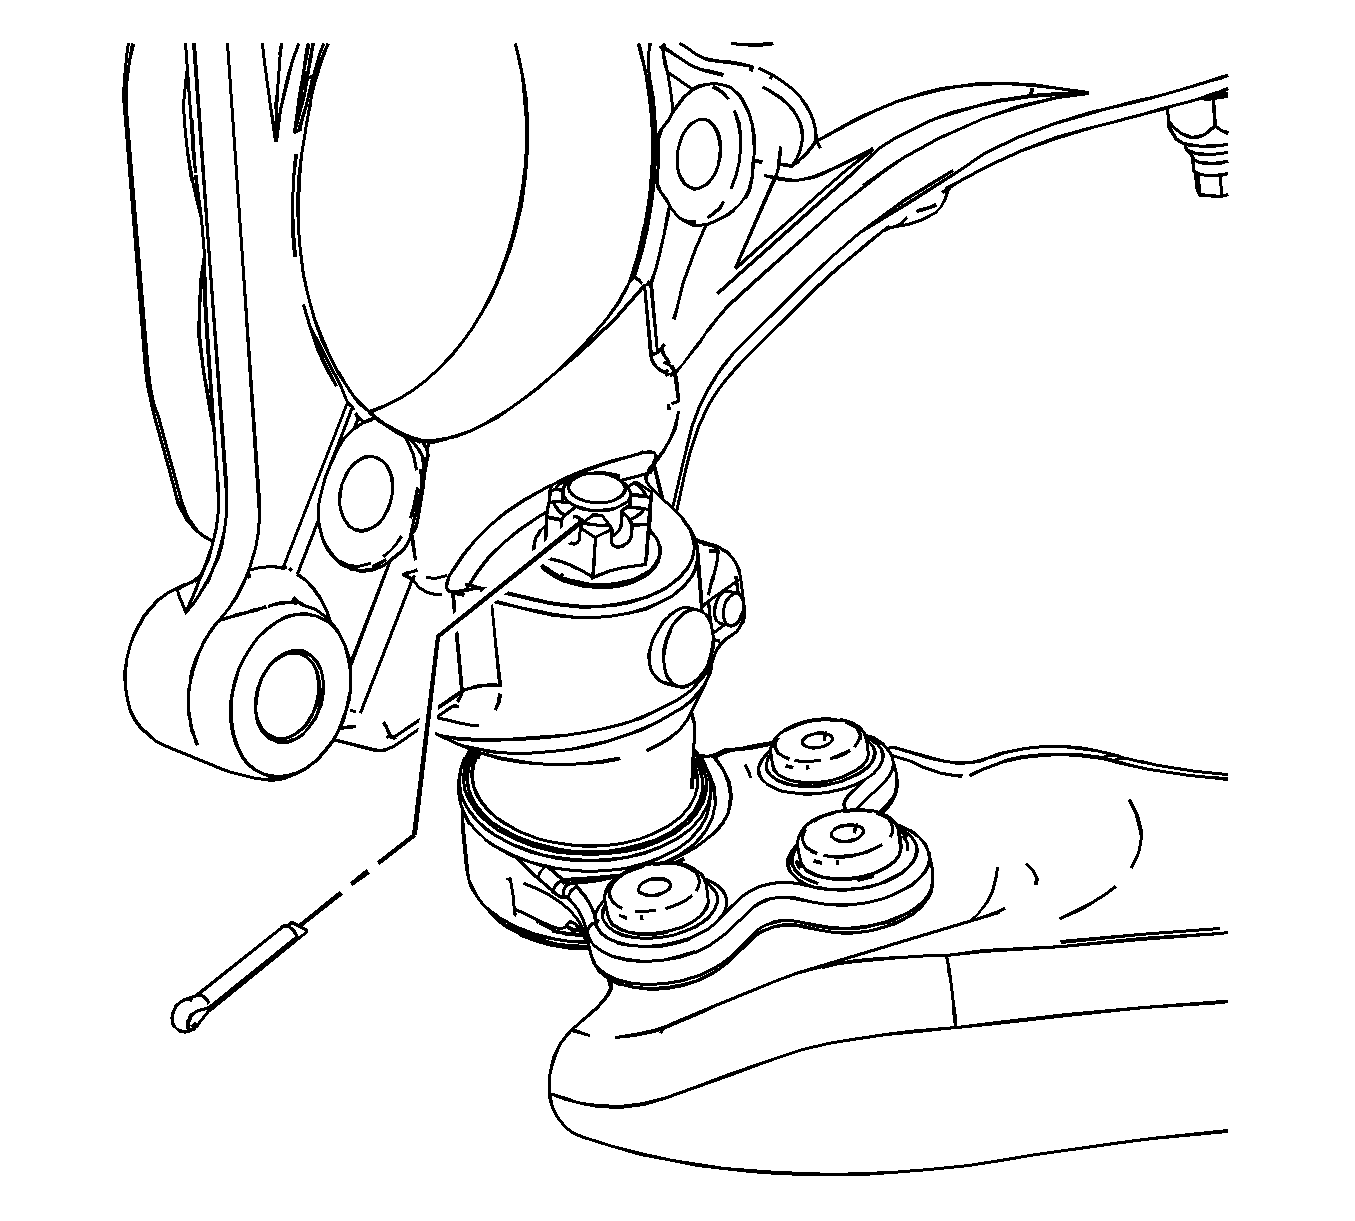
- Remove the lower ball joint stud cotter pin. Discard the cotter pin.
- Loosen the ball stud nut until the nut is level with the top of the ball stud.
- Using J-42188-B , separate the lower control arm from the steering knuckle.
- Remove the lower ball joint stud nut.
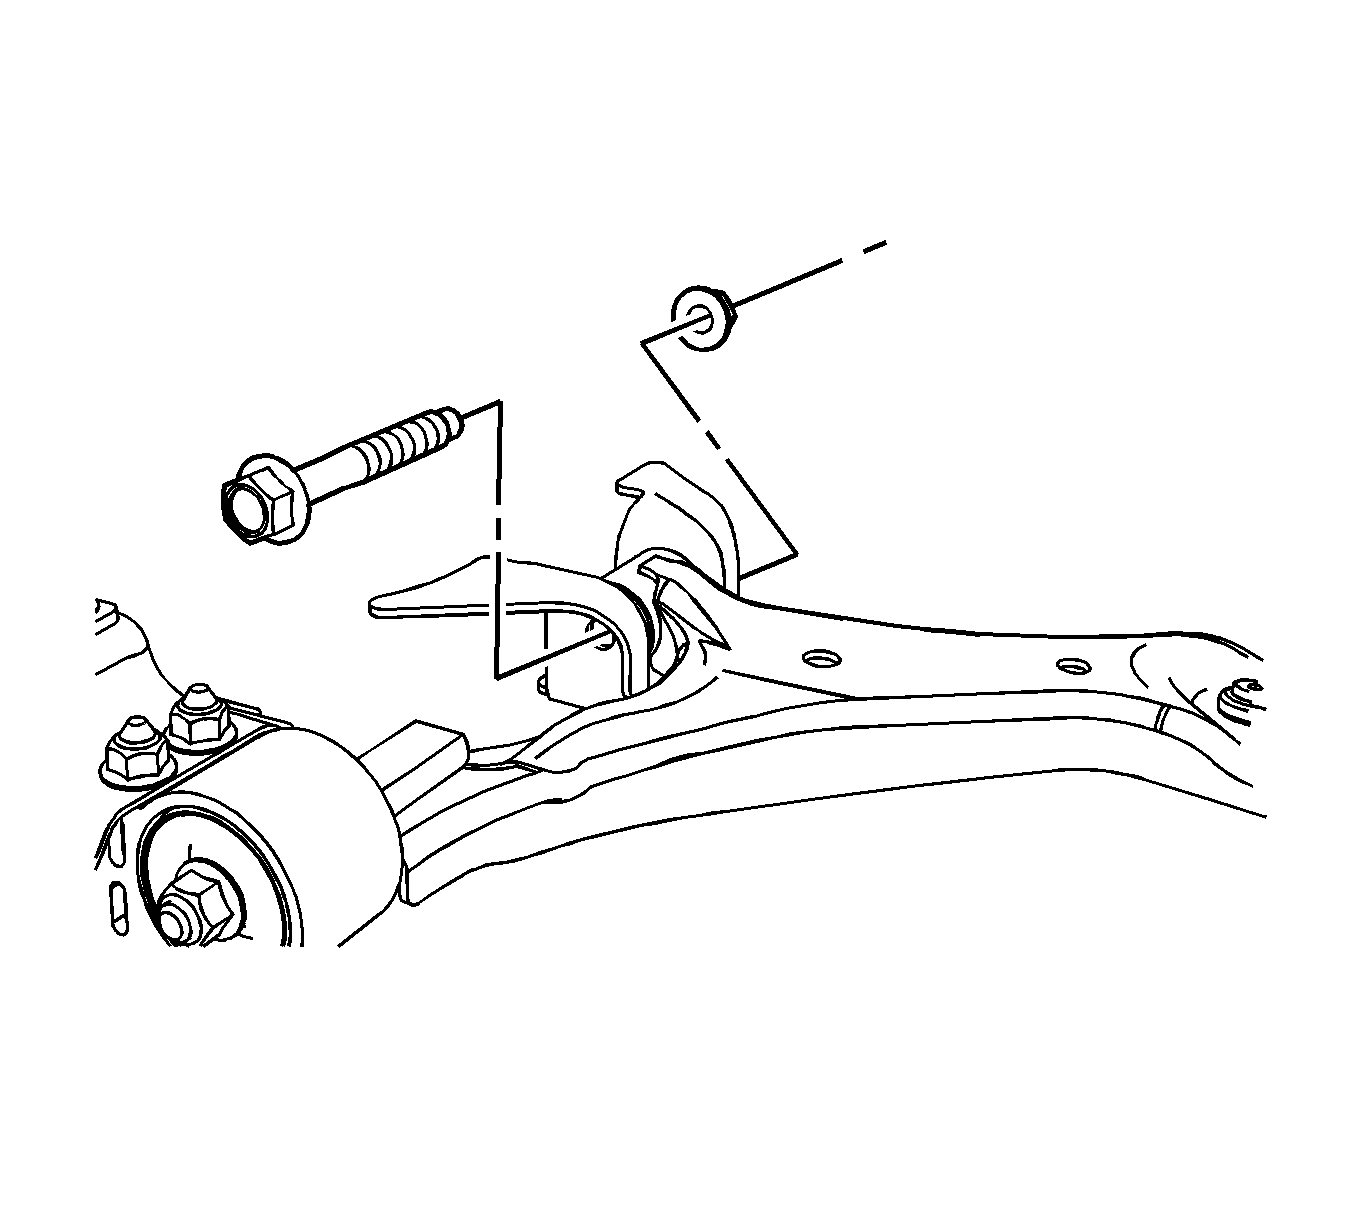
- Remove the control arm-to-frame front bolt and nut. Discard the bolt and nut.
- Remove the control arm-to-frame rear bolts and nuts. Discard the bolts and nuts.
- Remove the control arm.

Installation Procedure
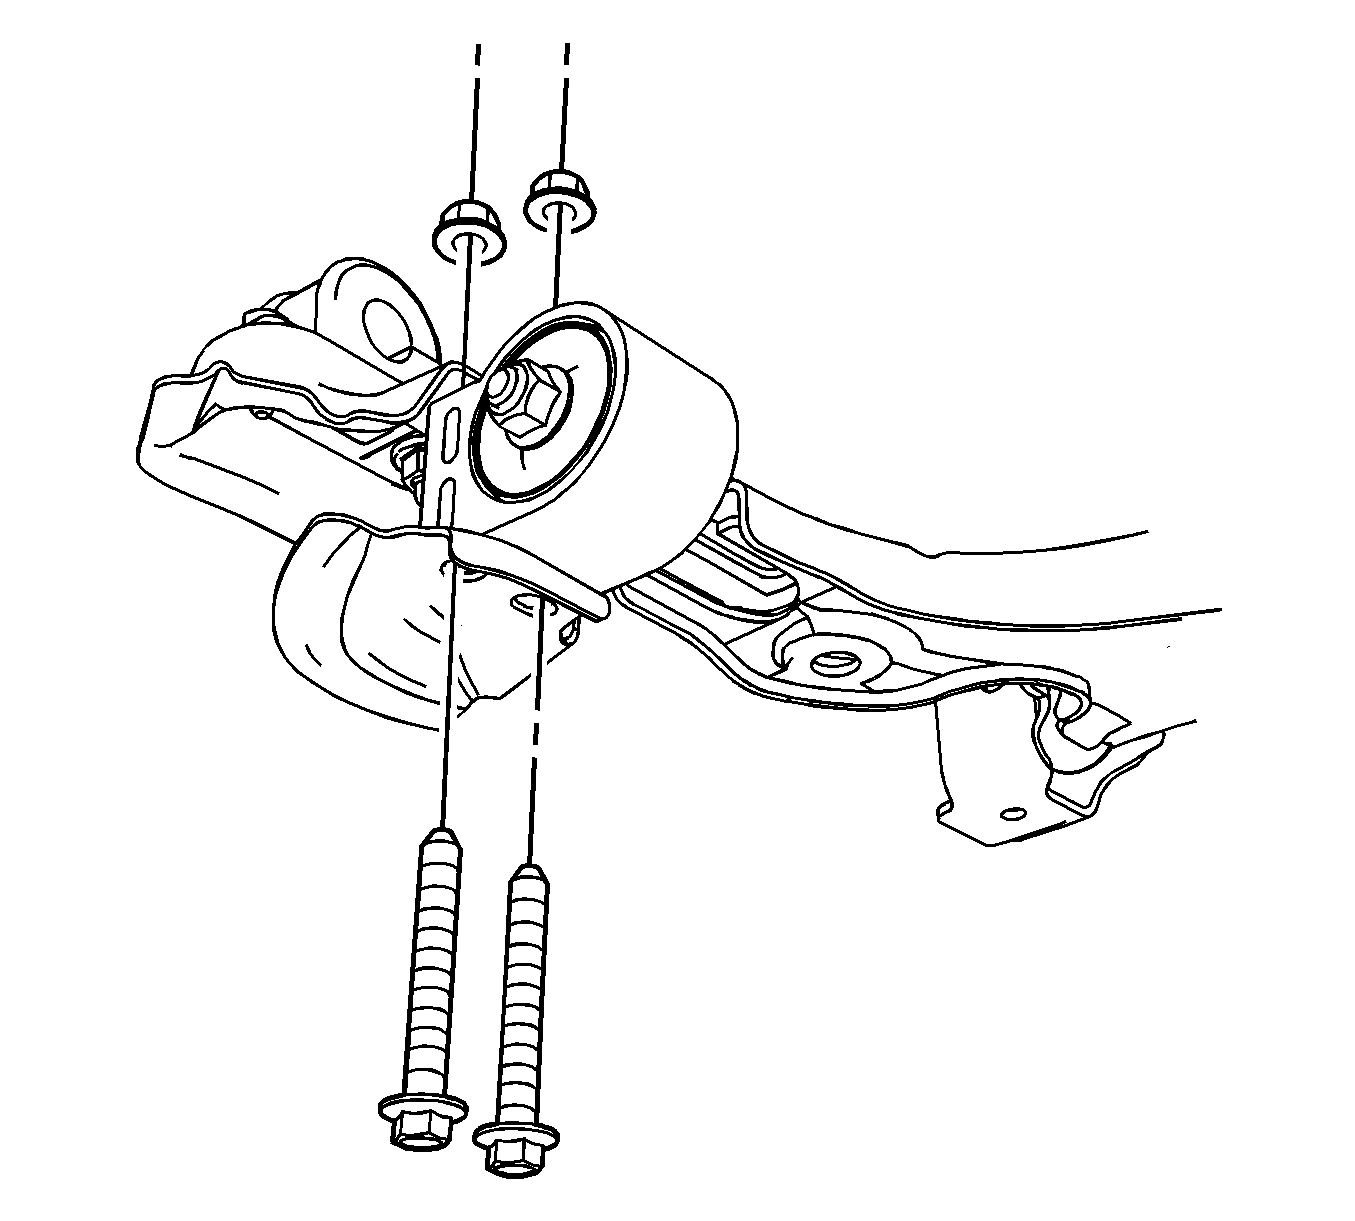
- Position the control arm to the cradle/frame.
- Install new control arm-to-frame rear bolts and nuts.
- Install a new arm-to-frame front bolt and nut.
- Position the control arm ball stud into the steering knuckle and install the nut.
- Continue to tighten the nut only enough to align the castle nut slots with the ball stud, install a new cotter pin.
- Install the wheel and tire assembly. Refer to Tire and Wheel Removal and Installation .
- Verify front end alignment. Refer to Wheel Alignment Specifications .
- Lower the vehicle.
Notice: Refer to Fastener Notice in the Preface section.
Tighten
Tighten the control arm rear bolts and nuts to 70 N·m (52 lb ft).
Install new control arm-to-frame rear bolts and nuts.
Tighten
Tighten the control arm front bolt and nut to 120 N·m (89 lb ft).
Tighten
Tighten the nut to 40 N·m (30 lb ft).
Important:
• Do not loosen the castle nut, only tighten to align the ball stud slot. • Ensure that the cotter pin ends do not contact the antilock brake system (ABS) sensor harness or drive axle.
