Brake Pressure Modulator Valve Assembly Replacement Except V275
Removal Procedure
- Disconnect the negative battery cable.
- Remove the cooling surge tank. Refer to Radiator Surge Tank Replacement .
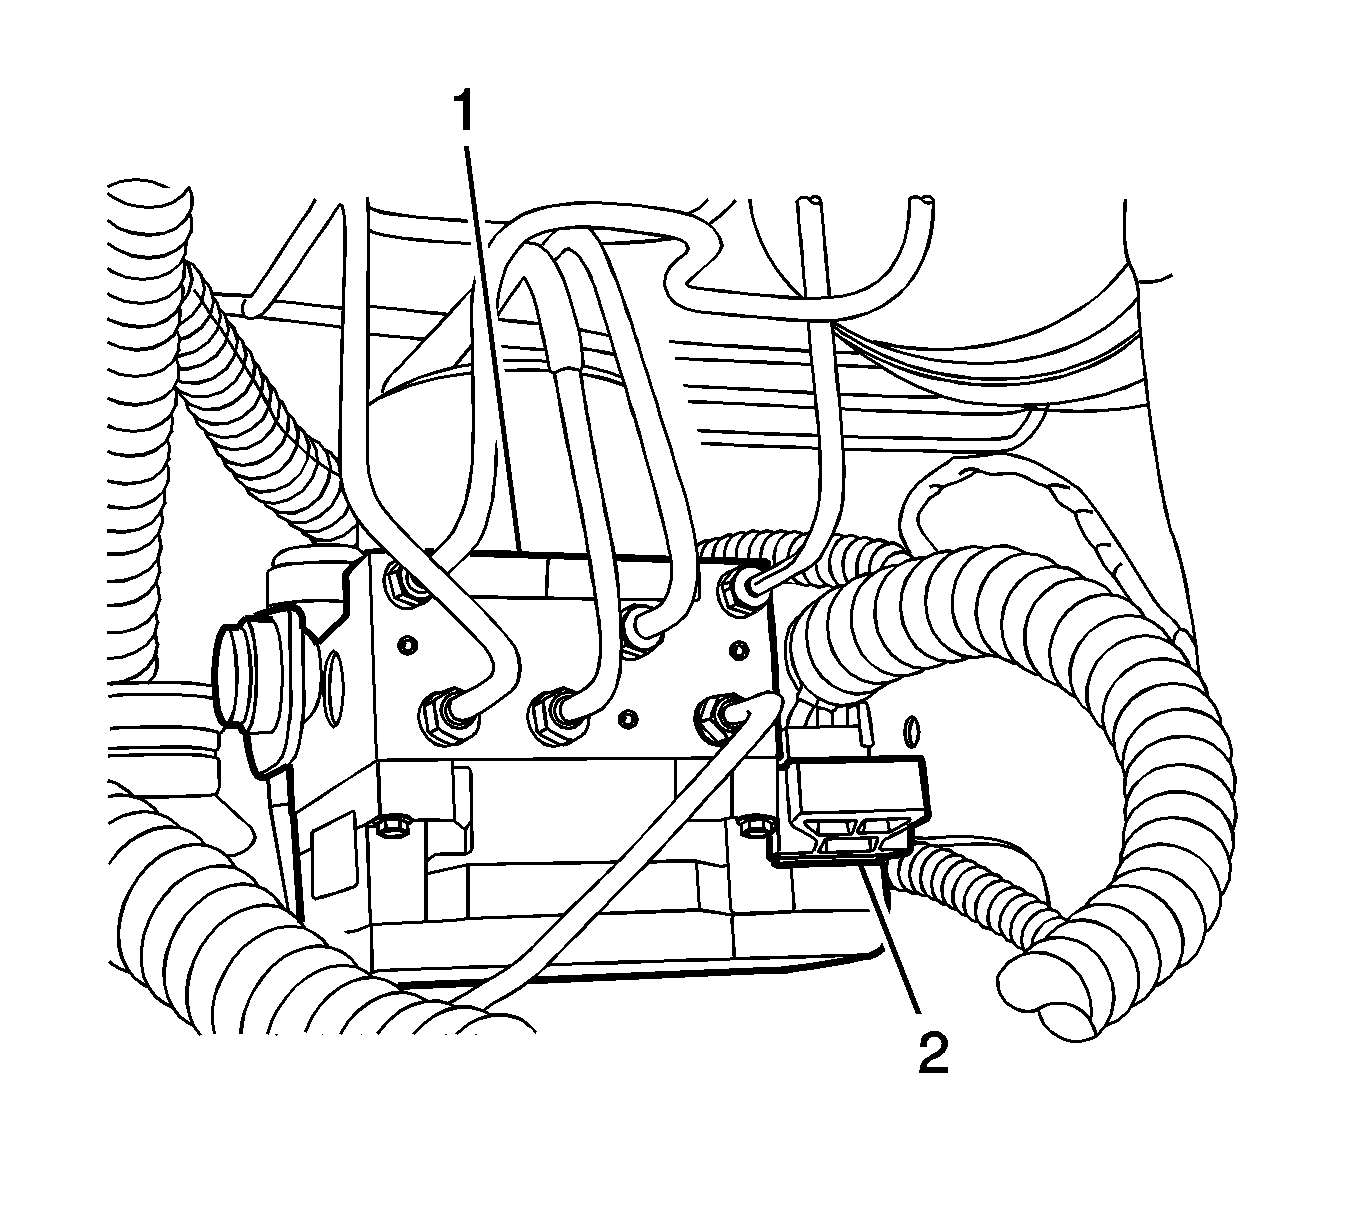
- Disconnect the ABS wiring harness connector (2) from the socket on the electronic brake control module (EBCM).
- Cover the connector and the socket with shop cloths to protect it from the brake fluid.
- Remove the 6 brake pipe fitting nuts from the hydraulic unit.
- Remove the mounting bracket bolts from the brake modulator assembly.
- Remove the brake modulator assembly.
Caution: Refer to Battery Disconnect Caution in the Preface section.
Important: Do not allow air from the master cylinder into the hydraulic unit or the brake pipes. If air gets into the hydraulic unit, perform a bleeding procedure using a scan tool programmed for the ABS system. As long as no air enters the hydraulic unit, a simple bleeding procedure is all the system will require.
Installation Procedure
- Install the 6 brake pipe fitting nuts.
- Install the brake modulator assembly and secure with the mounting bracket bolts (2).
- Connect the ABS wiring harness (2).
- Inspect the fluid level of the brake master cylinder. Add new brake fluid as required.
- Bleed the brake system. Refer to Hydraulic Brake System Bleeding .
- Test the brake system for leaks.
- Install the cooling surge tank. Refer to Radiator Surge Tank Replacement .
- Connect the negative battery cable.
- Refer to Control Module References for programming and setup information.
Notice: Refer to Fastener Notice in the Preface section.
Tighten
Tighten the nuts to 16 N·m (12 lb ft).
Tighten
Tighten the bolts to 22 N·m (16 lb ft).
Notice: Refer to Brake Fluid Effects on Paint and Electrical Components Notice in the Preface section.
Brake Pressure Modulator Valve Assembly Replacement V275
Removal Procedure
- Disconnect the negative battery cable.
- Remove the air cleaner assembly. Refer to Air Cleaner Assembly Replacement or Air Cleaner Assembly Replacement.
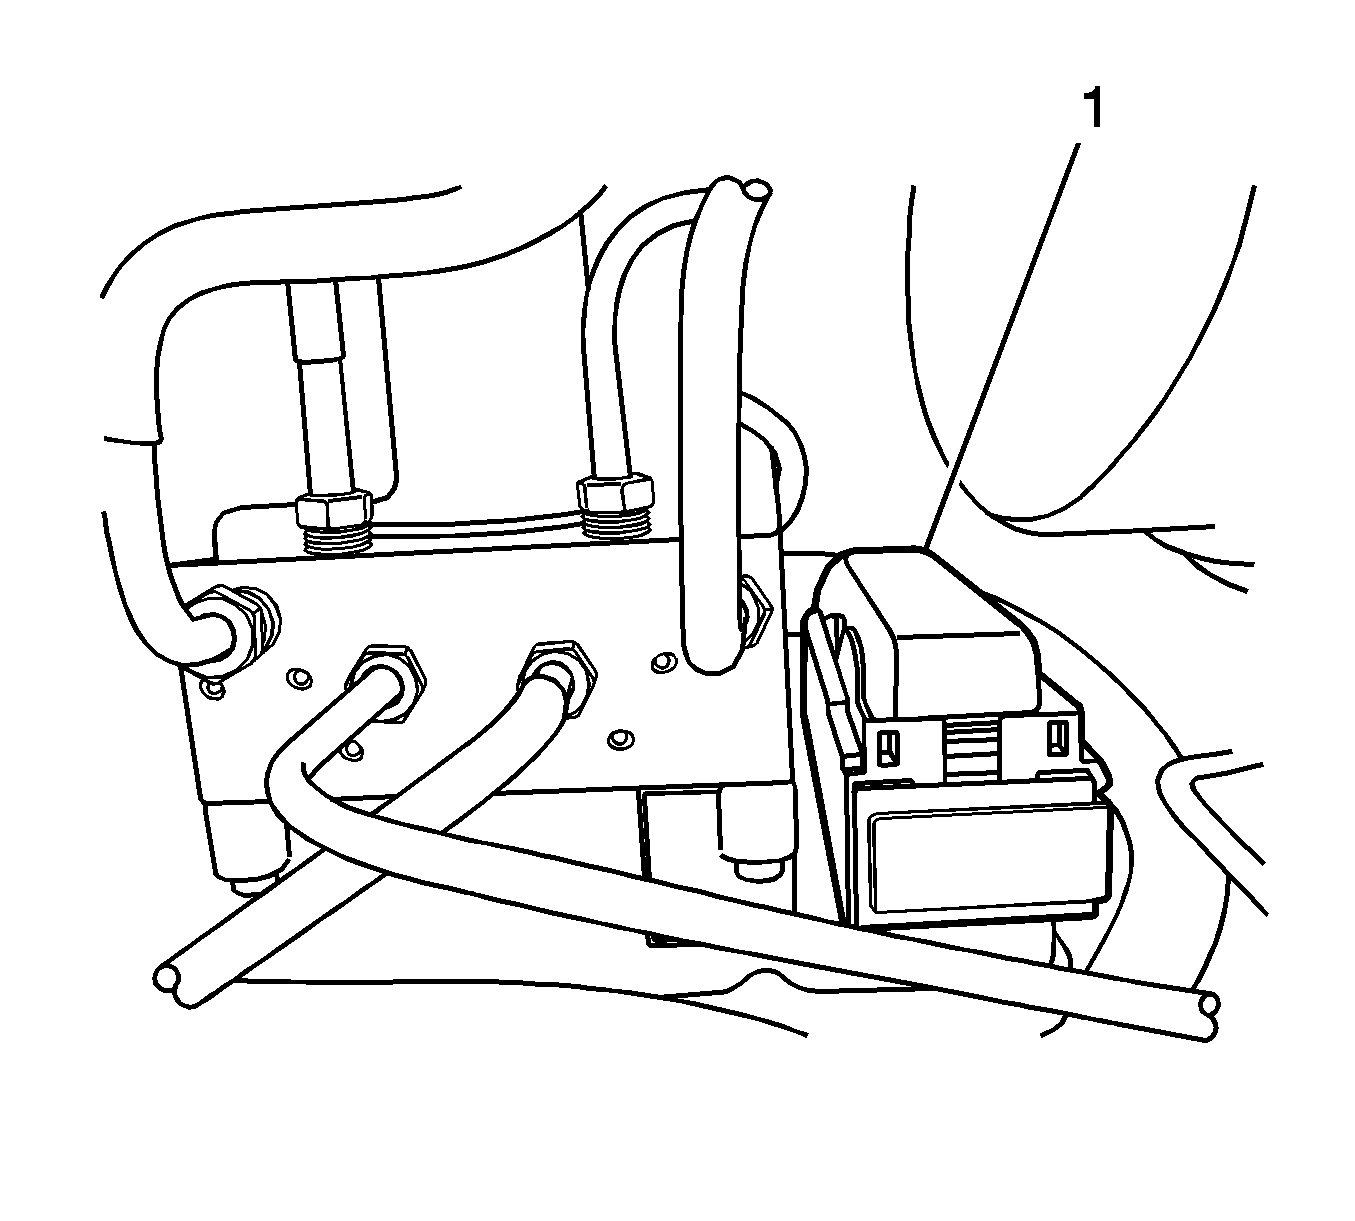
- Disconnect the ABS wiring harness connector (1) from the socket on the electronic brake control module (EBCM).
- Cover the connector and the socket with shop cloths to protect it from the brake fluid.
- Remove the 6 brake pipe fitting nuts from the hydraulic unit.
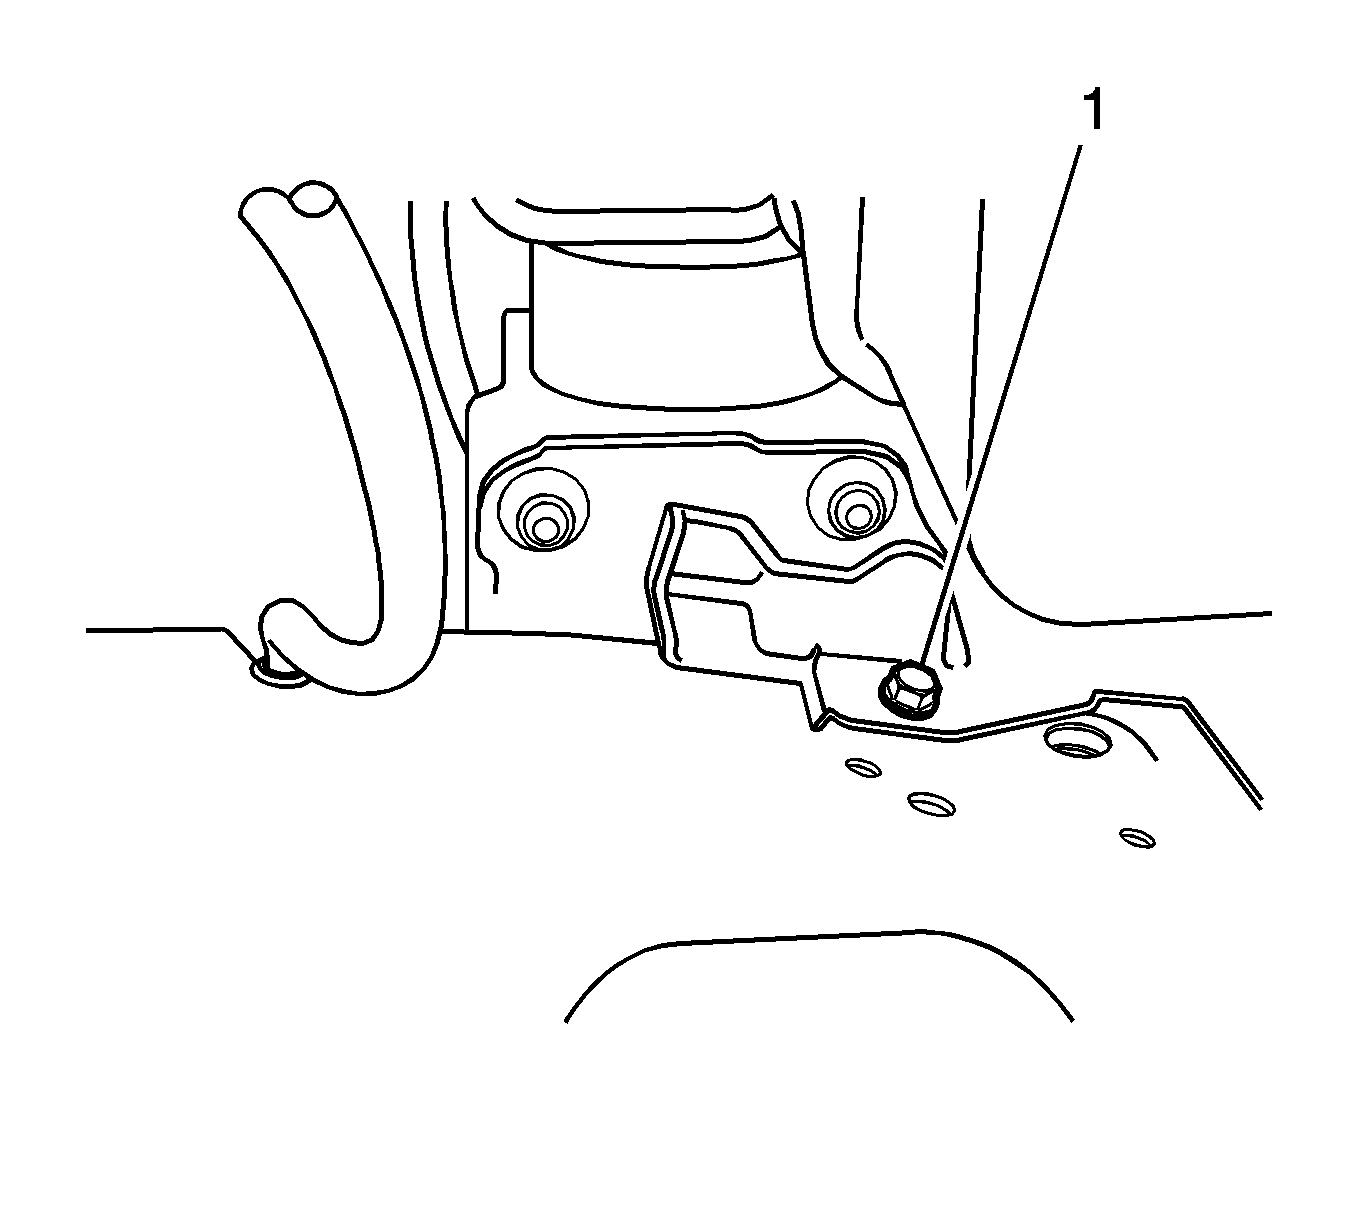
- Remove the mounting bracket bolts (1) from the brake modulator assembly.
- Remove the brake modulator assembly.
Caution: Refer to Battery Disconnect Caution in the Preface section.
Important: Do not allow air from the master cylinder into the hydraulic unit or the brake pipes. If air gets into the hydraulic unit, perform a bleeding procedure using a scan tool programmed for the ABS system. As long as no air enters the hydraulic unit, a simple bleeding procedure is all the system will require.
Installation Procedure
- Install the 6 brake pipe fitting nuts.
- Install the brake modulator assembly and secure with the mounting bracket bolts (1).
- Connect the ABS wiring harness (1).
- Inspect the fluid level of the brake master cylinder. Add new brake fluid as required.
- Bleed the brake system. Refer to Hydraulic Brake System Bleeding .
- Test the brake system for leaks.
- Install the air cleaner assembly. Refer to Air Cleaner Assembly Replacement or Air Cleaner Assembly Replacement.
- Connect the negative battery cable.
- Refer to Control Module References for programming and setup information.
Notice: Refer to Fastener Notice in the Preface section.
Tighten
Tighten the nuts to 16 N·m (12 lb ft).
Tighten
Tighten the bolts to 11 N·m (8 lb ft).
Notice: Refer to Brake Fluid Effects on Paint and Electrical Components Notice in the Preface section.
