Tools Required
| • | J 23128-A Seal Seat Remover/Installer |
| • | J 33011 O-Ring Installer |
| • | J 34614 Shaft Seal Protector |
| • | J 5403 Snap Ring Pliers or Equivalent |
| • | J 9553-01 O-Ring Remover |
Important: A shaft seal should not be replaced because a small amount of oil is found on the adjacent surface. The seal is designed to leak some oil for lubrication purposes. A shaft seal should be changed only when a large amount of sprayed oil is found and then only after actual refrigerant leakage is found by using an approved leak detection procedure. Refer to Leak Testing .
Should a compressor shaft seal ever have to be replaced, the receiver-dryer in this system must also be removed from the vehicle. The oil in the receiver-dryer must then be drained, measured and replaced. Refer to Refrigerant Recovery and Recharging .
Removal Procedure
- Disconnect the negative battery cable.
- Recover the refrigerant. Refer to Refrigerant Recovery and Recharging .
- Loosen and reposition the compressor in the mounting brackets.
- Remove the clutch drive plate and hub assembly from the compressor. Refer to Compressor Clutch Plate/Hub Assembly Replacement .
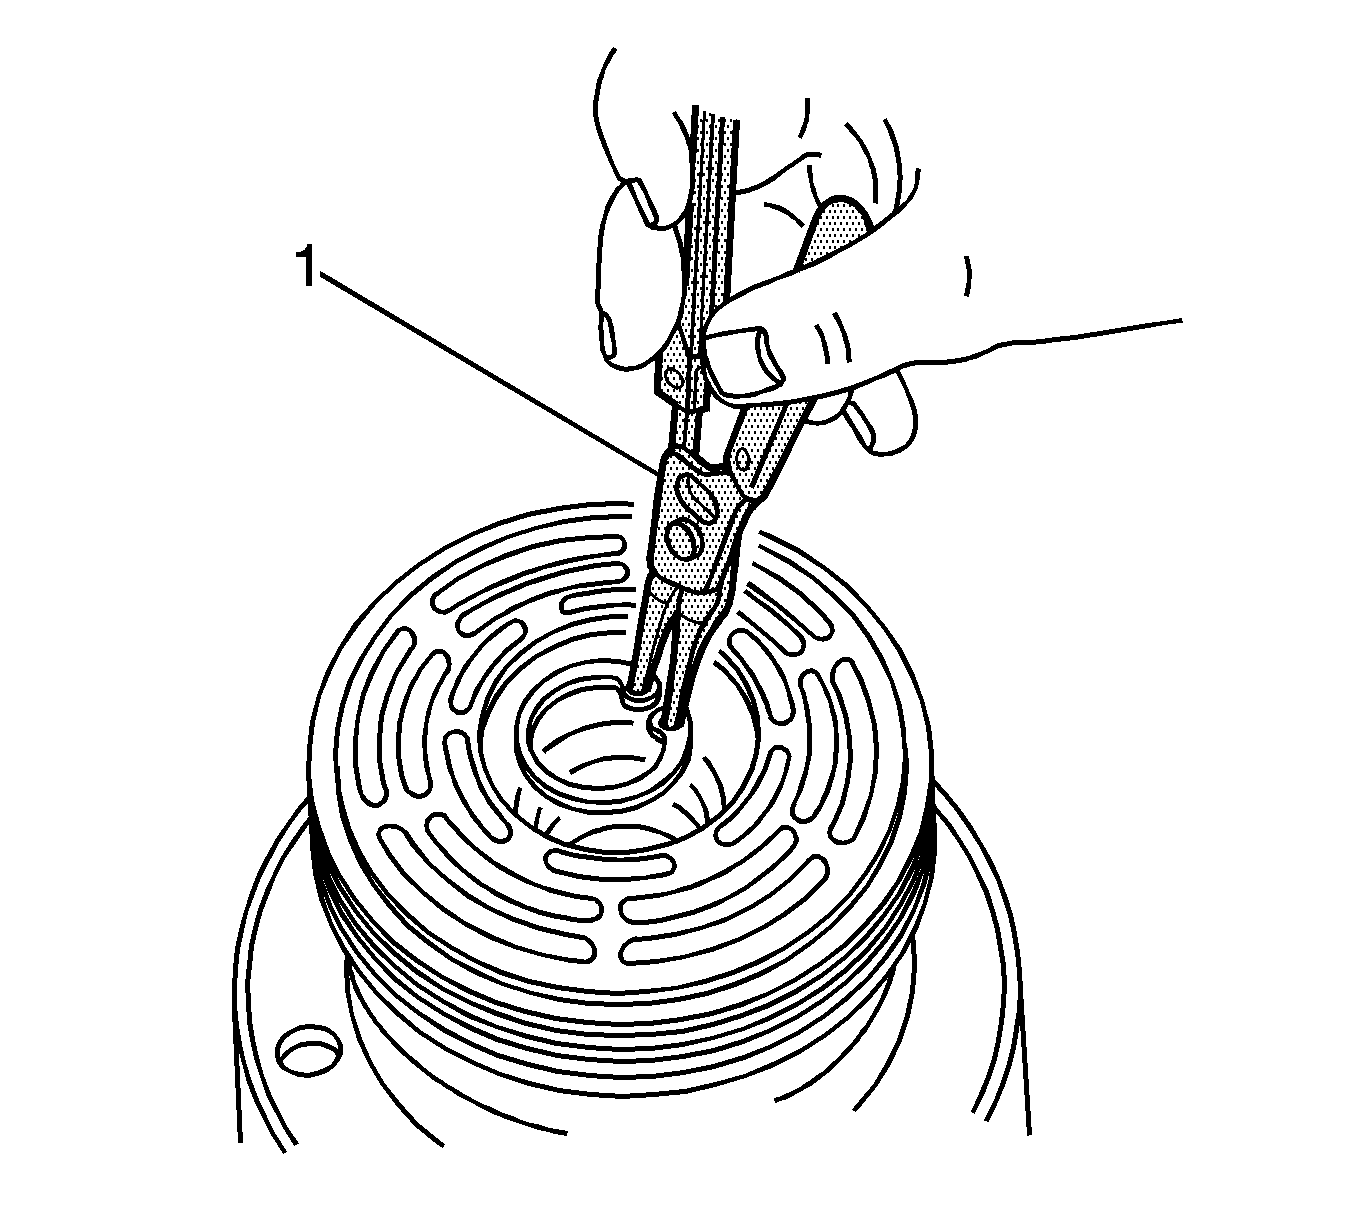
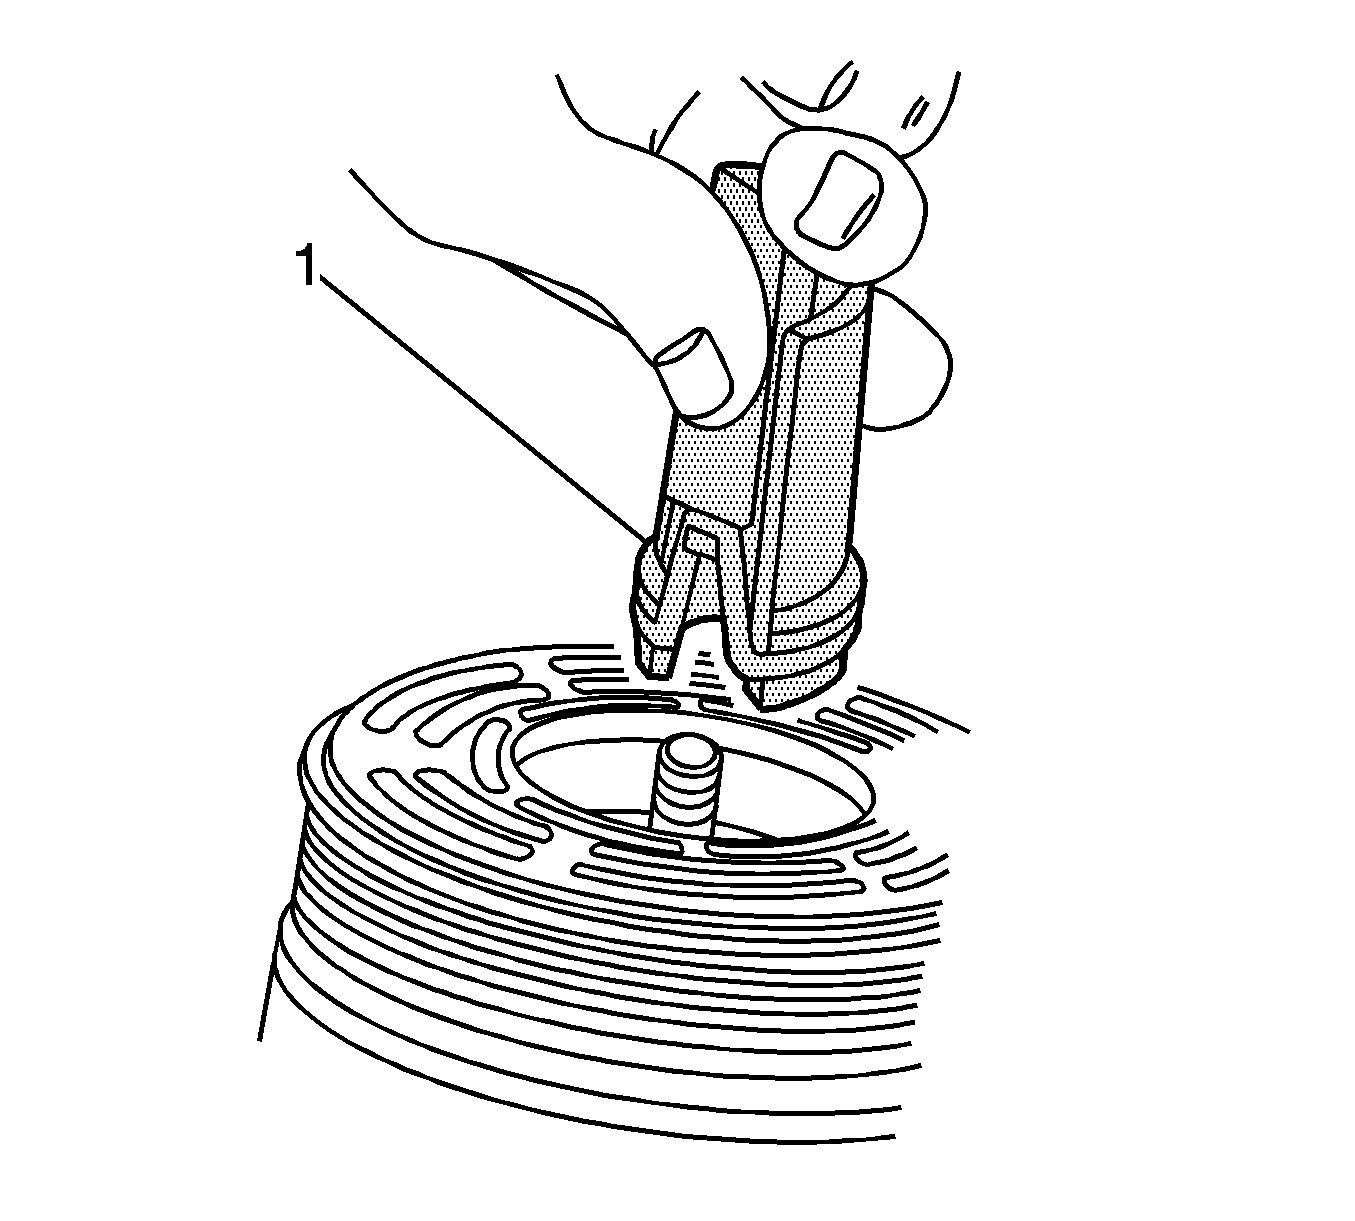
- Use the J 5403 (1) to remove the shaft seal retaining ring.
- Thoroughly clean the inside of the compressor housing area surrounding the shaft, the exposed portion of the seal, the shaft itself, and the O-ring groove.
- Fully engage the knurled tangs of the J 23128-A (1) into the recessed portion of the seal by turning the handle clockwise. Remove and discard the seal from the compressor with a rotating-pulling motion. The handle should be hand-tightened securely. Do not use a wrench or pliers to tighten the handle.
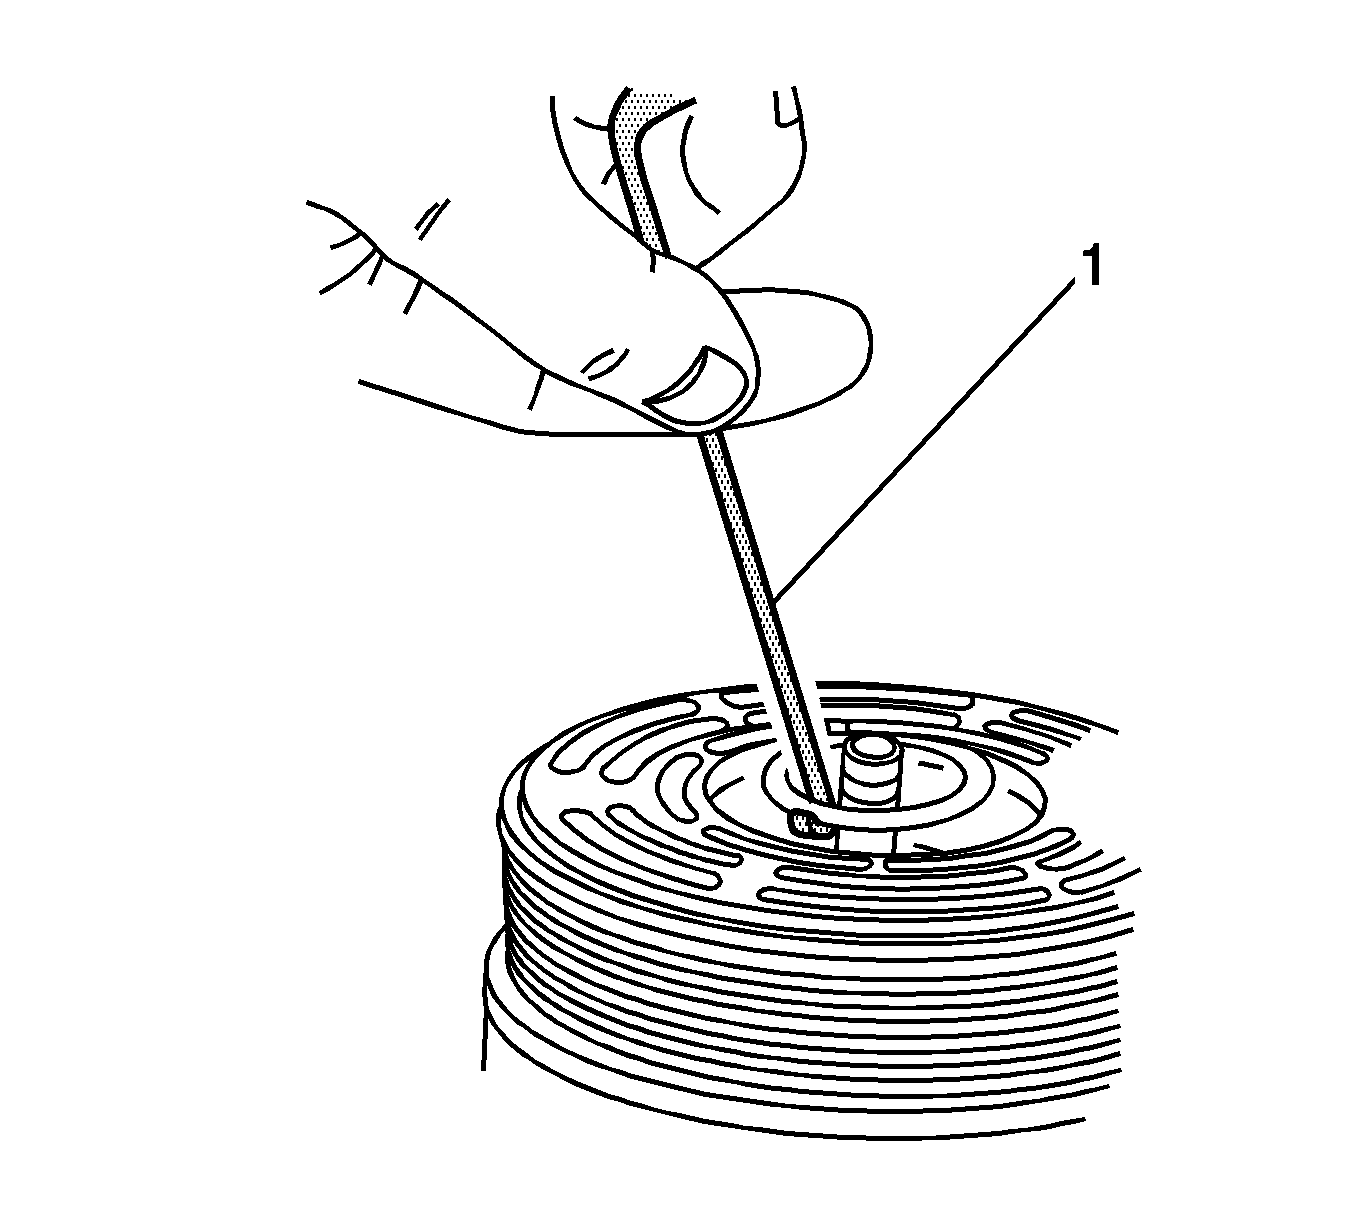
- Remove and discard the O-ring from the compressor neck using the J 9553-01 (1).
- Thoroughly clean the seal O-ring groove in the compressor housing.
- Inspect the shaft and the inside of the compressor housing neck for dirt or foreign material. These parts must be perfectly clean before installing any new parts.
Caution: Refer to Battery Disconnect Caution in the Preface section.
Notice: Prevent dirt and other contaminants from entering the compressor. Cap the fittings and plug the holes when servicing the compressor.
Installation Procedure
- Dip the new seal O-ring in clean polyalkaline glycol (PAG) refrigerant oil and assemble the O-ring onto the J 33011 (1).
- Insert the J 33011 (1) into the compressor neck until the installer bottoms. Lower the moveable slide of the J 33011 (1) to release the O-ring into the seal O-ring lower groove. The top groove of the compressor neck is for the shaft seal retainer ring. Rotate the installer to seat the O-ring and then remove the installer.
- Attach the shaft lip seal to the J 23128-A (1). Dip the seal in clean PAG oil.
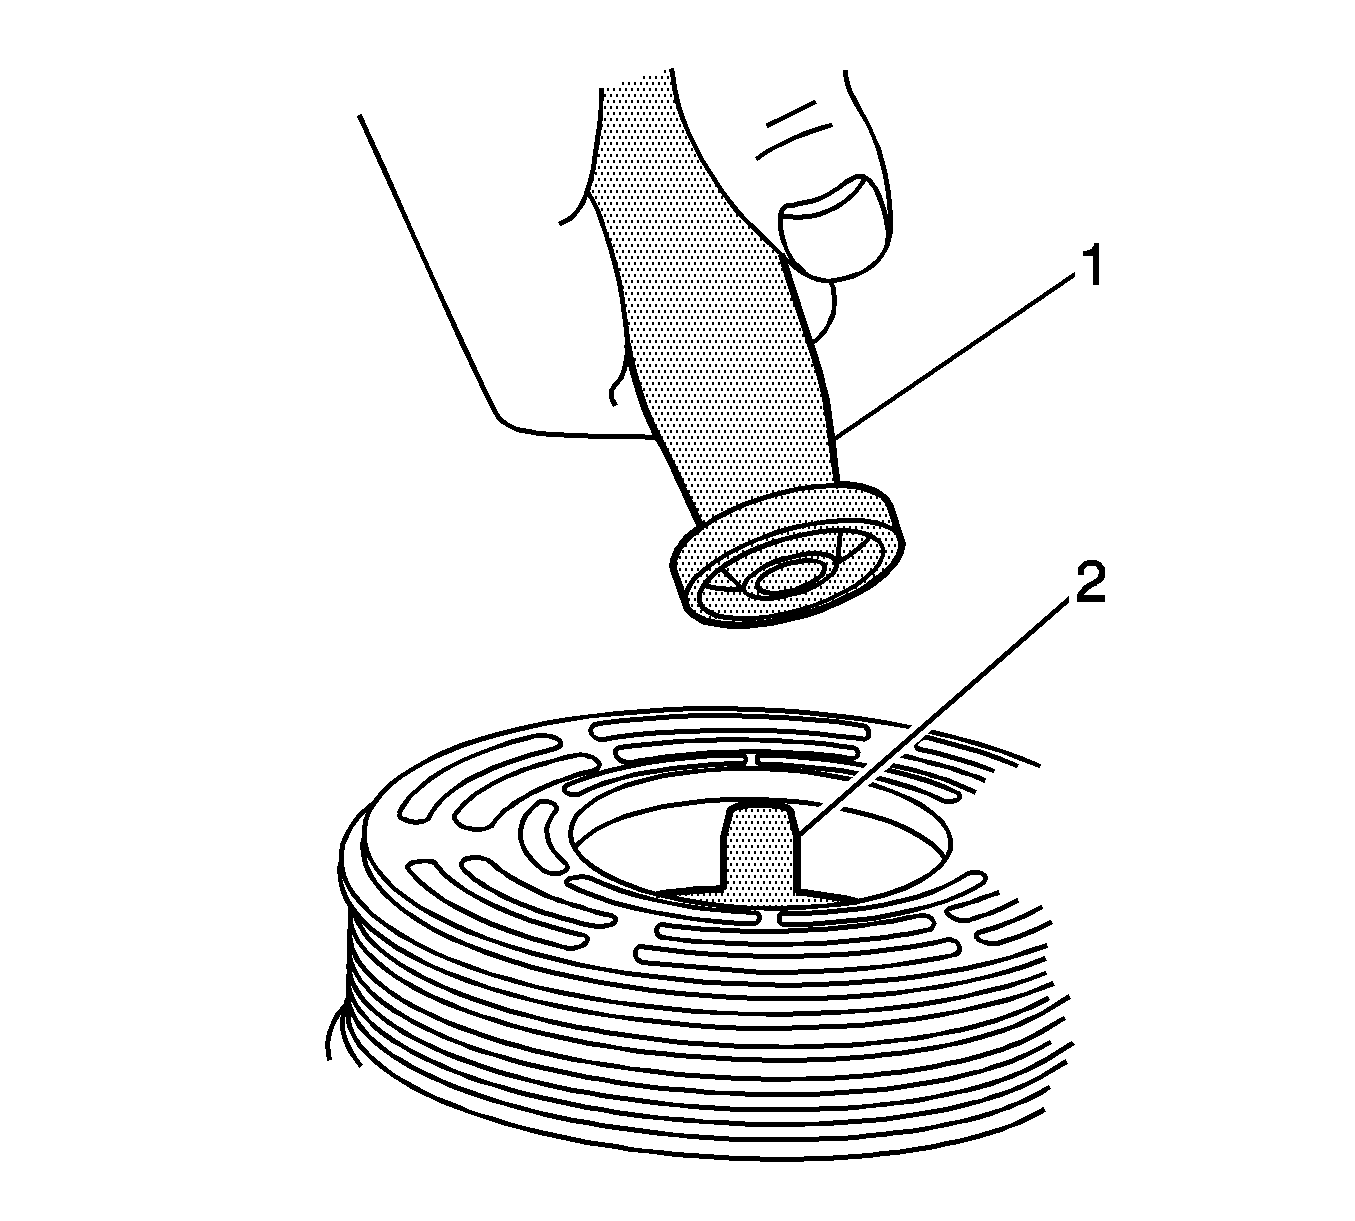
- Install the J 34614 (2) in the seal. Place it over the shaft and push the seal into place with a rotary motion.
- Use the J 5403 (1) to install the shaft seal retaining ring with its flat side against the seal.
- Remove any excess oil around the shaft and the inside of the compressor housing neck.
- Install the clutch plate and hub assembly. Refer to Compressor Clutch Plate/Hub Assembly Replacement .
- Reposition the compressor in its mounting.
- Adjust the tension on the serpentine accessory drive belt.
- Connect the negative battery cable.
- Evacuate and recharge the A/C system. Refer to Refrigerant Recovery and Recharging .
- Perform a leak test of the system. Refer to Leak Testing .
Important: Seals must not be reused. Always use a new specification service seal kit. Be sure that the seal to be installed is not scratched or damaged in any way. The seal must be free of lint and dirt that may damage the seal surface or prevent proper sealing.