Floor Panel Replacement Corvette
Tools Required
J 42058 Frame Adapter Clamp
Removal Procedure
Caution: Refer to Approved Equipment for Collision Repair Caution in the Preface section.
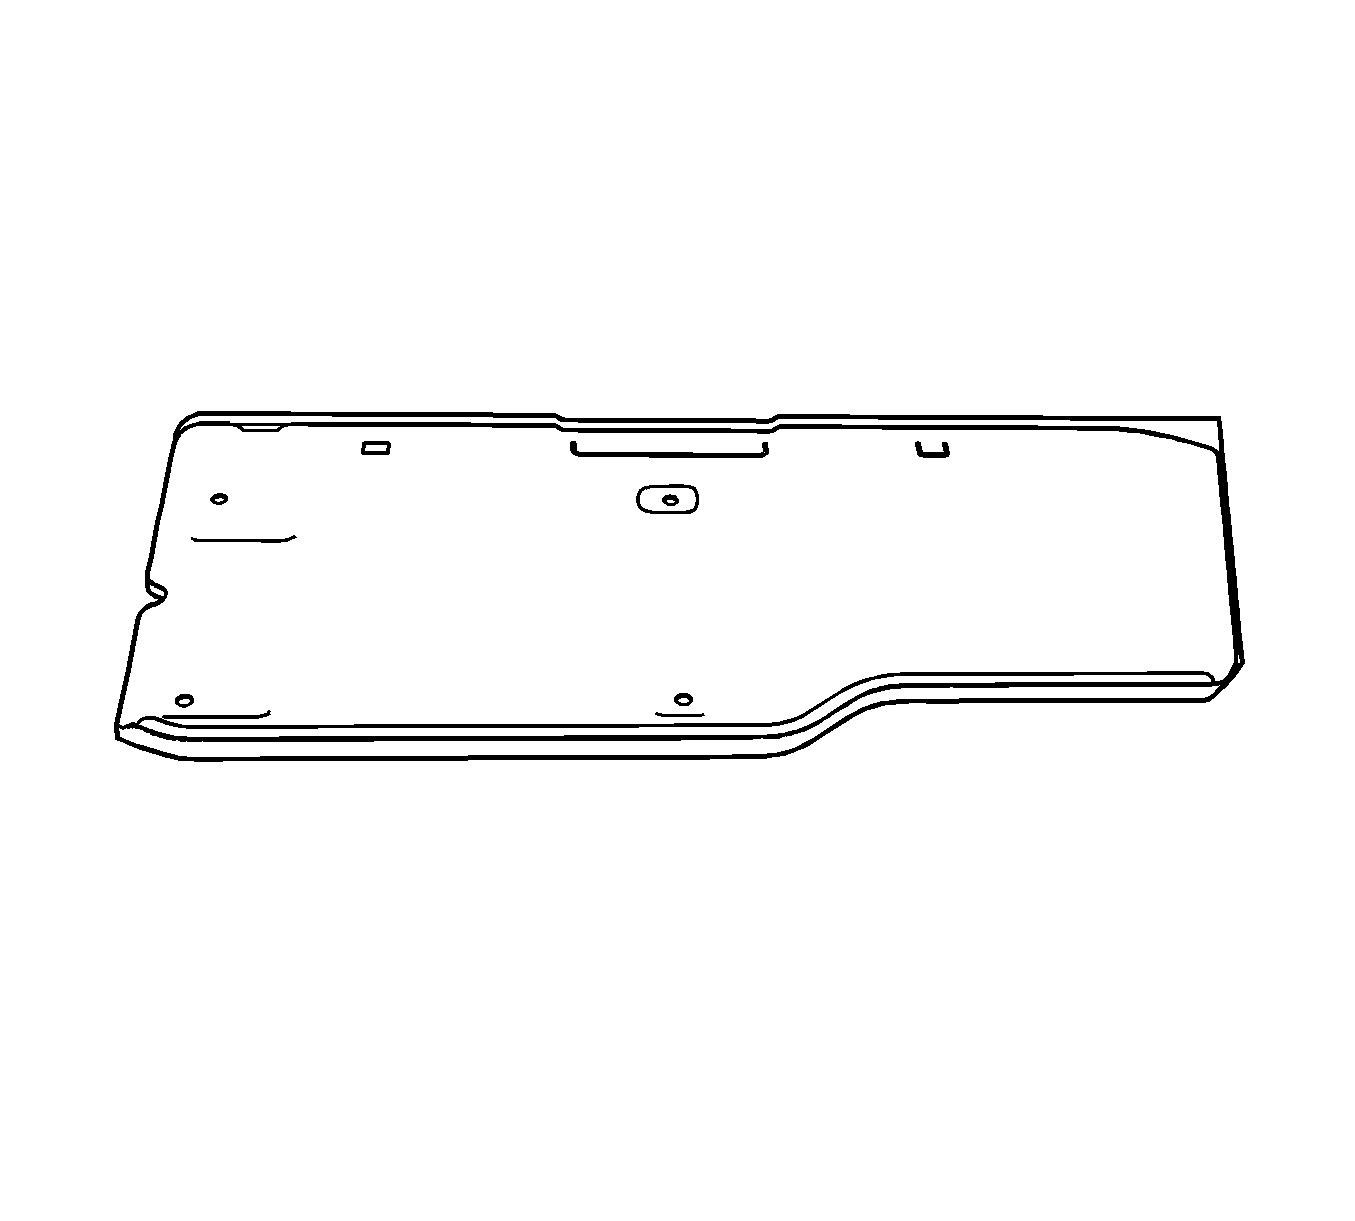
The floor panel is made of sheet molded compound (SMC), and is bonded to the floor structure and frame rail with structural adhesive.
- Disable the SIR system. Refer to SIR Disabling and Enabling .
- Disconnect the negative battery cable. Refer to Battery Negative Cable Disconnection and Connection .
- Remove all related panels and components.
- Remove or reposition electrical components and wiring harness as necessary to avoid damage.
- Remove wiring harness clips for transfer to new floor panel.
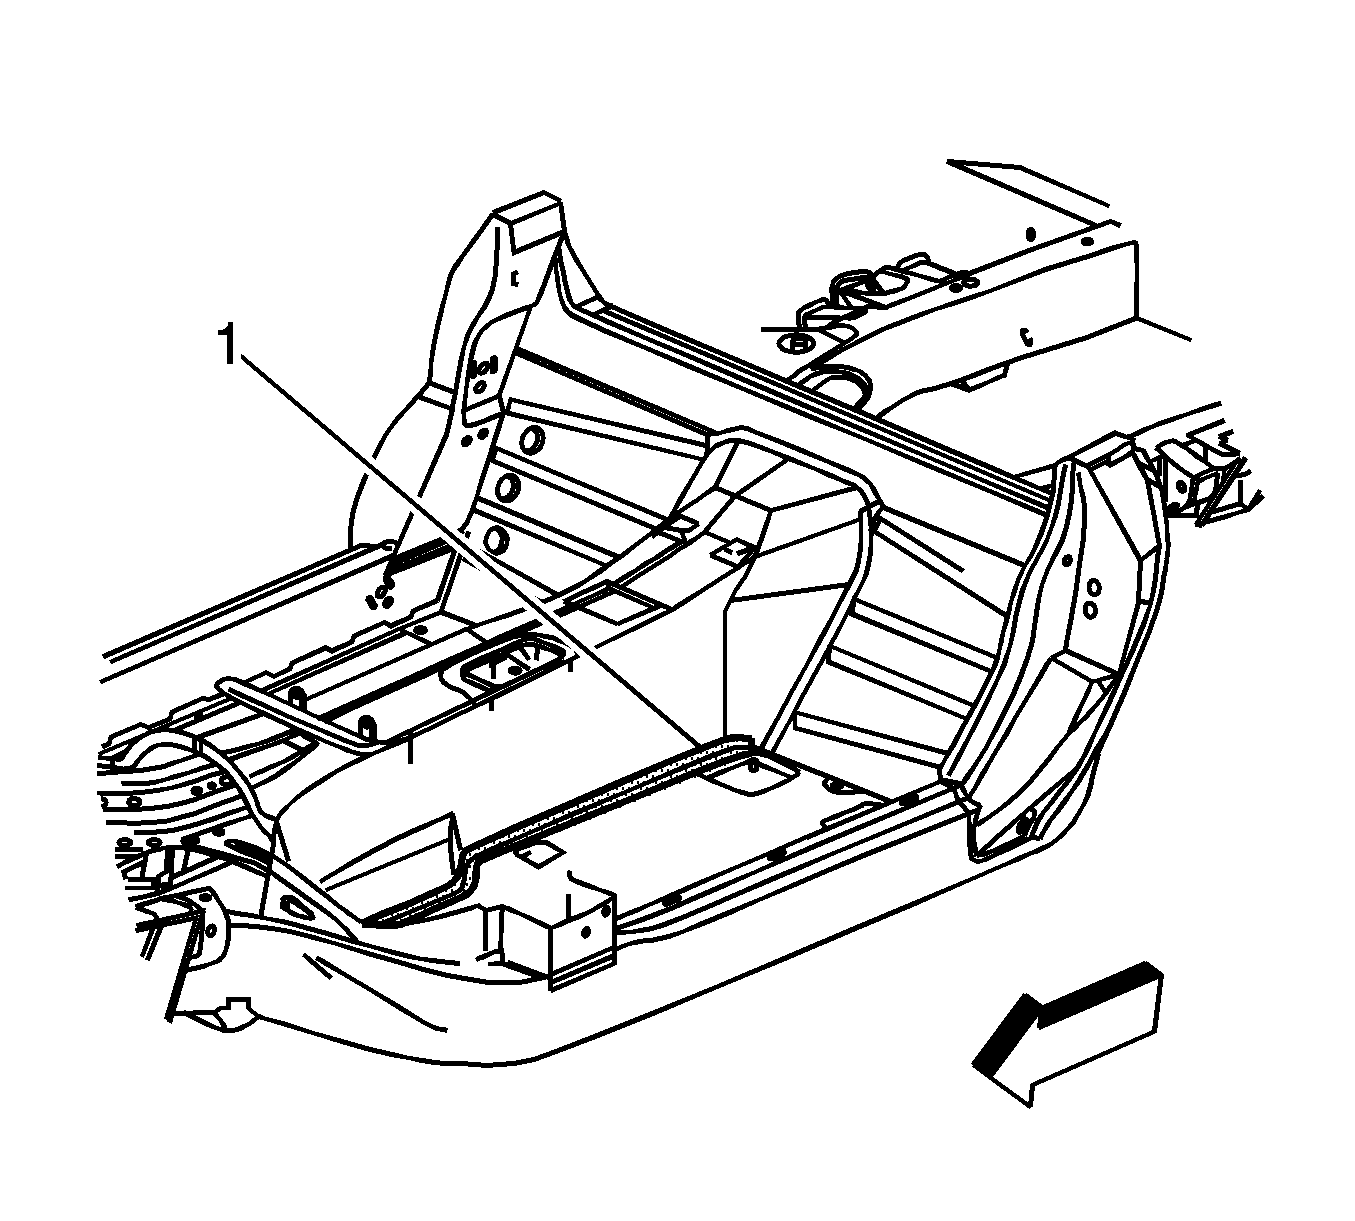
- Remove the inner reinforcement (1) bonded to the floor panel and the tunnel area.
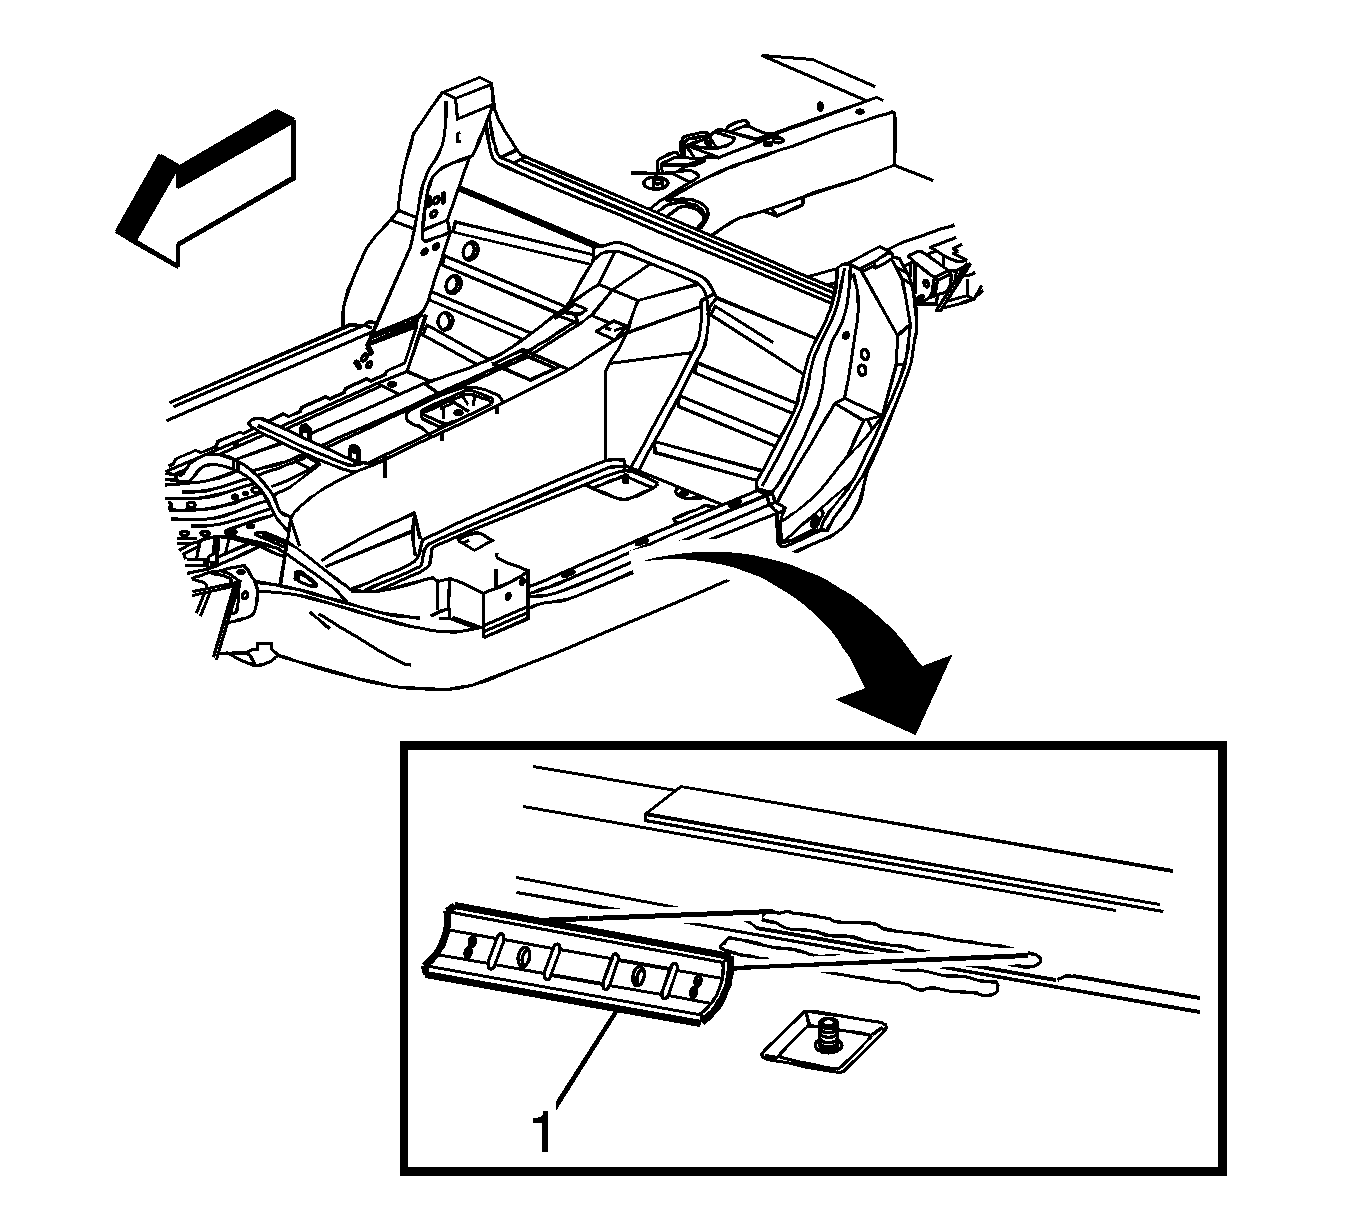
- Remove the outer reinforcement (1) bonded to the floor panel and the frame rail.
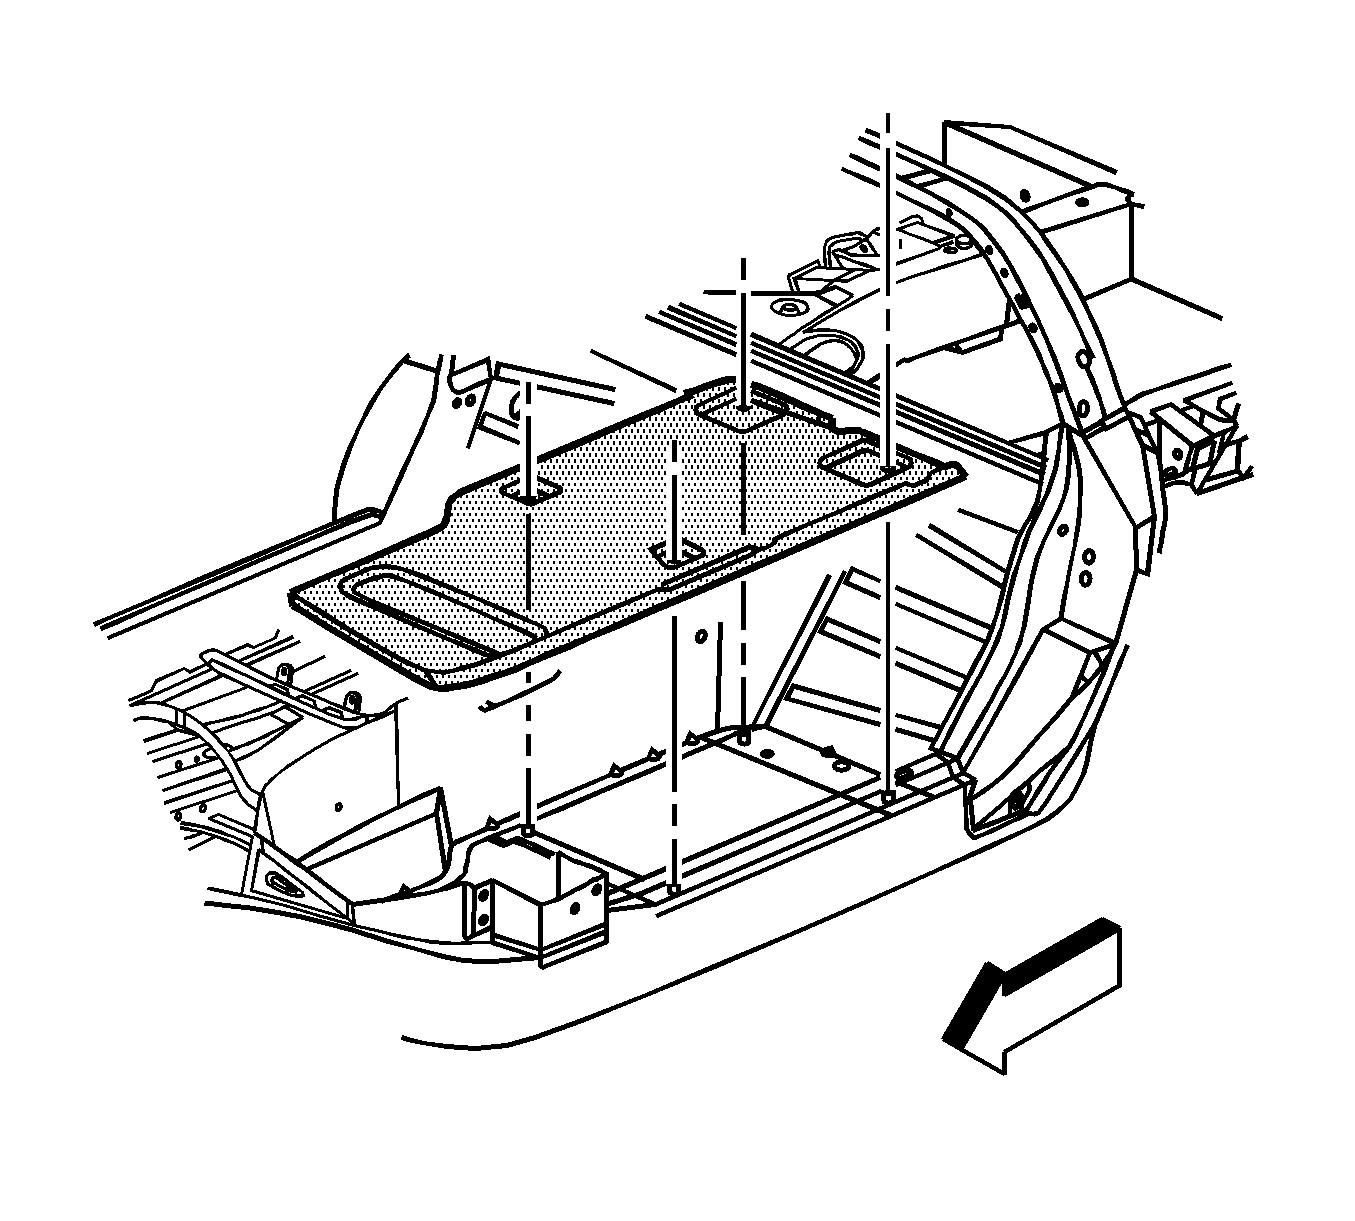
- Using a reciprocating saw or equivalent tool cut a large section of the floor out to gain access to the bond joint.
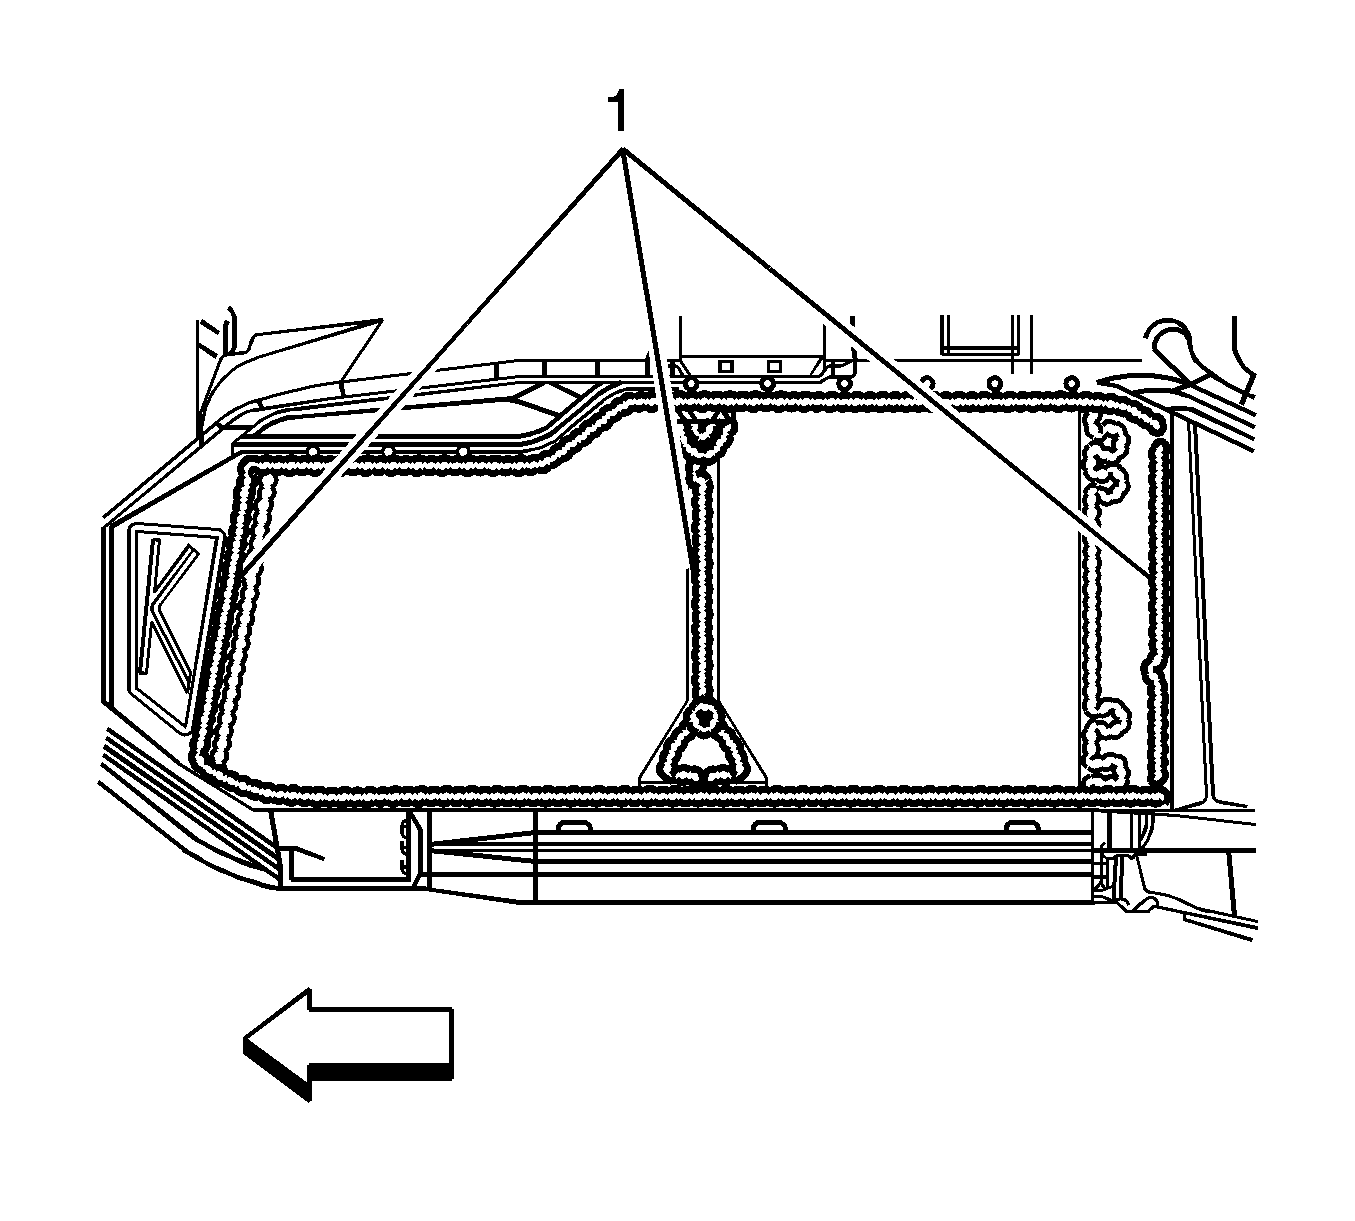
- Remove the remaining floor by applying heat and prying to detach adhesive along the bonding surface (1).
- Remove the floor panel from the vehicle.
- Save any and all brackets, mounting studs, and accessories for transfer to the new floor.
- Note the location and remove all remaining loose adhesive.
- Inspect the structure and frame rails for damage.
- Repair as much of the damage as possible to the factory specifications.
- Use J 42058 to secure the vehicle if pulling and straightening is required.
Installation Procedure
- Before applying adhesive dry fit the floor panel for proper fit and alignment.
- Clean and prepare all bonding mating surfaces according to adhesive manufacturer's recommendations.
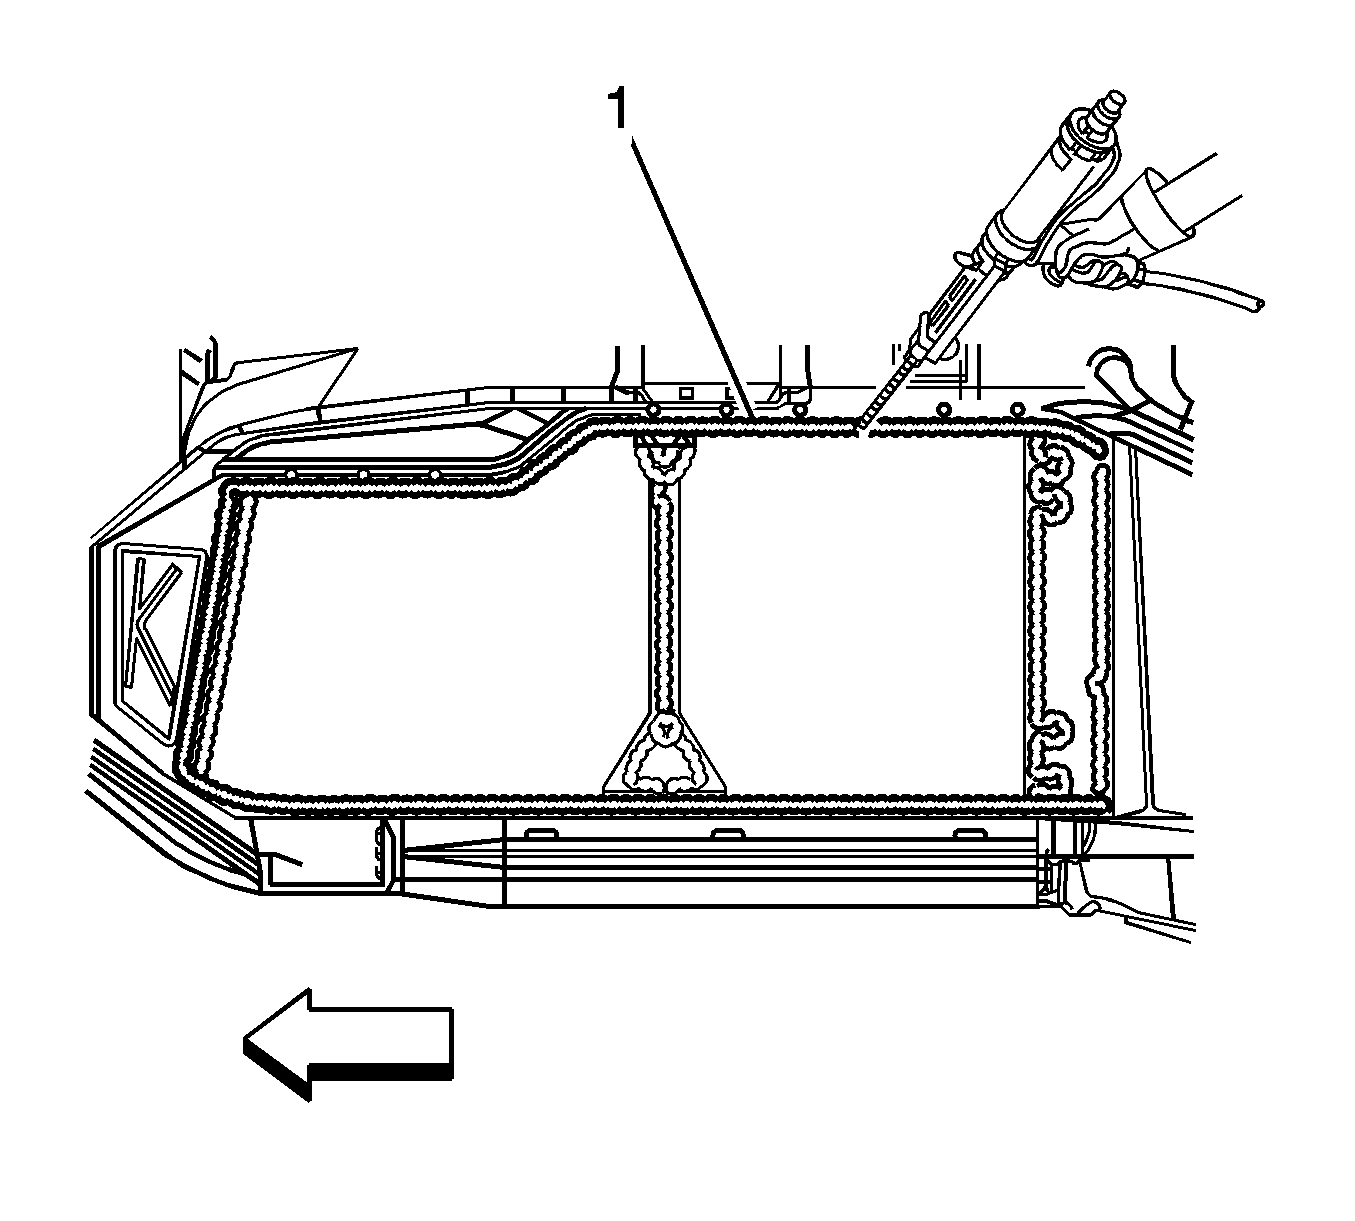
- Apply a consistent bead of structural adhesive (1) 10 mm (3/8 in) in diameter to the floor structure and frame rail to mate with the bonding surface of the floor. Refer to Sheet Molded Compound (SMC) Panel Bonding .
- Install the floor panel to the vehicle.
- Apply pressure to the floor panel to set the adhesive.
- Install the seat mounting nuts to set the adhesive at the cross brace.
- Apply structural adhesive (1) to the inner floor panel reinforcement. Refer to Sheet Molded Compound (SMC) Panel Bonding .
- Install the inner floor panel reinforcement to the tunnel.
- Apply pressure to the reinforcement to set the adhesive.
- Apply structural adhesive (1) to the outer floor panel reinforcement. Refer to Sheet Molded Compound (SMC) Panel Bonding .
- Install the outer floor panel reinforcement to the frame rail.
- Apply pressure to the reinforcement to set the adhesive.
- Apply structural adhesive to wiring harness clips, and install at the etched indicators on the floor panel by pressing firmly into place. Refer to Sheet Molded Compound (SMC) Panel Bonding .
- Smooth adhesive around perimeter of floor panel from underside of vehicle to form a consistent, leak-proof seal.
- Clamp or mechanically fasten the front end panel into place as necessary.
- Remove any excess adhesive.
- Install all related panels and components.
- Remove the seat mounting nuts.
- Connect the negative battery cable. Refer to Battery Negative Cable Disconnection and Connection .
- Enable the SIR system. Refer to SIR Disabling and Enabling .
Important: DO NOT top coat any bonding surface. Use primer only on bonding surfaces. Refer to adhesive manufacturer's recommendations.
Important: Keep adhesive away from seat studs to minimize squeeze out.
Floor Panel Replacement Z06
Tools Required
J 42058 Frame Adapter Clamp
Removal Procedure
Caution: Refer to Approved Equipment for Collision Repair Caution in the Preface section.
The floor panel is made of carbon fiber, and is bonded to the structure with structural adhesive.
- Disable the SIR system. Refer to SIR Disabling and Enabling .
- Disconnect the negative battery cable. Refer to Battery Negative Cable Disconnection and Connection .
- Remove all related panels and components.
- Remove or reposition electrical components and wiring harness as necessary to avoid damage.
- Remove wiring harness clips for transfer to new floor panel.
- Remove the inner reinforcement (1) bonded to the floor panel and the tunnel area.
- Remove the outer reinforcement (1) bonded to the floor panel and the frame rail.
- Using a reciprocating saw or equivalent tool cut a large section of the floor out to gain access to the bond joint.
- Remove the remaining floor by applying heat and prying to detach adhesive along the bonding surface (1).
- Remove the floor panel from the vehicle.
- Save any and all brackets, mounting studs, and accessories for transfer to the new floor.
- Note the location and remove all remaining loose adhesive.
- Inspect the structure and frame rails for damage.
- Repair as much of the damage as possible to the factory specifications.
- Use J 42058 to secure the vehicle if pulling and straightening is required.
Installation Procedure
- Before applying adhesive dry fit the floor panel for proper fit and alignment.
- Clean and prepare all bonding mating surfaces according to adhesive manufacturer's recommendations.
- Apply a consistent bead of structural adhesive (1) 10 mm (3/8 in) in diameter to the floor structure and frame rail to mate with the bonding surface of the floor. Refer to Sheet Molded Compound (SMC) Panel Bonding .
- Install the floor panel to the vehicle.
- Apply pressure to the floor panel to set the adhesive.
- Install the seat mounting nuts to set the adhesive at the cross brace.
- Apply structural adhesive (1) to the inner floor panel reinforcement. Refer to Sheet Molded Compound (SMC) Panel Bonding .
- Install the inner floor panel reinforcement to the tunnel.
- Apply pressure to the reinforcement to set the adhesive.
- Apply structural adhesive (1) to the outer floor panel reinforcement. Refer to Sheet Molded Compound (SMC) Panel Bonding .
- Install the outer floor panel reinforcement to the frame rail.
- Apply pressure to the reinforcement to set the adhesive.
- Apply structural adhesive to wiring harness clips, and install at the etched indicators on the floor panel by pressing firmly into place. Refer to Sheet Molded Compound (SMC) Panel Bonding .
- Smooth adhesive around perimeter of floor panel from underside of vehicle to form a consistent, leak-proof seal.
- Clamp or mechanically fasten the front end panel into place as necessary.
- Remove any excess adhesive.
- Install all related panels and components.
- Remove the seat mounting nuts.
- Connect the negative battery cable. Refer to Battery Negative Cable Disconnection and Connection .
- Enable the SIR system. Refer to SIR Disabling and Enabling .
Important: DO NOT top coat any bonding surface. Use primer only on bonding surfaces. Refer to adhesive manufacturer's recommendations.
Important: Keep adhesive away from seat studs to minimize squeeze out.
