For 1990-2009 cars only
Tools Required
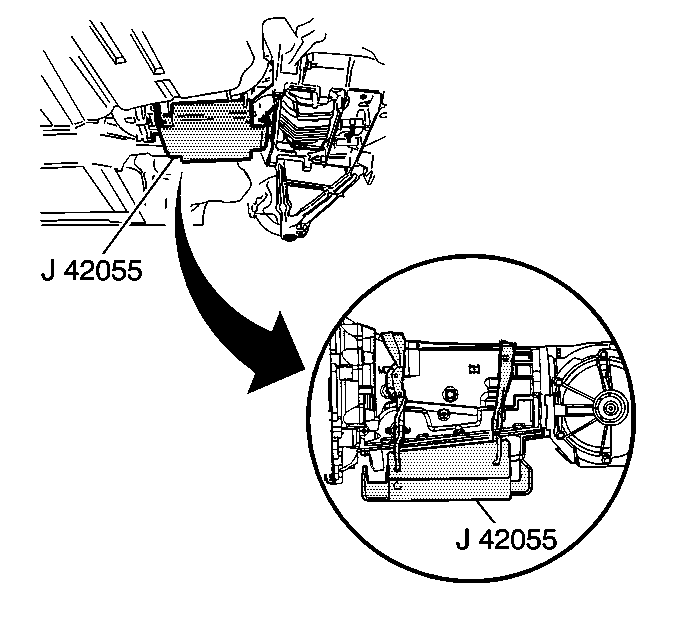
J 42055 Drivetrain Support Fixture
Removal Procedure
- Raise and support the vehicle. Refer to Lifting and Jacking the Vehicle .
- Remove the tire and wheel assemblies. Refer to Tire and Wheel Removal and Installation .
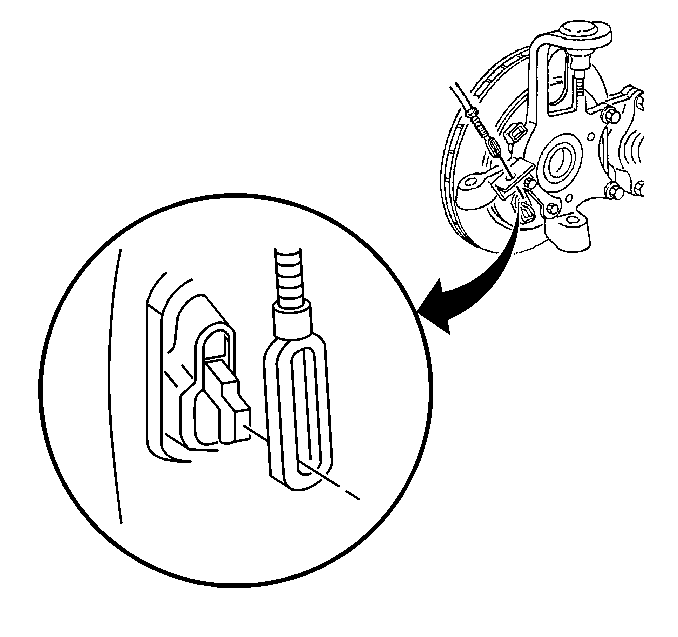
- Disconnect the wheel speed sensor harness connectors.
- Disconnect the park brake cables from the actuator levers.
- Disconnect the electrical connectors from the electronic suspension control (ESC) shock absorbers harnesses, if equipped.
- Remove the rear suspension position sensors. Refer to Electronic Suspension Rear Position Sensor Replacement .
- Disconnect the inner tie rod end studs from the rear crossmember. Refer to Tie Rod Replacement .
- Disconnect the lower control arms from the crossmember. Refer to Rear Axle Lower Control Arm Replacement .
- Support the lower control arms, tie rods, and rear suspension knuckles.
- Remove the transverse spring. Refer to Rear Transverse Spring Replacement .
- Assemble the J 42055 and install it to a transmission jack.
- Position and firmly secure the J 42055 with the transmission jack to the transmission. Support the transmission.
- Remove the transaxle mount lower nuts. Refer to Transmission Mount Replacement .
- Disconnect all the electrical harness retainers from the crossmember.
- Disconnect the brake pipe retainers from the crossmember.
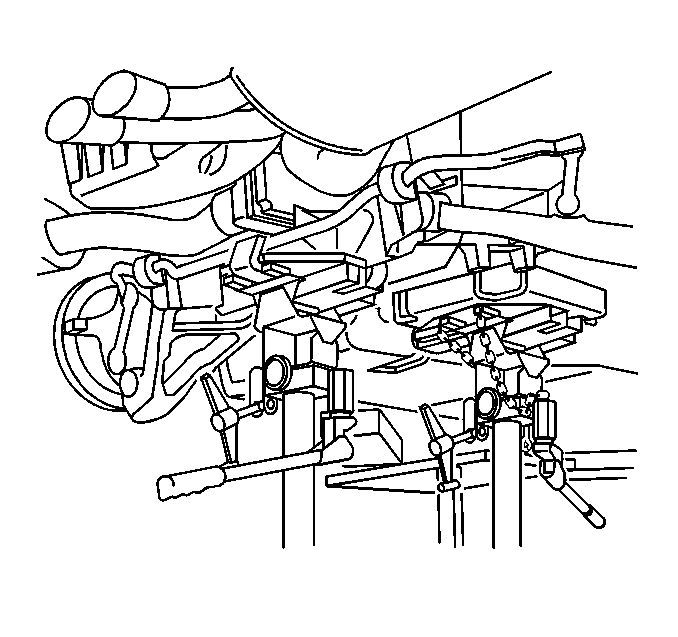
- Position a transmission jack under the rear crossmember and firmly secure the crossmember to the jack. Support the crossmember.
- Using HAND TOOLS ONLY, remove the rear crossmember mounting nuts.
- Remove the crossmember from the vehicle.
- Discard the rear crossmember mounting nuts.
Installation Procedure
- Install the crossmember to the vehicle.
- Using HAND TOOLS ONLY, install NEW rear suspension crossmember mounting nuts.
- Remove the J 42055 transmission jack from the transmission.
- Remove the transmission jack from the crossmember.
- Connect all electrical harness retainers to the crossmember.
- Connect the brake pipes retainers to the crossmember.
- Install the transaxle mount lower nuts. Refer to Transmission Mount Replacement .
- Install the transverse spring to the crossmember. Refer to Rear Transverse Spring Replacement .
- Install the lower control arms to the crossmember. Refer to Rear Axle Lower Control Arm Replacement .
- Install the inner tie rod end studs to the crossmember. Refer to Tie Rod Replacement .
- Install the rear suspension position sensors. Refer to Electronic Suspension Rear Position Sensor Replacement .
- Connect the electrical connectors to the ESC shock absorber harnesses, if equipped.
- Connect the park brake cables to the actuator levers.
- Connect the wheel speed sensor harness connector.
- Install the tire and wheel assemblies. Refer to Tire and Wheel Removal and Installation .
- Lower the vehicle.
- Measure and adjust the rear trim height as necessary. Refer to Trim Height Inspection .
- Perform a rear wheel alignment. Refer to Wheel Alignment Measurement .
| • | Align the crossmember dowel pins to the holes in the frame rails. |
| • | Align the transaxle mount studs to the crossmember. |
Notice: Refer to Fastener Notice in the Preface section.
Important: Only use NEW crossmember mounting nuts.
Tighten
Tighten nuts to 110 N·m (81 lb ft).
