Removal Procedure
- Remove the brake pressure modulator valve (BPMV) bracket. Refer to Brake Pressure Modulator Valve Bracket Replacement in Antilock Brake System.
- Place a drain pan under the vehicle and drain the power steering fluid.
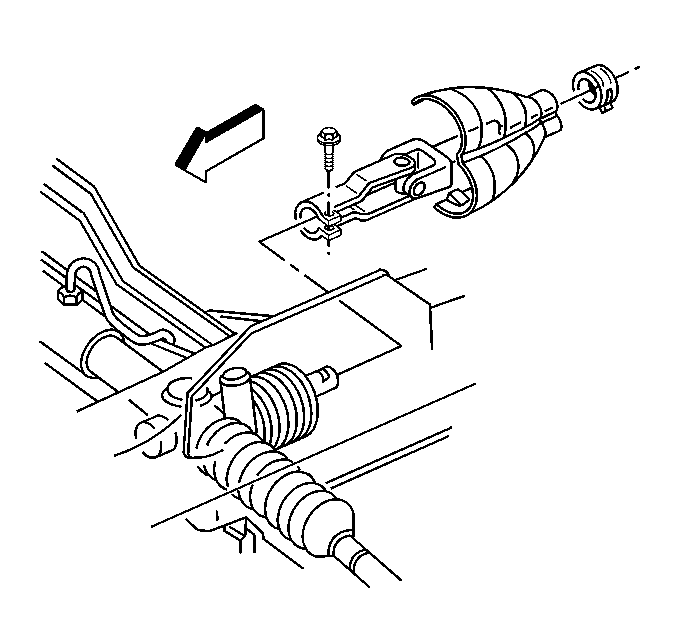
- Disconnect the intermediate shaft lower coupling from the power steering gear. Refer to Intermediate Steering Shaft Replacement in Steering Wheel and Column-Tilt.
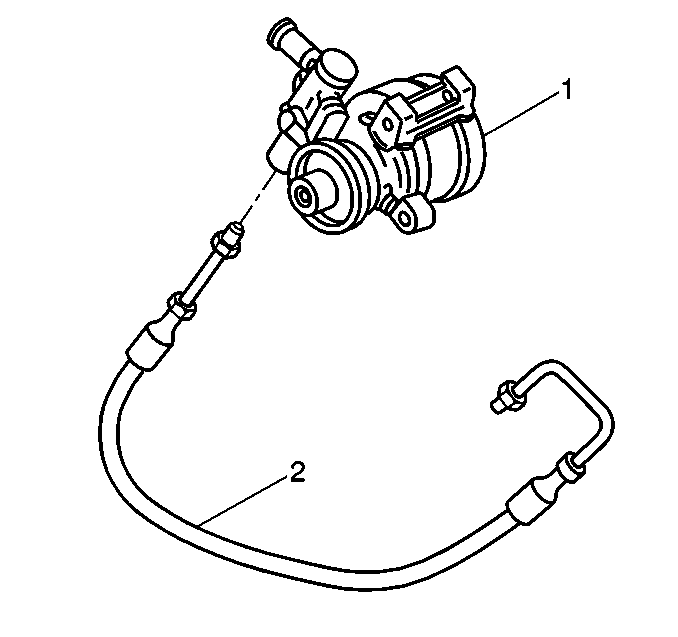
- Disconnect the power steering pump inlet hose (2) from the power steering gear.
- Raise and suitably support the vehicle. Refer to Lifting and Jacking the Vehicle in General Information.
- Remove the tire and wheel assemblies. Refer to Tire and Wheel Removal and Installation in Tires and Wheels.
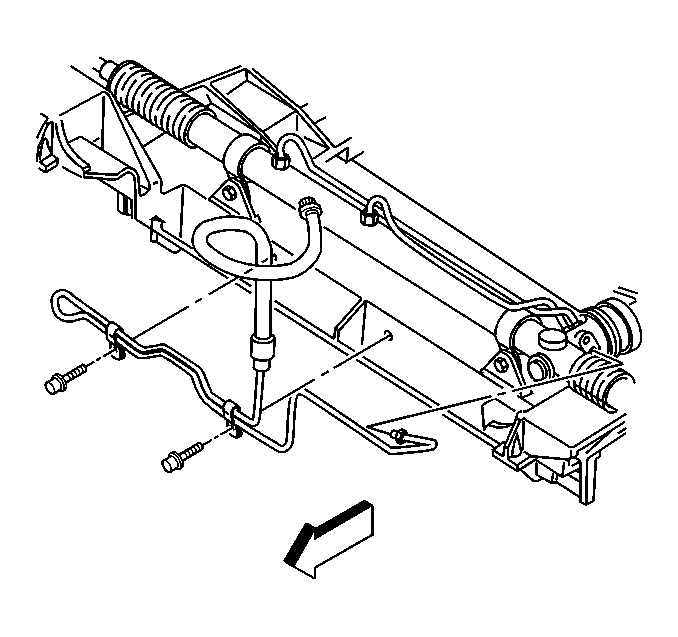
- Disconnect the power steering cooler pipe from the gear.
- Remove the power steering cooler from the vehicle.
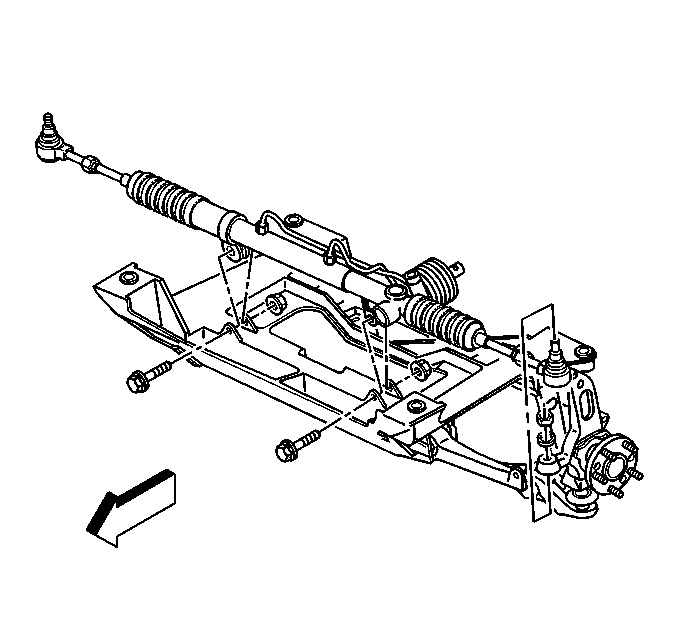
- Disconnect both outer tie rod ends from the steering knuckles. Refer to Rack and Pinion Outer Tie Rod End Replacement .
- Disconnect the electrical connector for Magnasteer®.
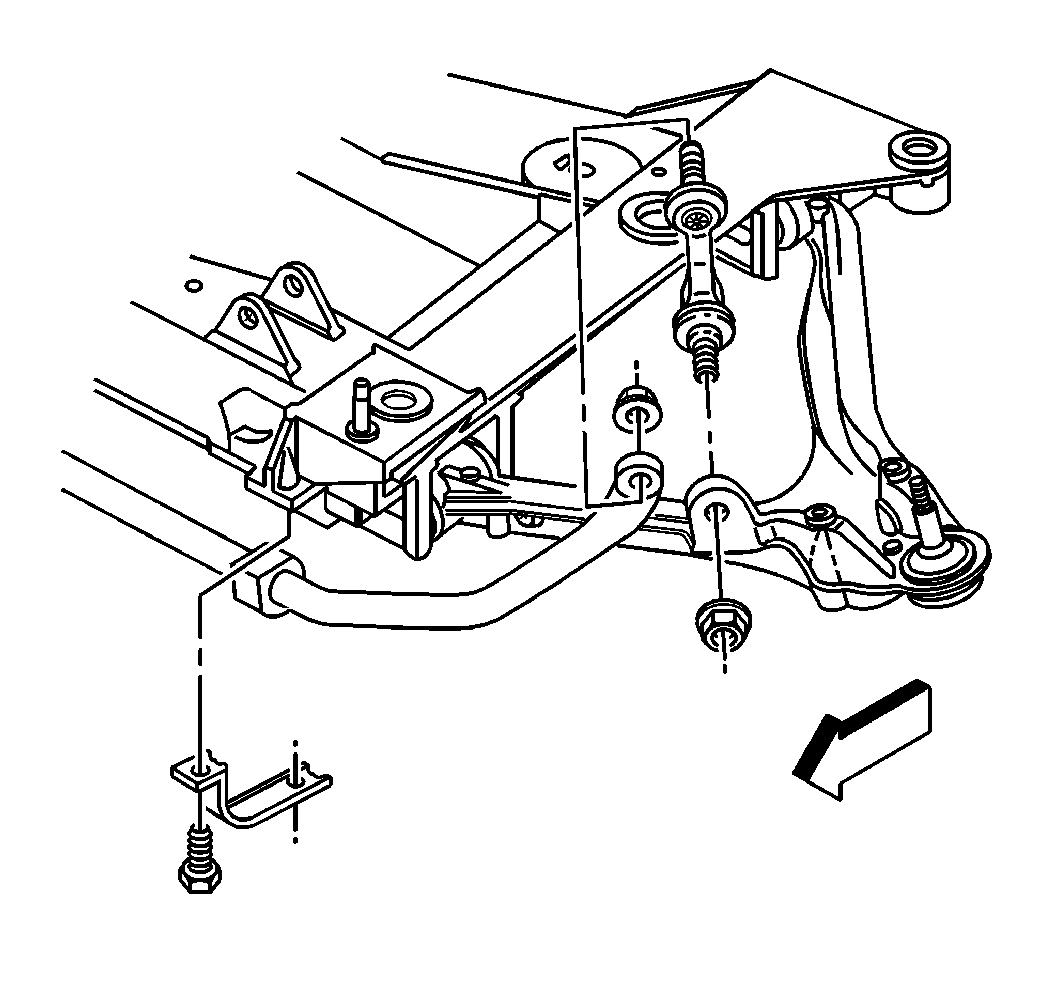
- Remove the stabilizer shaft from the crossmember. Refer to Stabilizer Shaft Replacement in Front Suspension.
- Disconnect the wiring harness clips from the crossmember.
- Disconnect the brake pipe from the crossmember fastener clips.
- Remove the steering gear mounting bolts and nuts.
- Using hand tools only, LOOSEN, Do Not Remove, the four crossmember mounting nuts 10 mm (0.394 in).
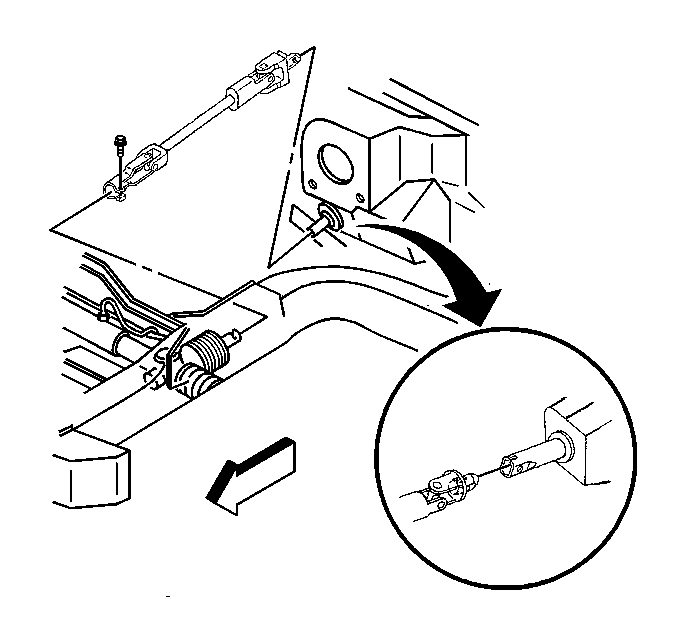
- Remove the power steering gear from the vehicle through the left wheelhouse opening by rotating.
Installation Procedure
- Install the power steering gear to the vehicle through the left wheelhouse opening.
- Install the power steering gear mounting bolts and nuts.
- Install the crossmember mounting nuts.
- Fasten the brake pipe to the crossmember fastener clips.
- Install the stabilizer shaft to the vehicle. Refer to Stabilizer Shaft Replacement in Front Suspension.
- Connect both outer tie rod ends to the steering knuckles. Refer to Rack and Pinion Outer Tie Rod End Replacement .
- Connect the intermediate shaft lower coupling to the power steering gear. Refer to Intermediate Steering Shaft Replacement in Steering Wheel and Column-Tilt.
- Connect the electrical connector for Magnesteer®.
- Connect the wiring harness clips to the crossmember.
- Install the power steering cooler to the crossmember.
- Connect the power steering cooler fitting to the power steering gear.
- Connect the power steering gear inlet hose (2) to the power steering gear.
- Remove the drain pan.
- Install the tire and wheel assemblies. Refer to Tire and Wheel Removal and Installation in Tires and Wheels.
- Lower the vehicle.
- Install the intermediate shaft shield.
- Refill the power steering fluid reservoir.
- Bleed the power steering system. Refer to Power Steering System Bleeding .
- Check and adjust the front wheel toe setting. Refer to Front Toe Adjustment in Wheel Alignment.
- Perform the SWPS plausibility test. Refer to Steering Wheel Position Sensor Plausibility Test in ABS Brakes.
Notice: Use the correct fastener in the correct location. Replacement fasteners must be the correct part number for that application. Fasteners requiring replacement or fasteners requiring the use of thread locking compound or sealant are identified in the service procedure. Do not use paints, lubricants, or corrosion inhibitors on fasteners or fastener joint surfaces unless specified. These coatings affect fastener torque and joint clamping force and may damage the fastener. Use the correct tightening sequence and specifications when installing fasteners in order to avoid damage to parts and systems.
Tighten
Tighten the power steering gear mounting nuts to 100 N·m
(74 lb ft).
Tighten
Using hand tools only, tighten the crossmember mounting nuts to 110 N·m
(81 lb ft).
Tighten
Tighten the power steering cooler fitting to the power steering gear
to 27 N·m (20 lb ft).
Hold the hose against the steering gear while tightening the fitting.
Tighten
Tighten the power steering gear inlet hose fitting to the power steering
gear to 27 N·m (20 lb ft).
Tighten
Tighten the intermediate shaft shield clamp to 3.5 N·m
(32 lb in).
