Refer to
Cell 20: Power, Ground, DLC and MIL
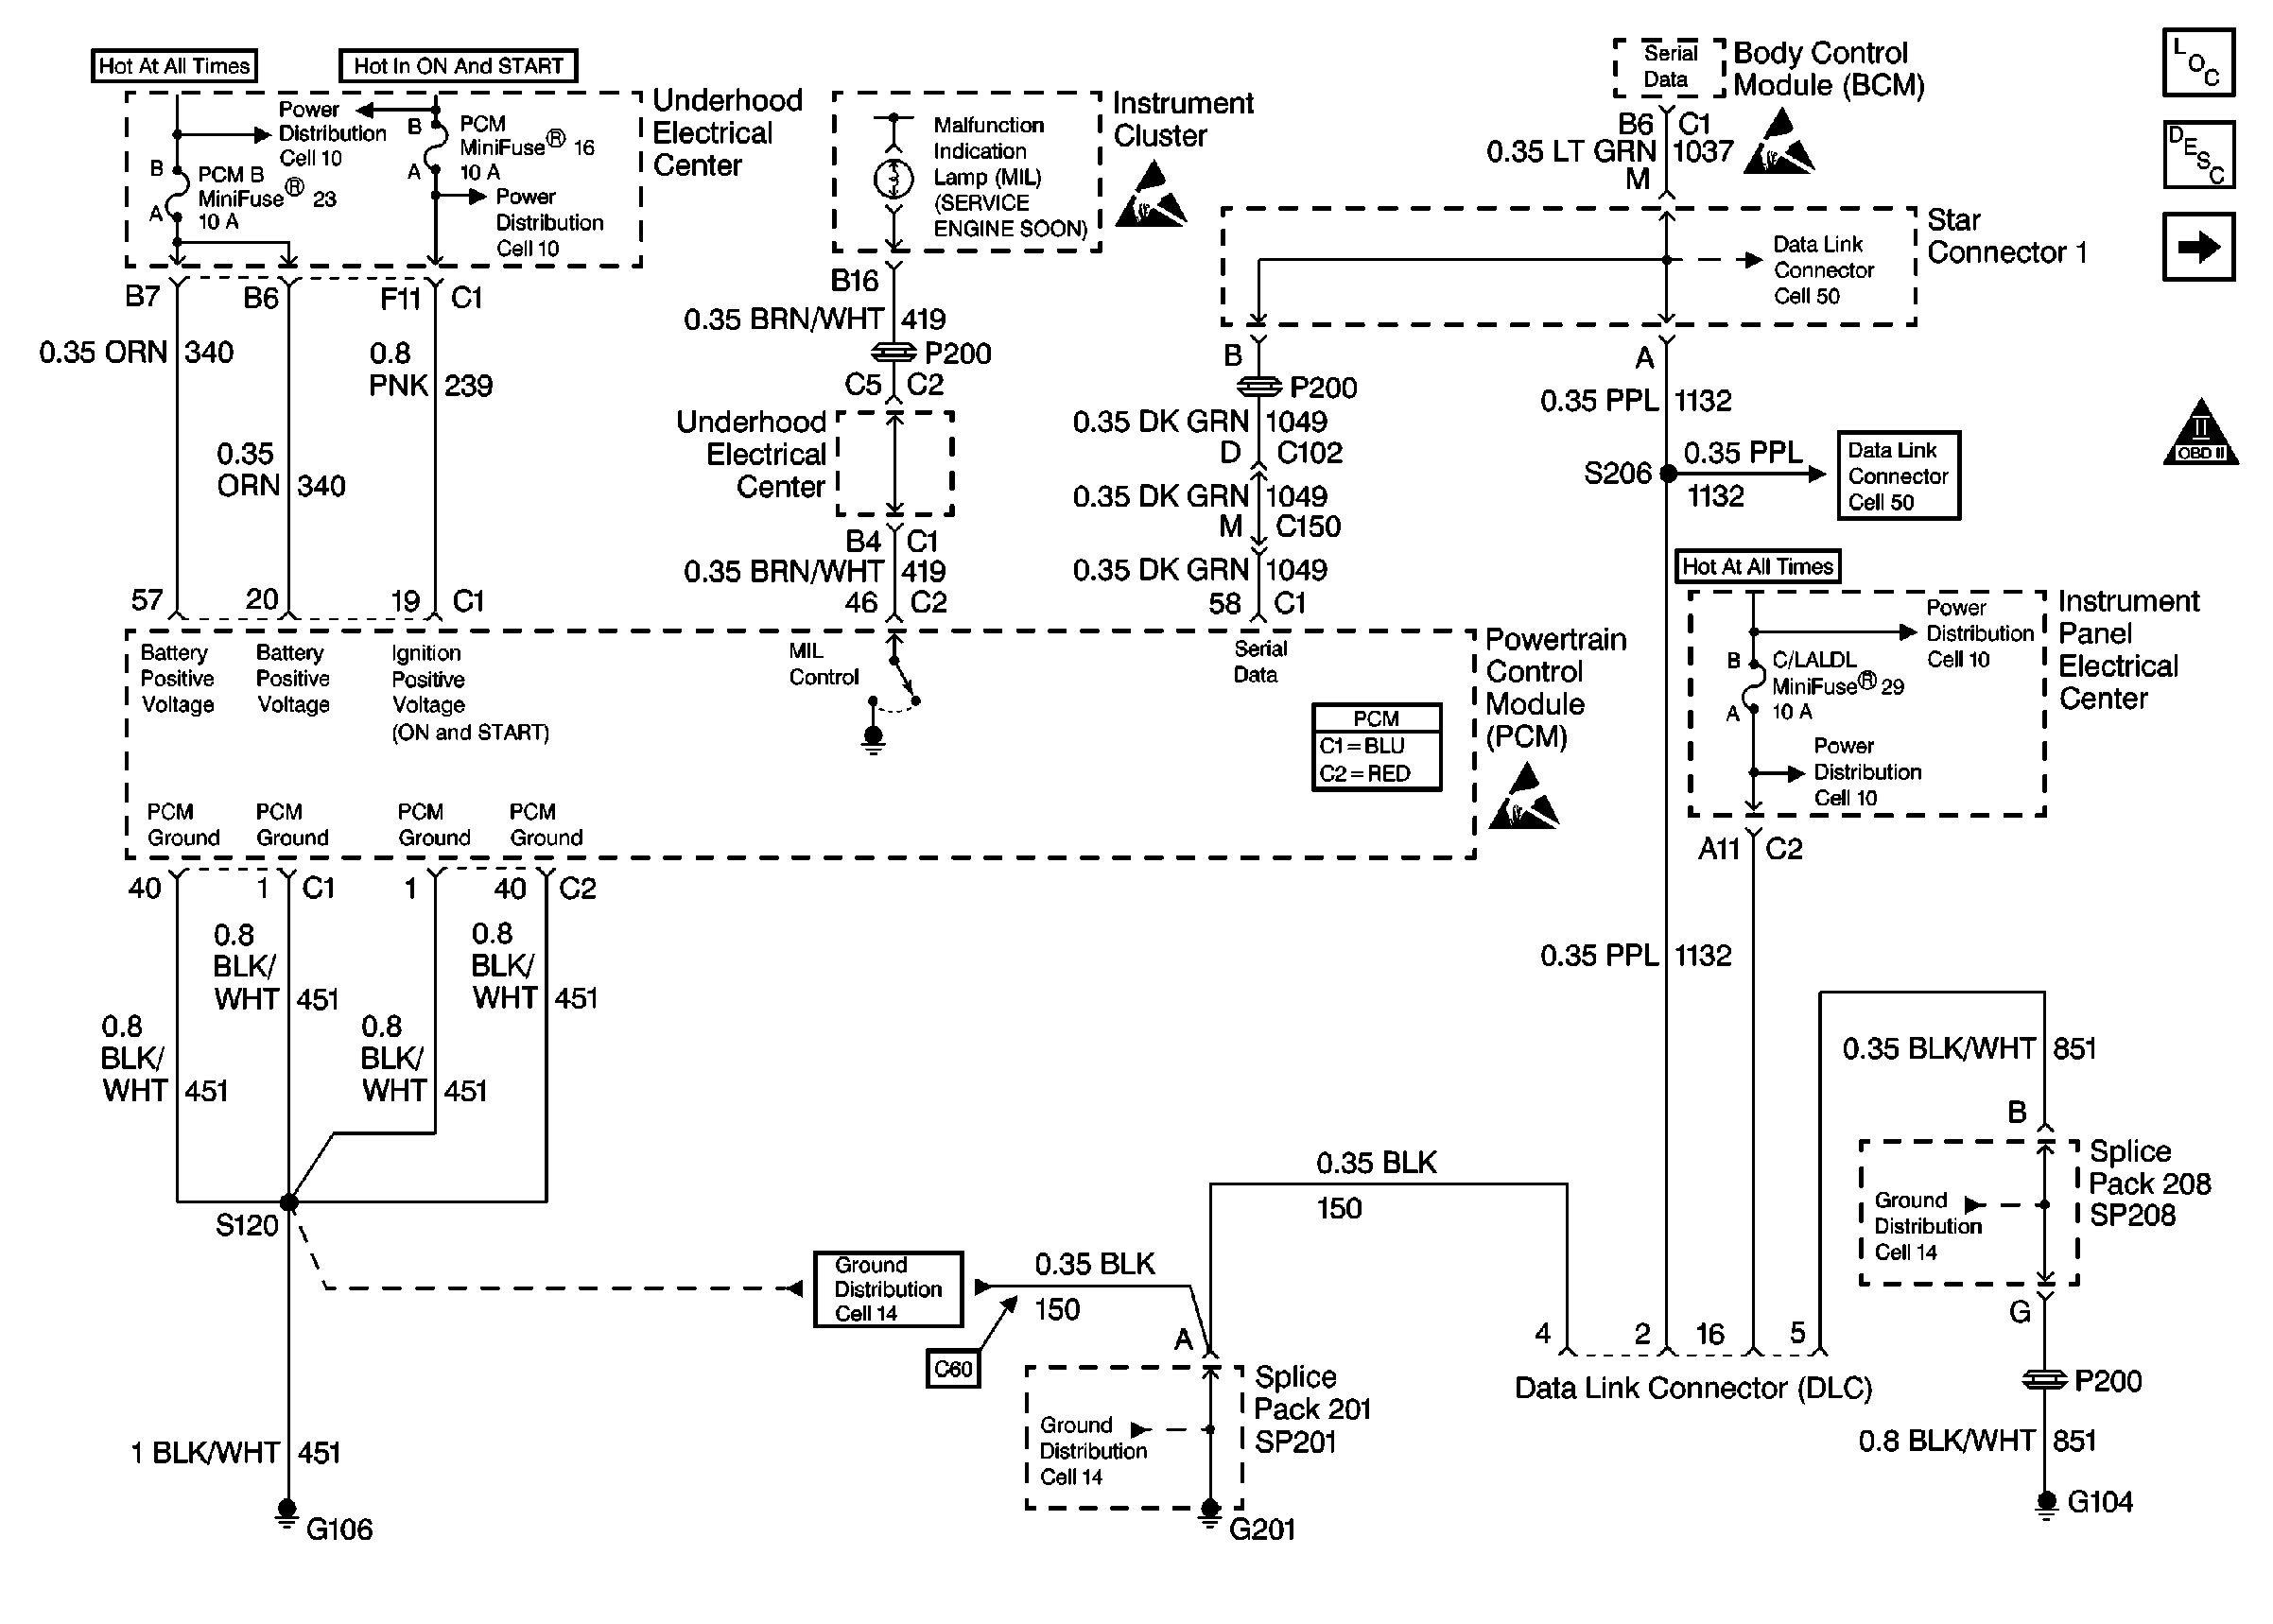
for complete circuit details.
Description
Use a properly functioning scan tool with the diagnostic tables in this section. DO NOT use the Clear Info function unless instructed by a diagnostic procedure.
Diagnostic Aids
Important:
• Remove any debris from the PCM\TAC module connector surfaces before
servicing the PCM\TAC module. Inspect the PCM\TAC module connector gaskets
when diagnosing/replacing the modules. Ensure that the gaskets are
installed correctly. The gaskets prevent contaminate intrusion into
the PCM\TAC modules. • For any test that requires probing the PCM or a component
harness connector, use the Connector Test Adapter Kit J 35616
. Using this kit prevents damage
to the harness/component terminals. Refer to
Using Connector Test Adapters
in Wiring Systems. • This vehicle, equipped with a powertrain control module (PCM),
utilizes an electrically erasable programmable read only memory (EEPROM).
Program the new PCM when the diagnostics call for replacement of the
PCM. Refer to
Powertrain Control Module Replacement
. • An engine which starts and then stalls is a good indication that
a concern with one of the following systems exists: - The Vehicle Theft Deterrent system - Refer to
Diagnostic System Check - Theft Deterrent
in Theft Deterrent. - The Class 2 circuit - Refer to
Diagnostic Starting Point
in Data Link Communications. - The Column Lock system - Refer to
Diagnostic System Check - Body Control System
in Body Control Systems.
Test Description
The numbers below refer to the step numbers on the diagnostic table.
-
This step verifies the IGN relay for proper operation. The IGN relay supplies voltage to the injectors and the ignition coils. When the IGN relay is not operating properly, a no start condition occurs. If the test lamp does not illuminate, this indicates the IGN relay is not suppling a voltage to the fuses.
-
This step is testing for a DTC that sets while the engine is cranking.
-
This step is testing for a grounded ignition feed circuit for the crankshaft position sensor and the camshaft position sensor. When the ignition feed circuit is shorted, a no start occurs and no DTCs are set. The ignition feed circuits are connected internally within the PCM. The PCM cannot detect that the engine is cranking with a grounded ignition feed circuit. If no engine speed is displayed on the scan tool, inspect the ignition feed circuit for a short to ground.
The scan tool may reset if the battery is at a low state of charge. The battery may need to be charged to perform this step.
-
This step is testing for B+ supply to the crankshaft position sensor.
-
The ignition feed circuits for the Camshaft and Crankshaft Position sensors is internally connected within the PCM. A short to ground on either circuit will cause a no start condition.
-
The fuel cap may need to be removed in order to hear if the fuel pump is operating.
Step | Action | Values | Yes | No | ||||||||||
|---|---|---|---|---|---|---|---|---|---|---|---|---|---|---|
1 | Did you perform the Powertrain On-Board Diagnostic (OBD) System Check? | -- | ||||||||||||
Does the test lamp illuminate on both sides of all the fuses? | -- | Go to Ignition Relay Diagnosis | ||||||||||||
3 | Monitor the Diagnostic Trouble Code (DTC) option with the scan tool. Does the scan tool display any throttle actuator control (TAC) system DTCs? | -- | Go to the applicable DTC table | |||||||||||
4 |
Important: Monitor the BCM for DTCs related to vehicle theft deterrent (VTD) system. This indicates a concern with the Column Lock or VTD fuel enable system. If a BCM DTC is stored, refer to Diagnostic System Check - Body Control System in Body Control Systems. Select the Diagnostic Trouble Code (DTC) option, then the DTC Information option with the scan tool. Is P0230, P0335, P0336, P0601, P0602, P0604, or P0606 displayed? | -- | Go to the applicable DTC table | |||||||||||
Did a DTC set while cranking the engine? | -- | Go to the applicable DTC table | ||||||||||||
Monitor the engine speed while cranking the engine. Is engine RPM indicated on the scan tool? | -- | |||||||||||||
Does the DMM display near the specified value? | B+ | |||||||||||||
Does the DMM display near the specified value? | B+ | |||||||||||||
9 |
Did you find and correct the condition? | -- | ||||||||||||
10 | Monitor the engine coolant temperature with the scan tool. Is the engine coolant temperature on the scan tool close to the actual engine temperature? | -- | Go to DTC P0118 Engine Coolant Temperature (ECT) Sensor Circuit High Voltage | |||||||||||
Enable the fuel pump with the scan tool. Does the fuel pump operate? | -- | |||||||||||||
12 |
Is the fuel pressure within the specified range? | 380-420 kPa (55-61 psi) | Go to Fuel System Diagnosis | |||||||||||
13 | Perform the following additional inspections:
Did you find and correct the condition? | -- | Go to Symptoms for diagnosis | |||||||||||
14 | Replace the CKP sensor. Refer to Crankshaft Position Sensor Replacement . Is the action complete? | -- | -- | |||||||||||
15 | Replace the CMP sensor. Refer to Camshaft Position Sensor Replacement . Is the action complete? | -- | -- | |||||||||||
16 |
Important: Program the replacement PCM. Replace the PCM. Refer to Powertrain Control Module Replacement . Is the action complete? | -- | -- | |||||||||||
17 |
Does the engine start and continue to run? | -- | ||||||||||||
18 |
Are any DTCs displayed? | -- | Go to the applicable DTC table | |||||||||||
19 | Select the Capture Info option and the Review Info option using the scan tool. Are any DTCs displayed that you have not diagnosed? | -- | Go to the applicable DTC table | System OK |
