Removal Procedure
- Disable the SIR system. Refer to SIR Disabling and Enabling and SIR Disabling and Enabling in SIR.
- Remove the instrument panel (I/P) storage compartment door. Refer to Instrument Panel Storage Compartment Replacement .
- Remove the left and right windshield garnish moldings. Refer to Windshield Pillar Garnish Molding Replacement in Interior Trim.
- Remove the left and right front door sill plates. Refer to Front Side Door Sill Plate Replacement in Interior Trim.
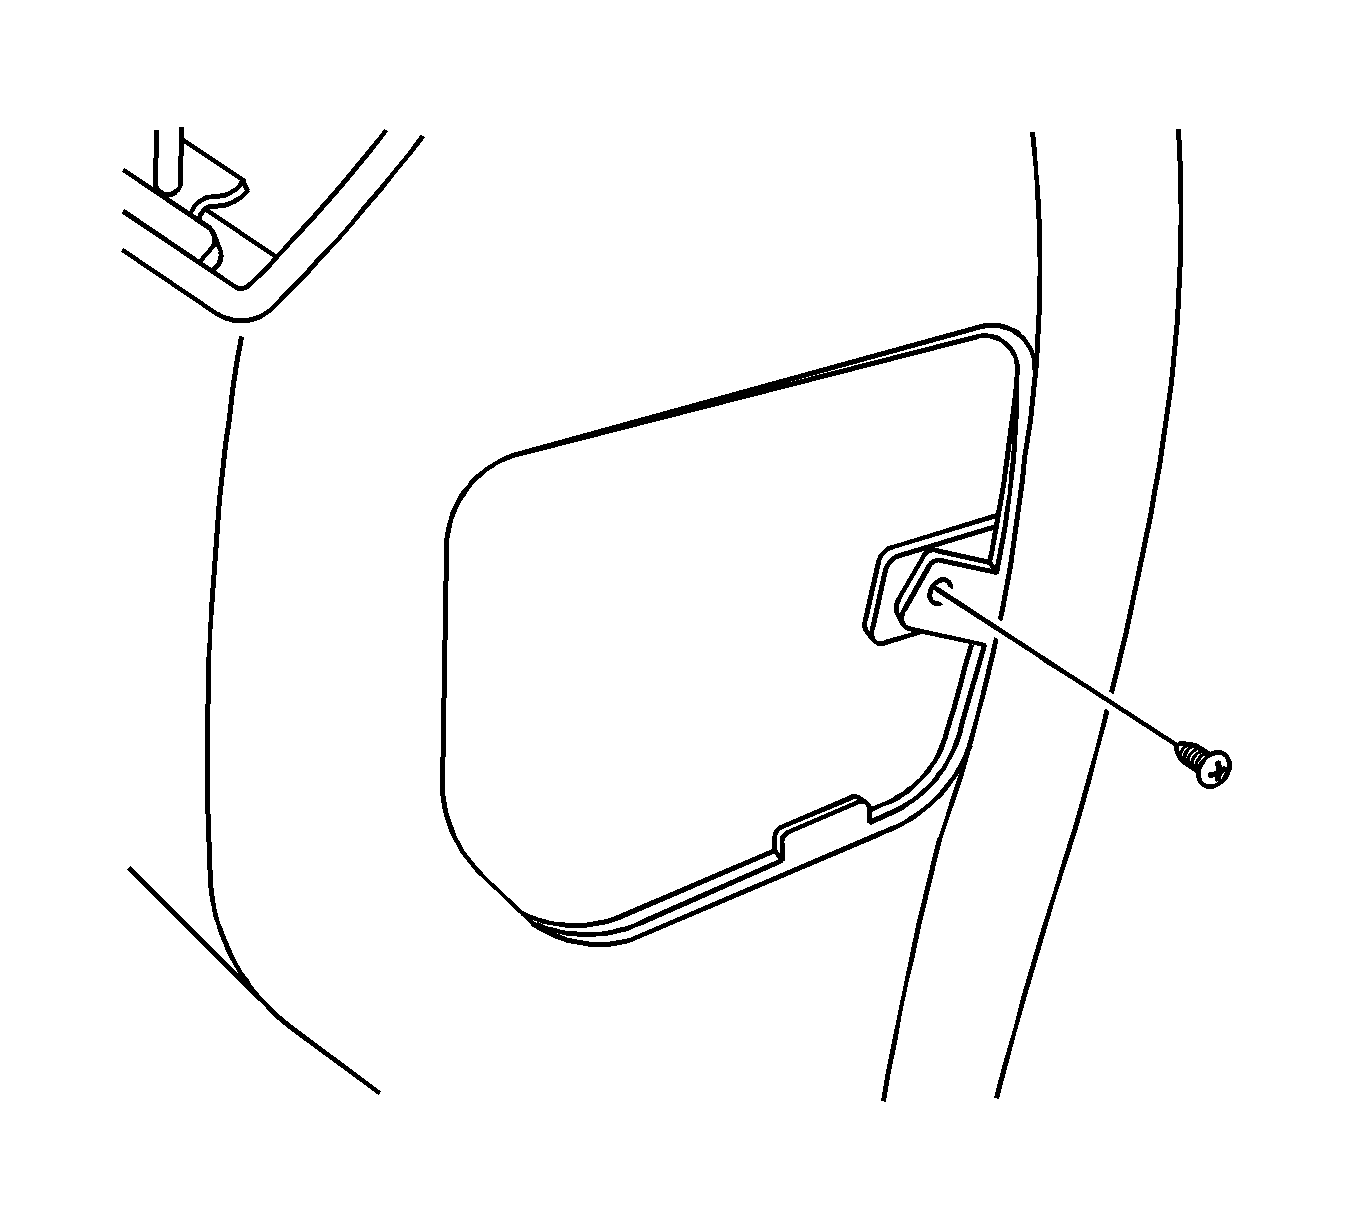
- Remove the left and right hinge pillar trim panels. Refer to Body Hinge Pillar Trim Panel Replacement - Left Side and Body Hinge Pillar Trim Panel Replacement - Right Side in Interior Trim.
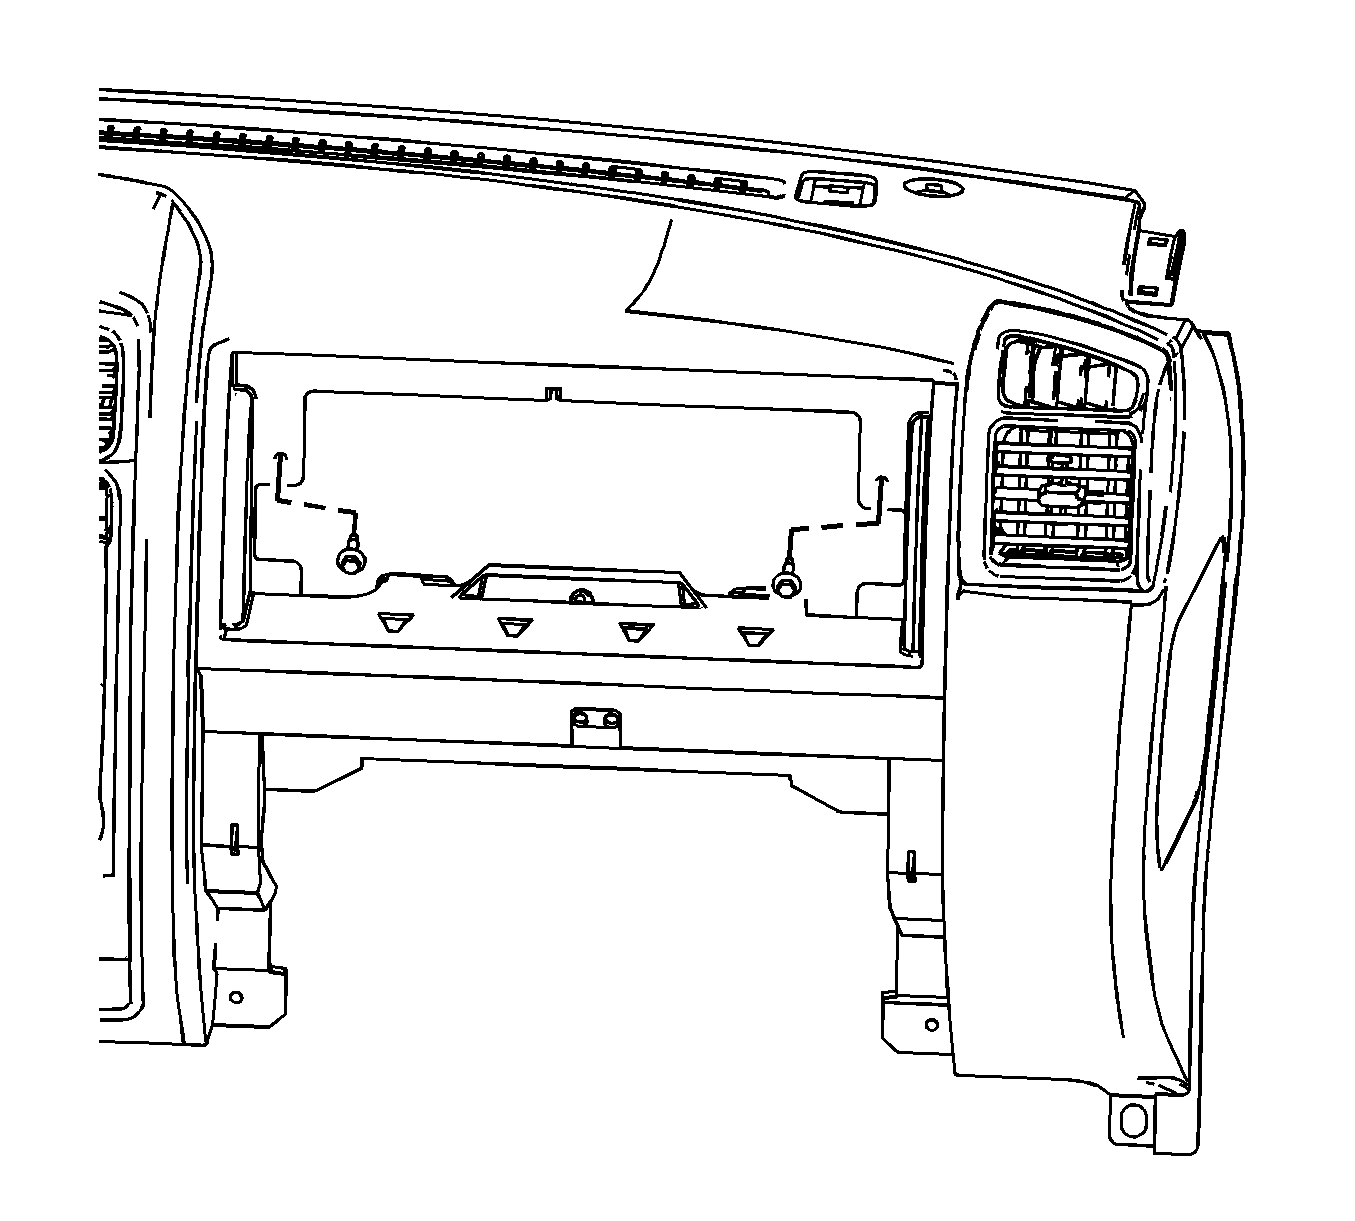
- Remove the lower center I/P extension. Refer to Instrument Panel Lower Center Trim Replacement .
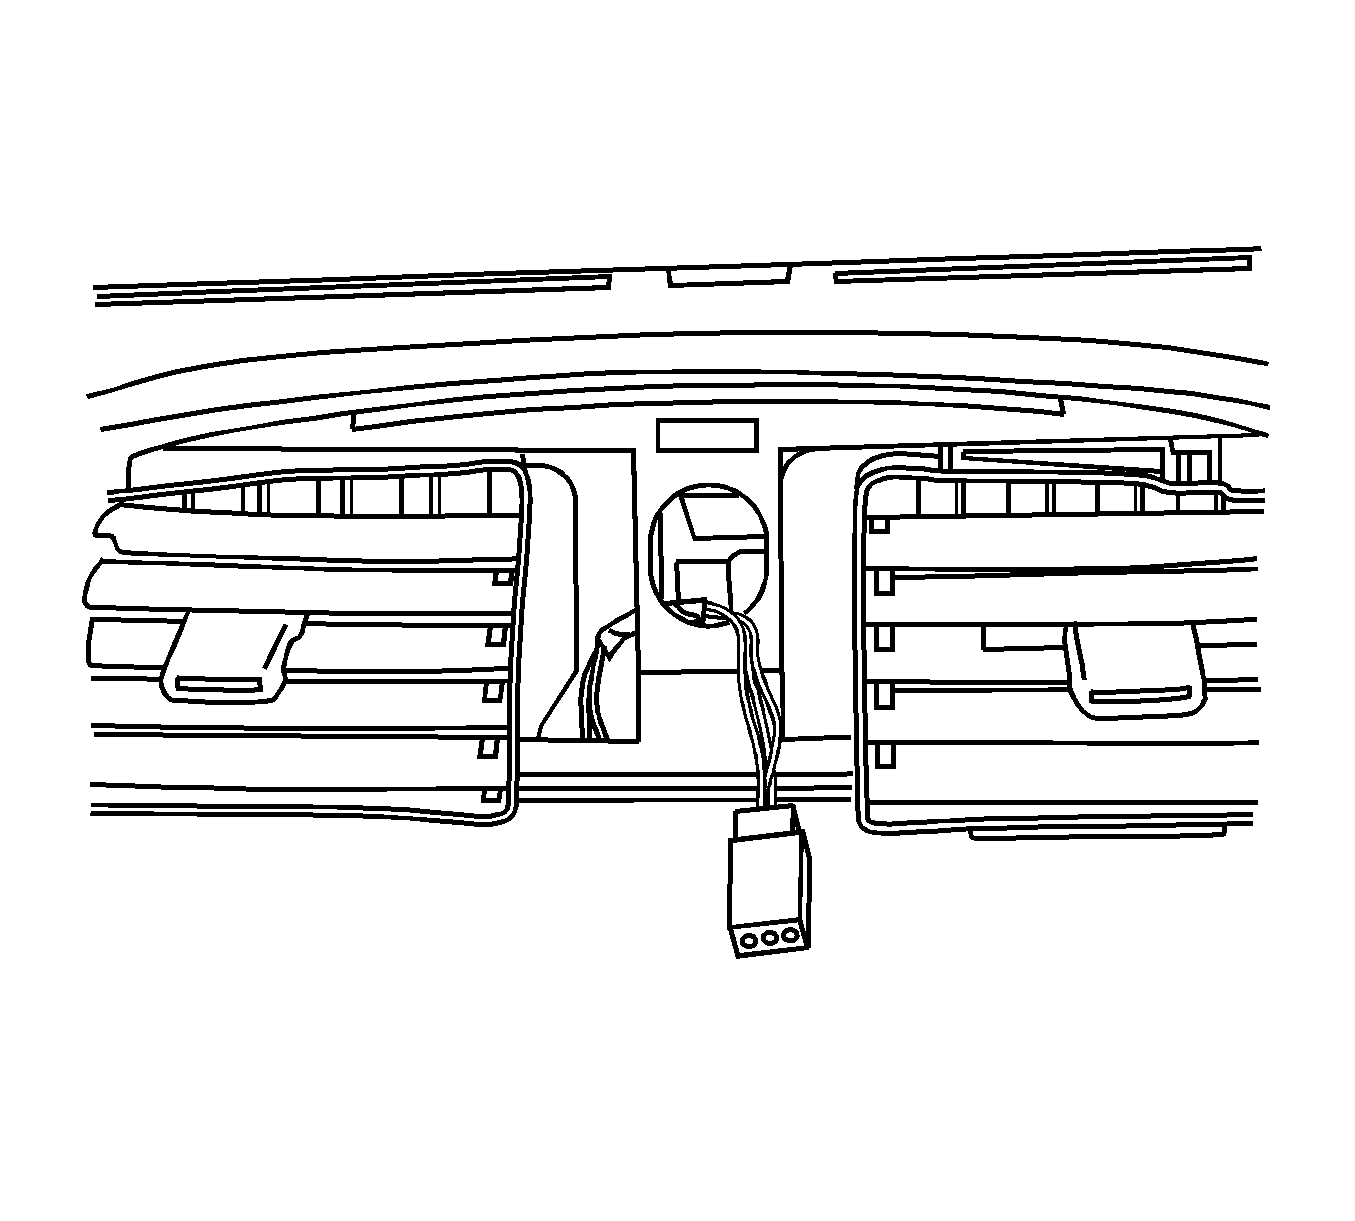
- Remove the accessory trim panel. Refer to Instrument Panel Accessory Trim Plate Replacement .
- Remove the radio. Refer to Radio Replacement in Entertainment.
- Remove the HVAC control assembly. Refer to Heater and Air Conditioning Control Replacement in HVAC Systems - Manual.
- If replacing the I/P assembly, remove the left air outlet. Refer to Instrument Panel Outer Air Outlet Replacement - Left Side in Heating, Ventilation, and Air Conditioning.
- Remove the right air outlet. Refer to Instrument Panel Outer Air Outlet Replacement - Right Side in Heating, Ventilation, and Air Conditioning.
- Remove the knee bolster trim panel. Refer to Driver Knee Bolster Panel Replacement .
- Remove the knee bolster. Refer to Knee Bolster Replacement .
- Remove the instrument panel cluster (IPC) bezel. Refer to Instrument Panel Cluster Trim Plate Bezel Replacement .
- Remove the IPC. Refer to Instrument Cluster Replacement .
- If replacing the I/P, remove the headlamp switch and retain for transfer. Refer to Headlamp Switch Replacement .
- Remove the daytime running lamp (DRL) sensor from the I/P. Refer to Ambient Light Sensor Replacement in Lighting Systems.
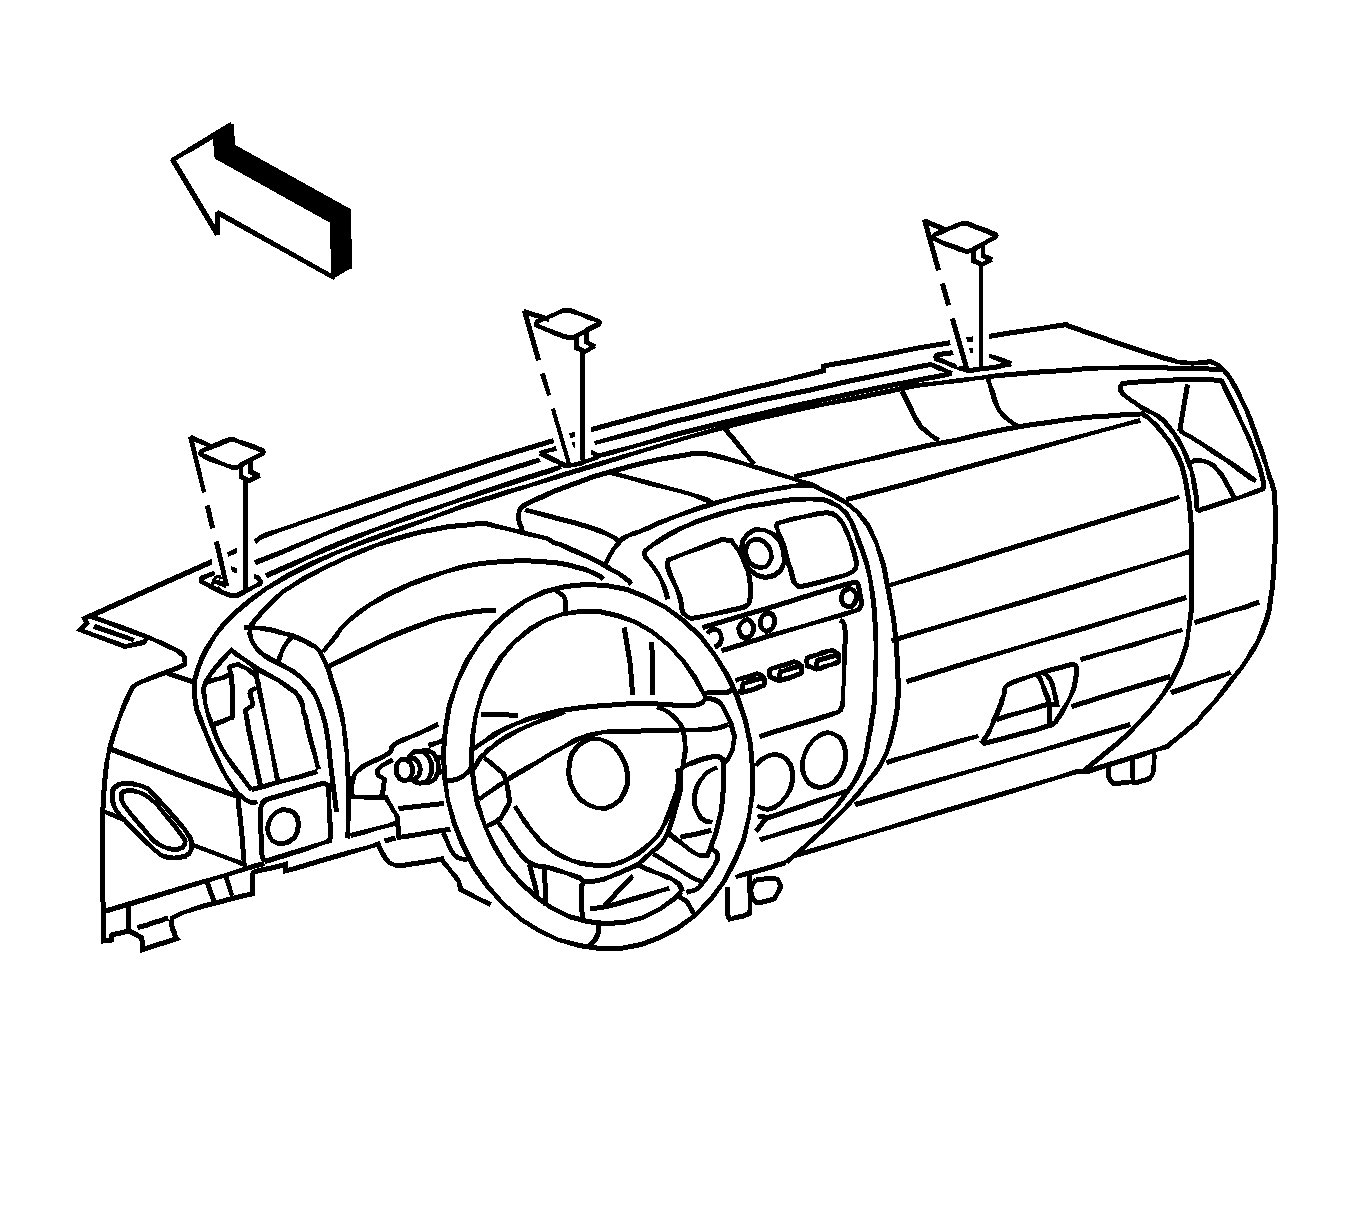
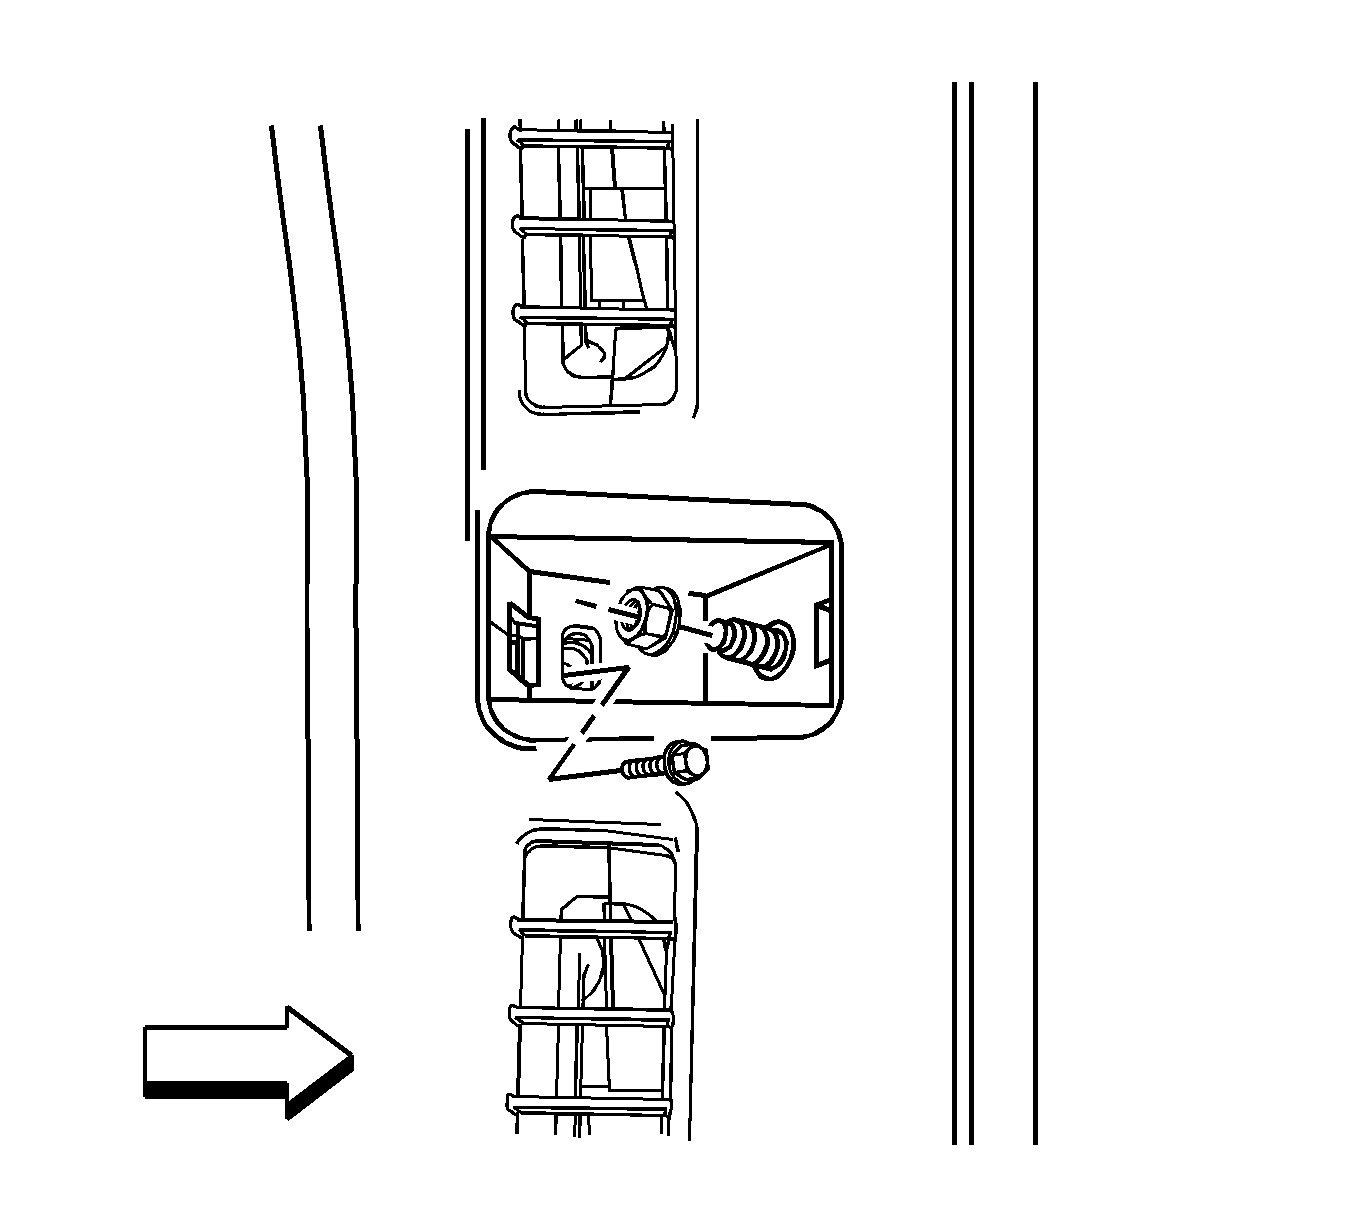
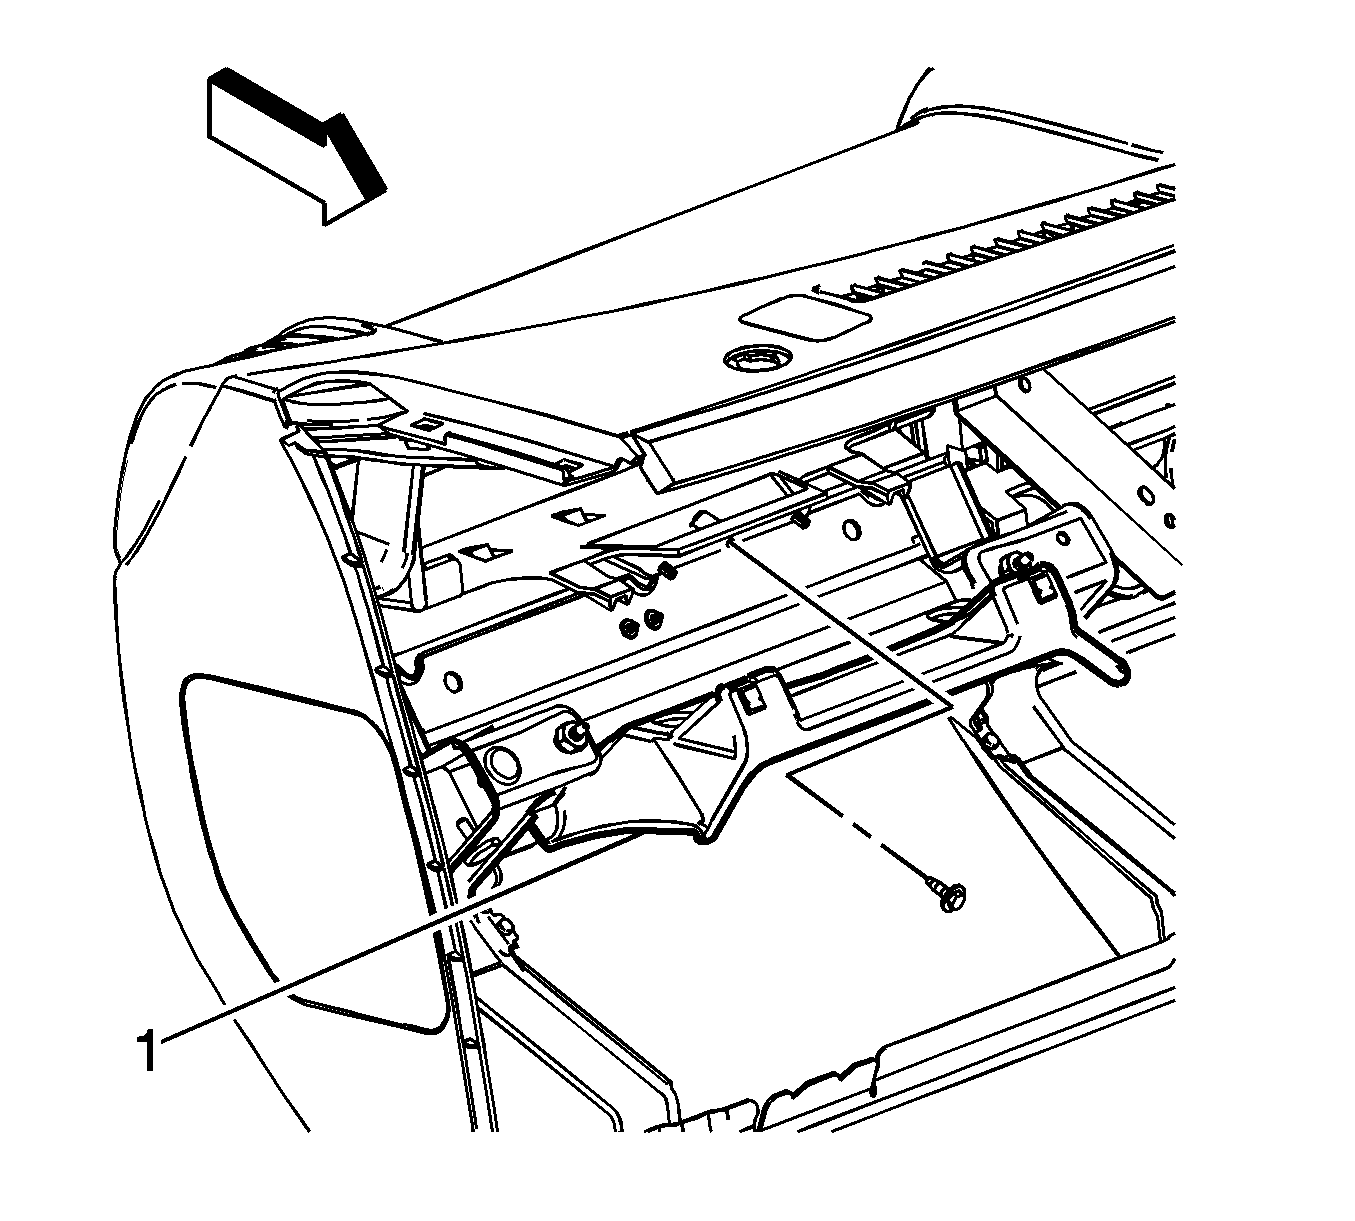
- Remove the 3 upper I/P bolt covers located on top of the I/P.
- Remove the 3 upper I/P nuts retaining the I/P to the bulkhead.
- Remove the 3 upper HVAC duct screws retaining the duct to the I/P.
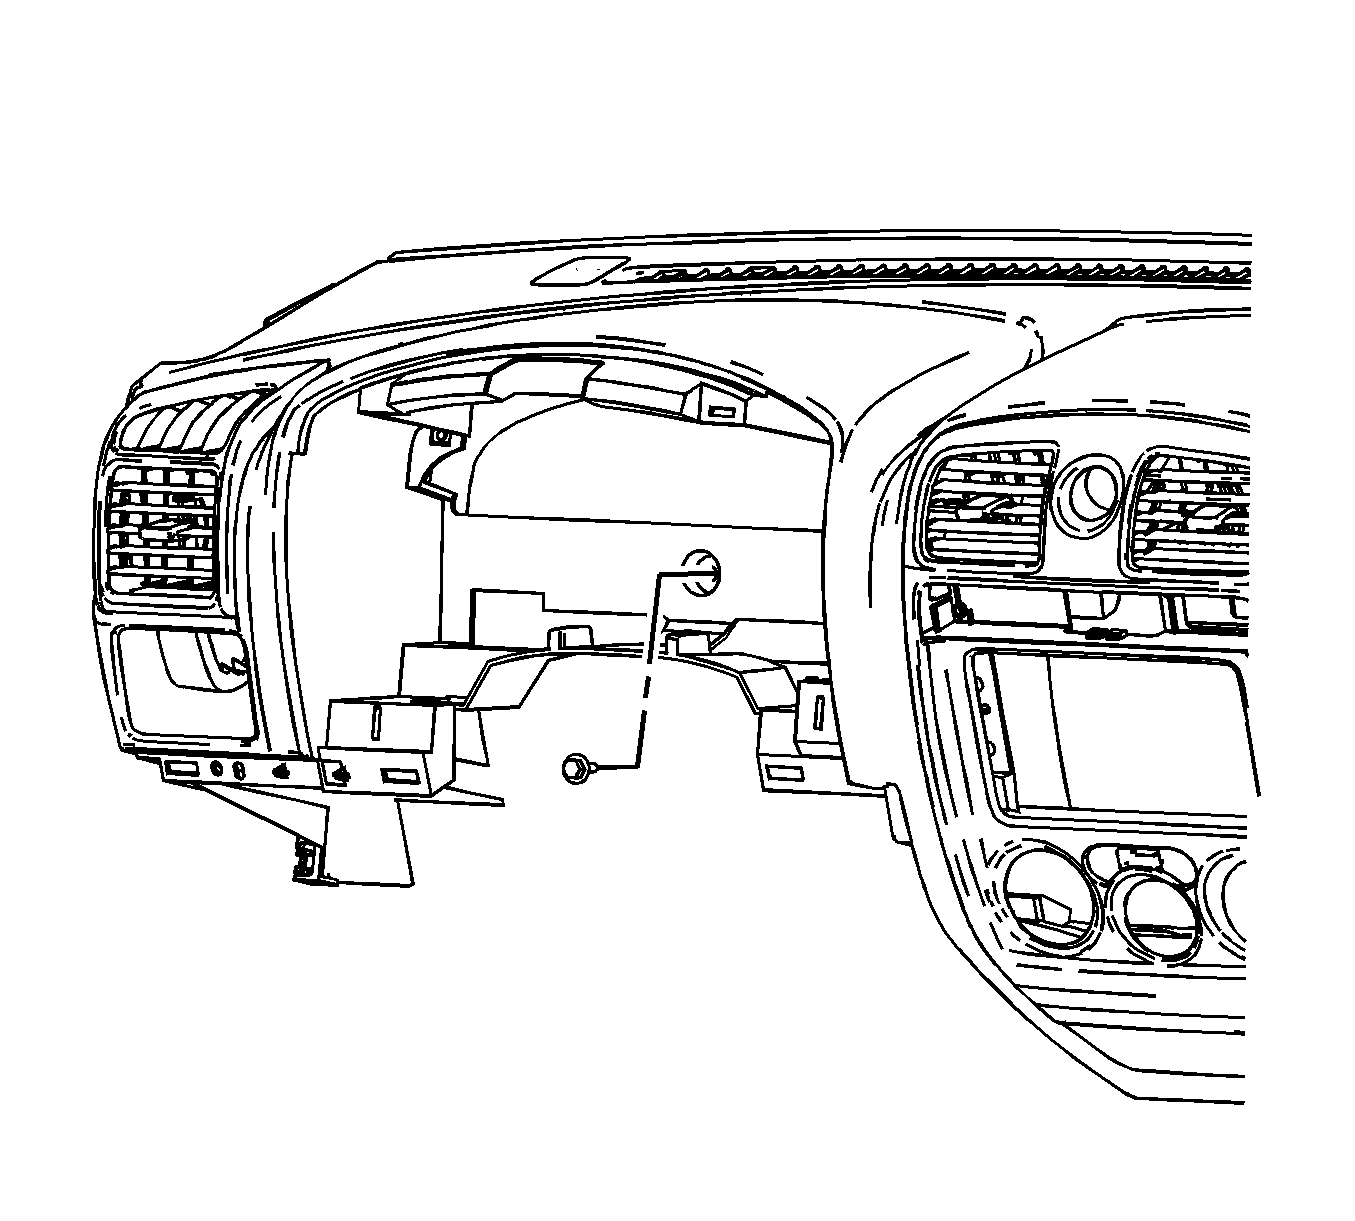
- Remove the screw located behind the IPC.
- Remove the 2 screws retaining the I/P compartment door latch.
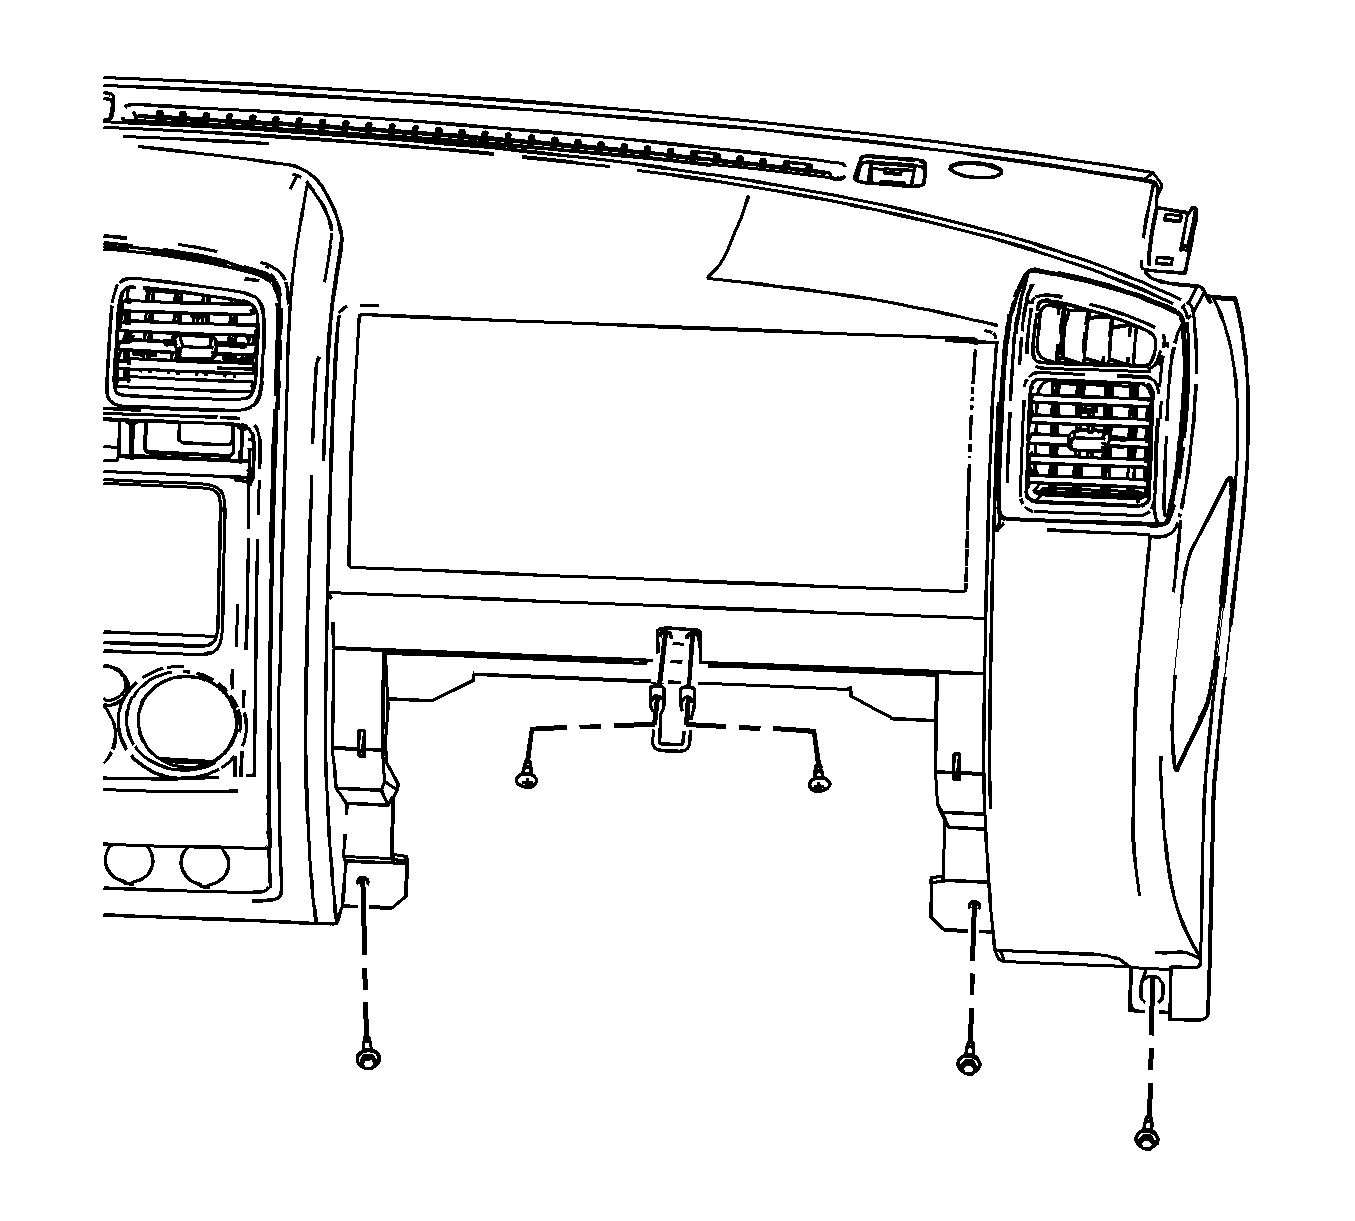
- Remove the 3 lower I/P retaining screws located near the I/P storage compartment.
- Remove the hazard switch harness from the routing hole.
- Remove the digital radio receiver. Refer to Digital Radio Receiver Replacement in Entertainment.
- Remove the instrument panel module (IPM). Refer to Inflatable Restraint Instrument Panel Module Replacement in SIR.
- Remove the 2 screws located in the IPM opening.
- Remove the screw from the I/P end cap.
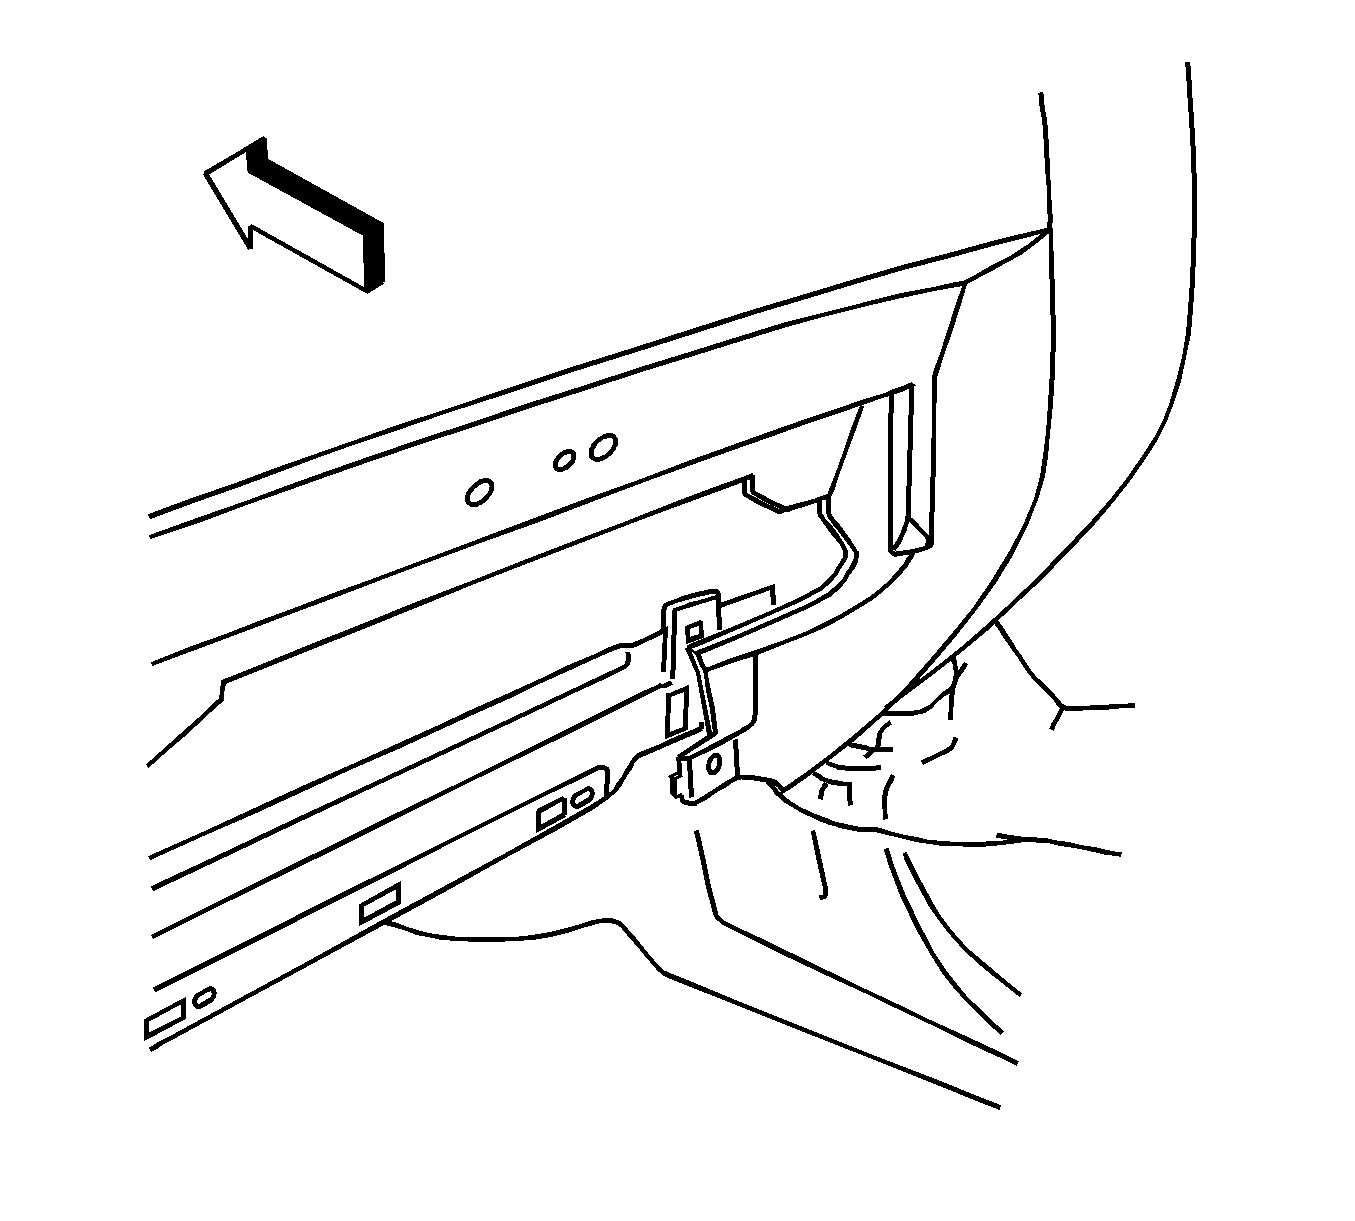
- Pull the I/P compartment folding panel (1) down and rearward to reveal the screw.
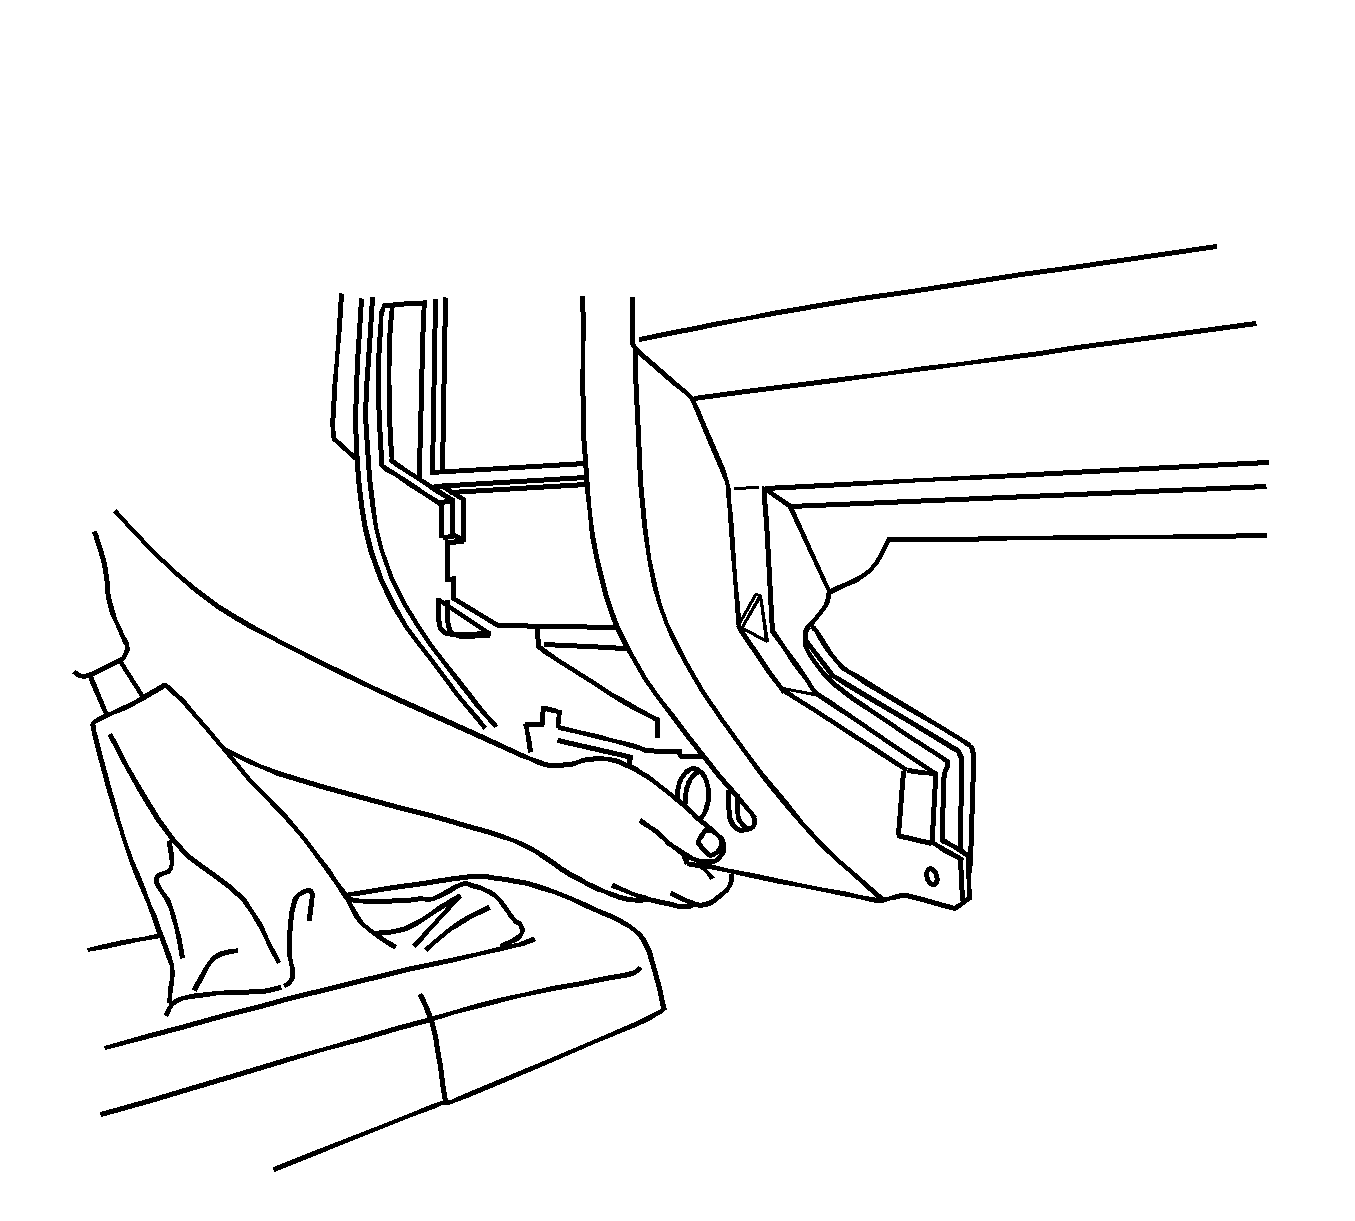
- Reach through the I/P storage compartment opening and remove the screw retaining the I/P carrier to the I/P structure.
- If equipped, disconnect the accessory power outlet electrical connectors.
- Grasp the lower center edge of the I/P and pull rearward in order to release the 2 retaining clips.
- Grasp the lower right edge of the I/P and pull rearward in order to release the retaining clip.
- Pull the I/P partially away from the I/P structure.
- Reach through the IPM opening and remove the I/P wiring harness clips (1) from the I/P.
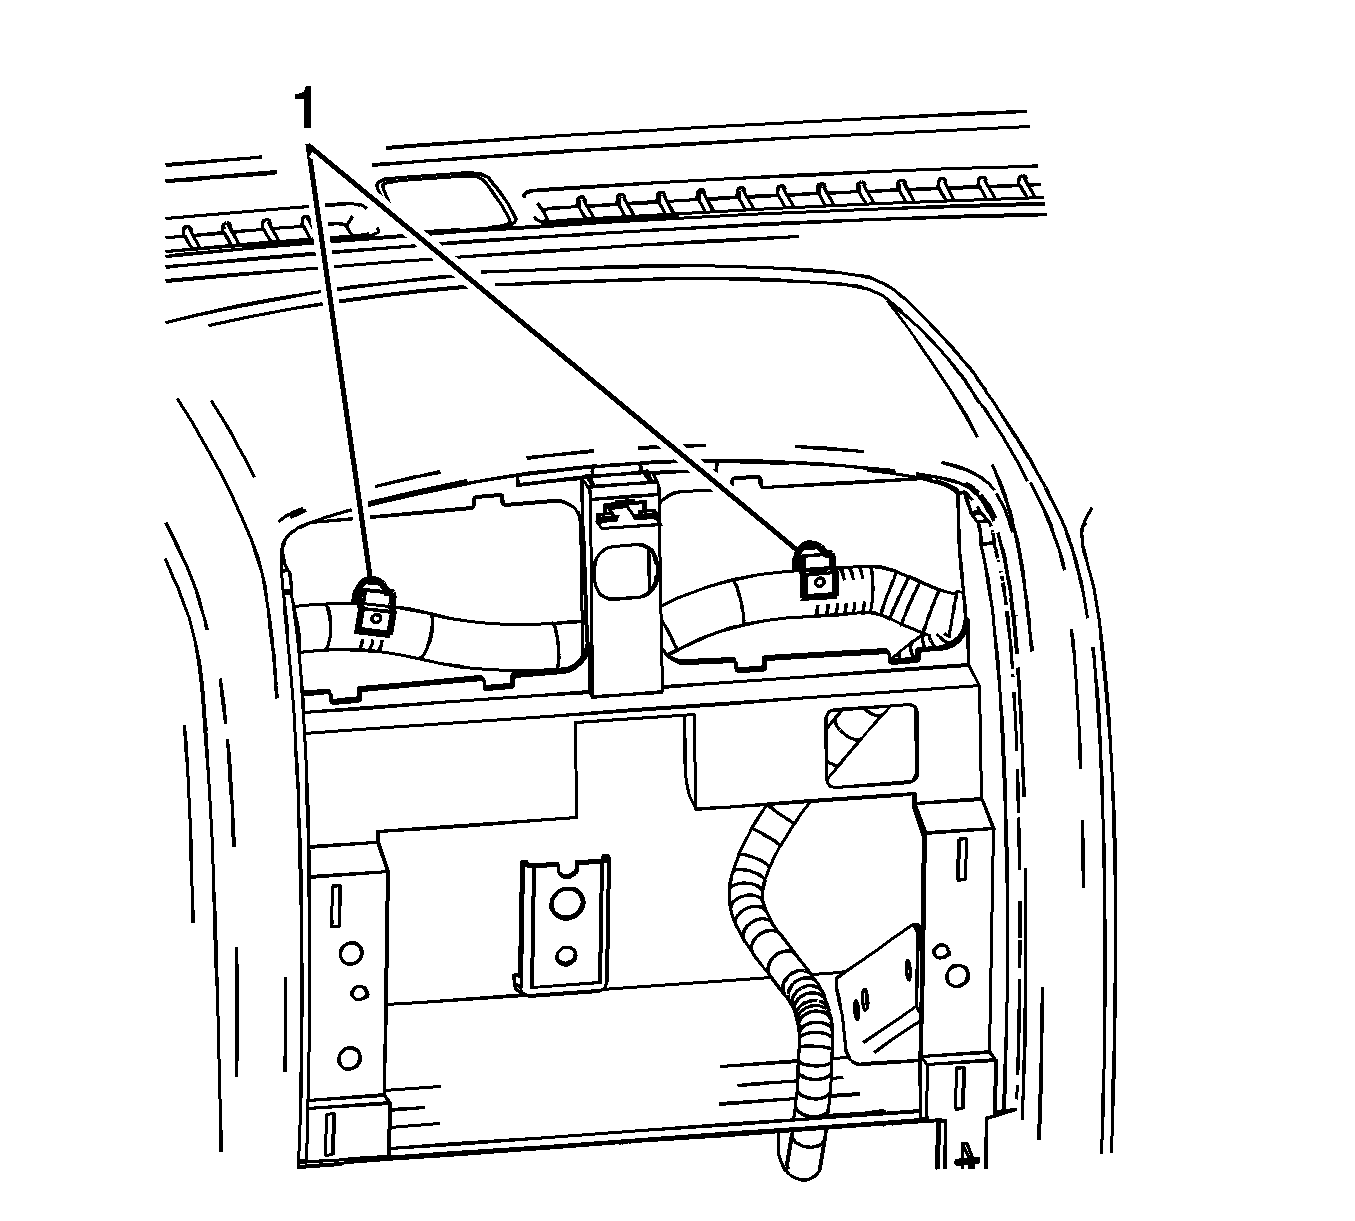
- Reach through the center stack opening and remove the I/P wiring harness clips (1) from the HVAC vent.
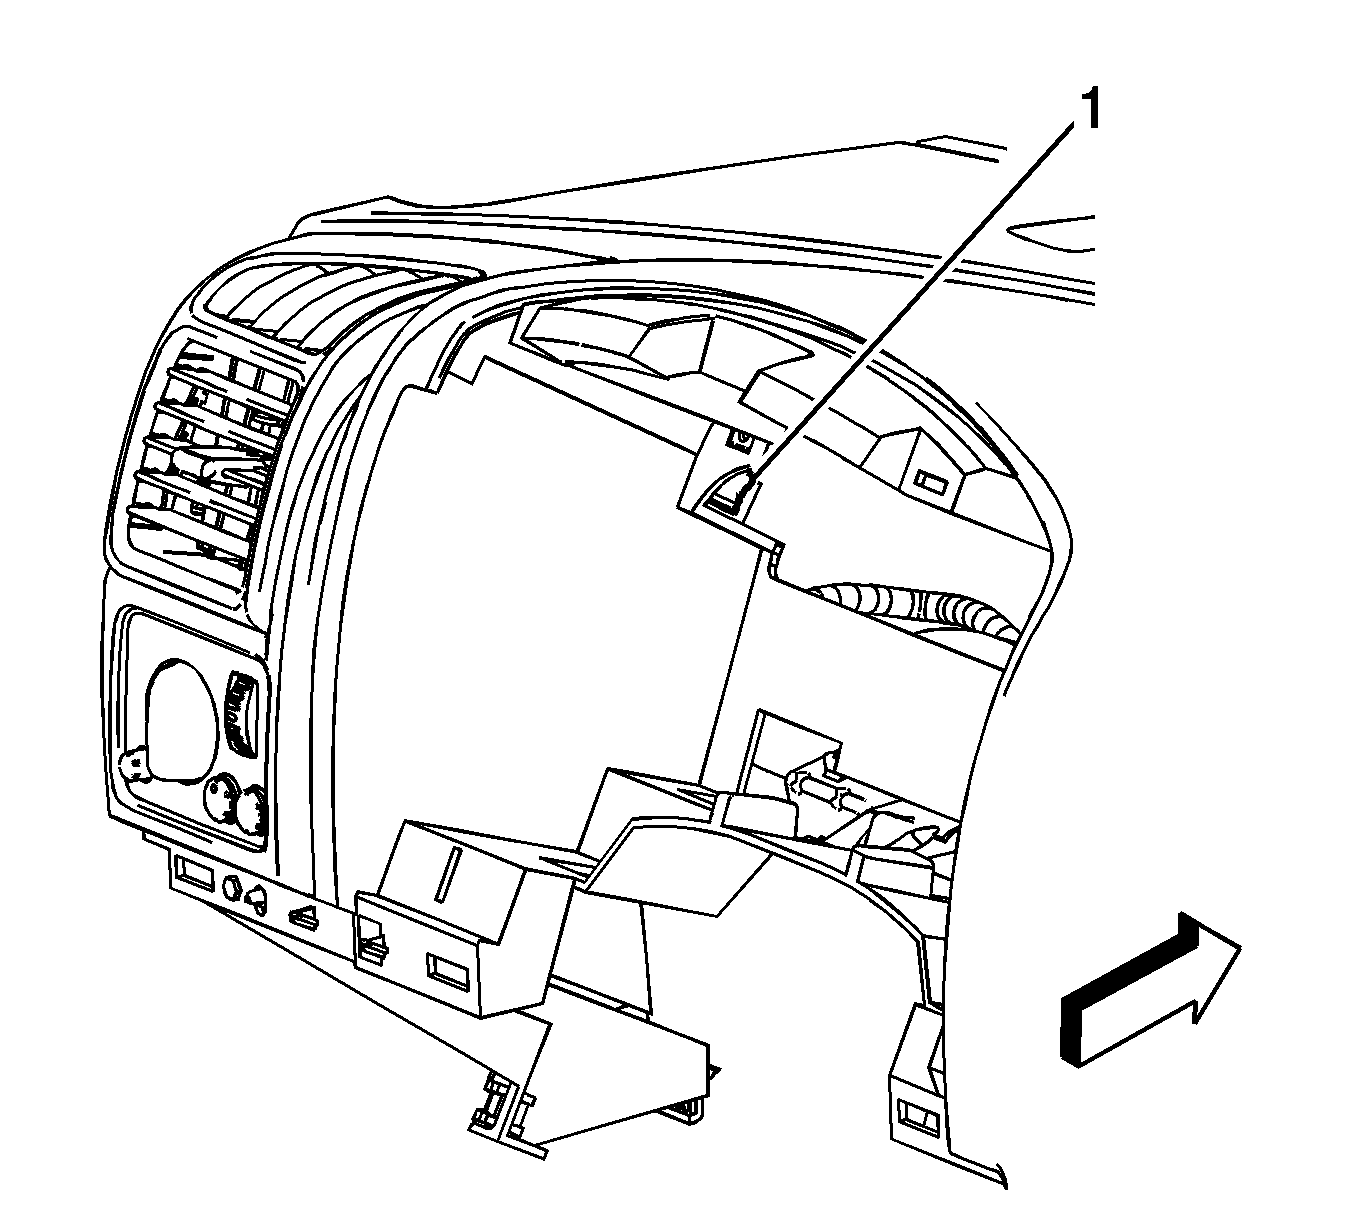
- Reach through the IPC opening and remove the I/P wiring harness clips (1) from the I/P.
- Reach through the left side of the IPC opening and remove the I/P wiring harness clips (1) from the I/P.
- With the aid of an assistant, carefully remove the I/P from the vehicle.
If removing the I/P, disconnect the headlamp switch electrical connector.


Installation Procedure
- With the aid of an assistant, partially install the I/P to the I/P structure.
- Reach through the left side of the IPC opening and install the I/P wiring harness clips (1) to the I/P.
- Reach through the IPC opening and install the I/P wiring harness clips (1) to the I/P.
- Reach through the center stack opening and install the I/P wiring harness clips (1) to the HVAC vent.
- Reach through the IPM opening and install the I/P wiring harness clips (1) to the I/P.
- Ensure all the wire harness and electrical connectors are not pinched between the I/P and I/P structure.
- Connect the electrical connectors to the power outlets.
- Grasp the lower center edge of the I/P and seat the 2 retaining clips.
- Grasp the lower right edge of the I/P and seat the retaining clip.
- Install the 3 upper HVAC duct screws retaining the duct to the I/P.
- Install the 3 upper nuts retaining the I/P to the bulkhead.
- Pull the I/P compartment folding panel (1) down and rearward to reveal the screw installation area.
- Reach through the I/P storage compartment opening and install the screw retaining the I/P carrier to the I/P structure.
- Install the 2 screws located in the IPM opening.
- Install the end cap screw.
- Install the hazard switch harness through the routing hole.
- Install the 2 screws retaining the I/P compartment door latch.
- Install the 3 lower I/P retaining screws located near the I/P storage compartment.
- Install the screw located behind the IPC.
- Install the 3 upper I/P bolt covers located on top of the I/P.
- Install the DRL sensor to the I/P. Refer to Ambient Light Sensor Replacement in Lighting Systems.
- If replacing the I/P, install the headlamp switch. Refer to Headlamp Switch Replacement .
- Install the left air outlet. Refer to Instrument Panel Outer Air Outlet Replacement - Left Side in Heating, Ventilation, and Air Conditioning.
- Install the IPC. Refer to Instrument Cluster Replacement .
- Install the IPC bezel. Refer to Instrument Panel Cluster Trim Plate Bezel Replacement .
- Install the knee bolster. Refer to Knee Bolster Replacement .
- Install the knee bolster trim panel. Refer to Driver Knee Bolster Panel Replacement .
- Install the IPM. Refer to Inflatable Restraint Instrument Panel Module Replacement in SIR.
- Install the digital radio receiver. Refer to Digital Radio Receiver Replacement in Entertainment.
- Install the right air outlet. Refer to Instrument Panel Outer Air Outlet Replacement - Right Side in Heating, Ventilation, and Air Conditioning.
- Install the HVAC control assembly. Refer to Heater and Air Conditioning Control Replacement in HVAC Systems - Manual.
- Install the radio. Refer to Radio Replacement in Entertainment.
- Install the accessory trim panel. Refer to Instrument Panel Accessory Trim Plate Replacement .
- Install the I/P storage compartment door. Refer to Instrument Panel Storage Compartment Replacement .
- Install the left and right windshield garnish moldings. Refer to Windshield Pillar Garnish Molding Replacement in Interior Trim.
- Install the left and right hinge pillar trim panels. Refer to Body Hinge Pillar Trim Panel Replacement - Left Side and Body Hinge Pillar Trim Panel Replacement - Right Side in Interior Trim.
- Install the left and right front door sill plates. Refer to Front Side Door Sill Plate Replacement in Interior Trim.
- Install the lower center I/P extension. Refer to Instrument Panel Lower Center Trim Replacement .
- Enable the SIR system. Refer to SIR Disabling and Enabling and SIR Disabling and Enabling in SIR.
Notice: Use the correct fastener in the correct location. Replacement fasteners must be the correct part number for that application. Fasteners requiring replacement or fasteners requiring the use of thread locking compound or sealant are identified in the service procedure. Do not use paints, lubricants, or corrosion inhibitors on fasteners or fastener joint surfaces unless specified. These coatings affect fastener torque and joint clamping force and may damage the fastener. Use the correct tightening sequence and specifications when installing fasteners in order to avoid damage to parts and systems.
Tighten
Tighten the screws to 3 N·m (27 lb in).
Tighten
Tighten the nuts to 9 N·m (80 lb in).
Tighten
Tighten the screw to 3 N·m (27 lb in).
Tighten
Tighten the screws to 3 N·m (27 lb in).
Tighten
Tighten the screws to 2.5 N·m (22 lb in).
Tighten
Tighten the screws to 3 N·m (27 lb in).
Tighten
Tighten the screws to 9 N·m (80 lb in).
Tighten
Tighten the screw to 9 N·m (80 lb in).
If reinstalling the original I/P, connect the headlamp switch electrical connector.
