For 1990-2009 cars only
Removal Procedure
- Remove the air cleaner assembly. Refer to Air Cleaner Assembly Replacement in Engine Controls - 2.8L (LK5) or to Air Cleaner Assembly Replacement in Engine Controls - 3.5L (L52).
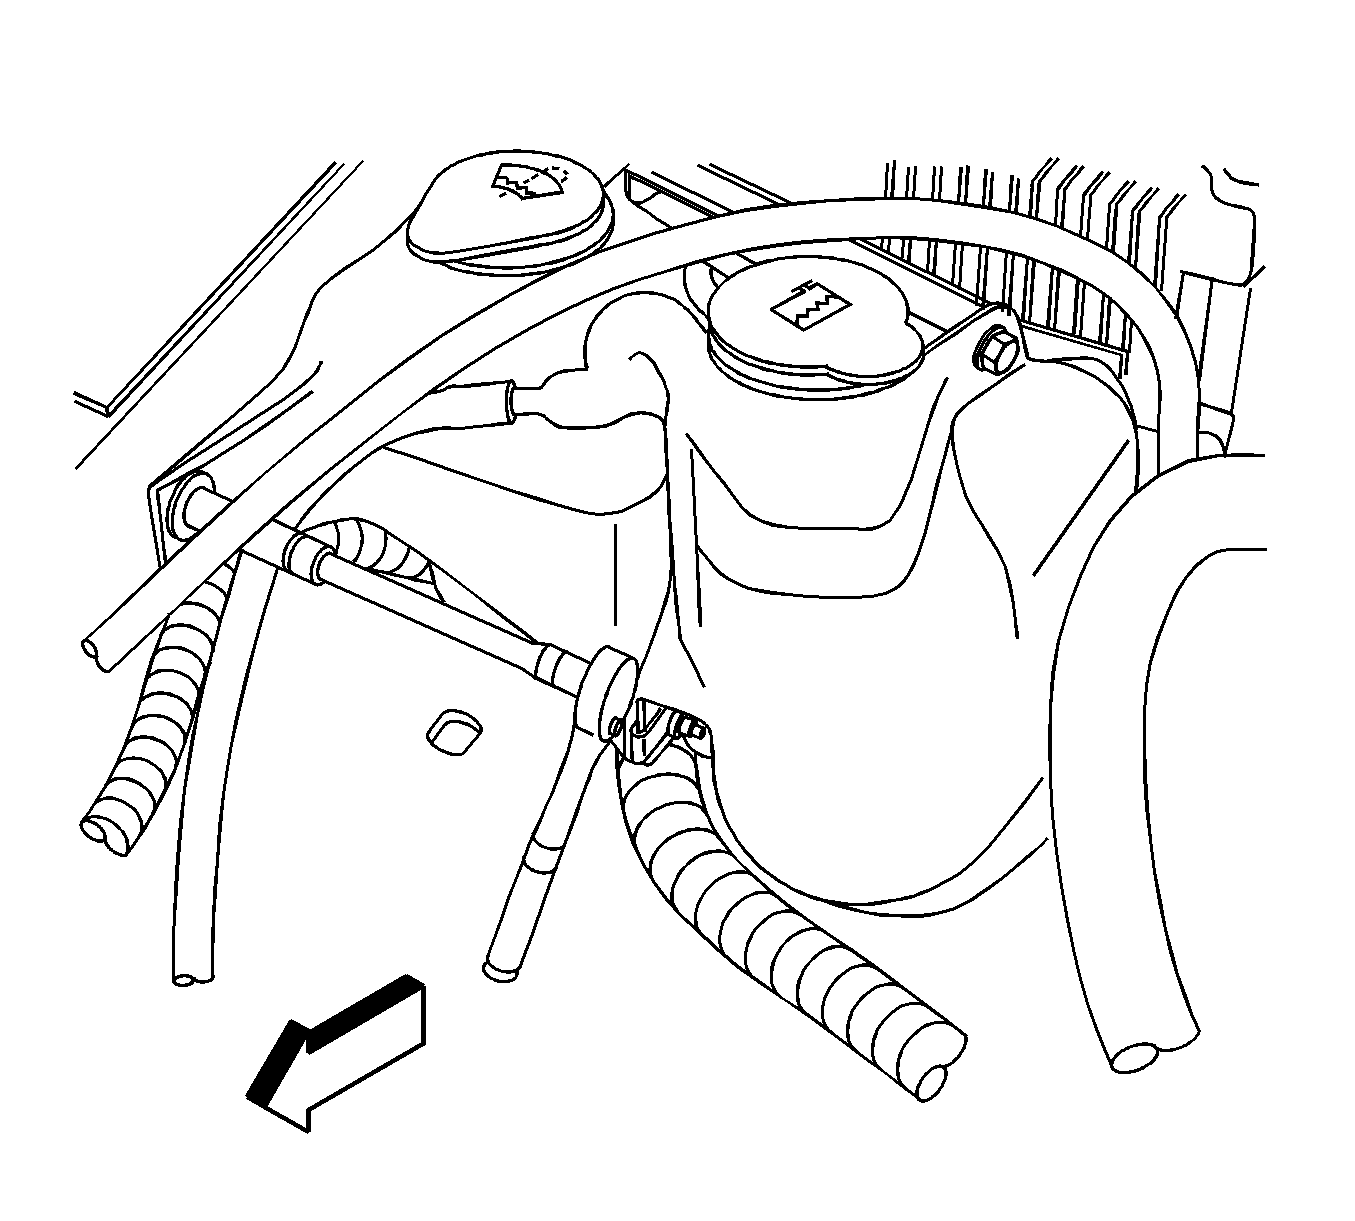
- Remove the washer container to fender flange fasteners.
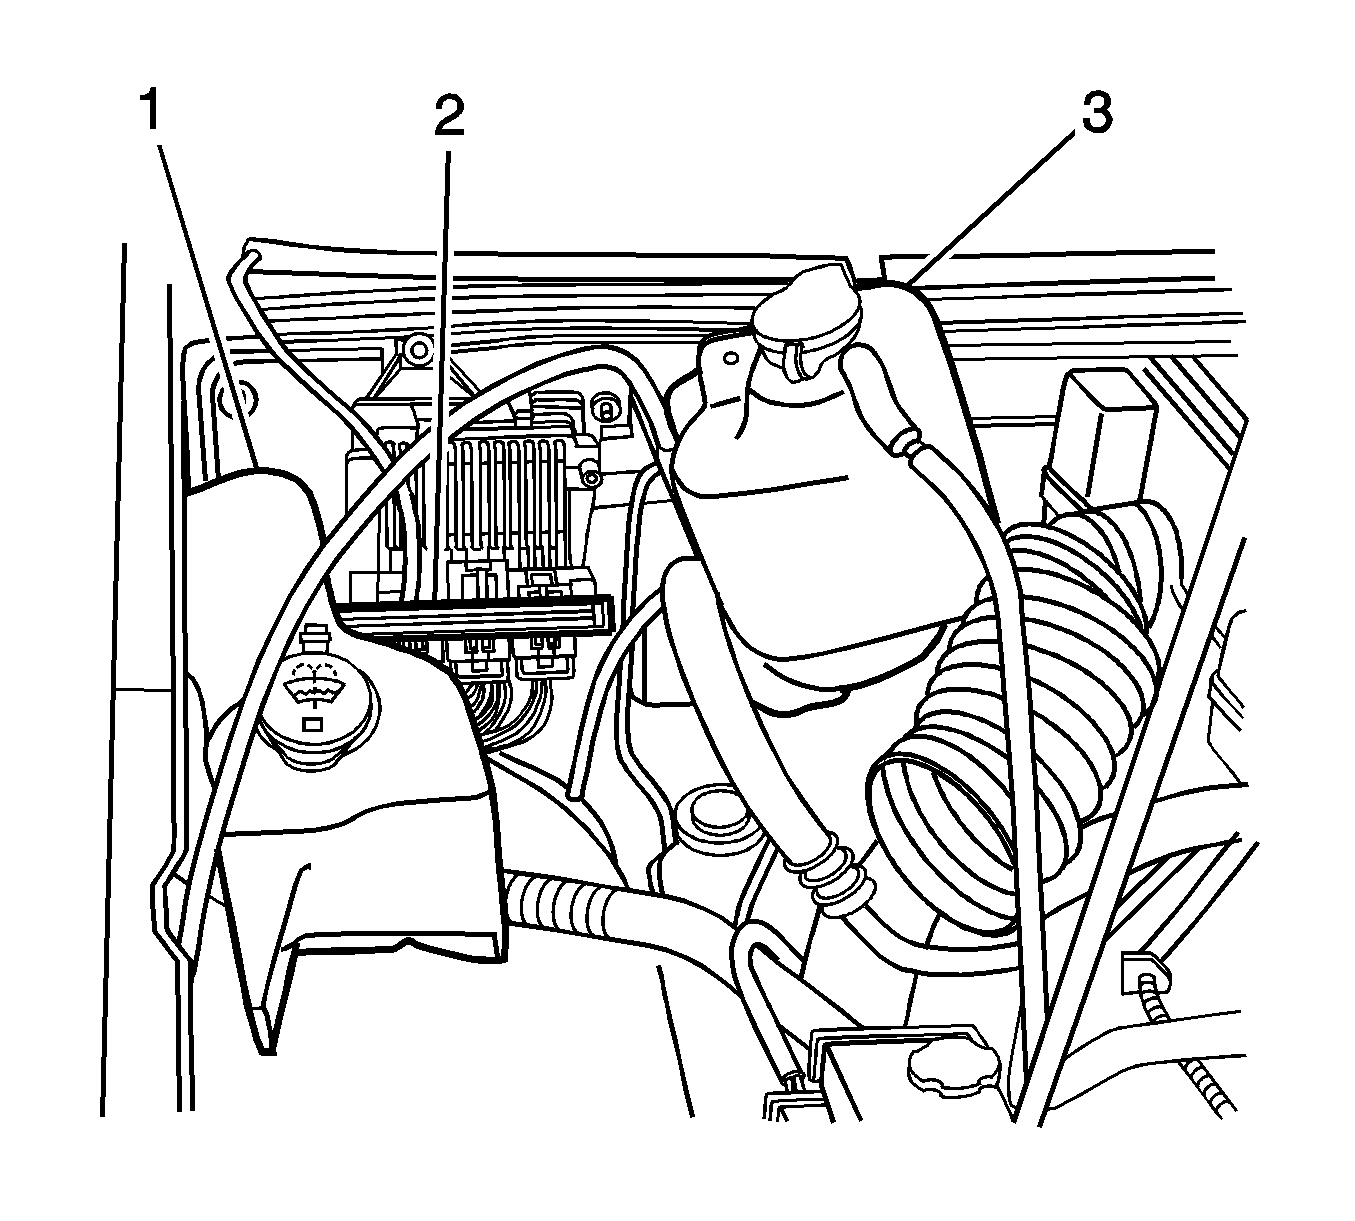
- Remove the coolant reservoir to wheelhouse fastener (3).
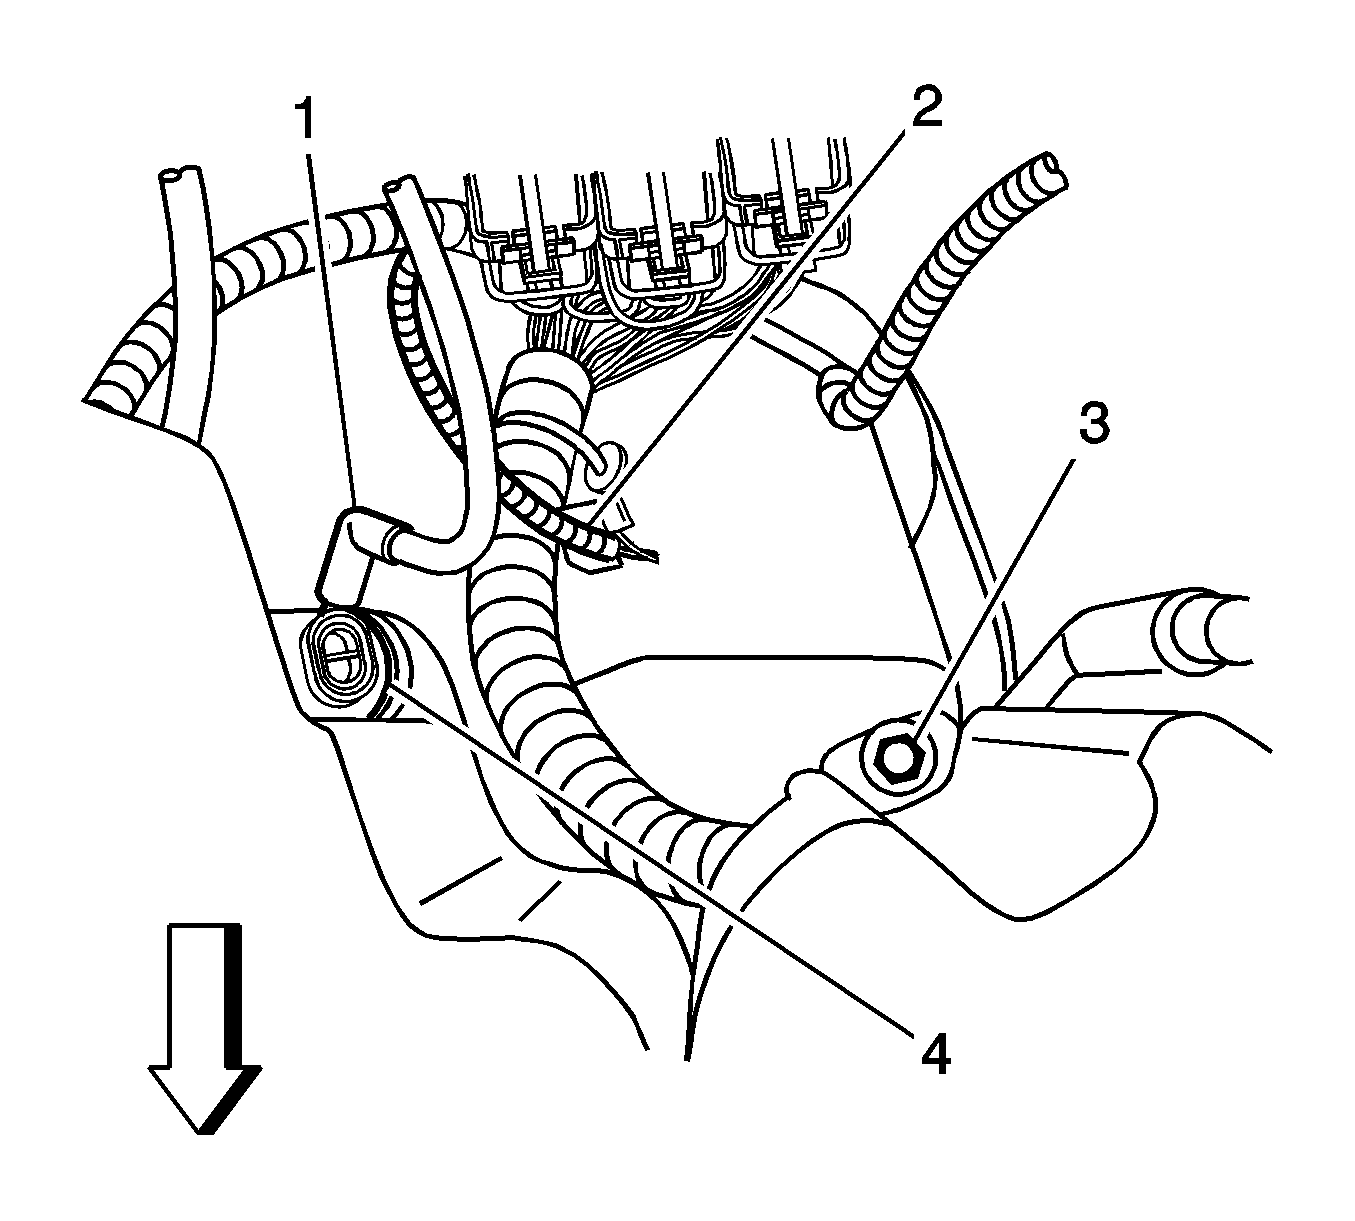
- Disconnect the electrical connector (2) from the washer pump (4).
- Remove the bolt securing the washer container to the top bracket.
- Remove the bolt securing the washer/coolant reservoir to the J-clip.
- Position the coolant reservoir (3) off to the side.
- Remove the washer hose from the washer pump.
- Drain the washer solvent into a suitable container.
- Remove the washer solvent container from the vehicle.
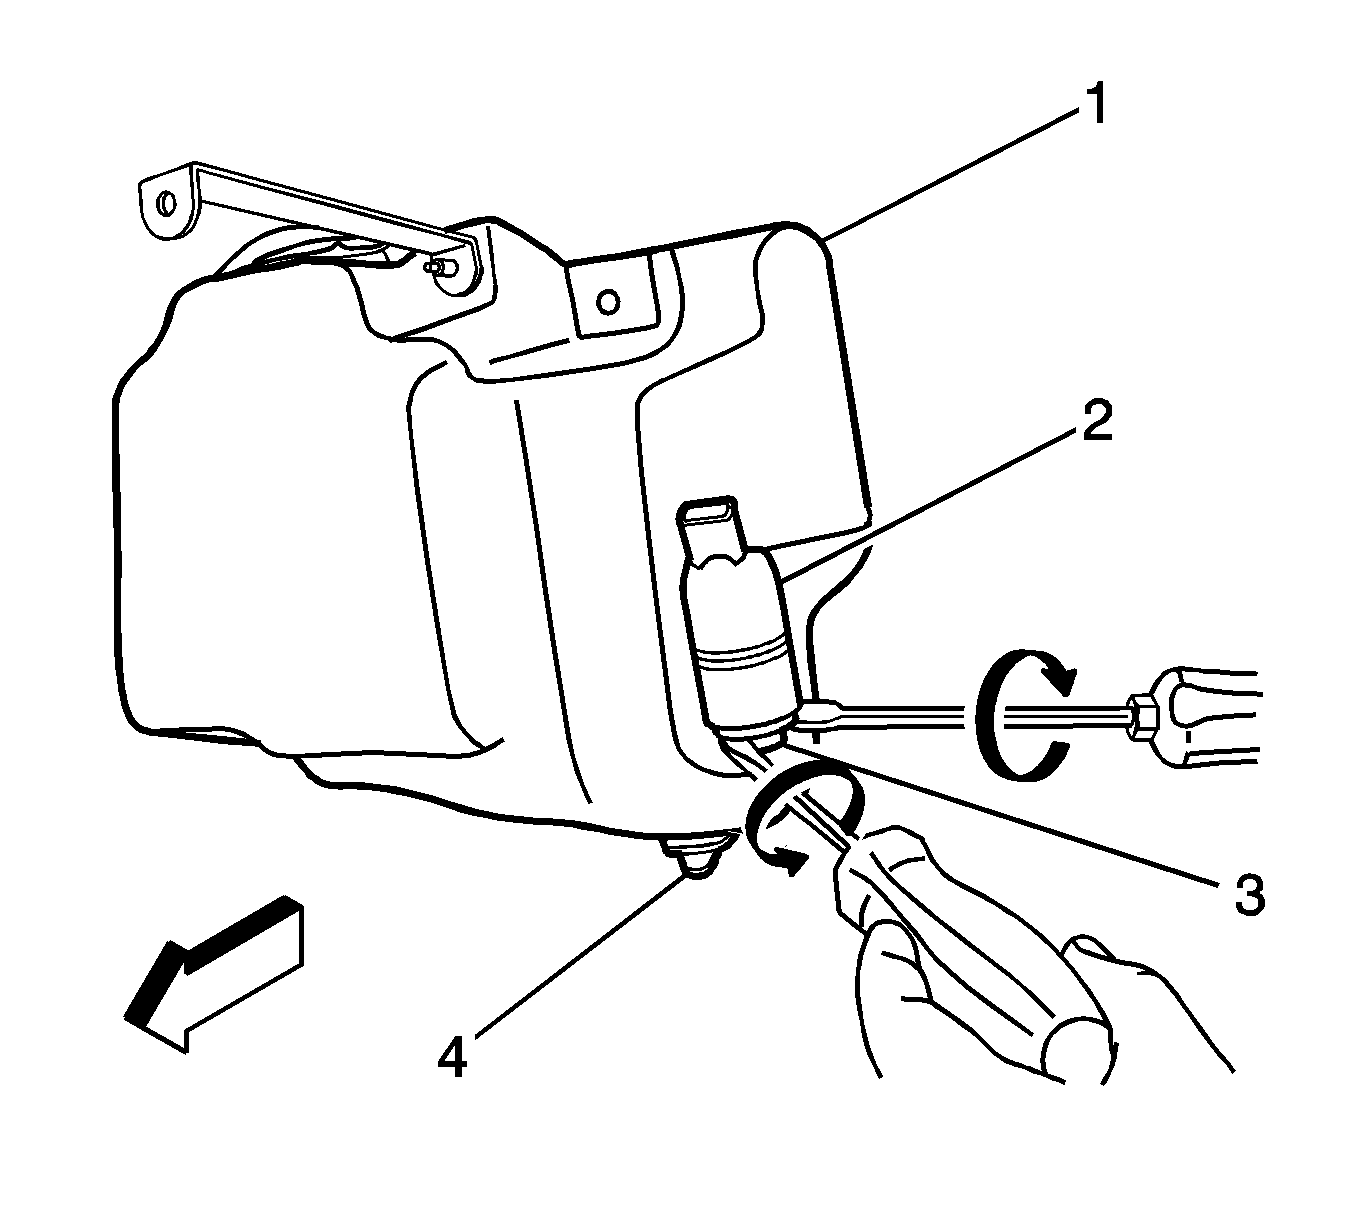
- Remove the pump (2), grommet (3), cap, and lower container grommet.
- Discard the washer solvent container (1).


Installation Procedure
- Install a new washer pump grommet into the container.
- Install the old cap and lower container grommet.
- Install the old pump into the new pump grommet.
- Use clean washer solvent on the washer pump grommet to aid in the pump installation.
- Secure the top of the pump to the container.
- Position the washer solvent container (1) to the fender flange and loosely install the bolts.
- Position the coolant reservoir (3) to the washer solvent container (1).
- Loosely install the bolt to the upper bracket (2) in order to secure the coolant reservoir to the wheelhouse.
- Loosely install the bolt in order to secure the bracket (2) to the washer solvent container (1).
- Tighten the washer container to fender flange bolts to 9 N·m (81 lb in).
- Tighten the washer solvent container bracket bolt to 9 N·m (81 lb in).
- Tighten the bolt/J-clip securing both washer/coolant containers together to 9 N·m (81 lb in).
- Tighten the coolant reservoir to wheelhouse bolt to 9 N·m (81 lb in).
- Secure the washer hose (1) to the washer pump (4).
- Connect the electrical connector (2) to the washer pump (4).
- Install the air cleaner assembly. Refer to Air Cleaner Assembly Replacement in Engine Controls - 2.8L (LK5) or to Air Cleaner Assembly Replacement in Engine Controls - 3.5L (L52).
- Fill the washer solvent container with clean washer solvent.
- Test the washer system and inspect for leaks.
- Close the hood.

Notice: Refer to Fastener Notice in the Preface section.
Tighten

