GM Service Manual Online
For 1990-2009 cars only

Removal Procedure

  1. Remove the oil level indicator and tube. Refer to Oil Level Indicator and Tube Replacement .
  2. Remove the engine protection shield. Refer to Engine Protection Shield Replacement in Frame and Underbody.
  3. Drain the engine oil. Refer to Engine Oil and Oil Filter Replacement .
  4. Remove the applicable components in order to gain clearance to remove the oil pan:
  5. • RWD
    • Remove the power steering gear. Refer to Steering Gear Replacement in Power Steering System.
    • 4WD
        1. Remove the front propeller shaft. Refer to Front Propeller Shaft Replacement in Propeller Shaft.

    Object Number: 1339814  Size: SH
        2. Remove the differential carrier assembly bushing to frame bolts ONLY.
        3. Pull the differential carrier assembly downward.
        4. Secure the pinion yoke, in order to prevent the differential carrier from rotating.

    Object Number: 1350702  Size: SH
  6. Remove the service slot plug.
  7. Remove the nuts securing the fuel hose/pipe bracket to the transmission, and position aside.
  8. Remove 4 lower transmission mounting bolts that are attached to the oil pan.
  9. For the 4WD only, remove the power steering gear mounting bolts ONLY. Refer to Steering Gear Replacement in Power Steering System.
  10. Pull the power steering gear downward in order to gain access to the oil pan.
  11. Disconnect the engine wiring harness retainers from the oil pan.

  12. Object Number: 953957  Size: SH
  13. Remove the oil pan bolts.
  14. Install 2 bolts in the threaded holes at the rear of the oil pan to act as jack screws and tighten evenly to release the oil pan from the engine block.
  15. Remove the oil pan.
  16. Remove the 2 bolts from the jack screw holes.
  17. Clean and inspect the oil pan. Refer to Oil Pan Cleaning and Inspection .
  18. Clean and inspect the engine block sealing surface.

Installation Procedure


    Object Number: 858363  Size: SH

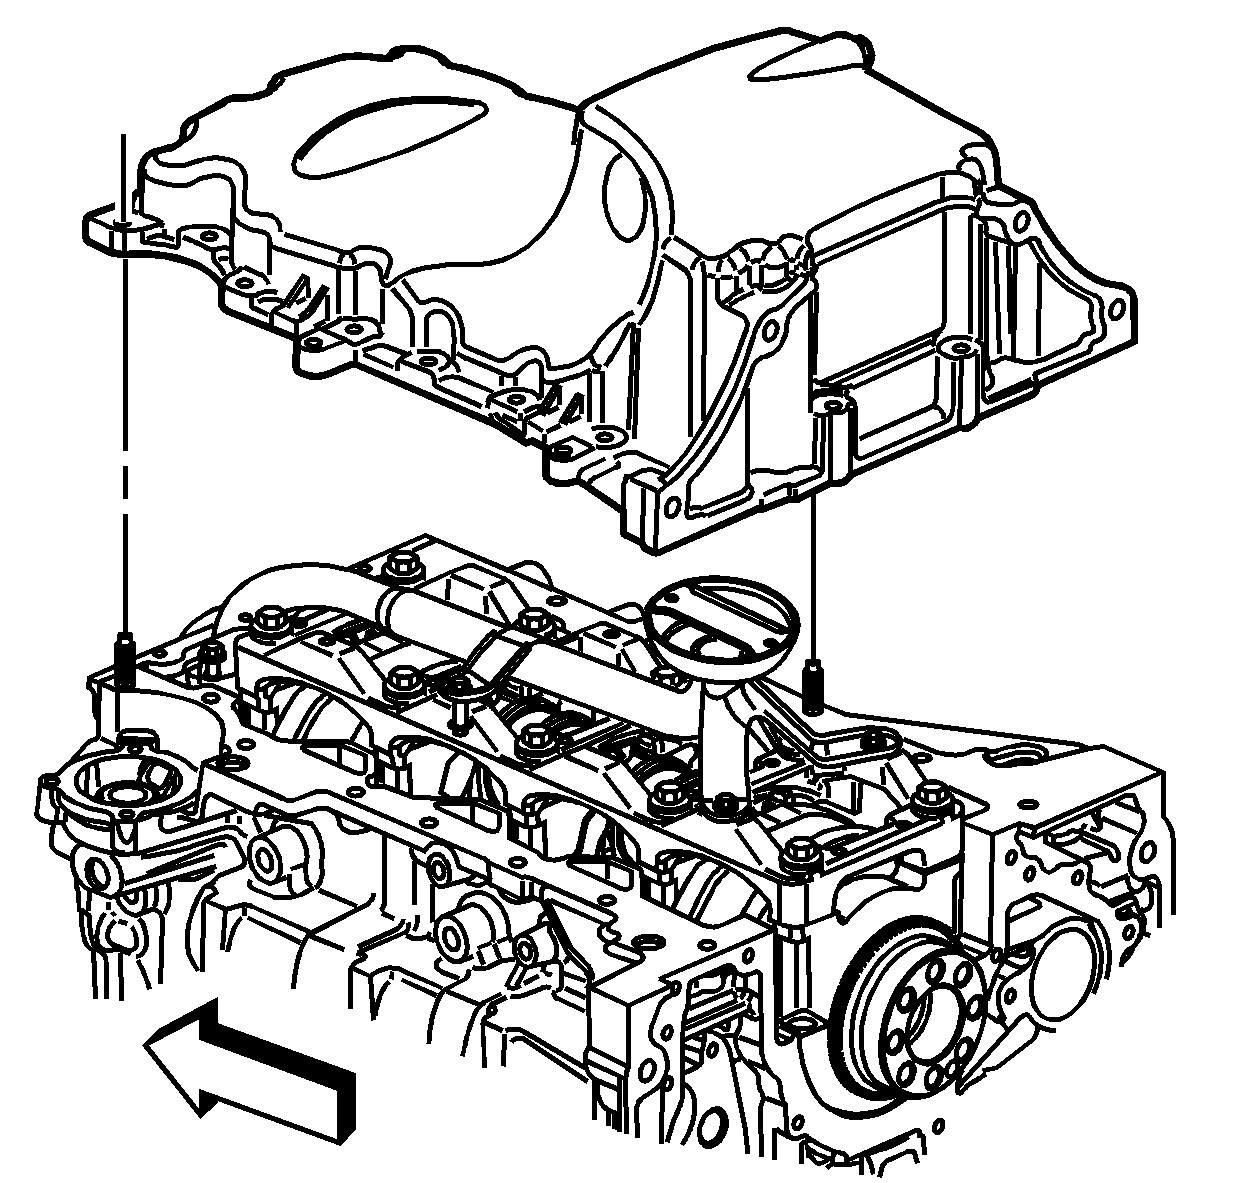
    Important: The oil pan must be installed within 10 minutes from when the sealer was applied.

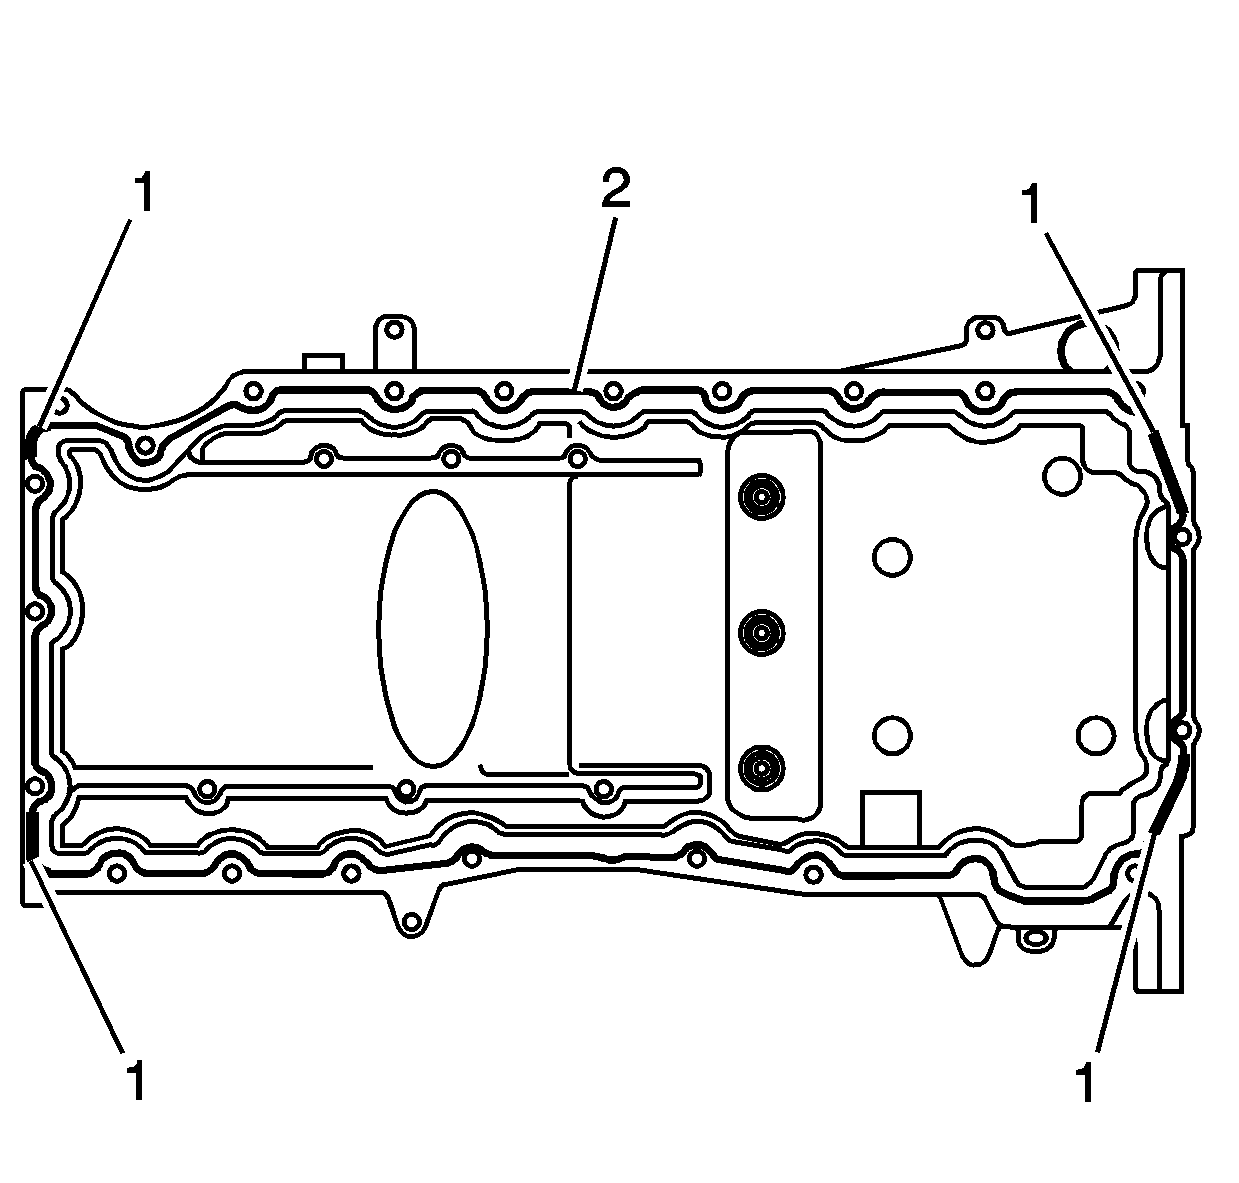
  1. Apply a 5.5 mm (0.22 in) bead of sealer to the oil pan in the areas marked (1). Refer to Adhesives, Fluids, Lubricants, and Sealers for the correct part number.
  2. Apply a 3 mm (0.12 in) bead of sealer to the oil pan in the area marked (2). Refer to Adhesives, Fluids, Lubricants, and Sealers for the correct part number.

  3. Object Number: 953957  Size: SH

    Important: Use care not to allow the sealer to contact the oil pump pipe and screen assembly.

  4. Position the oil pan to the engine block.

  5. Object Number: 858365  Size: SH

    Important: The rear oil pan surface needs to be flush with the rear block surface.

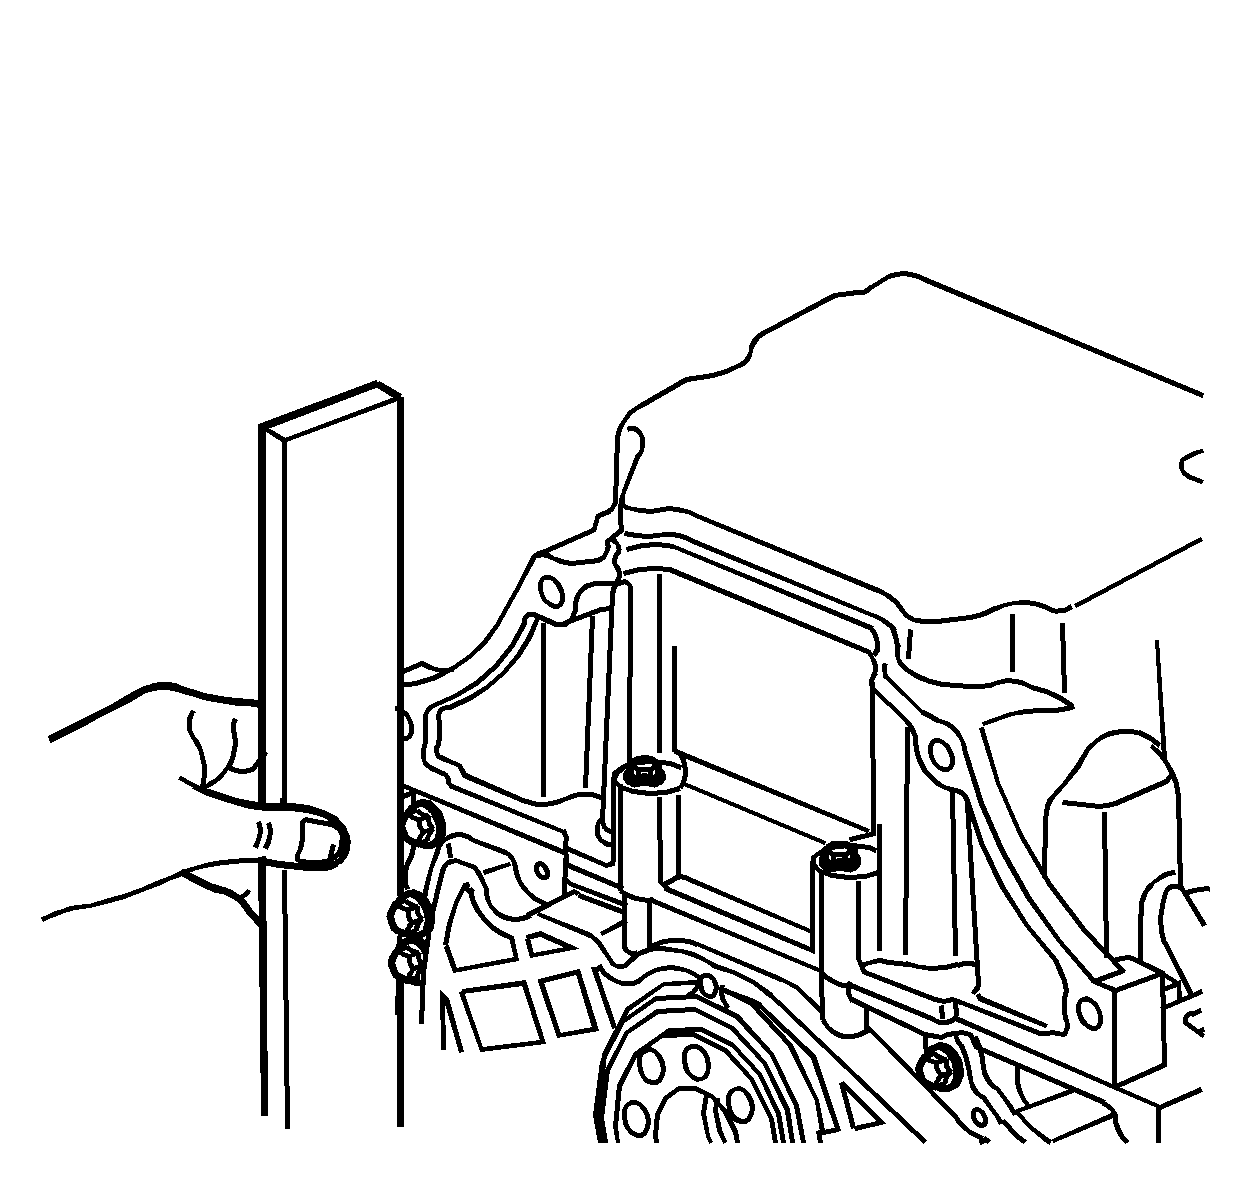
  6. Use the following applicable step to properly align the oil pan:
  7. • Transmission Removed
    • Use a straight edge at the rear of the block and oil pan for proper alignment.
    • Transmission Installed
    • Ensure the oil pan is positioned fully rearward against the transmission mounting surface.

    Notice: Refer to Fastener Notice in the Preface section.

  8. Install the oil pan bolts.
  9. Tighten the oil pan bolts.
  10. Tighten

        • Tighten the (side) oil pan bolts to 25 N·m (18 lb ft).
        • Tighten the (end) oil pan bolts to 10 N·m (89 lb in).
  11. Connect the engine wiring harness retainers to the oil pan.
  12. For the 4WD only, position the power steering gear upward to the frame assembly.
  13. For the 4WD only, install the power steering gear mounting bolts. Refer to Steering Gear Replacement in Power Steering System.

  14. Object Number: 1350702  Size: SH
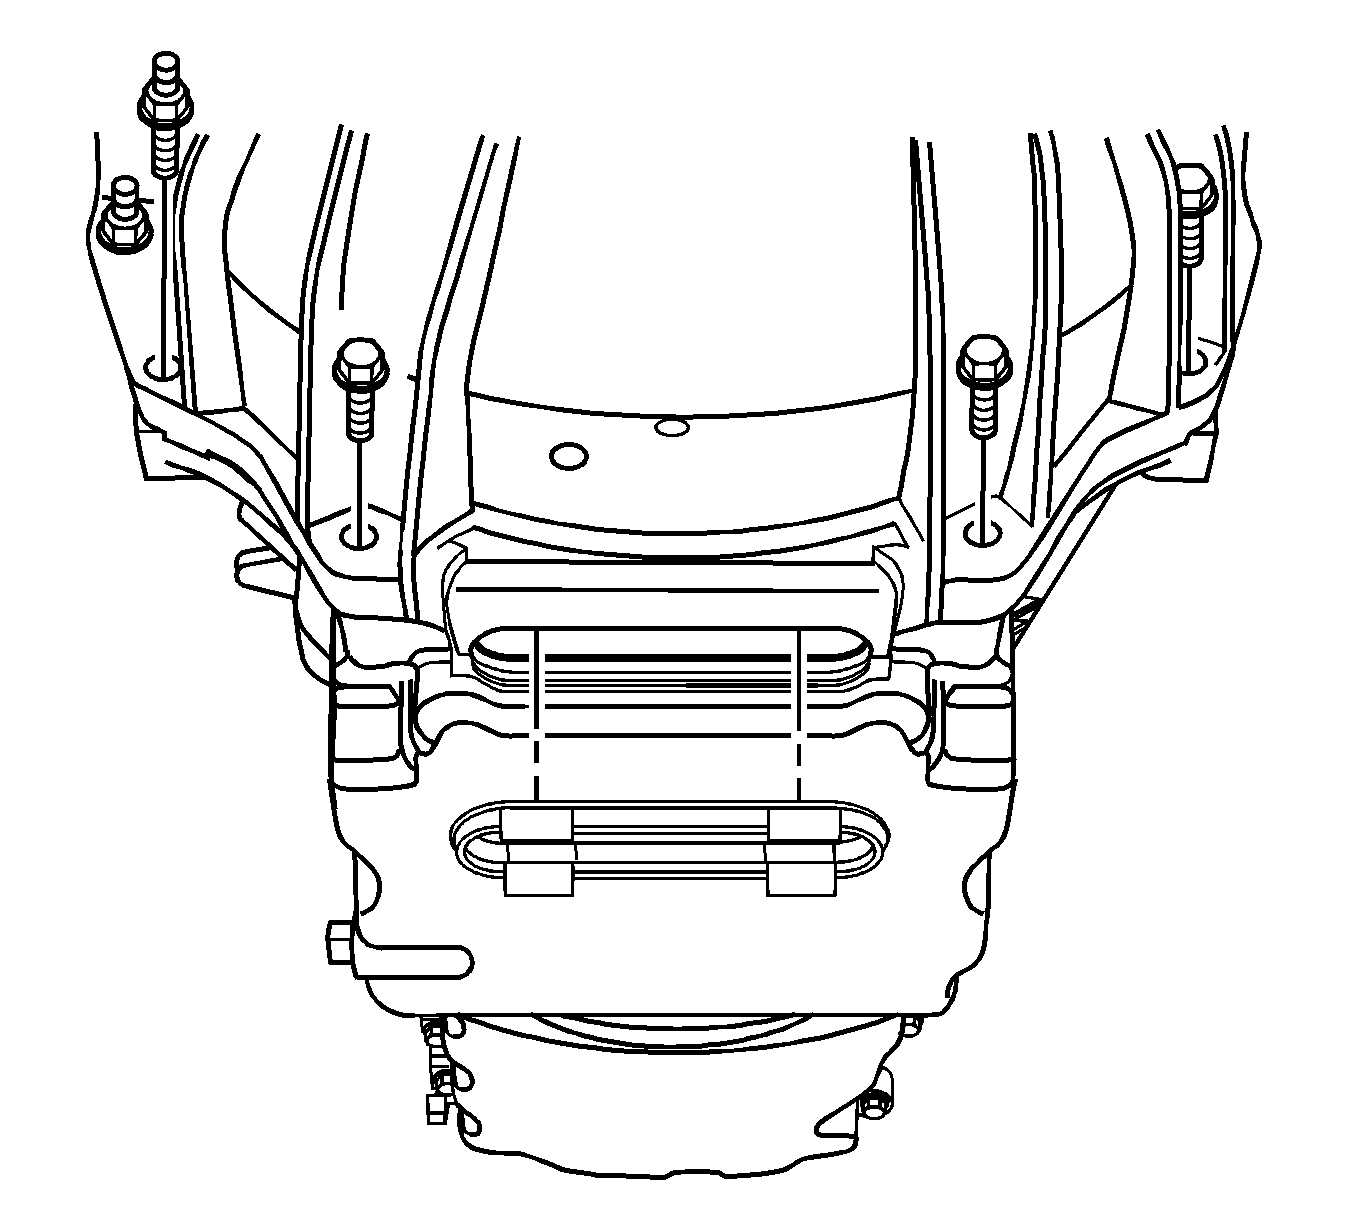
  15. Install the 4 lower transmission mounting bolts.
  16. Tighten
    Tighten the transmission mounting bolts to 50 N·m (37 lb ft).

  17. Install the nuts securing the fuel hose/pipe bracket to the transmission.
  18. Tighten
    Tighten the fuel hose/pipe bracket nuts to 20 N·m (15 lb ft).

  19. Install the service slot plug.
  20. Install the applicable components:
  21. • RWD
    • Install the power steering gear. Refer to Steering Gear Replacement in Power Steering System.
    • 4WD
        1. Position the differential carrier assembly to the frame.

    Object Number: 1339814  Size: SH
        2. Install the differential carrier assembly bushing to frame bolts.

    Tighten
    Tighten the differential carrier assembly bushing to frame bolts to 152 N·m (112 lb ft).

        3. Install the front propeller shaft. Refer to Front Propeller Shaft Replacement in Propeller Shaft.
  22. Install the engine protection shield. Refer to Engine Protection Shield Replacement in Frame and Underbody.
  23. Install the oil level indicator and tube. Refer to Oil Level Indicator and Tube Replacement .
  24. Fill the engine oil. Refer to Engine Oil and Oil Filter Replacement .