For 1990-2009 cars only
Removal Procedure
- Remove the air cleaner assembly. Refer to Air Cleaner Assembly Replacement .
- Support the engine with a hydraulic floor jack. Use a piece of wood between the floor jack and the oil pan.
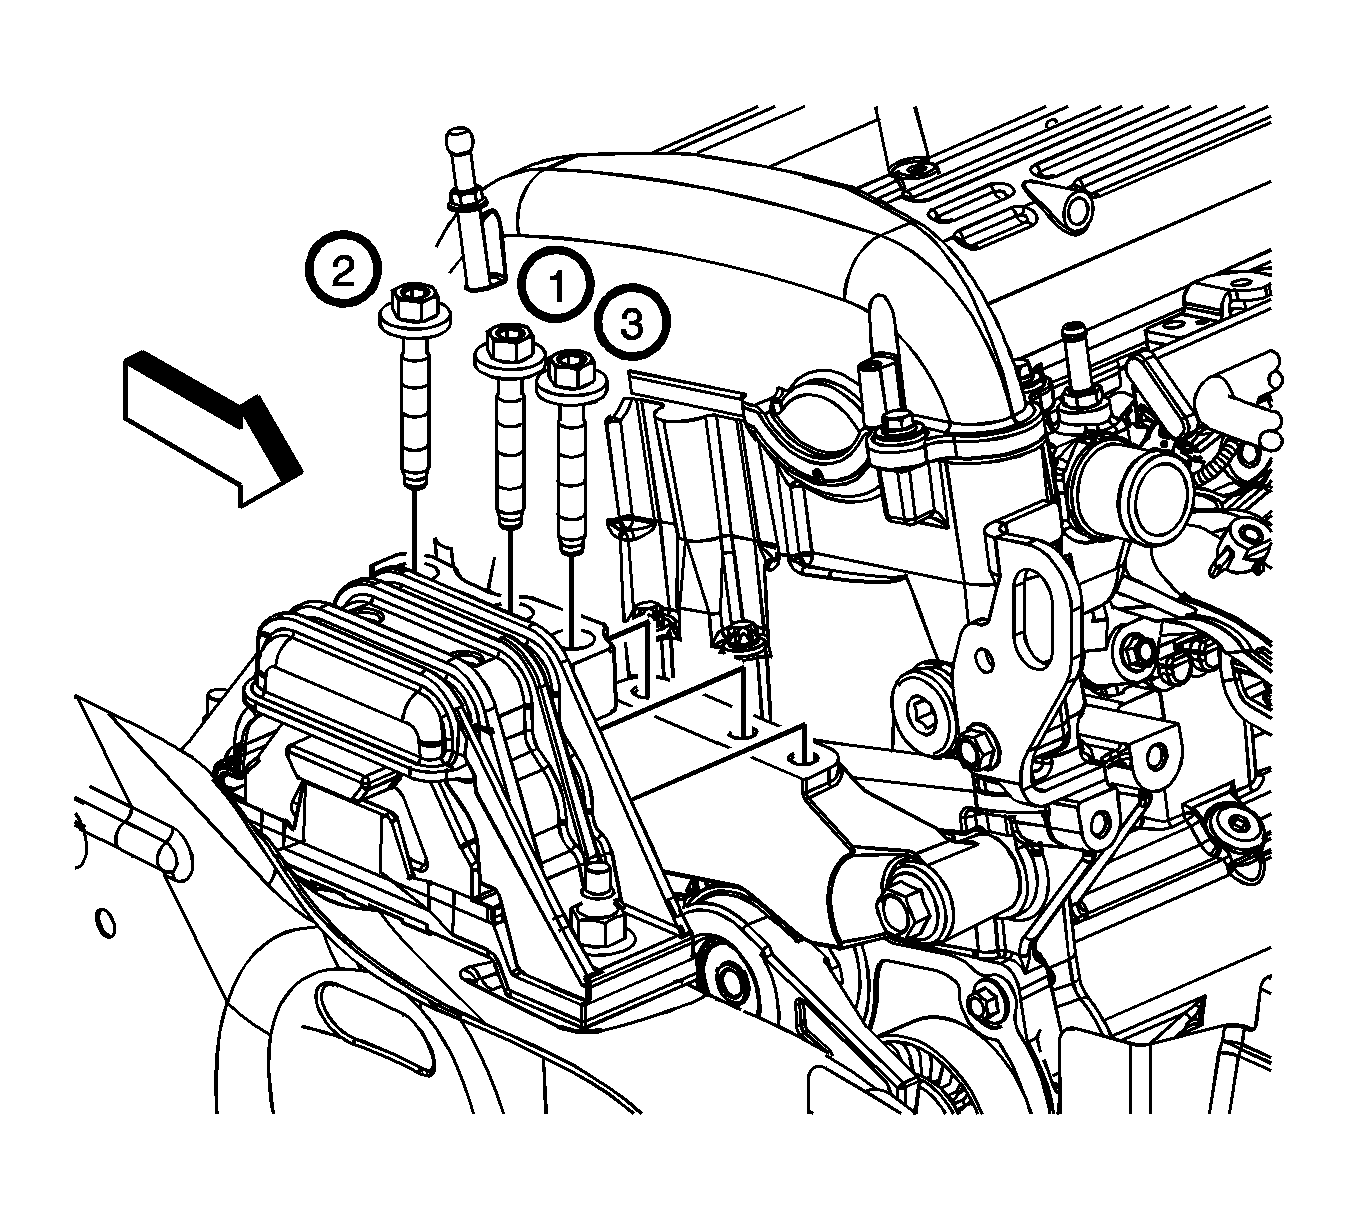
- Remove the engine mount to bracket bolts.
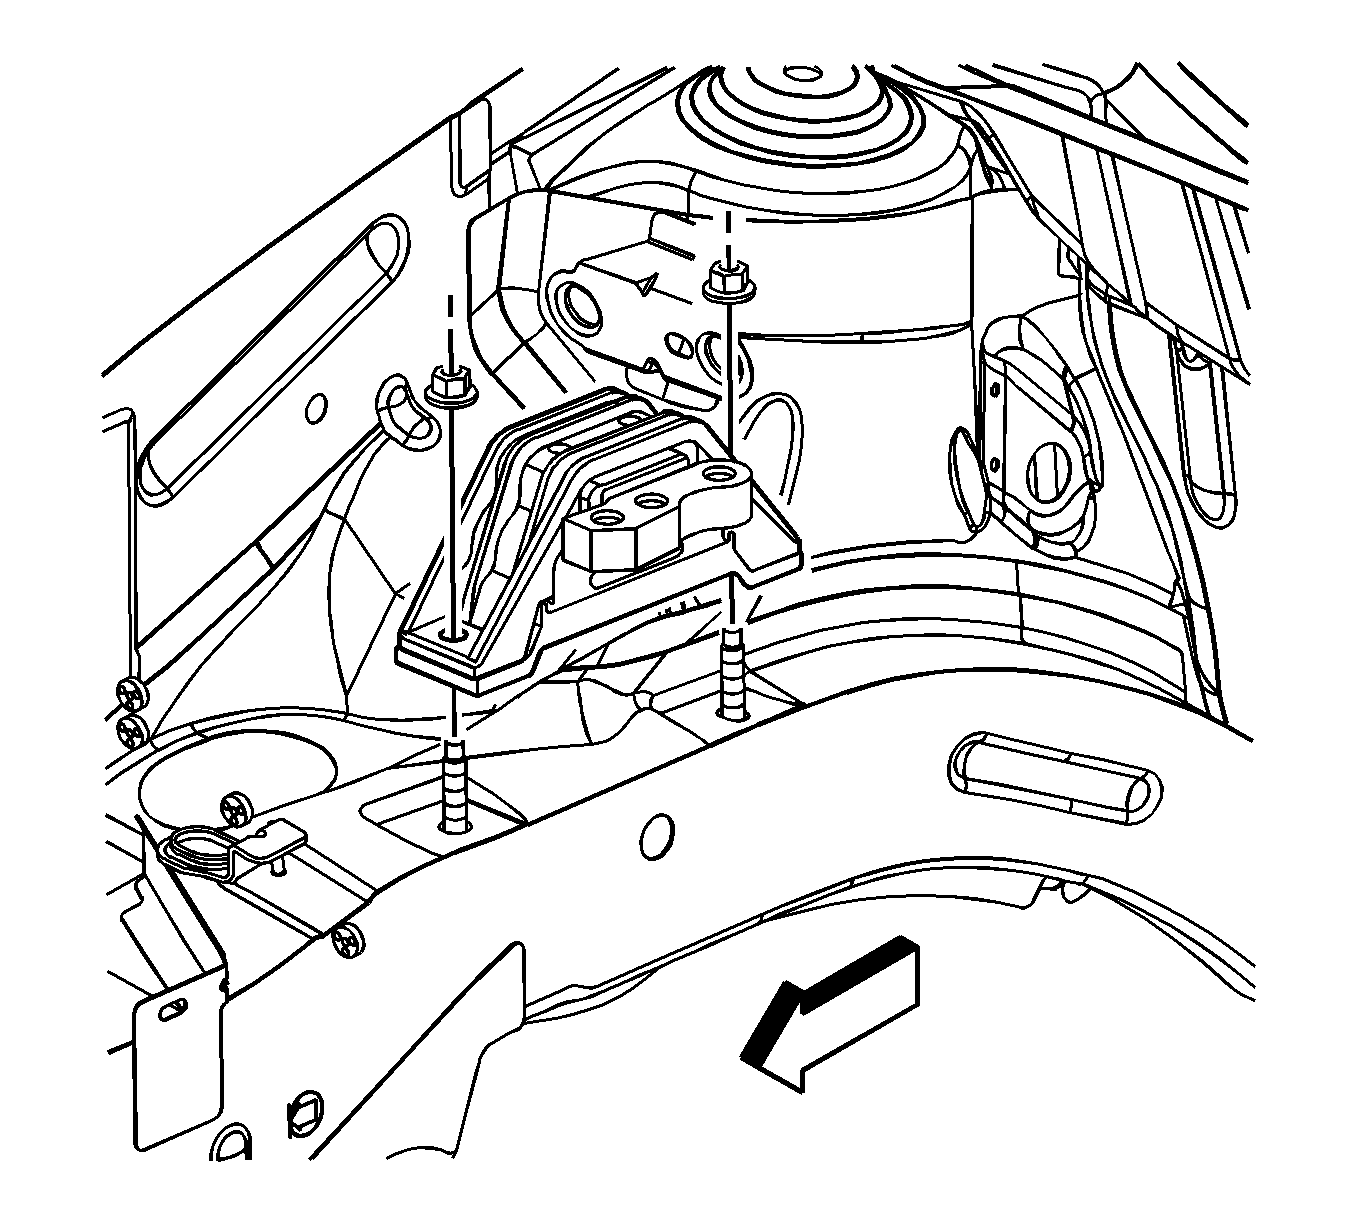
- Remove the engine mount to side rail nuts.
- Remove the engine mount from the engine compartment.
Installation Procedure
- Place the engine mount onto the side rail studs.
- Install the engine mount to side rail nuts.
- Install the engine mount to bracket bolts.
- Tighten the engine mount to bracket bolts.
- Remove the hydraulic floor jack from under the oil pan.
- Install the air cleaner assembly. Refer to Air Cleaner Assembly Replacement .
Notice: Refer to Fastener Notice in the Preface section.
Tighten
Tighten the nuts in the sequence shown to 100 N·m (74 lb ft).
Important: The engine mount to bracket bolts must be hand started. Do not pry the engine mount to align the holes.
Tighten
Tighten the bolts in the sequence shown to 50 N·m (37 lb ft).
