For 1990-2009 cars only
Starter Replacement RPOs L61/LE5
Removal Procedure
- Disconnect the negative battery cable. Refer to Battery Negative Cable Disconnection and Connection .
- Raise and support the vehicle. Refer to Lifting and Jacking the Vehicle .
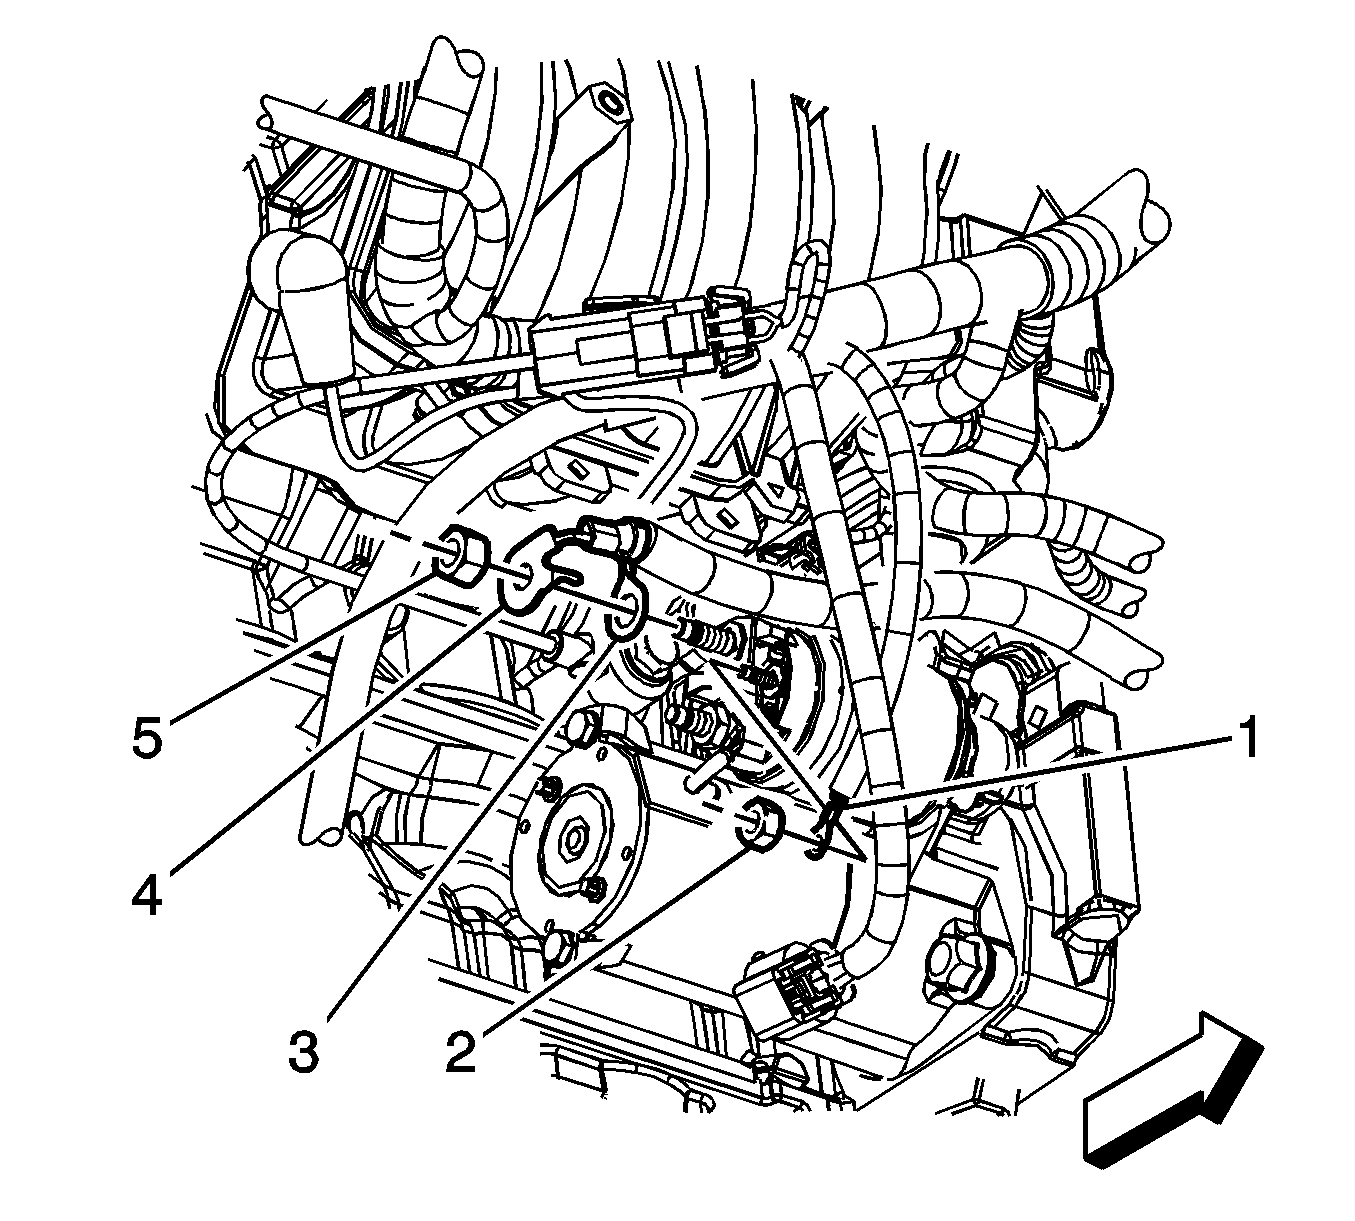
- Remove the starter solenoid terminal nut (5).
- Remove the positive battery cable terminal (4) from the starter.
- Remove the starter solenoid wire terminal (3) from the starter.
- Remove the starter solenoid "S" terminal nut (2).
- Remove the engine harness terminal (1) from the starter.
- Remove the starter bolts.
- Remove the starter.

Installation Procedure
- Position the starter to the engine.
- Install the starter bolts.
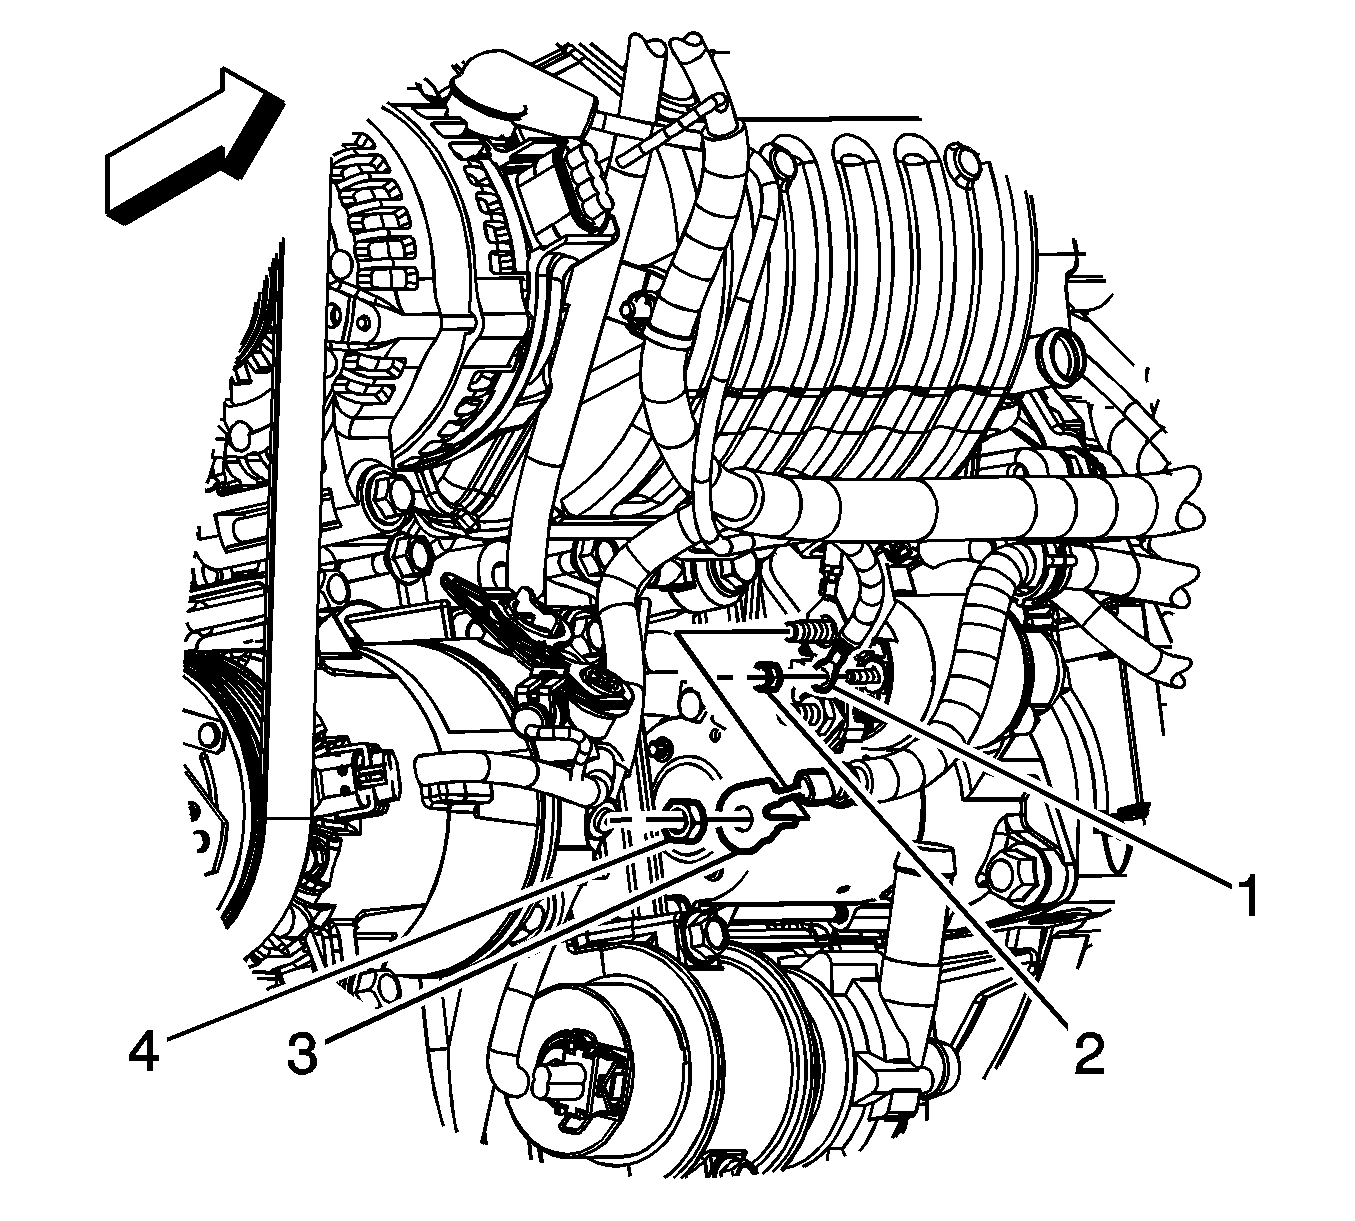
- Install the engine harness terminal (1) to the starter.
- Install the starter solenoid "S" terminal nut (2).
- Install the starter solenoid wire terminal (3) to the starter.
- Install the positive battery cable terminal (4) to the starter. Ensure that the anti-rotational tab is correctly located into the indexing slot.
- Install the starter solenoid terminal nut (5).
- Lower the vehicle.
- Connect the negative battery cable. Refer to Battery Negative Cable Disconnection and Connection .
Notice: Refer to Fastener Notice in the Preface section.
Tighten
Tighten the bolts to 40 N·m (30 lb ft).
Tighten
Tighten the nut to 3 N·m (27 lb in).
Tighten
Tighten the nut to 17 N·m (13 lb ft).
Starter Replacement RPO LSJ
Removal Procedure
- Disconnect the negative battery cable. Refer to Battery Negative Cable Disconnection and Connection .
- Raise and support the vehicle. Refer to Lifting and Jacking the Vehicle .
- Remove the charge air cooler pump. Refer to Charge Air Cooler Coolant Pump Replacement .
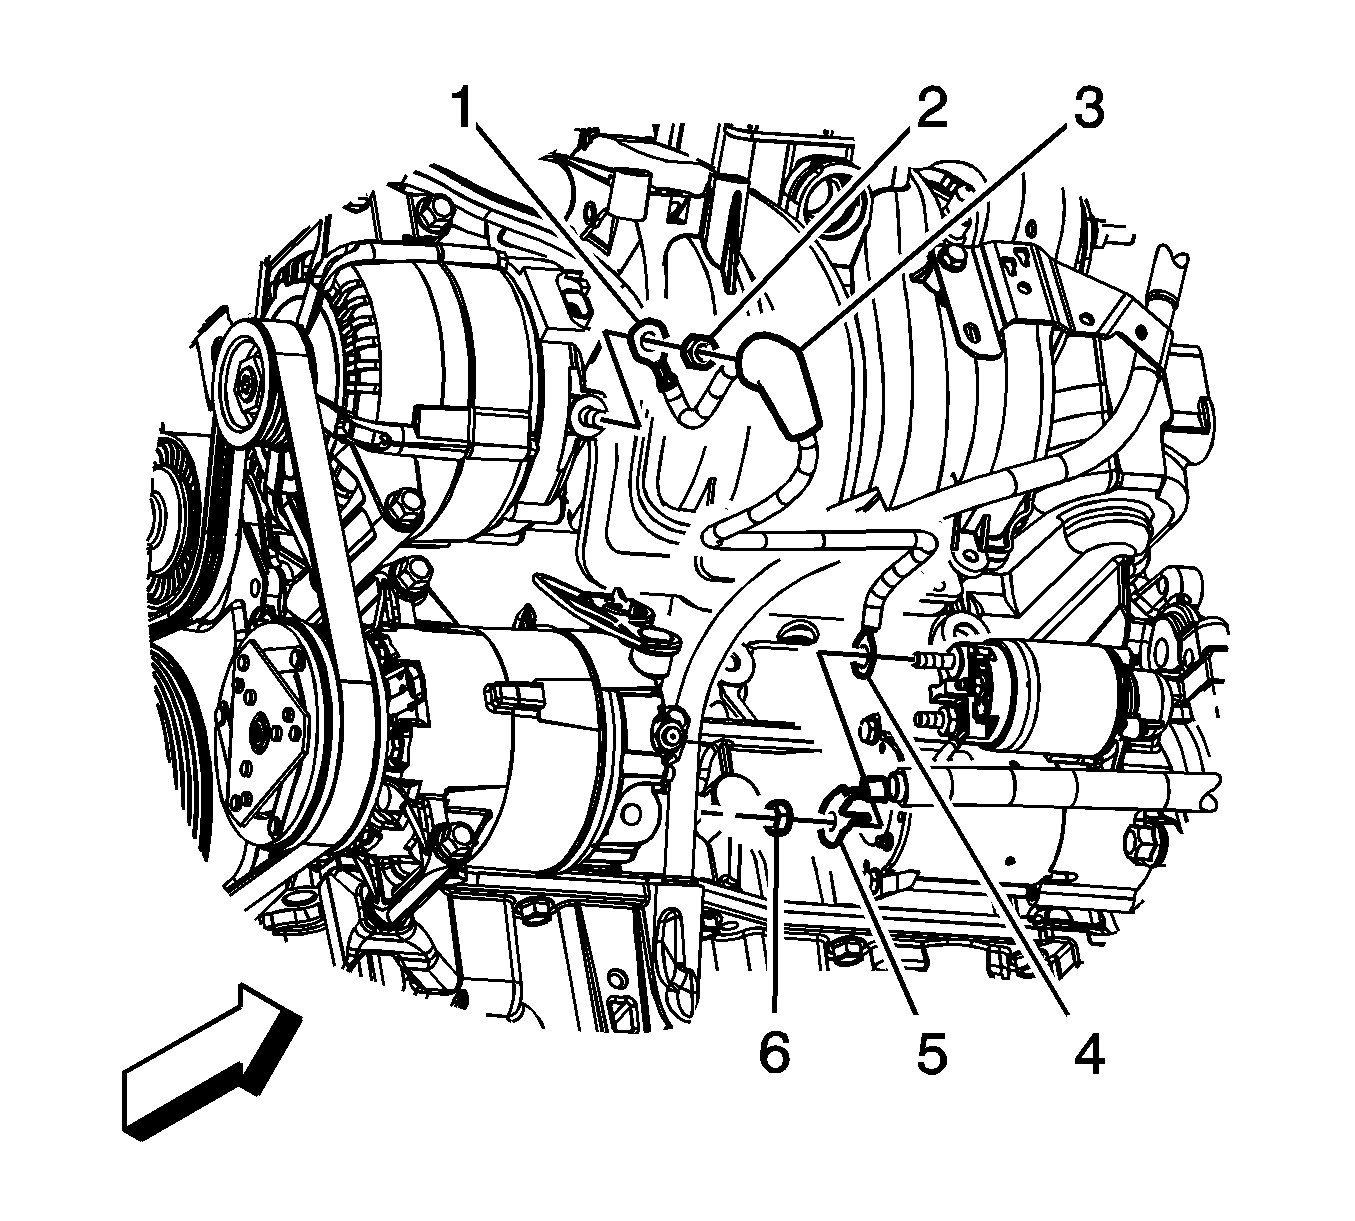
- Remove the starter solenoid terminal nut (6).
- Remove the positive battery cable terminal (5) and the starter solenoid terminal (4) from the starter.
- Remove the starter solenoid "S" terminal nut (1).
- Remove the engine harness terminal (2) from the starter.
- Remove the starter bolts.
- Remove the starter.
Installation Procedure
- Position the starter to the engine.
- Install the starter bolts.
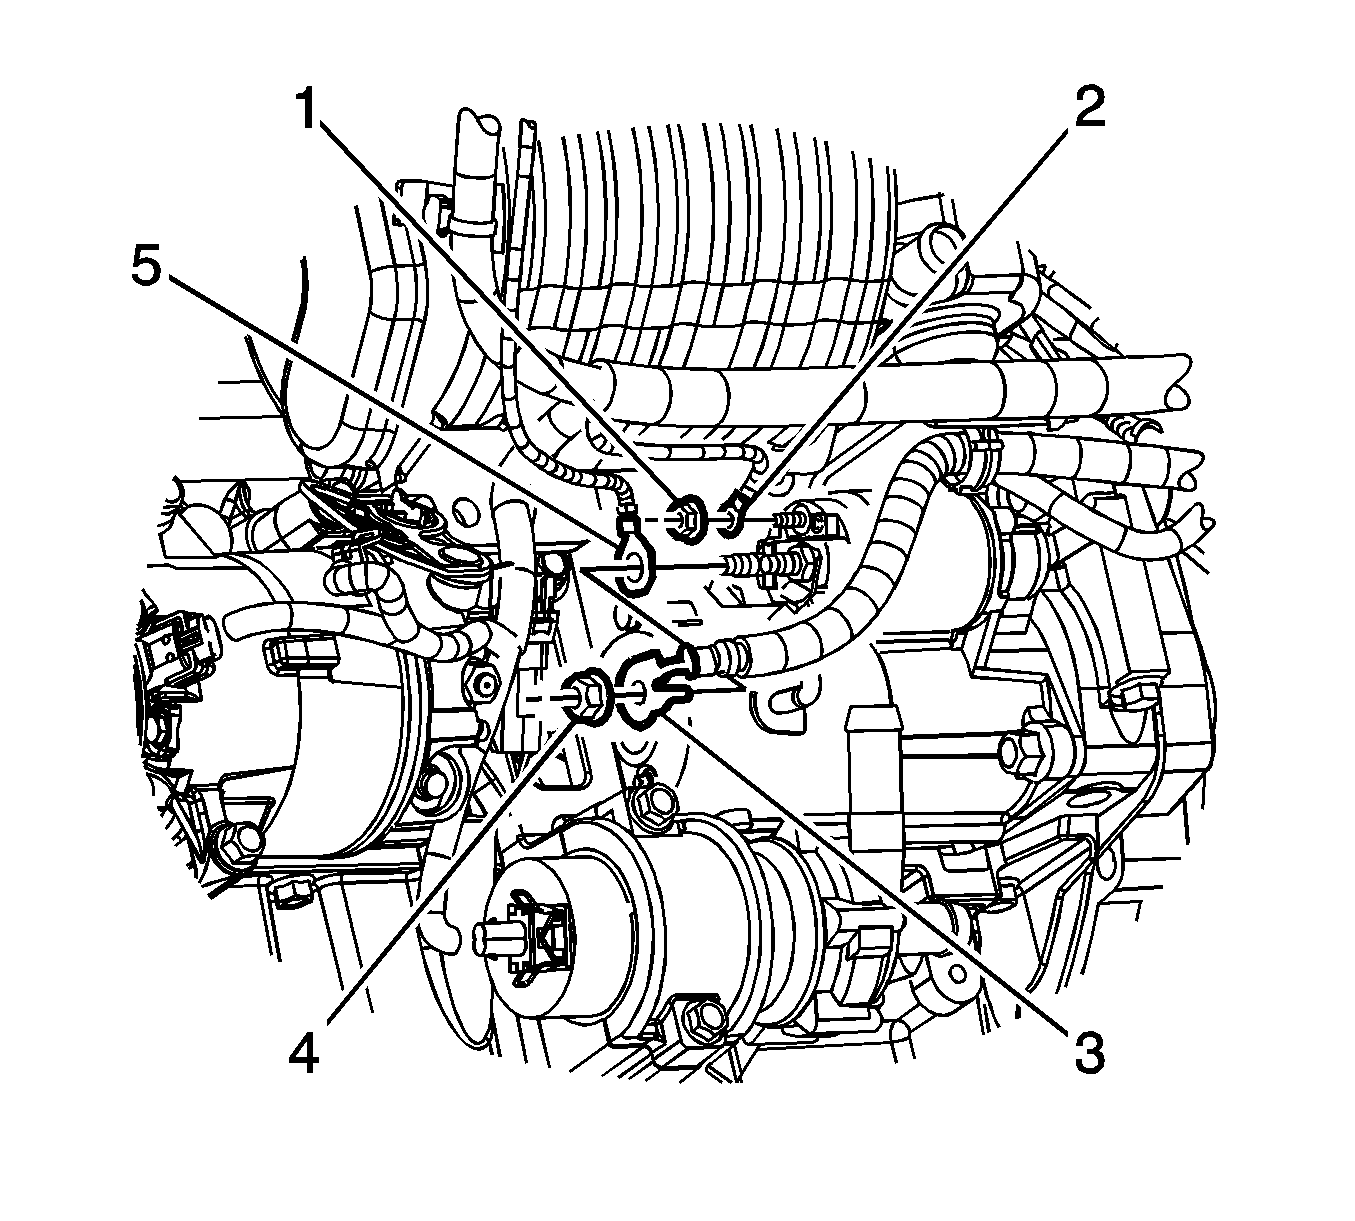
- Install the engine harness terminal (2) to the starter.
- Install the starter solenoid "S" terminal nut (1).
- Install the starter solenoid terminal (4) and the positive battery cable terminal (5) to the starter. Ensure that the anti-rotational tab on the positive battery cable terminal is correctly located into the indexing slot.
- Install the starter solenoid terminal nut (6).
- Install the charge air cooler pump. Refer to Charge Air Cooler Coolant Pump Replacement .
- Lower the vehicle.
- Connect the negative battery cable. Refer to Battery Negative Cable Disconnection and Connection .
Notice: Refer to Fastener Notice in the Preface section.
Tighten
Tighten the bolts to 50 N·m (37 lb ft).
Tighten
Tighten the nut to 3 N·m (27 lb in).
Tighten
Tighten the nut to 11 N·m (97 lb in).
