Wheel Stud Replacement 4-Stud Pattern
Tools Required
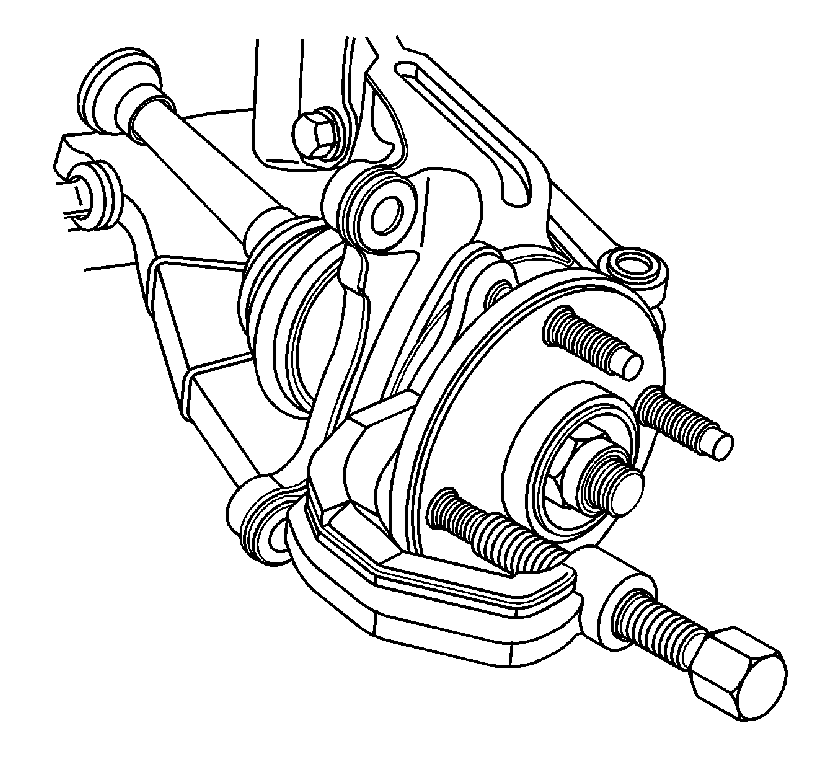
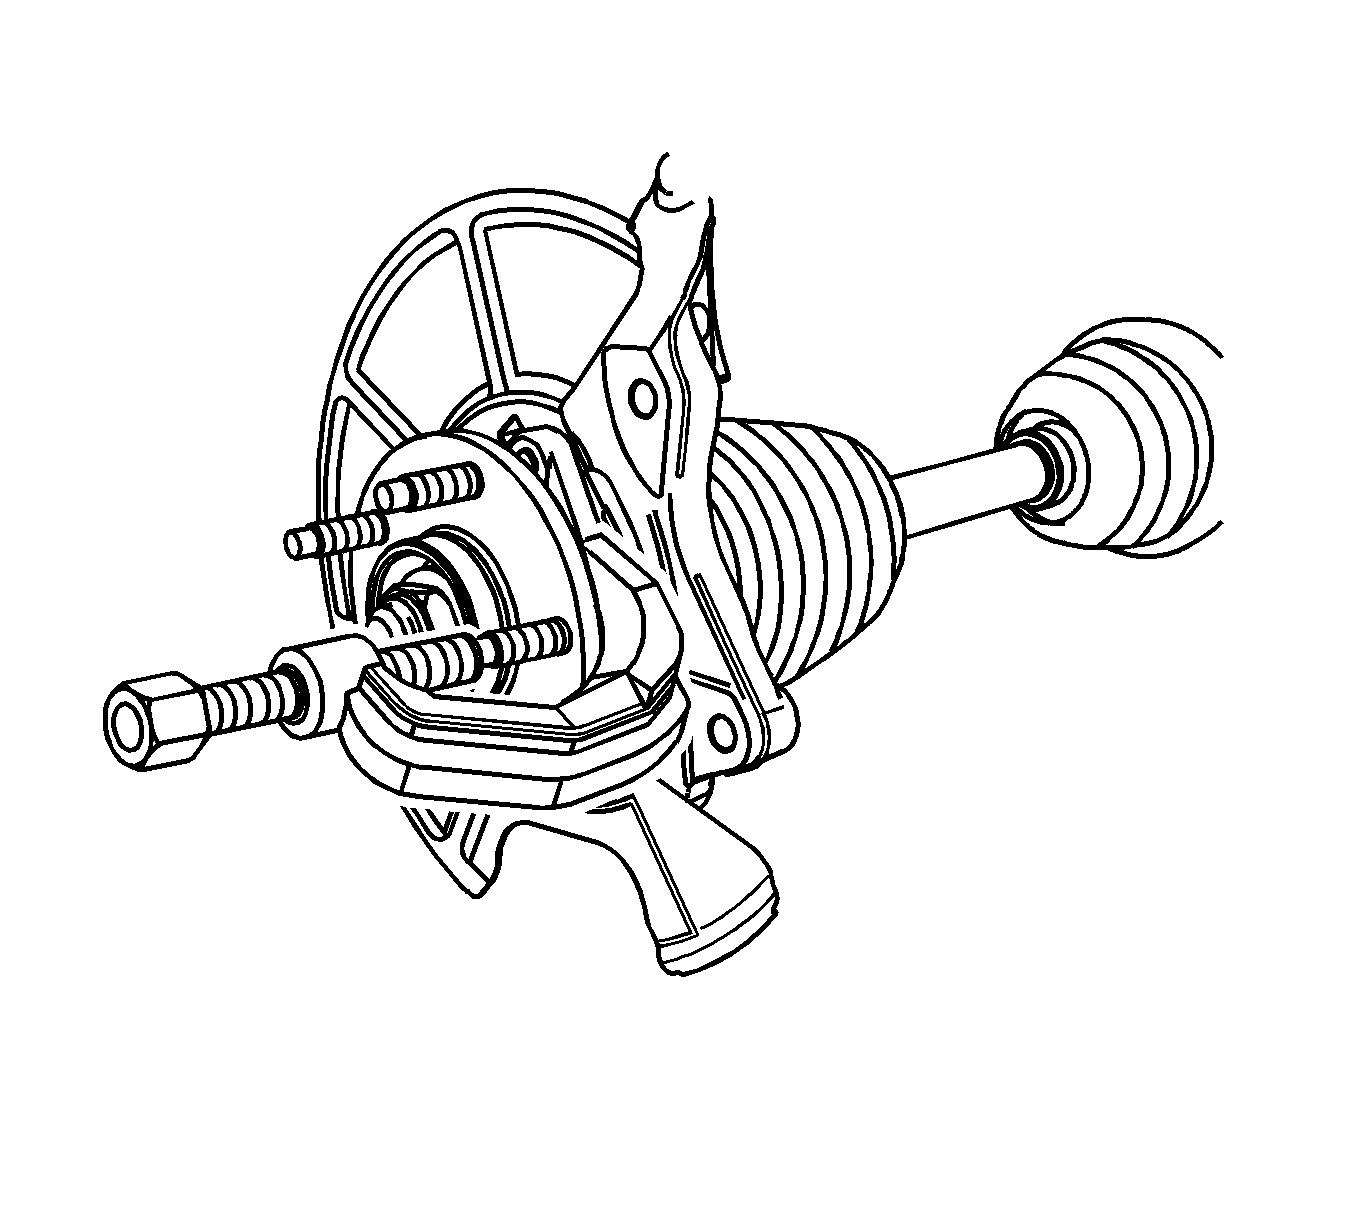
J 43631 Ball Joint Remover
Notice: Avoid tool contact to the outer constant velocity boot seal when removing the wheel bearing mounting bolts. Failure to observe this notice may result in damage to the CV boot.
Removal Procedure
- Raise and support the vehicle. Refer to Lifting and Jacking the Vehicle .
- Remove the tire and wheel assembly. Refer to Tire and Wheel Removal and Installation .
- Without disconnecting the hydraulic brake flex hose, remove and support the brake caliper and bracket as an assembly, and remove the brake rotor. Refer to Front Brake Rotor Replacement .
- Inspect the head of the wheel stud to be replaced, to determine if the stud is an original, round-head, or a service replacement, D-shape head.
- If an original, round-head wheel stud is to be replaced, then a portion of the stud must be cut off, so that the remainder of the stud will be approximately 10 mm (0.39 in) long from the face of the bearing hub flange.
- Rotate the bearing hub to a position where the least amount of interference between the stud and the steering knuckle exists.
- Using the J 43631 , release the wheel stud from the bearing hub. If a portion of the stud was cut off, remove and discard the stud.
- Loosen the 3 wheel bearing/hub assembly mounting bolts evenly, until there is approximately 7 mm (¼ in) of clearance between the seat of the bearing assembly and the steering knuckle. This will be necessary for removing and installing a service replacement D-shape head stud.
- If the stud being replaced was a D-shape head, remove and discard the stud.
Important: It will be necessary to cut off a portion of an original, round-head wheel stud in order to provide clearance to remove the stud from the wheel bearing hub.
Installation Procedure
- With the bearing hub still in position, install the NEW service replacement stud into the bearing/hub assembly.
- Tighten the wheel bearing/hub assembly mounting bolts evenly to draw the bearing assembly back to the steering knuckle, then tighten the bolts to specifications.
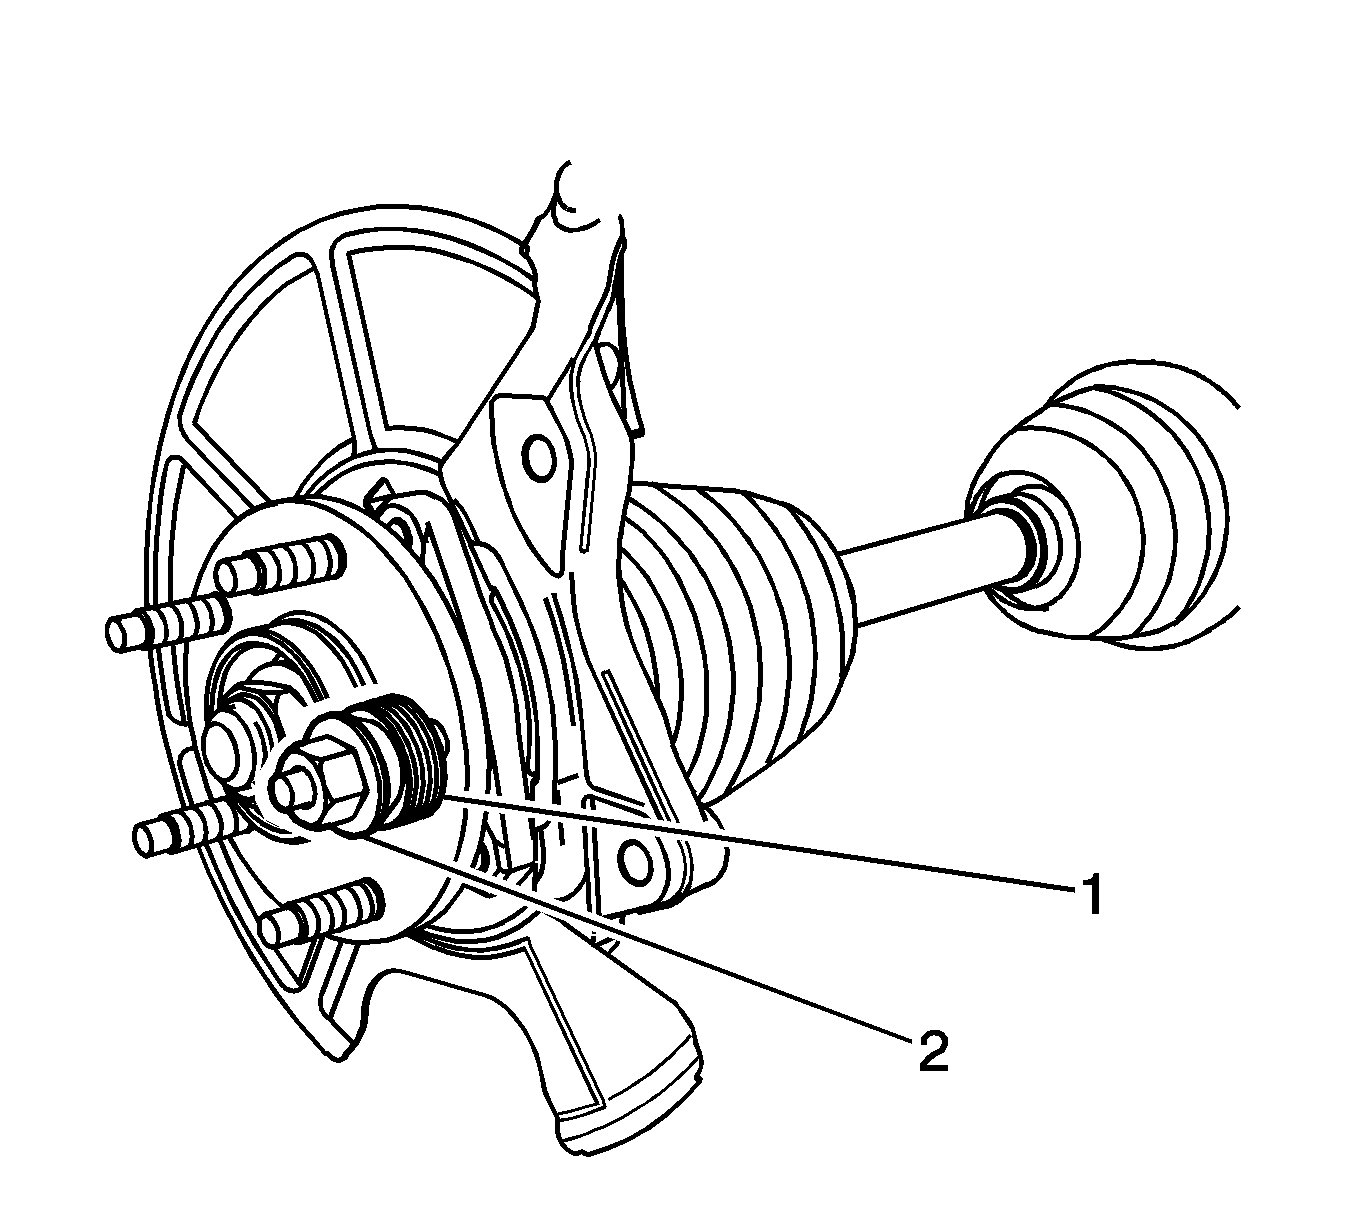
- Add enough washers (1) in order to draw the stud into the hub.
- Install the wheel nut (2) with the flat side against the washers.
- Tighten the wheel nut until the head of the wheel stud is fully seated against the back of the bearing hub flange.
- Remove the wheel nut and the washers.
- Install the brake rotor, and install the brake caliper and bracket as an assembly. Refer to Front Brake Rotor Replacement .
- Install the tire and wheel assembly. Refer to Tire and Wheel Removal and Installation .
- Lower the vehicle.
Important: The replacement front wheel stud has a D-shape head to provide clearance for installation.
Notice: Refer to Fastener Notice in the Preface section.
Notice: This is a self-retaining fastener joint that does not require thread locking compounds. Do not attempt to clean the threads with a standard tap. If a standard tap is used, damage to the joint threads will occur.
Tighten
Tighten the bolts to 115 N·m (85 lb ft).
Wheel Stud Replacement 5-Stud Pattern
Tools Required
J 43631 Ball Joint Remover
Removal Procedure
- Raise and support the vehicle. Refer to Lifting and Jacking the Vehicle .
- Remove the tire and wheel assembly. Refer to Tire and Wheel Removal and Installation .
- Without disconnecting the hydraulic brake flex hose, remove and support the brake caliper and bracket as an assembly, and remove the brake rotor. Refer to Front Brake Rotor Replacement .
- Rotate the bearing hub to a position where the least amount of interference between the stud and the steering knuckle exists.
- Using the J 43631 , release the wheel stud from the bearing hub and discard the stud.
Installation Procedure
- With the bearing hub still in position, install the NEW stud into the bearing/hub assembly.
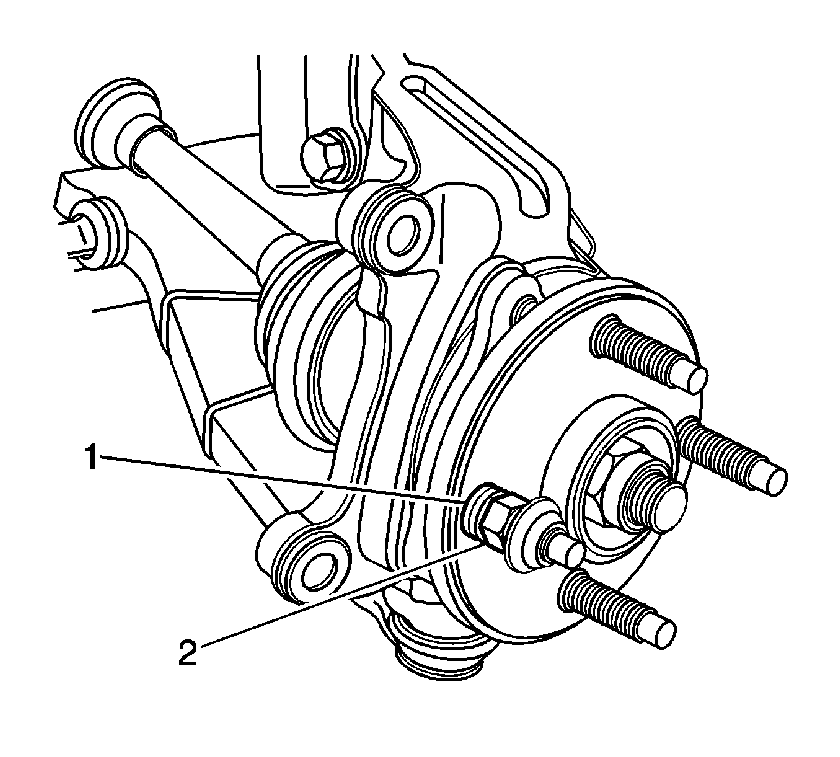
- Add enough washers (1) in order to draw the stud into the hub.
- Install the wheel nut (2) with the flat side against the washers.
- Tighten the wheel nut until the head of the wheel stud is fully seated against the back of the bearing hub flange.
- Remove the wheel nut and the washers.
- Install the brake rotor, and install the brake caliper and bracket as an assembly. Refer to Front Brake Rotor Replacement .
- Install the tire and wheel assembly. Refer to Tire and Wheel Removal and Installation .
- Lower the vehicle.