Tools Required
J 39765 Fuel Sender Lock Nut Wrench
Removal Procedure
Caution: Refer to Gasoline/Gasoline Vapors Caution in the Preface section.
Caution: In order to reduce the risk of fire and personal injury that may result from a fuel leak, always replace the fuel sender gasket when reinstalling the fuel sender assembly.
- Remove the fuel tank. Refer to Fuel Tank Replacement .
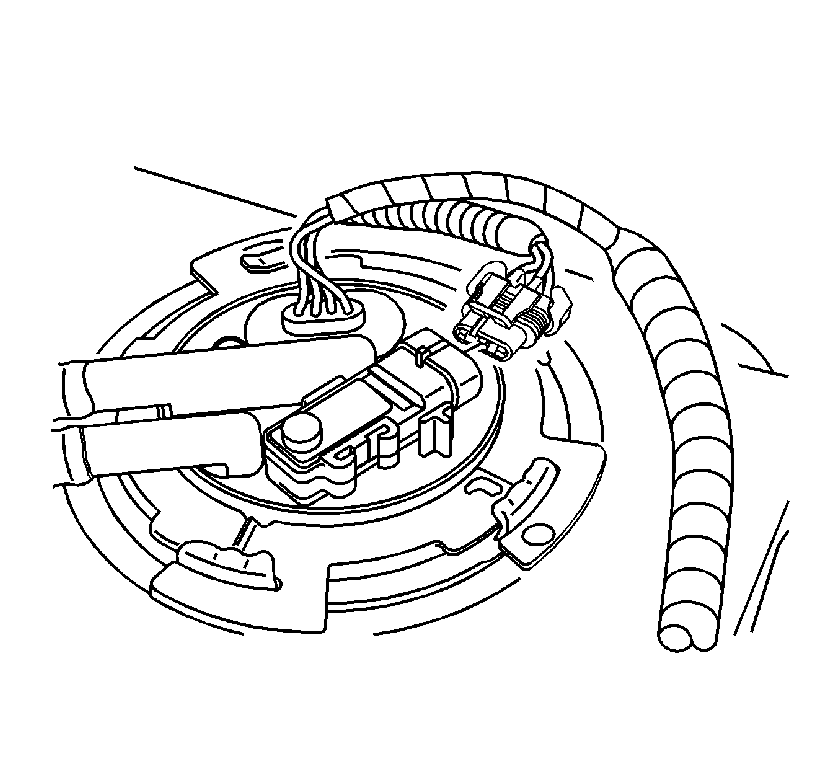
- Release the retaining tab on the fuel tank retainer used to secure the fuel pump module pipes in position on the tank.
- Release the fuel pump module electrical harness from the retaining slot on the tank.
- Disconnect the fuel pump module harness electrical connector from the fuel tank pressure sensor.
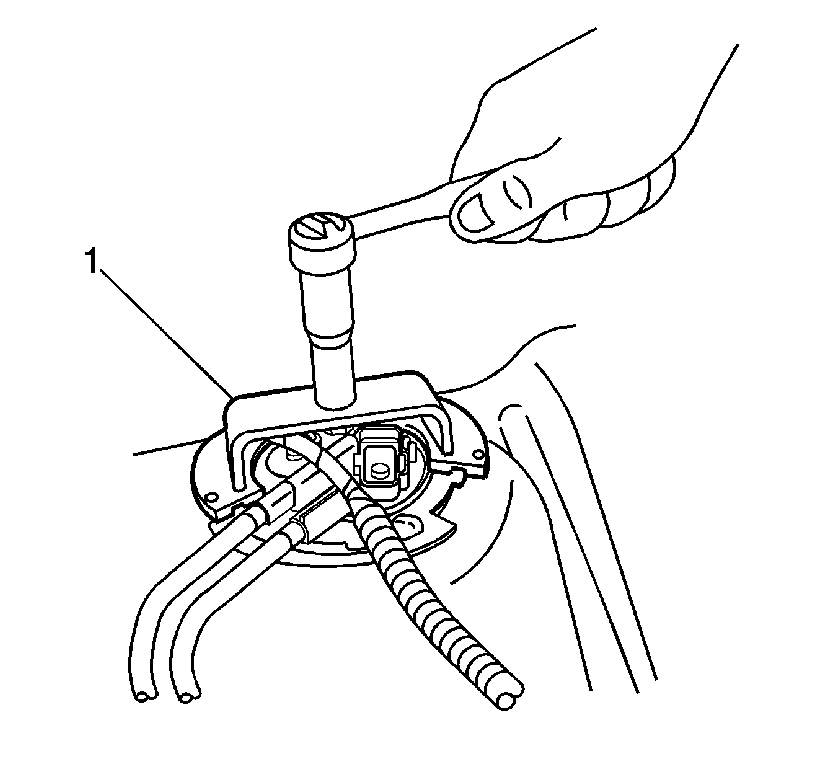
- Using the J 39765 (1), carefully rotate to release the fuel pump module retaining lock ring.
- Remove the fuel pump module retaining lock ring, by sliding the ring over the module pipes and electrical harness.
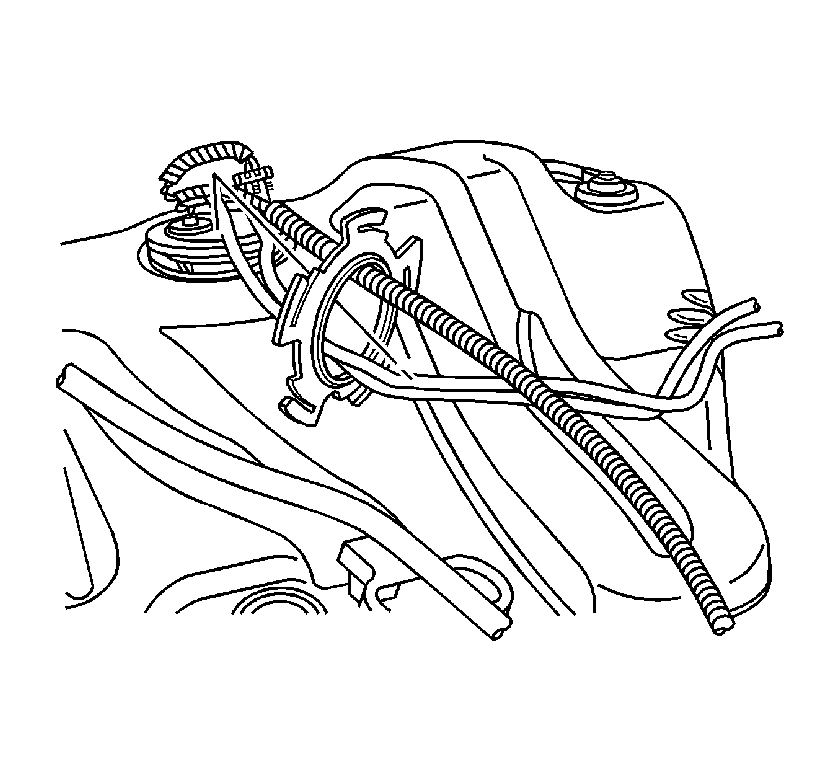
- Slowly raise the fuel pump module assembly until the fuel level sensor float arm is just visible. Ensure that the fuel level sensor harness connector clears the tank opening.
- Tilt the pump module toward the rear of the fuel tank to enable the level sensor float arm to clear the tank opening. Remove the pump module from the tank.
- Carefully discard the fuel in the pump module reservoir bowl into an approved fuel container.
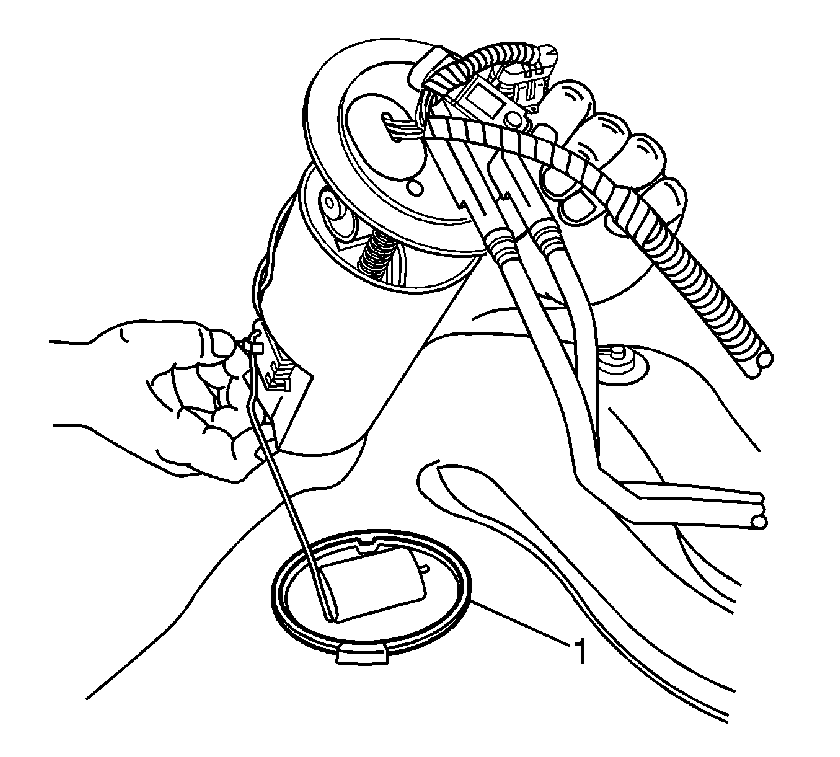
- Remove and discard the fuel pump module-to-fuel tank seal (1).
Important: Take note of the positioning of the fuel tank rear shield prior to releasing the pump module pipe retainer.
Important: When removing the fuel pump module assembly from the fuel tank, be aware that the pump module reservoir bowl is full of fuel. The reservoir must be tipped slightly during removal to avoid bending the fuel level sensor float arm.
Important: Do NOT reuse the old fuel pump module-to-fuel tank seal.
Installation Procedure
- Install a NEW fuel pump module-to-fuel tank seal (1).
- Tilt the pump module toward the rear of the fuel tank to enable the level sensor float arm to clear the tank opening. Install the fuel pump module to the fuel tank.
- Slowly lower the fuel pump module assembly into the tank. Ensure that the fuel level sensor harness connector is positioned properly.
- Install the fuel pump module retaining lock ring over the module pipes and electrical harness, and into position on the top of the module.
- Using the J 39765 (1), carefully rotate to fully secure the fuel pump module retaining lock ring.
- Connect the fuel pump module harness electrical connector to the fuel tank pressure sensor.
- Secure the fuel pump module electrical harness into the retaining slot on the tank.
- Secure the retaining tab on the fuel tank retainer used to secure the fuel pump module pipes in position on the tank.
- Install the fuel tank. Refer to Fuel Tank Replacement .
Important: The reservoir must be tipped slightly during installation to avoid bending the fuel level sensor float arm.
Important: Ensure that the fuel pump module retaining lock ring is fully seated within the fuel tank retaining tab slots.
Important: Ensure that the fuel tank rear shield is positioned properly on the pump module pipe retainer.
