For 1990-2009 cars only
Removal Procedure
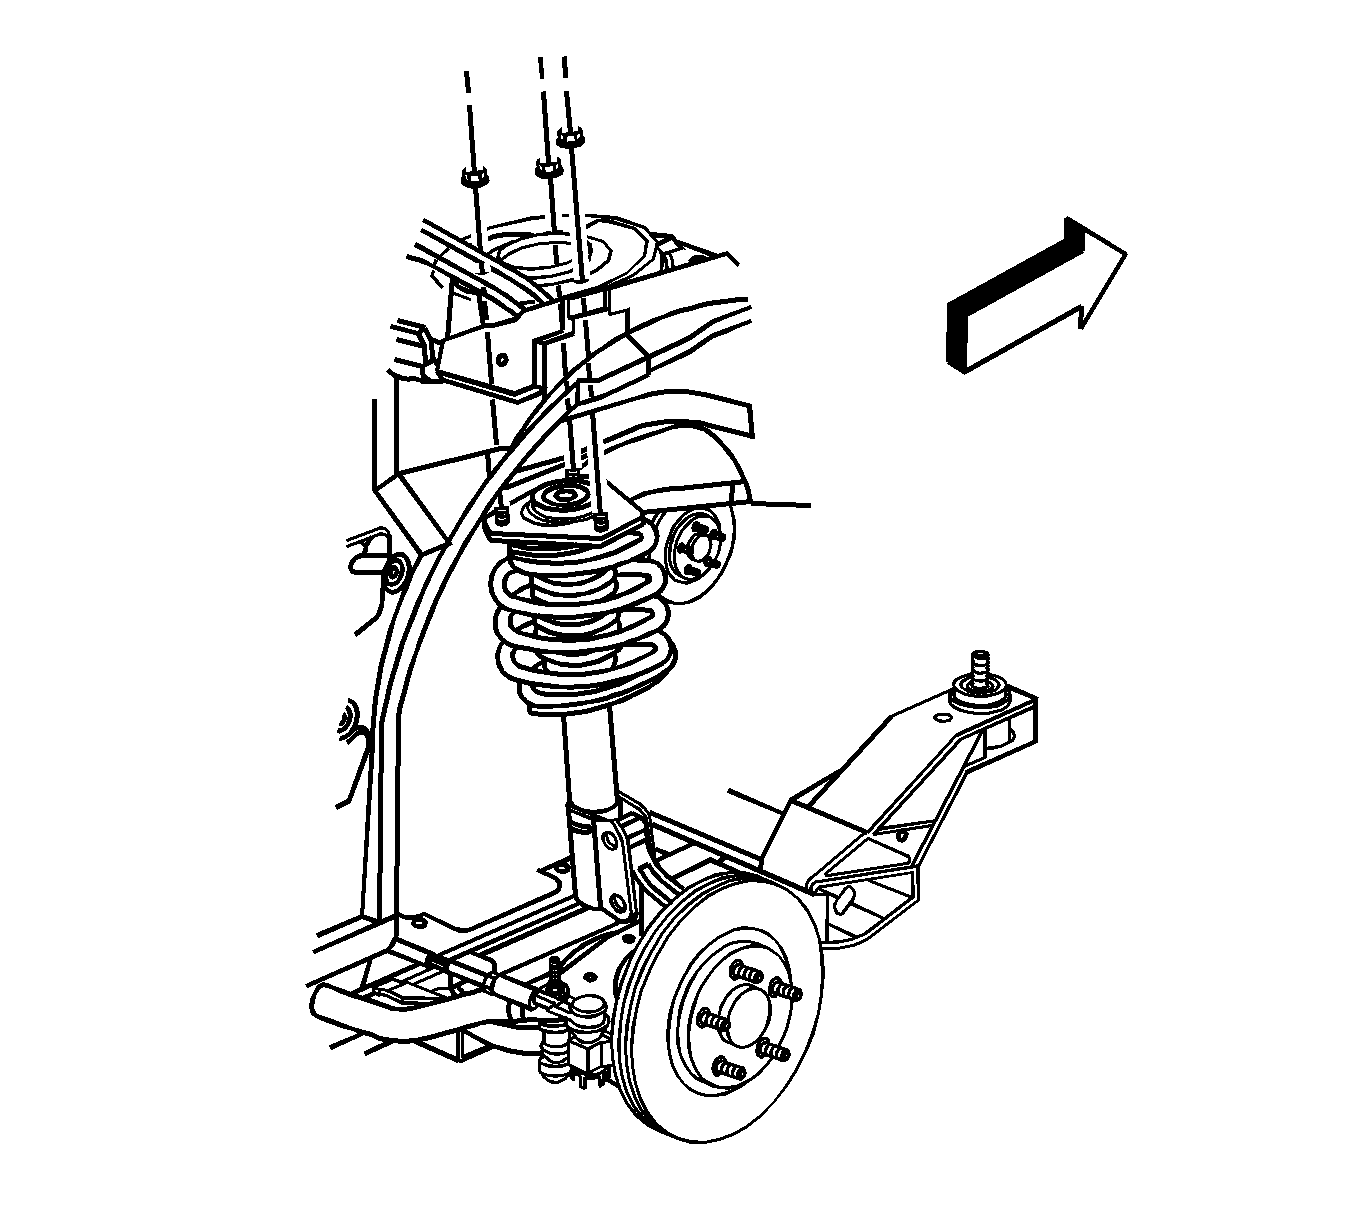
- Remove the strut upper mounting nuts.
- Raise and support the vehicle. Refer to Lifting and Jacking the Vehicle .
- Remove the tire and wheel. Refer to Tire and Wheel Removal and Installation .
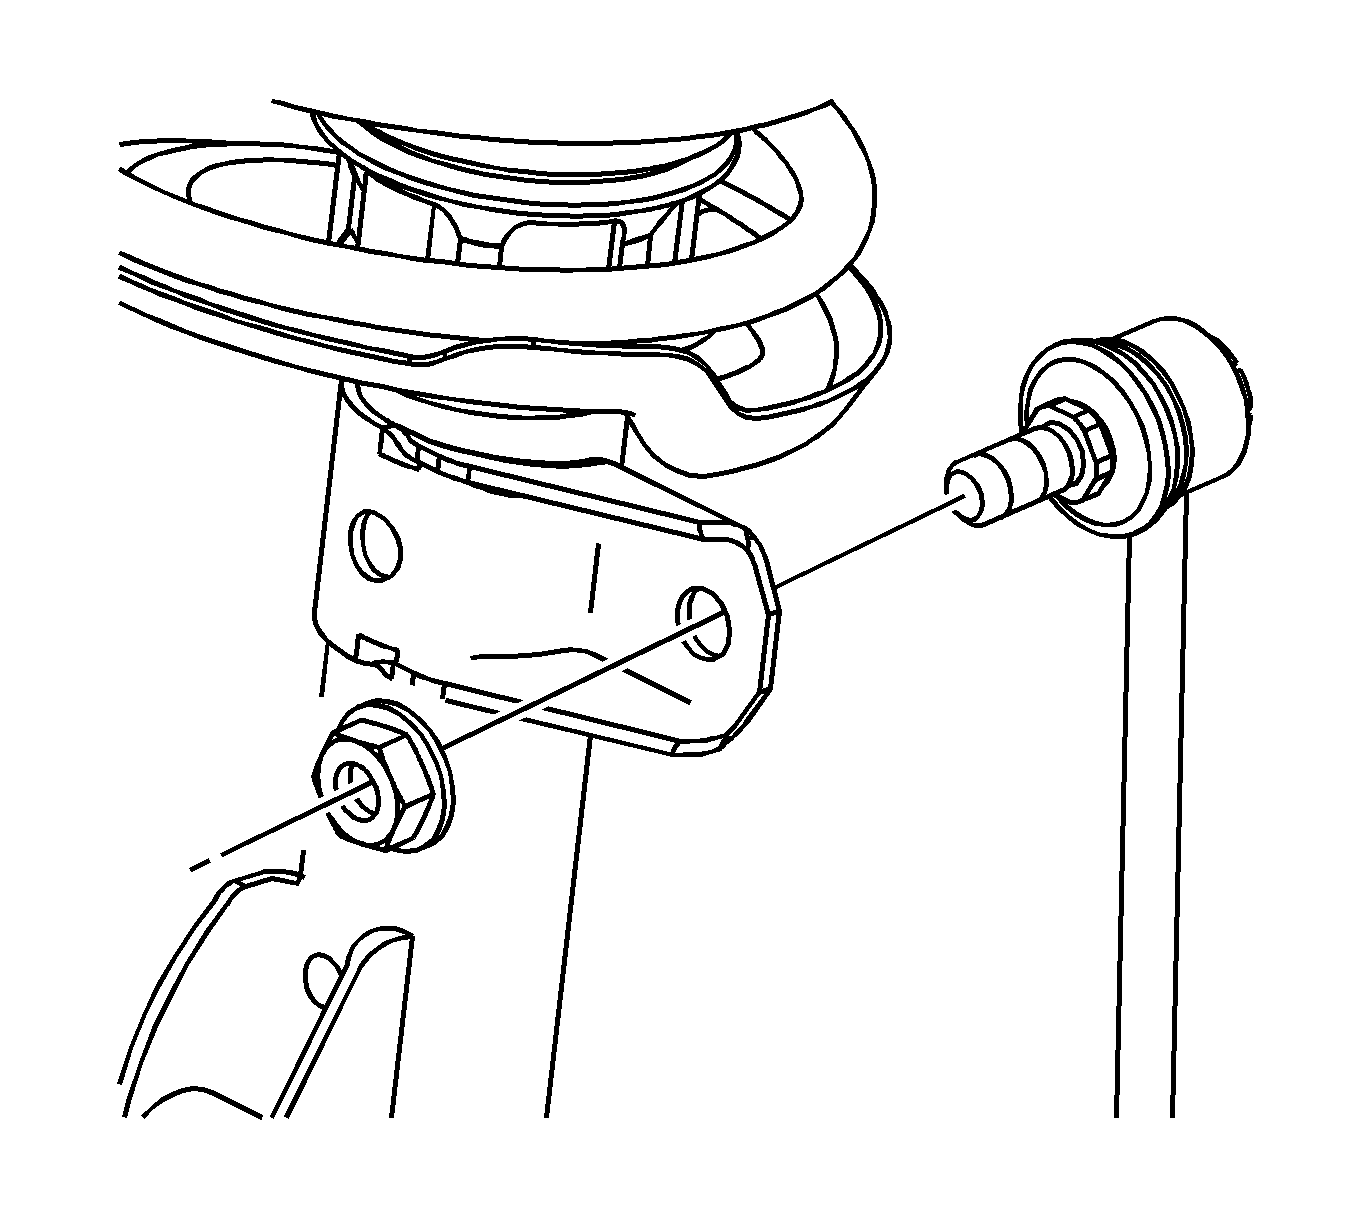
- Disconnect the stabilizer shaft link from the strut assembly.
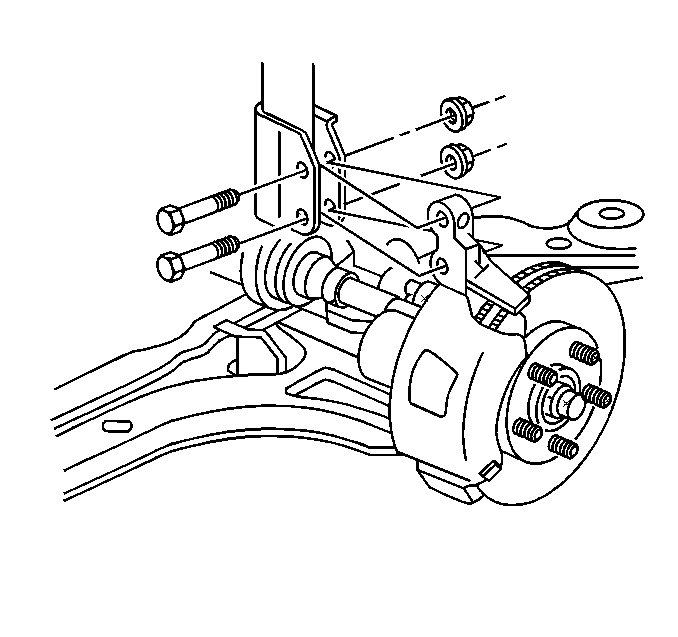
- Remove the strut lower bolts, nuts and antilock brake system (ABS) wiring bracket, if equipped.
- Remove the strut.
Important: Lift the vehicle using ONLY a frame-contact vehicle lift. Do NOT lift the vehicle using a suspension-contact vehicle lift.
Installation Procedure
- Install the strut.
- Install the strut upper mounting nuts.
- Install the strut lower bolts, nuts and ABS wiring bracket, if equipped.
- Connect the stabilizer shaft link to the strut assembly.
- Install the tire and wheel. Refer to Tire and Wheel Removal and Installation .
- Lower the vehicle.
- Align the front wheels. Refer to Wheel Alignment Measurement .
Notice: Refer to Fastener Notice in the Preface section.
Tighten
Tighten the nuts to 20 N·m (15 lb ft).
Important: This is a prevailing torque type fastener. This fastener may be reused ONLY if:
• The fastener and its counterpart are clean and free from rust.
If the fastener does not meet these criteria, REPLACE the fastener.
• The fastener develops 3 N·m (27 lb in) of torque/drag against its counterpart prior to the fastener seating.
Tighten
Tighten the strut lower nuts to 120 N·m (89 lb ft).
Tighten
Tighten the stabilizer shaft link nut to 65 N·m (48 lb ft).
