For 1990-2009 cars only
Removal Procedure
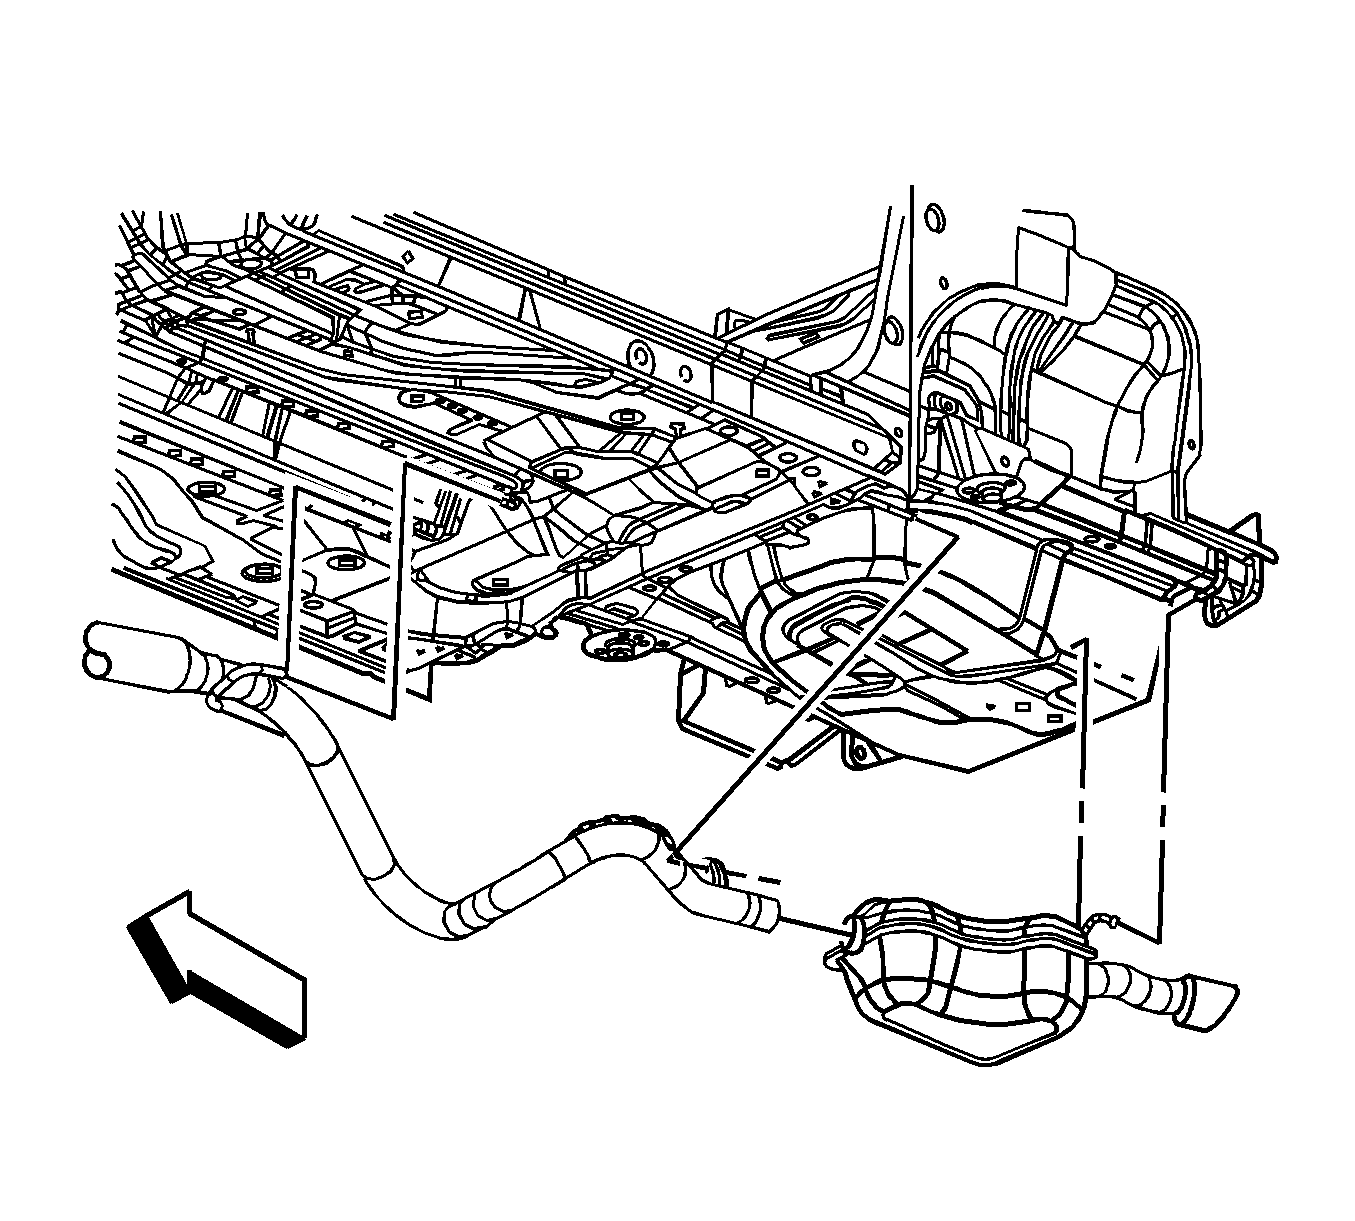
Important: The originally equipped, welded exhaust extension pipe can be cut and reused when installing a service muffler, if the extension pipe is in acceptable condition.
- Raise and support the vehicle. Refer to Lifting and Jacking the Vehicle in General Information.
- Support the exhaust muffler.
- Cut the exhaust extension pipe just forward of the weld at the front of the exhaust muffler.
- Release the muffler from the underbody hanger insulators and remove the exhaust muffler.
- Deburr the extension pipe end, as necessary.
Installation Procedure
- Install the muffler to the vehicle.
- Slide the muffler inlet pipe over the extension pipe, then install the muffler to the underbody hanger insulators.
- Install a muffler clamp to the muffler inlet pipe. Position the clamp approximately 19 mm (¾ in) from the edge of the muffler inlet, with the clamp nuts oriented away from the evaporative emission (EVAP) canister.
- Align the muffler and tailpipe to the vehicle underbody and rear bumper fascia.
- While maintaining muffler positioning, tighten the exhaust clamp nuts.
- Lower the vehicle.
Notice: Refer to Fastener Notice in the Preface section.
Tighten
Tighten the nuts to 45 N·m (33 lb ft).
