Removal Procedure
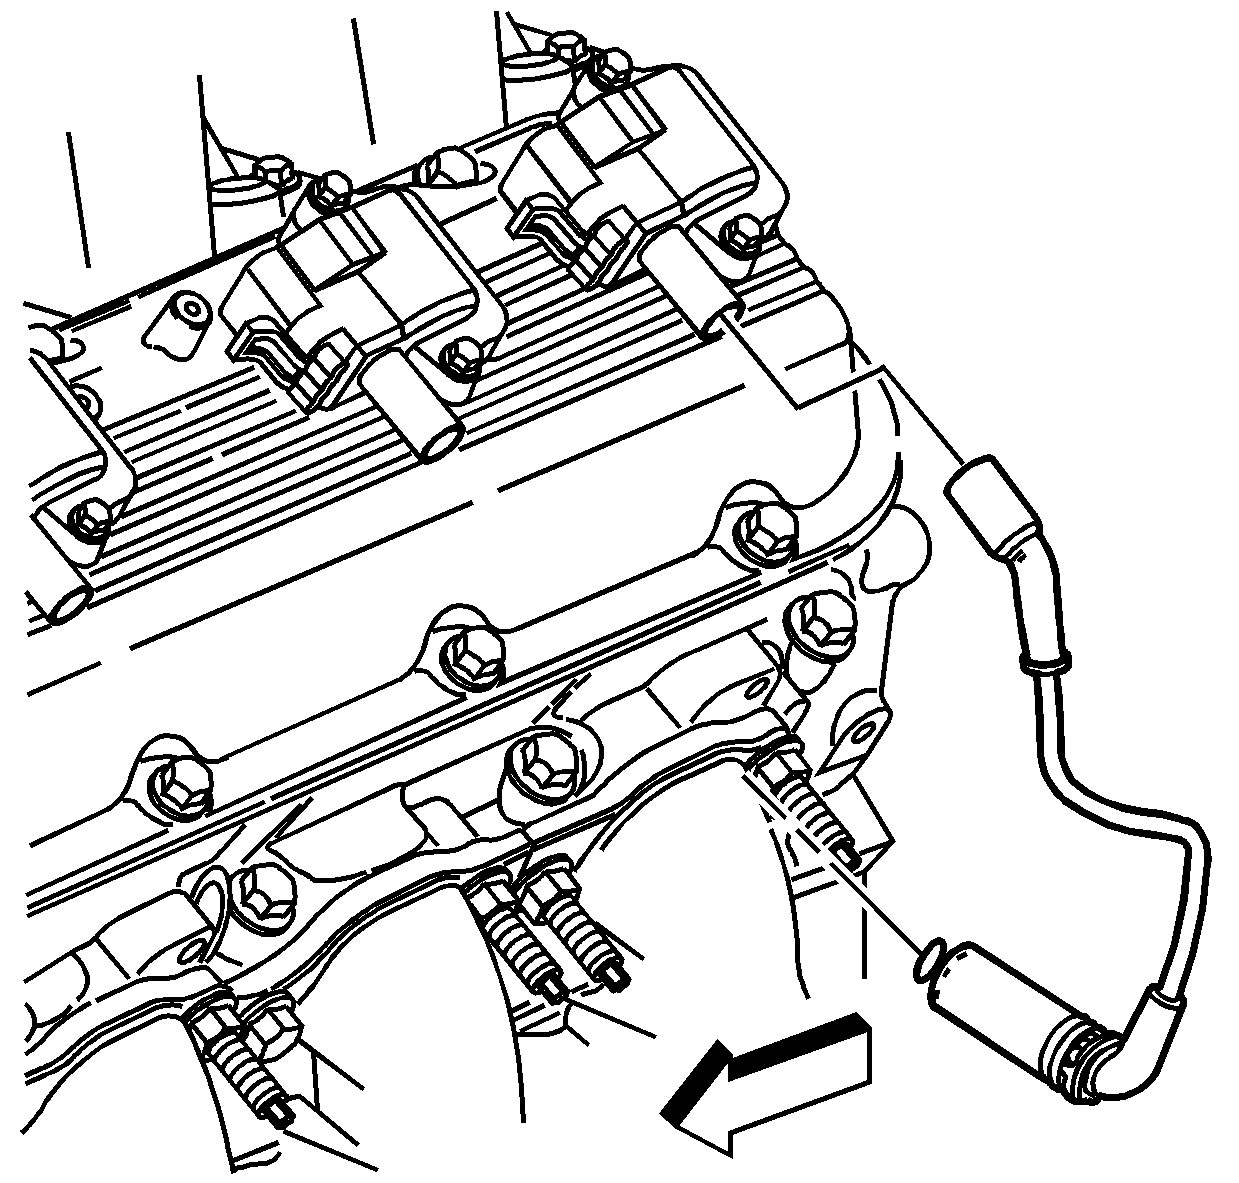
- Disconnect the spark plug wire from the ignition coil.
| • | Twist the spark plug boot 1/2 turn. |
| • | Pull only on the boot in order to remove the wire from the ignition coil. |
- Disconnect the ignition coil electrical connector.
- Remove the ignition coil bolts.
- Remove the ignition coil.
Installation Procedure
Notice: This component is initially installed using a self-tapping
bolt. Care should be taken when removing and/or installing the self-tapping bolt. Failure to use care when removing and/or installing the self-tapping bolt can lead to damage and unnecessary replacement of the self-tapping bolt and/or the component the self-tapping
bolt is threaded into.
- Install ignition coil.
Notice: Use the correct fastener in the correct location. Replacement fasteners
must be the correct part number for that application. Fasteners requiring
replacement or fasteners requiring the use of thread locking compound or sealant
are identified in the service procedure. Do not use paints, lubricants, or
corrosion inhibitors on fasteners or fastener joint surfaces unless specified.
These coatings affect fastener torque and joint clamping force and may damage
the fastener. Use the correct tightening sequence and specifications when
installing fasteners in order to avoid damage to parts and systems.
- Install the ignition coil bolts.
Tighten
Tighten the bolts to 12 N·m (106 lb in).
- Connect the ignition coil electrical connector.
- Connect the spark plug wire to the ignition coil.
- Inspect the wire for proper installation:
| 5.1. | Push sideways on the boot in order to inspect the seating. |
| 5.2. | Reinstall any loose boot. |
