Rear Window Washer Spray Nozzle Drips Leaving Stain on Rear Bumper Step Cover (Install Additional Rear Window Washer Check Valve and Apply Conditioner to Rear Bumper Cover)

| Subject: | Rear Window Washer Spray Nozzle Drips Leaving Stain On Rear Bumper Step Cover (Install Additional Rear Window Washer Check Valve and Apply Conditioner to Rear Bumper Cover) |
| Models: | 2002-2004 Cadillac Escalade |
| 2003-2004 Cadillac Escalade ESV |
| 2000-2004 Chevrolet Suburban, Tahoe |
| 2000-2004 GMC Yukon, Yukon XL |
This bulletin is being revised to update the repair procedure and add warranty information. Please discard Corporate Bulletin Number 03-08-43-002 (Section 08 -- Body and Accessories).
Condition
Some customers may comment on the rear window washer spray nozzle dripping and leaving a stain on the rear bumper step cover.
Cause
The location of the existing rear window washer check valve along with thermal expansion of the valve may be the cause of this condition.
Correction
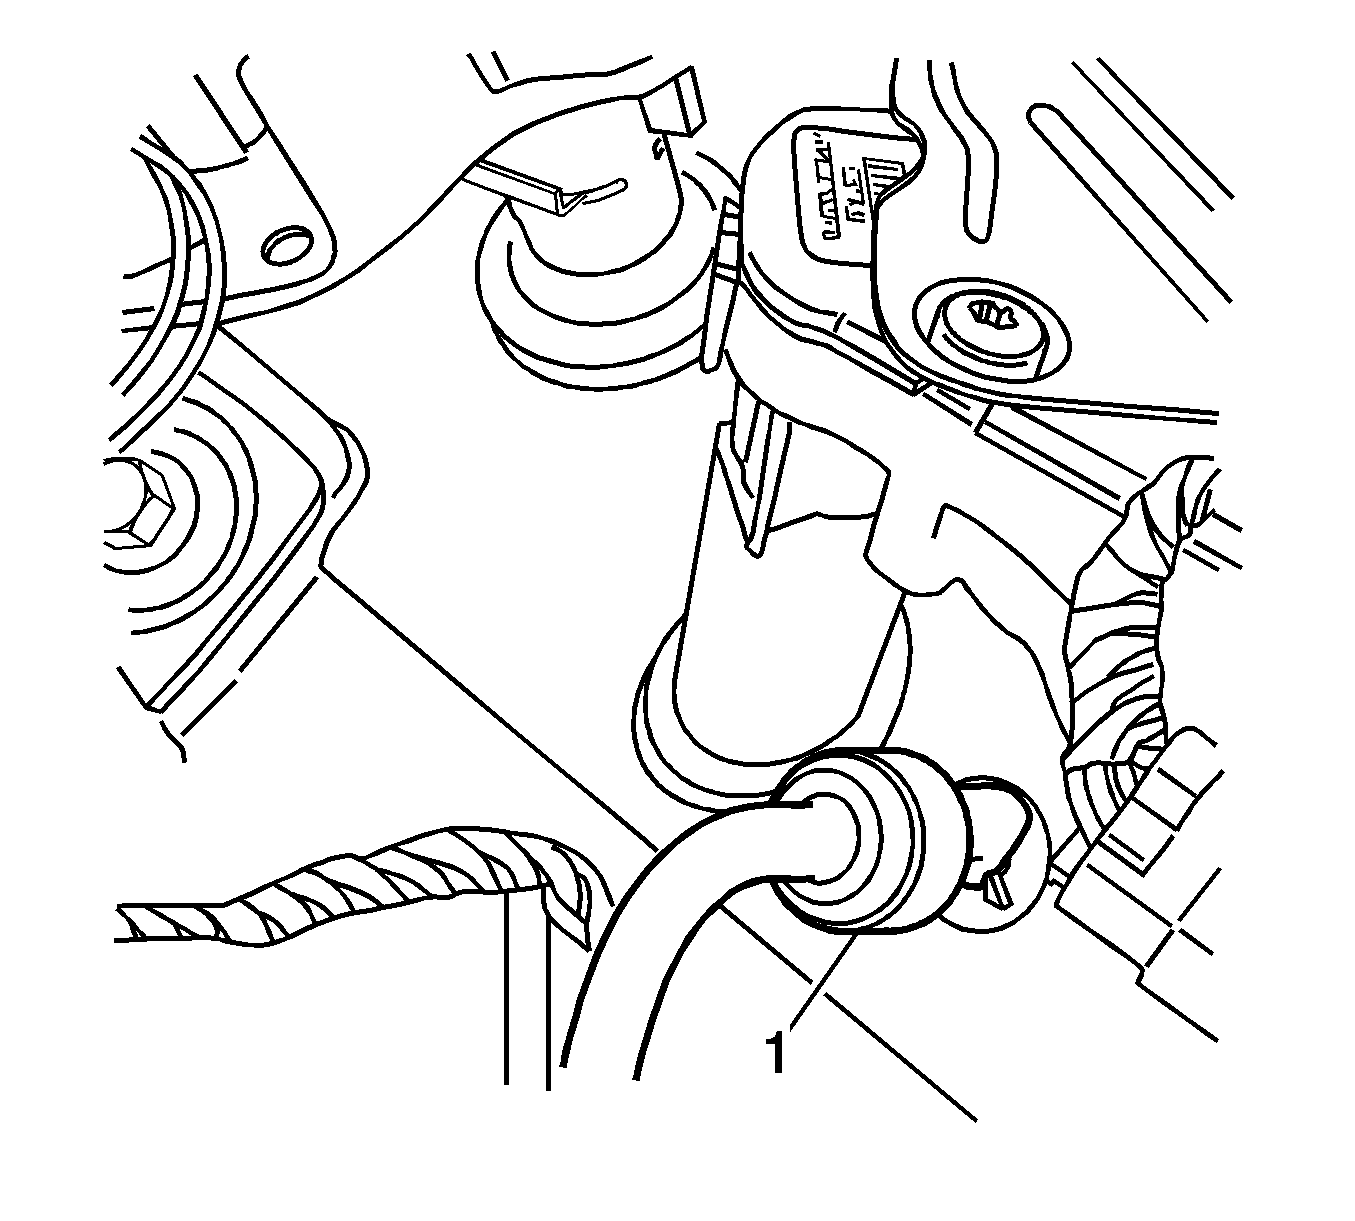
Follow the service procedure below to add an additional check valve to the rear window washer hose where it passes through the lift gate sheet metal.
- Remove the lift gate garnish molding.
- Remove the lift gate trim panel.
- Locate and remove the straight connector that connects the washer hose to the pass through grommet on the lift gate sheet metal. Discard the straight connector.
- Install the new washer check valve (1), P/N 22102237, in place of the straight connector. Install with the arrow pointing in the direction of fluid flow.
- Install the lift gate trim panel.
- Install the lift gate garnish molding.
- Apply Armor-Dillo following the procedure below.
| 1.1. | Open the lift gate window. |
| 1.2. | Remove the pushpin retainers from the garnish molding. |
| 1.3. | Pry gently with a thin-bladed tool in order to release the retaining clips. |
| 1.4. | Remove the garnish molding. |
| 2.1. | Remove the pull strap. |
| 2.2. | Pry gently with a thin-bladed tool in order to release the retaining clips. |
| 2.3. | Slide the trim panel upward to disengage the mounting hooks. |
| 2.4. | Remove the trim panel from the lift gate. |

| 5.1. | Position the trim panel to the lift gate. |
| 5.2. | Slide the trim panel downward to engage the mounting hooks. |
| 5.3. | Press on the trim panel in order to engage the retaining clips. |
| 5.4. | Install the pull strap. |
| 6.1. | Install the molding to the lift gate. |
| 6.2. | Press on the molding in order to engage the retaining clips. |
| 6.3. | Install the pushpin retainers into the garnish molding. |
| 6.4. | Close the lift gate window. |
Caution: This product should be used in a well ventilated area using nitrile gloves and proper eye protection. This product is flammable, do not use around open flames. These reconditioning wipes may spontaneously combust, be aware of the risk. All personnel should read the Material Safety Data Sheet before using this product. Proper disposal of used wipes should be followed.
Important: Make certain that the surface is clean and dry before applying Armor-Dillo. This product will not bond to wet surfaces and, if the surface is not clean, the results will not meet expectations.
| 7.1. | Wash the vehicle with a general purpose cleaner to make certain the surface is clean. |
| 7.2. | For ease of clean-up, tape off the painted or chrome bumper surface around step cover and remove the license plate if necessary. |
| 7.3. | Apply Armor-Dillo evenly over the surface. |
| 7.4. | Allow the product to remain on the surface for a few minutes. |
| Important: If this step is not performed, this product will remain tacky and will attract dirt. |
| 7.5. | . Use a damp lint free towel and wipe the treated surface thoroughly. |
| 7.6. | A second coat may be needed on severely stained surface and can be applied after step # 4. |
Parts Information
Part Number | Description |
|---|---|
22102237 | Washer Check Valve |
Parts are currently available from GMSPO.
For Ordering |
|---|
www.armor-dillo.net (COD and credit card orders will be accepted) |
1-888-393-4722 |
Armor-Dillo TS-1 Recondition Wipes |
This product is sold in a package of 20 per box.
A Canadian distributor is not available for this product. Dealers in Canada may experience difficulty and delays associated with cross border shipment. French Language support cannot be guaranteed, therefore, French speaking dealers may seek the assistance of their District Service manager.
Warranty Information
Important: Please advise the customer that this is a one-time warranty repair and that future coatings are the responsibility of the owner.
For vehicles repaired under warranty, use:
Labor Operation | Description | Labor Time |
|---|---|---|
*B1798 | Valve Washer, Pump | 0.2 hr |
B9734 | Condition, Rear Step Bumper Cover | 0.4 hr |
Add | To Apply Second Coat If Needed | 0.2 hr |
Add | Material Allowance | GC |
Add | Material Allowance Second Coat If Needed At The Time Of The First Repair | GN |
*This is a unique labor operation number for use only with this bulletin. This number will not be published in the Labor Time Guide. | ||
