Front Propeller Shaft Replacement NP8
Removal Procedure
Tools Required
J 43218 Clamp Pliers
- Position the transmission range select lever to Neutral (N) and release the park brake.
- Raise and support the vehicle.
- Remove the transfer case shield, if equipped. Refer to Shield Replacement in Transfer Case - NVG 246-NP8 (Two-Speed Automatic).
- Remove the nut securing the transmission control lever to the manual control shaft.
- Remove the transmission control lever from the manual control shaft.
- Check the universal joints for looseness.
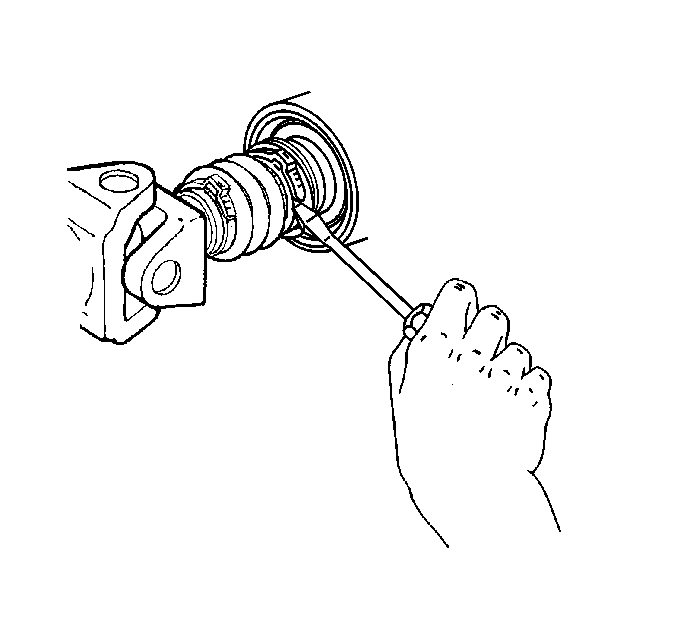
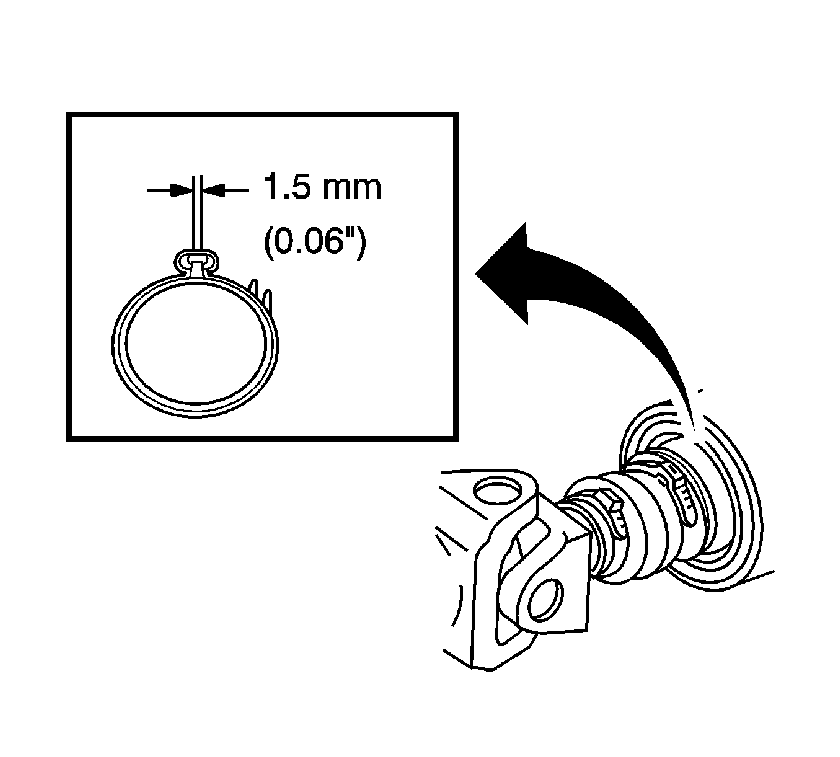
- Remove the boot clamp at the transfer case end by lifting up the exposed end of the clamp with a flat bladed tool.
- Reference mark the relationship of the propeller shaft to the front axle.
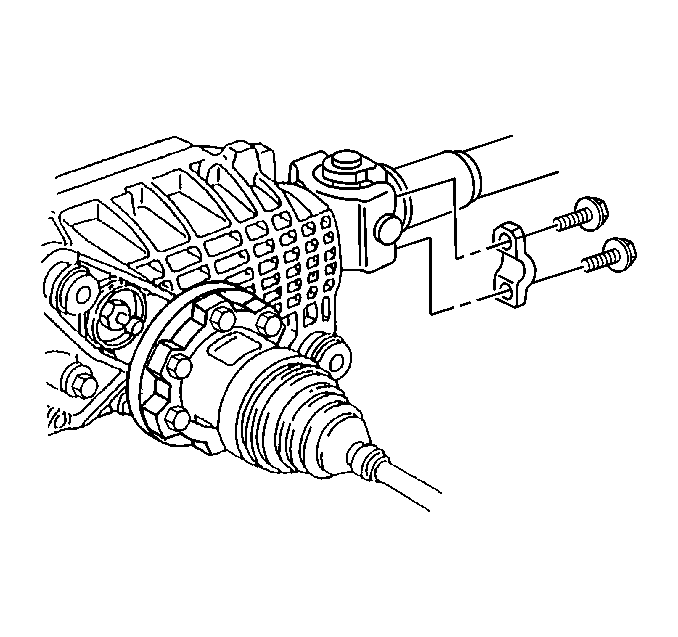
- Remove the bolts and the bearing cap retainers from the front axle.
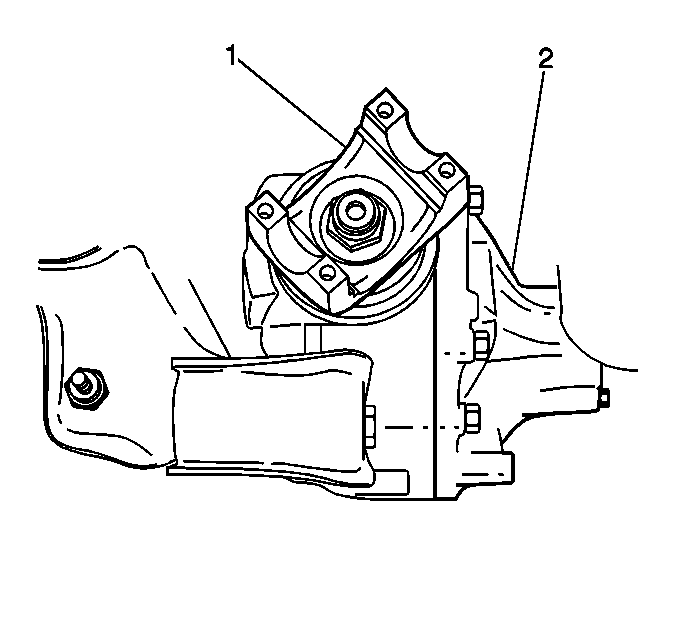
- Rotate the front axle yoke (1) until the retainer ends are at the 2 o'clock and 8 o'clock positions.
- Disengage the propeller shaft by moving it rearward.
- Rotate the propeller shaft (1) 90 degrees in relation to the front axle yoke (2).
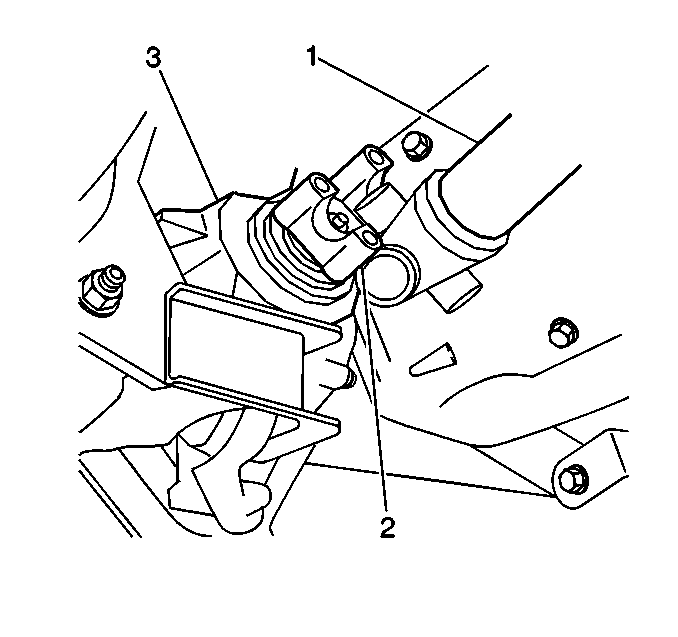
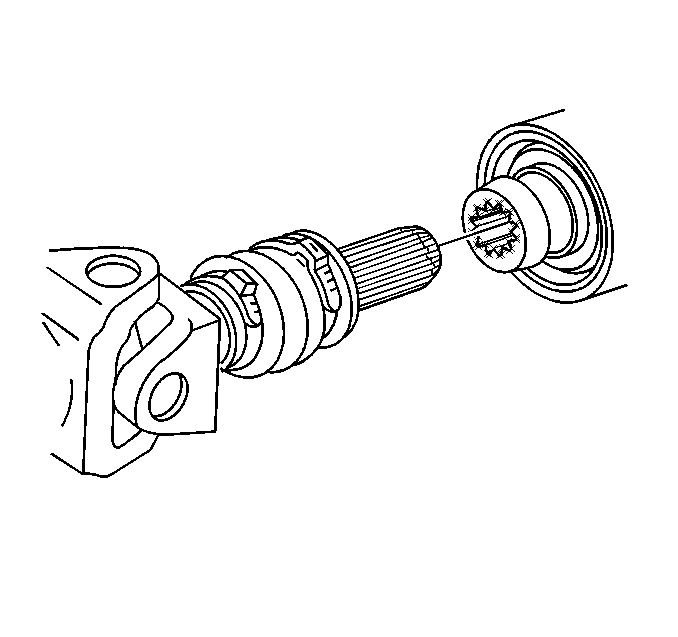
- Slide the propeller shaft boot (2) out of the groove on the OD of the output shaft (1).
- Remove the propeller shaft from the transfer case output shaft by sliding it forward.
- Remove the propeller shaft.
- Inspect the propeller shaft for damage.
Important: Accurately reference mark all driveline components prior to disassembly to ensure correct component alignment upon installation.

Important: Do not drop the universal joint bearing cap assemblies.
Installation Procedure
- Lightly coat the splines of the transfer case output shaft with grease GM P/N 12345879, Canadian P/N 10953511.
- Place the new clamp in the groove of the propeller shaft boot.
- Install the propeller shaft splines into the transfer case output shaft.
- Install the boot onto the transfer case output shaft until the boot fits into the groove on the OD of the output shaft.
- Install the propeller shaft to the front axle.
- Install the bearing cap retainers and bolts.
- Install the transmission control lever to the manual control shaft.
- Install the nut to the manual control shaft.
- Crimp the clamp with J 43218 according to crimping specifications.
- Install the transfer case shield, if equipped. Refer to in Transfer Case - NVG 246-NP8 (Two-Speed Automatic).
- Lower the vehicle.
- Position the steering column transmission shift lever to PARK.
| 5.1. | Line up the reference marks made previously. |
| 5.2. | Install the propeller shaft to the flange. |
Notice: Refer to Fastener Notice in the Preface section.
Tighten
Tighten the bolts to 20 N·m (15 lb ft).
Tighten
Tighten the nut to 28 N·m (21 lb ft).
Front Propeller Shaft Replacement Except NP8
Removal Procedure
- Raise the vehicle on a hoist.
- Remove the transfer case shield, if equipped. Refer to Shield Replacement in Transfer Case - BW 4401 (Two Speed Manual), or Shield Replacement in Transfer Case - BW 4470 (Two Speed Manual), or Shield Replacement in Transfer Case - NVG 241-NP2 (Two Speed Manual), or Shield Replacement in Transfer Case - NVG 243-NP1 (Two Speed Selectable).
- Reference mark the relationship of the propeller shaft to the front axle and the transfer case flange.
- Remove the bolts and the bearing cap retainers from the front axle.
- Remove the bolts and the bearing cap retainers from the transfer case.
- Remove the propeller shaft.
- Compress the propeller shaft forward enough to disengage, then move the propeller shaft rearward.
- Avoid dropping the bearing cap assemblies from the yoke ends.
- Clean all parts with an approved solvent.
- Inspect the splines for damage, wear, burrs, and twisting.
- Inspect the universal joint bearings for wear.
- Inspect the propeller shaft for any evidence of damage.
Important: Accurately reference mark all driveline components prior to disassembly to ensure correct component alignment upon installation.
Installation Procedure
- Extend the propeller shaft to its full length, then compress it about half its stroke.
- Align the reference marks on the propeller shaft and front drive axle yoke.
- Install the propeller shaft to the front drive axle yoke.
- Support the free end of the propeller shaft.
- Install the bearing cap retainers and bolts.
- Align the reference marks on the propeller shaft and the transfer case.
- Adjust the propeller shaft length.
- Install the propeller shaft to the transfer case.
- Install the bearing cap retainers and bolts.
- Install the transfer case shield, if equipped. Refer to Shield Replacement in Transfer Case - BW 4401 (Two Speed Manual), or Shield Replacement in Transfer Case - BW 4470 (Two Speed Manual), or Shield Replacement in Transfer Case - NVG 241-NP2 (Two Speed Manual), or Shield Replacement in Transfer Case - NVG 243-NP1 (Two Speed Selectable).
- Apply chassis lubricant at the slip spline grease fitting until the grease begins to leave through the vent hole.
Tighten
Tighten the retainer bolts to 20 N·m (15 lb ft).
Tighten
Tighten the retainer bolts to 20 N·m (15 lb ft).
Important: If the slip spline is dry or corroded, it may be necessary to disconnect the propeller shaft from the vehicle. Wipe the spline clean before installation.
