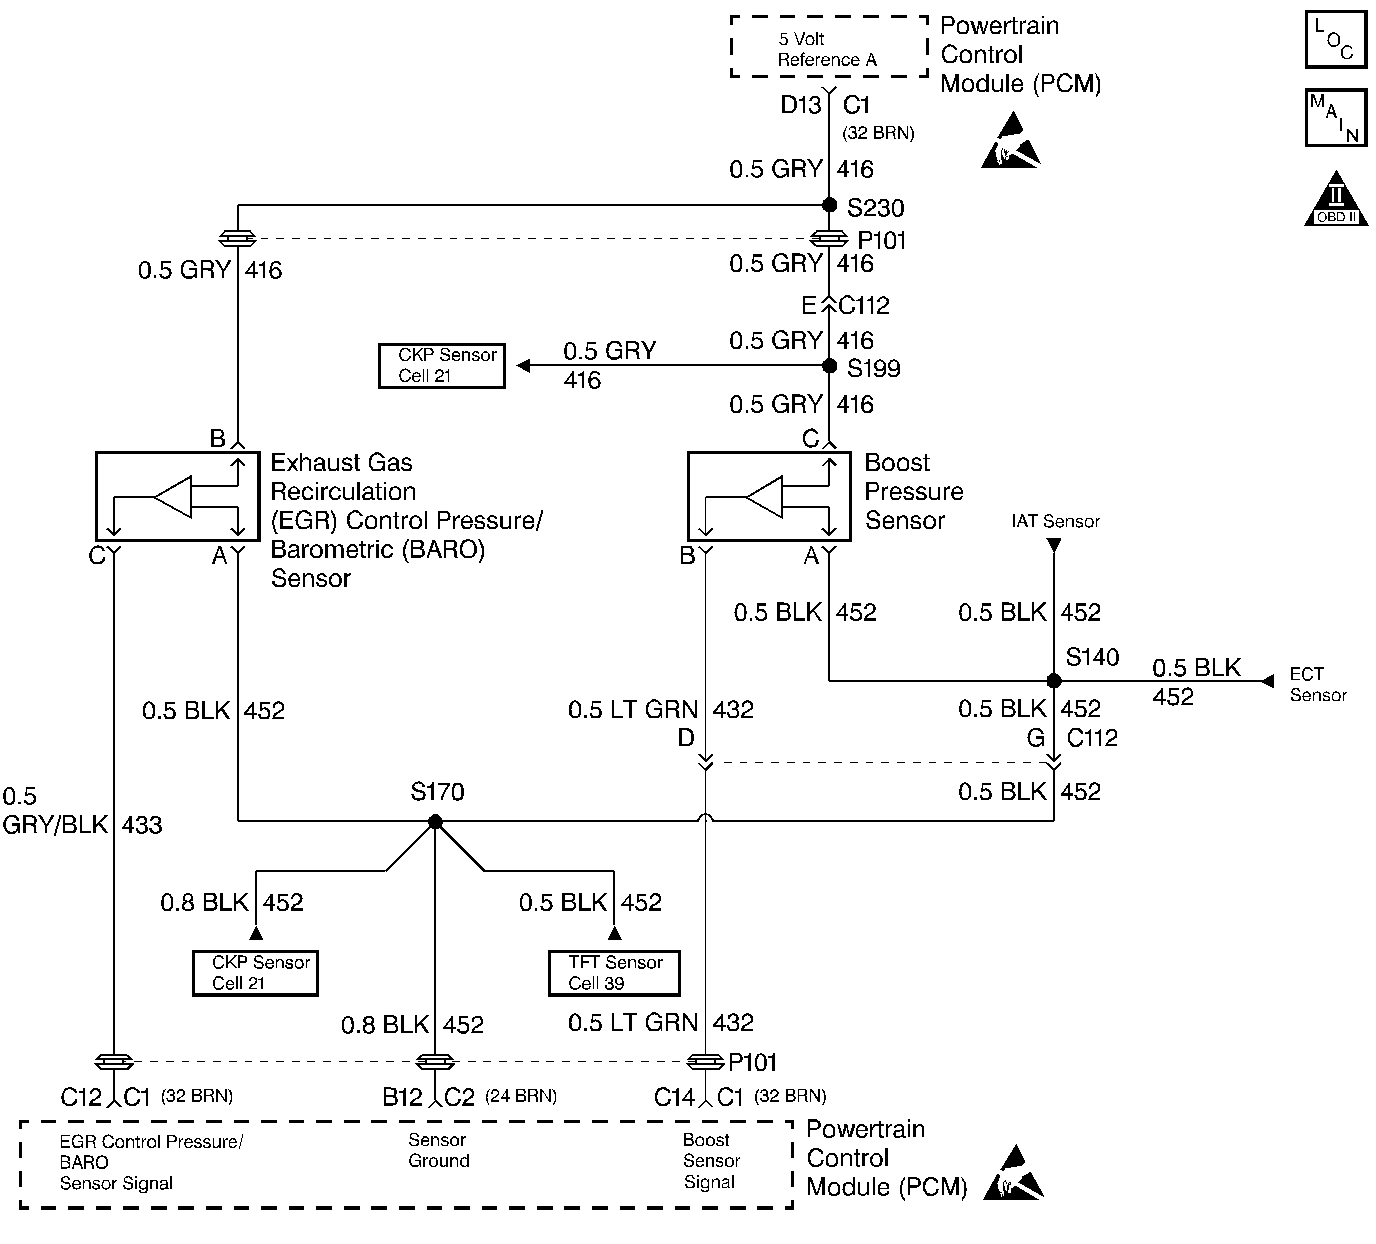
Circuit Description
The PCM operates a solenoid to control boost. This solenoid is normally open. By providing a ground path the PCM energizes the solenoid which then allows vacuum to pass to the wastegate valve. During normal operation, the PCM compares its wastegate duty cycle signal with the boost signal and makes corrections in the duty cycle accordingly. This is a type B DTC.
Conditions for Setting the DTC
| • | Boost Pressure greater than or equal 4.8 volts (202 kPa). |
| • | Engine Speed less than 3506 RPM. |
Action Taken When the DTC Sets
No turbo boost.
Conditions for Clearing the MIL/DTC
| • | The PCM will turn the MIL off after three consecutive trips without a fault condition. |
| • | A History DTC will clear when forty consecutive warm-up cycles that the diagnostic does not fail (coolant temperature has risen 5°C (40°F) from start up coolant temperature and engine coolant temperature exceeds 71°C (160°F) that same ignition cycle. |
| • | Use of a Scan Tool |
Diagnostic Aids
With the ignition ON and the engine stopped, boost pressure is approximately equal to Baro. Comparison of this reading with a known good vehicle using the same sensor is a good way to check accuracy of a suspec' sensor. Readings should be the same + .4 volt. Very little boost can be attained by revving the engine in neutral. A J 39200 can be used to measure (actual) signal voltage at the PCM harness connector.
Test Description
Number(s) below refer to the step number(s) on the Diagnostic Table.
-
This step will determine if the PCM is responding to a low signal voltage. This will indicate that the PCM is OK.
-
If the scan display is still less than or equal to 9 kPa by disconnecting the PCM the short to voltage is in the wiring.
-
If the voltmeter value stays the same by disconnecting the PCM the short to battery voltage is in the wiring.
Step | Action | Value(s) | Yes | No |
|---|---|---|---|---|
1 |
Important: Before clearing the DTCs, use the scan tool Capture Info to save the Freeze Frame and failure records for reference. The control module's data is deleted once the Clear Info function is used. Did you perform the Powertrain On-Board Diagnostic (OBD) System Check? | -- | ||
2 |
Does the scan tool display a Boost Pressure greater than or equal to the specified value? | 202 kPa | ||
Does the Scan tool display a Boost Pressure less than or equal to the specified value? | 10 kPa | |||
4 |
Is the current less than the specified value? | 10 mA | ||
5 |
Are any additional DTCs stored? | -- | Go to the Applicable DTC Table | Go to Diagnostic Aids |
6 |
Probe the 5 volt reference circuit at the boost sensor harness. Is the voltage greater than the specified value? | 5.2 V | ||
7 |
Is the voltage within the within the specified range? | 4.8-5.2 V | ||
8 |
Is the action complete? | -- | ||
Is the action complete? | -- | |||
Is the action complete? | -- | -- | ||
11 |
Is the action complete? | -- | ||
12 |
Is the action complete? | -- | ||
13 |
Is the action complete? | -- | ||
14 |
Important:: The new PCM must be programmed. Refer to Powertrain Control Module Replacement/Programming Is the action complete? | -- | -- | |
15 |
Does the scan tool indicate the diagnostic Passed? | -- | ||
16 | Does the scan tool display any additional undiagnosed DTCs? | -- | Go to the Applicable DTC Table | System OK |
