Removal Procedure
Warning: The high pressure accumulator (HPA) and the chambers of the brake modulator assembly to which it attaches, store brake fluid at extremely high pressures. Fluid pressure must be relieved before attempting to service the HPA. Ensure that the recommended procedures are followed to relieve system pressure, including using the manual pressure release steps. Failure to properly follow procedures to depressurize the system may result in personal injury.
Warning: Refer to Brake Fluid Irritant Warning in the Preface section.
Caution: Refer to Brake Fluid Effects on Paint and Electrical Components Caution in the Preface section.
Caution: Always connect or disconnect the wiring harness connector from the EBCM/EBTCM with the ignition switch in the OFF position. Failure to observe this precaution could result in damage to the EBCM/EBTCM.
Note: The ignition must be in the OFF position, without pausing at ACCESSORY, and without applying the brake pedal to ensure the brake modulator and high pressure accumulator (HPA) pressure relief occurs. This process will take approximately 1-3 minutes.
- Turn the ignition to OFF, without pausing at ACCESSORY, and without applying the brake pedal.
- Raise and support the vehicle. Refer to Lifting and Jacking the Vehicle.
- Remove the assist step motor, if equipped. Refer to Assist Step Motor Replacement.
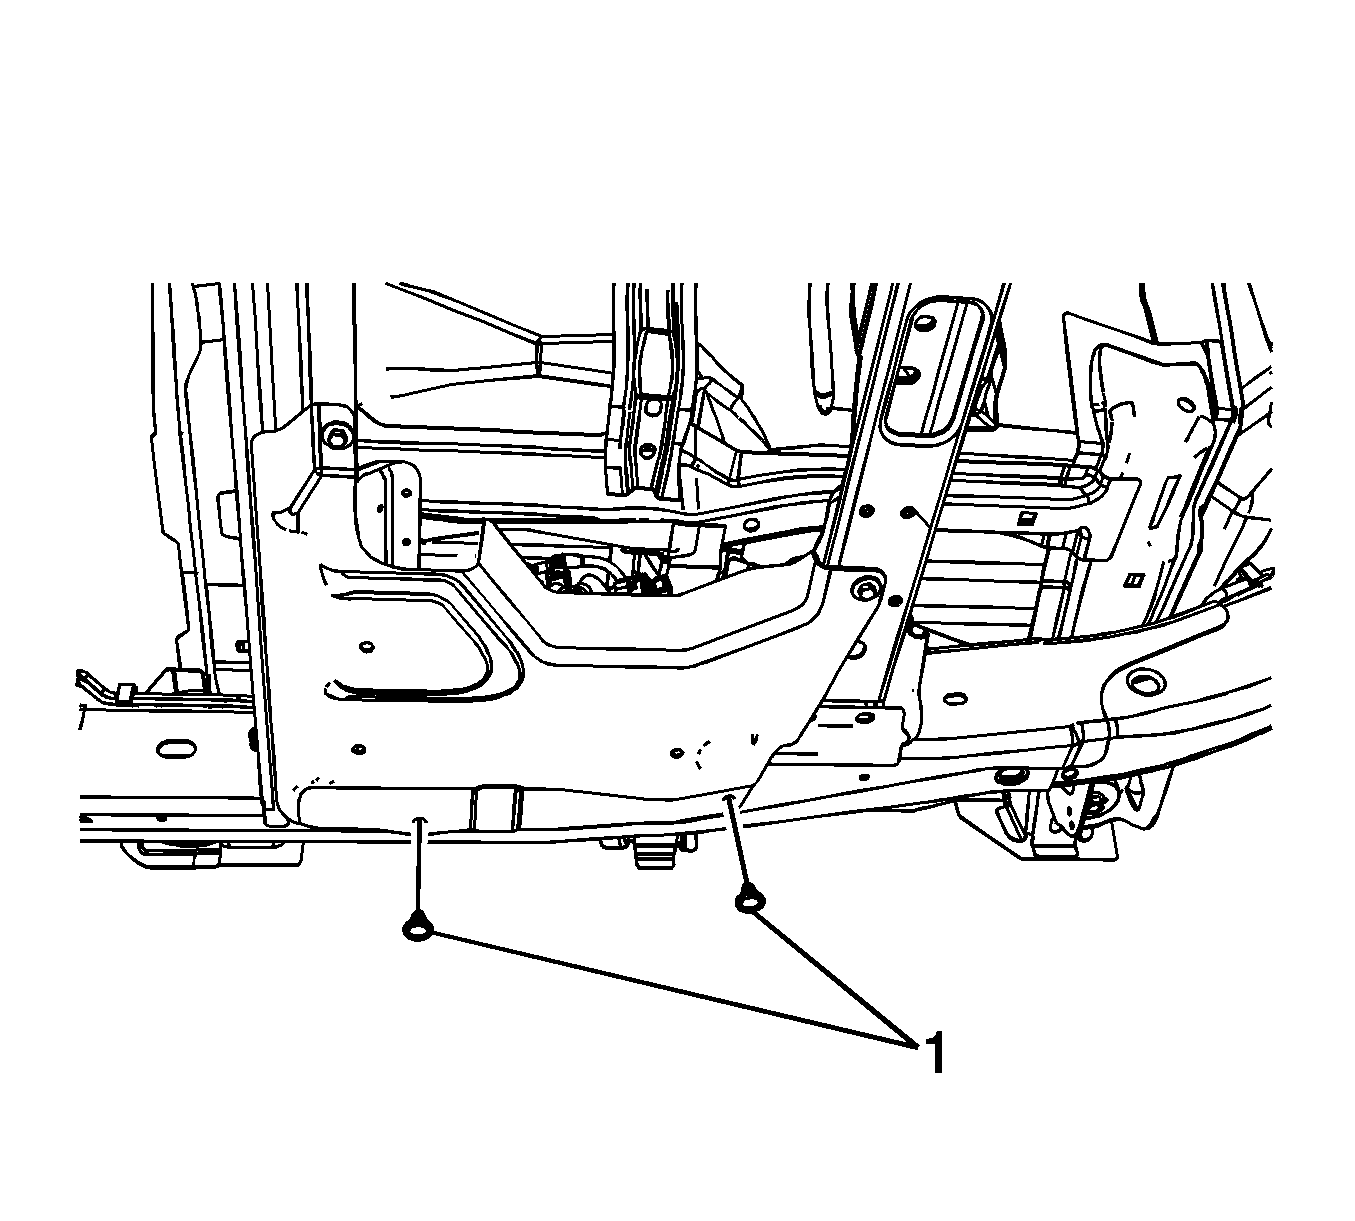
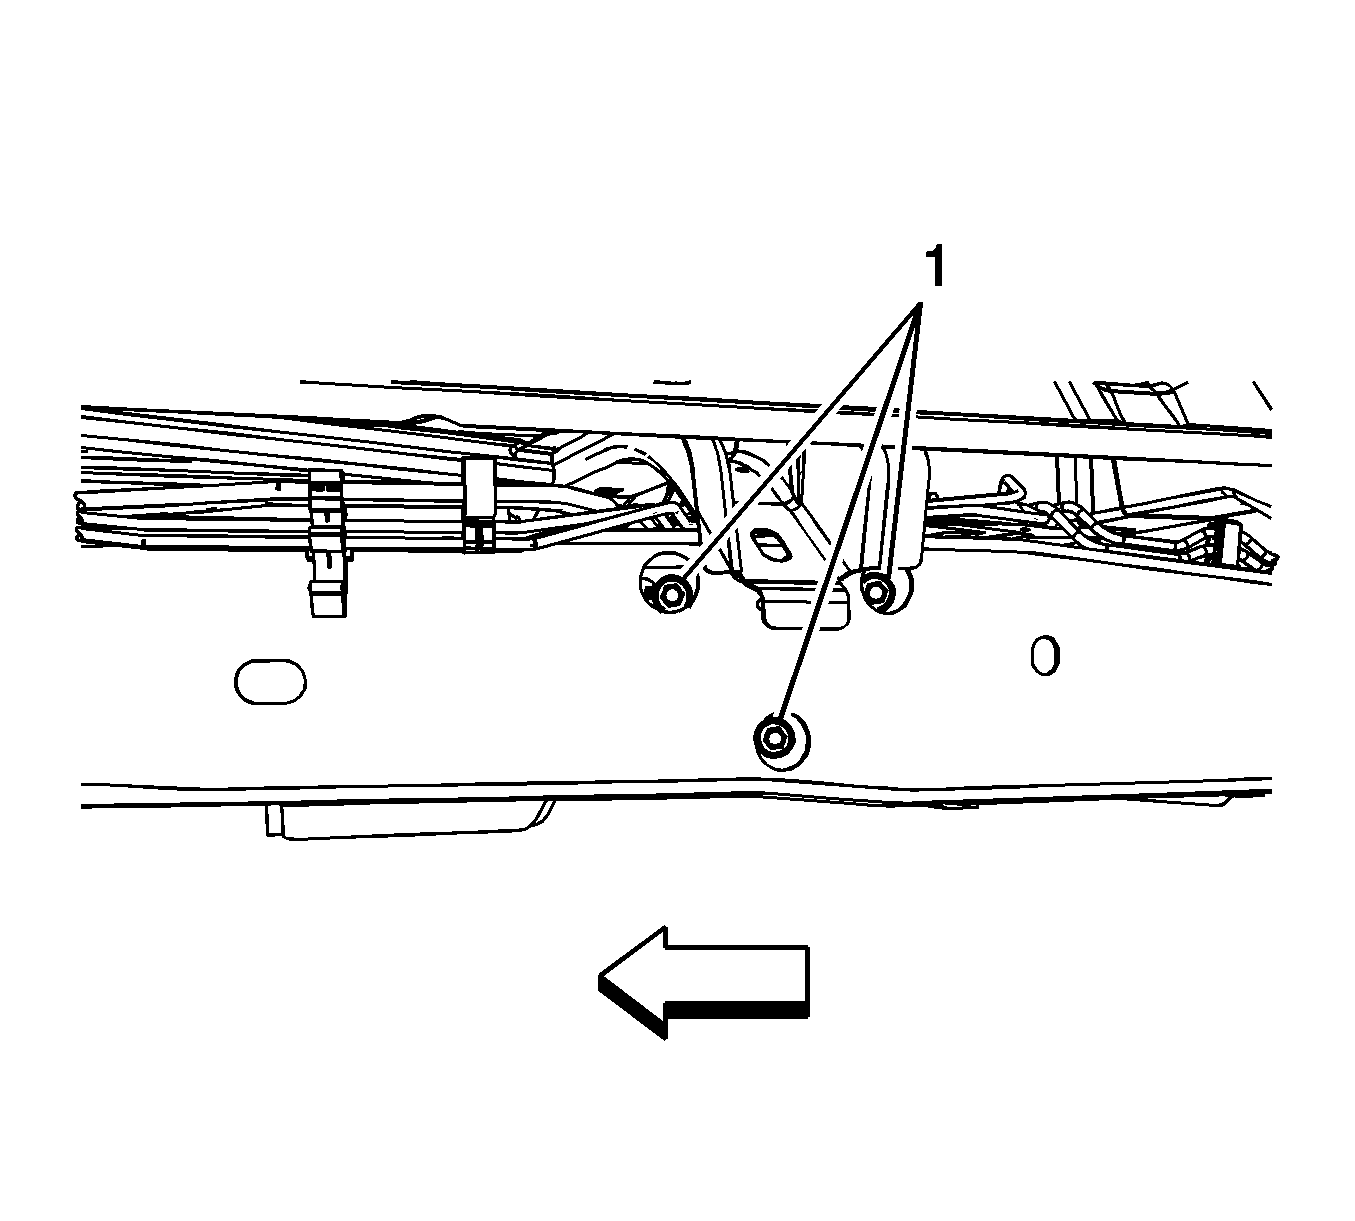
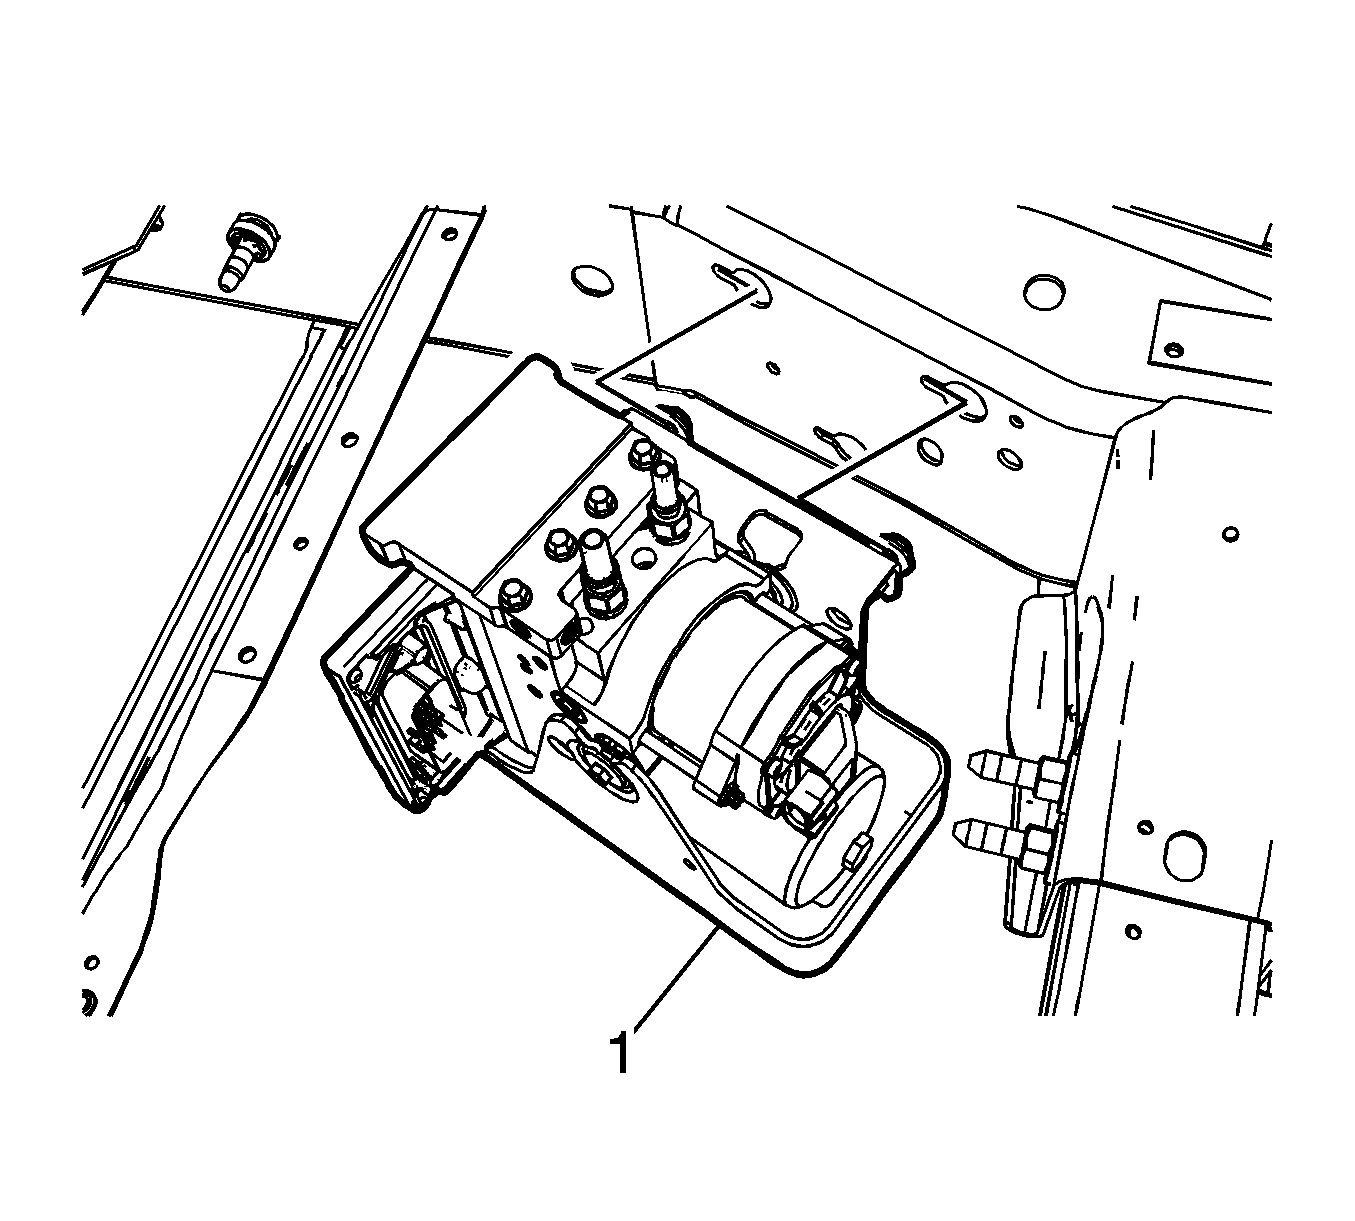
- Remove the antilock brake system (ABS) module splash shield retainers (1).
- Remove the ABS module splash shield bolts (1).
- Remove the ABS module splash shield (1).
- Clean all dirt and debris from the brake pressure modulator valve (BPMV) assembly and the brake pipe fittings.
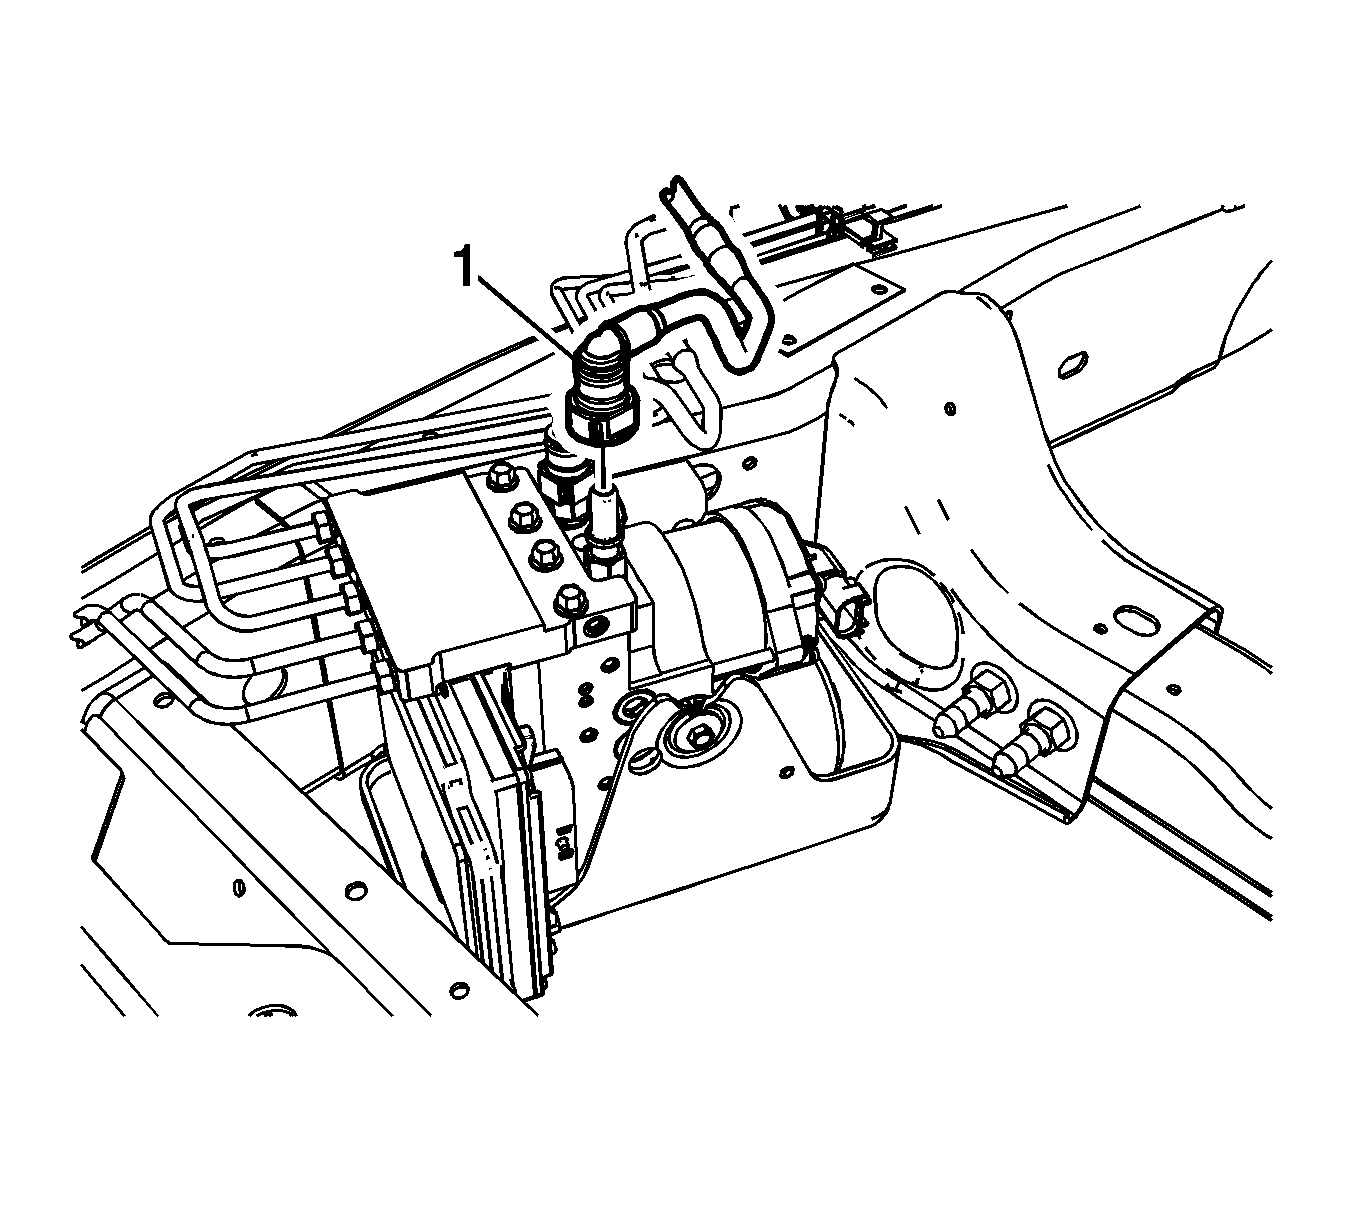
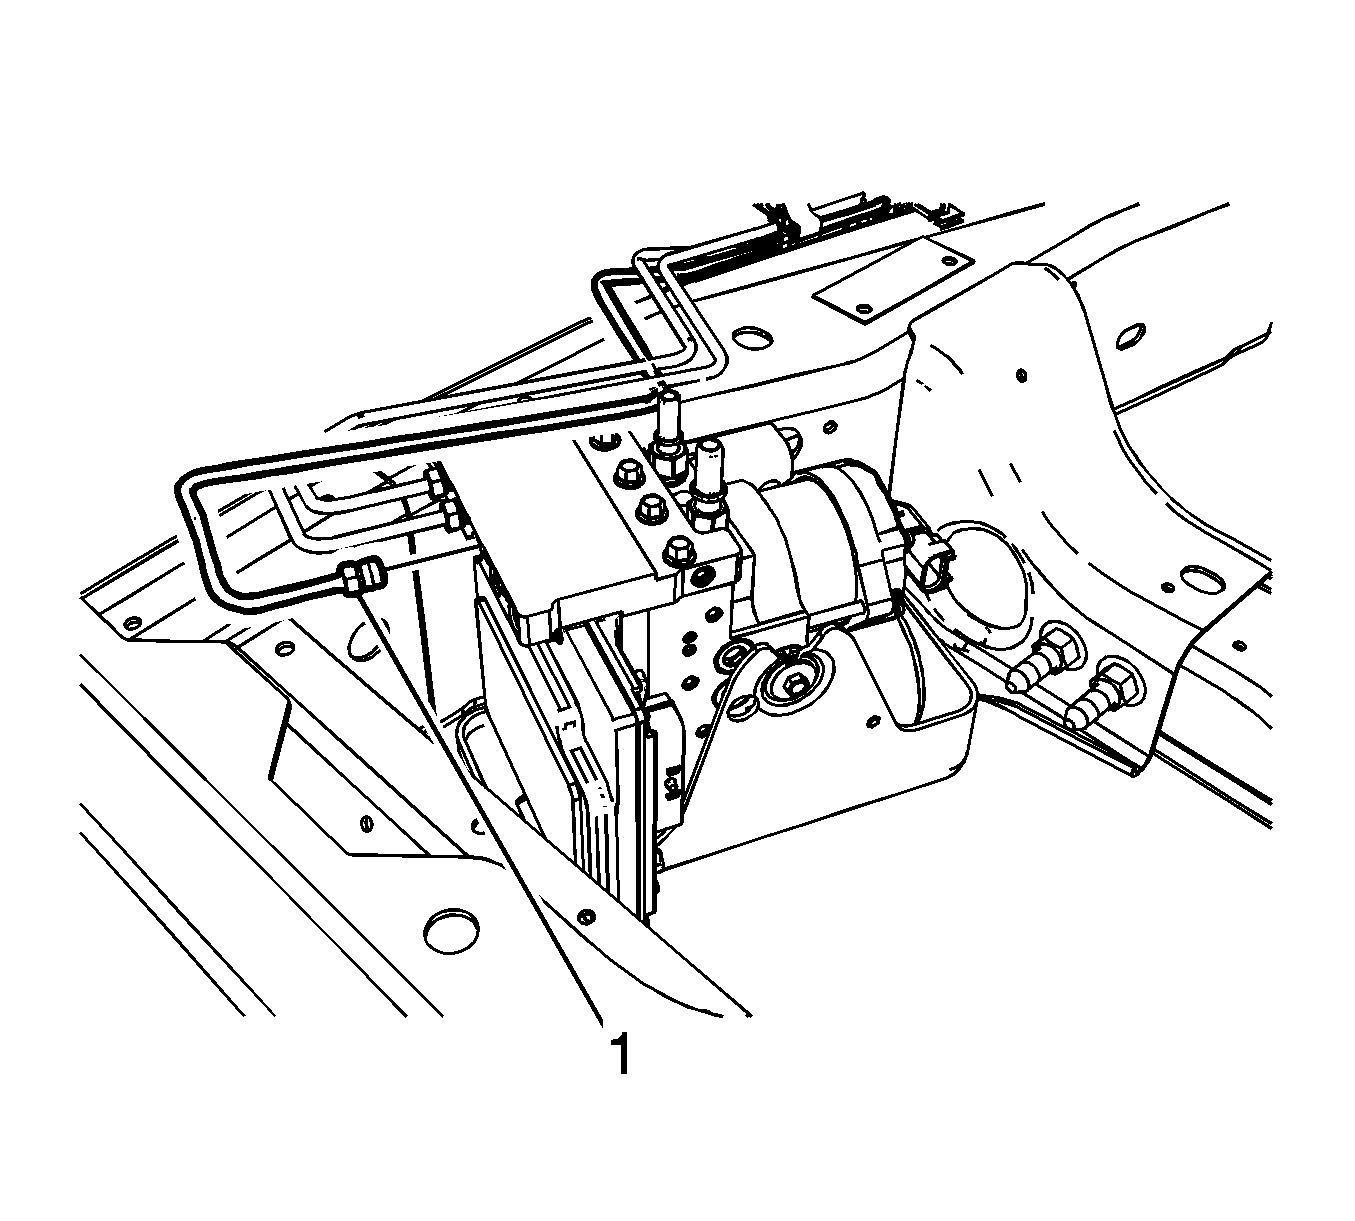
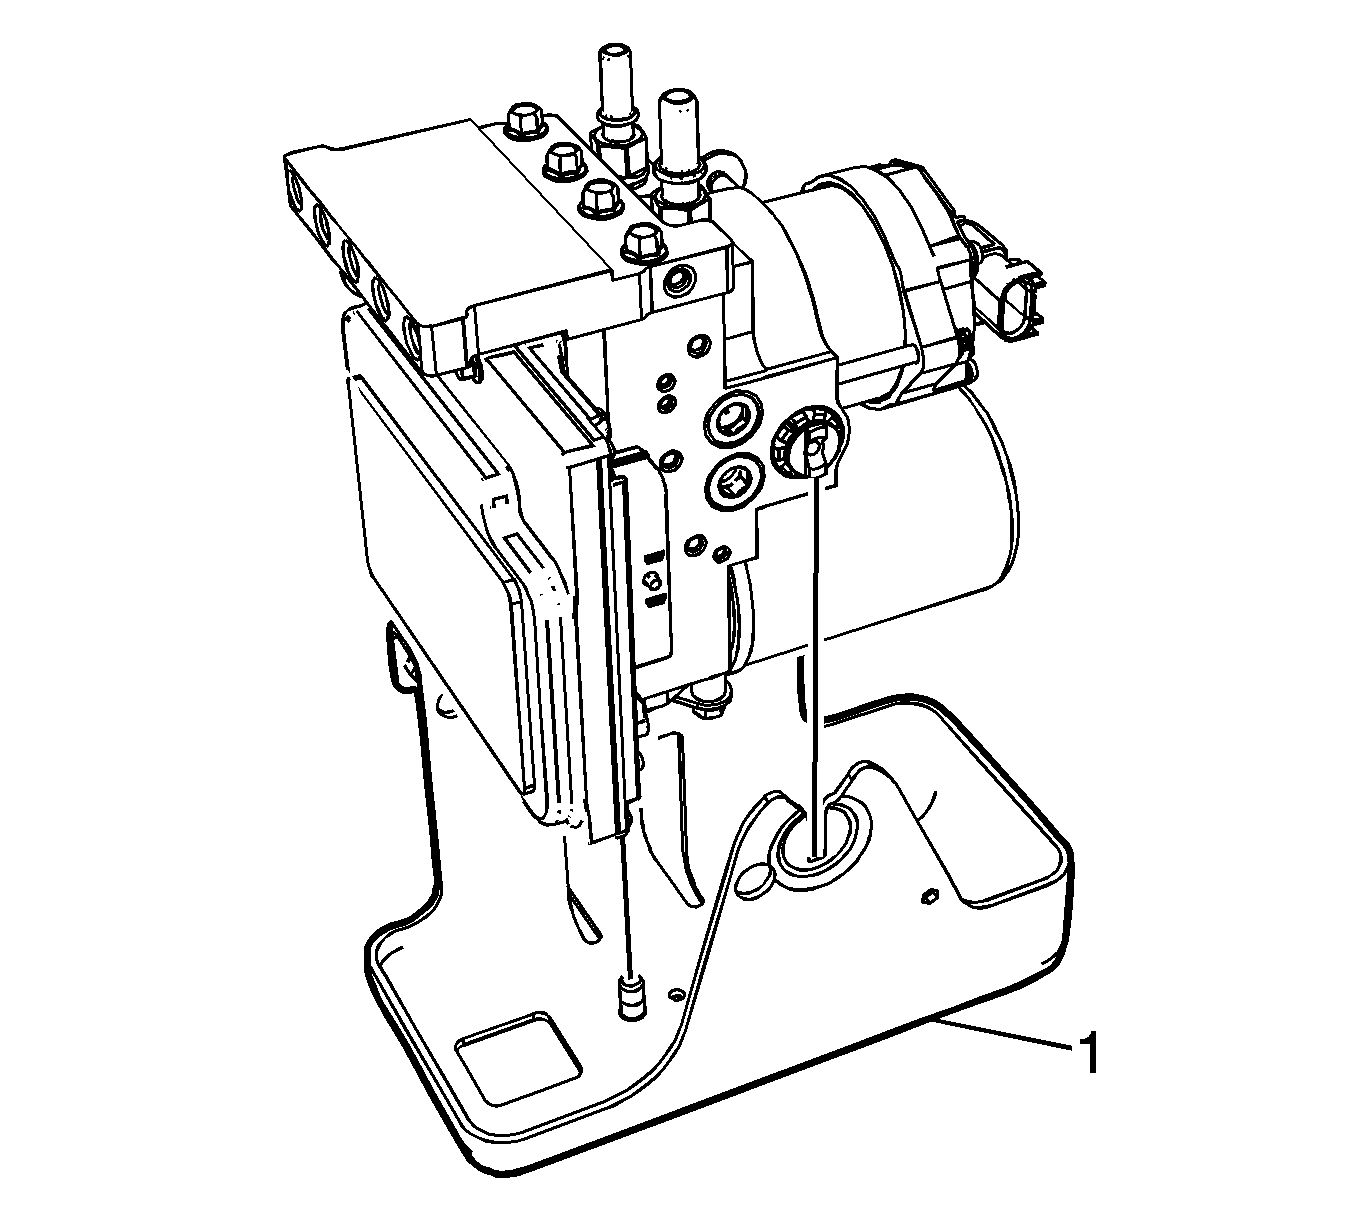
- Loosen the brake modulator manual pressure relief valve (1) ¼ turn counterclockwise.
- Seat, but do not tighten, the manual pressure relief valve.
- Disconnect the electronic brake control module (EBCM) electrical connector.
- Disconnect the electronic brake control position sensor electrical connector.
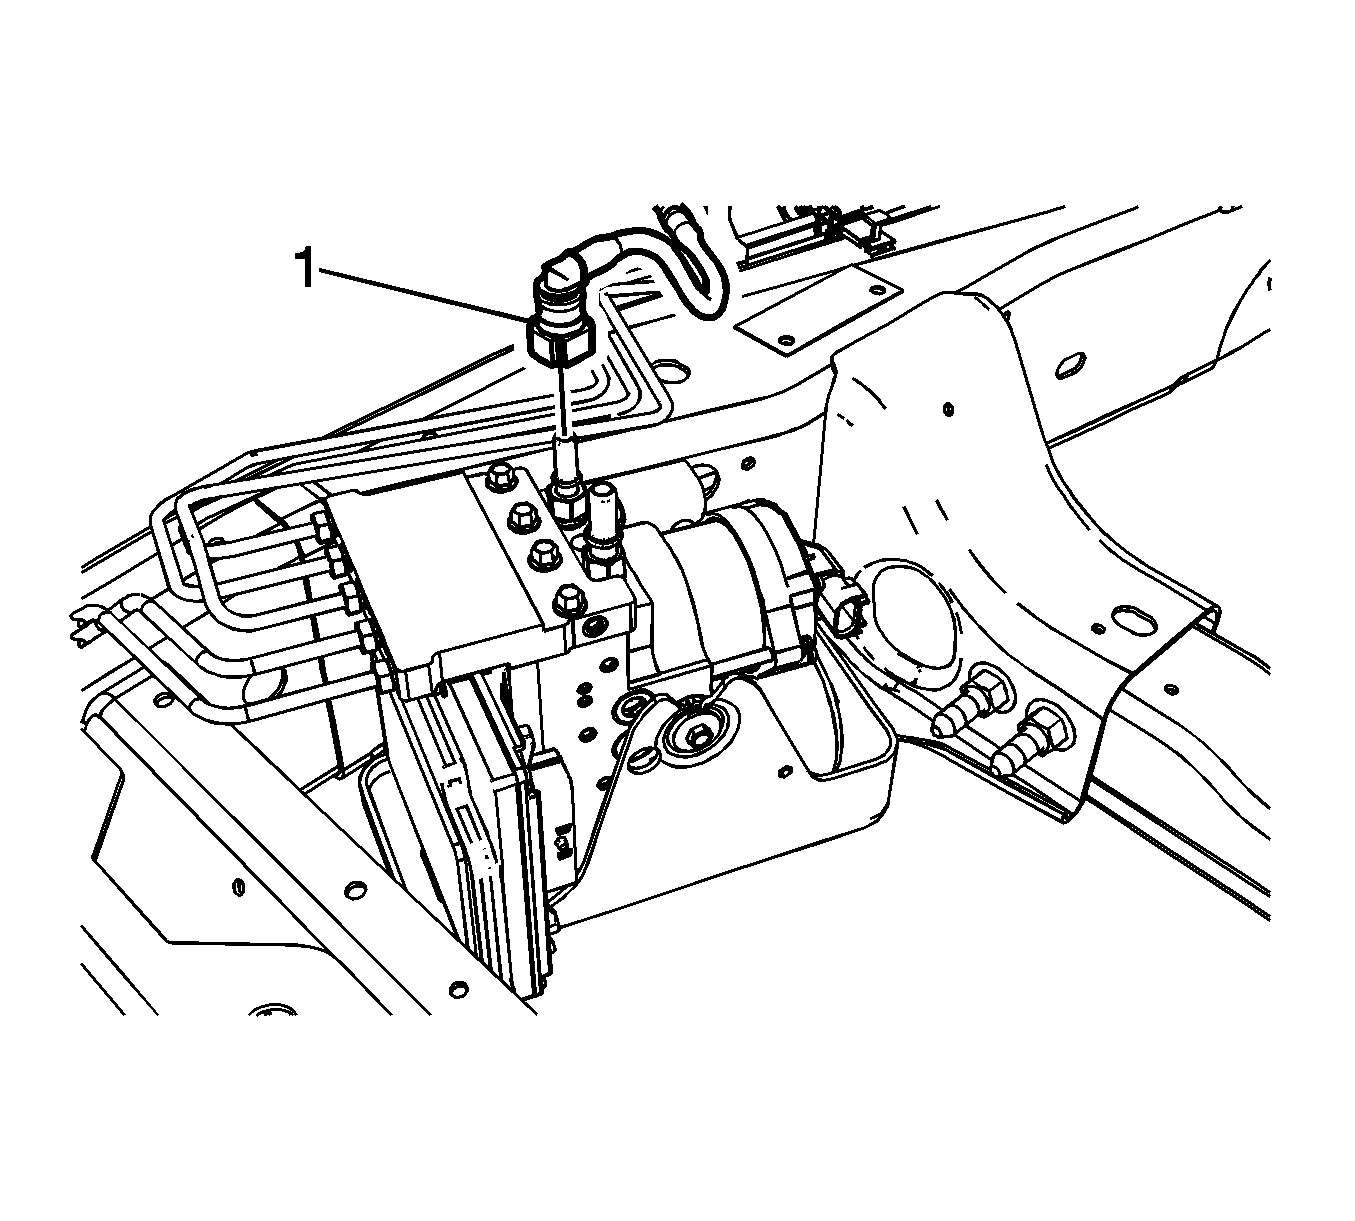
- Disconnect the BPMV supply hose quick connect (1).
- Disconnect the BPMV return hose quick connect (1).
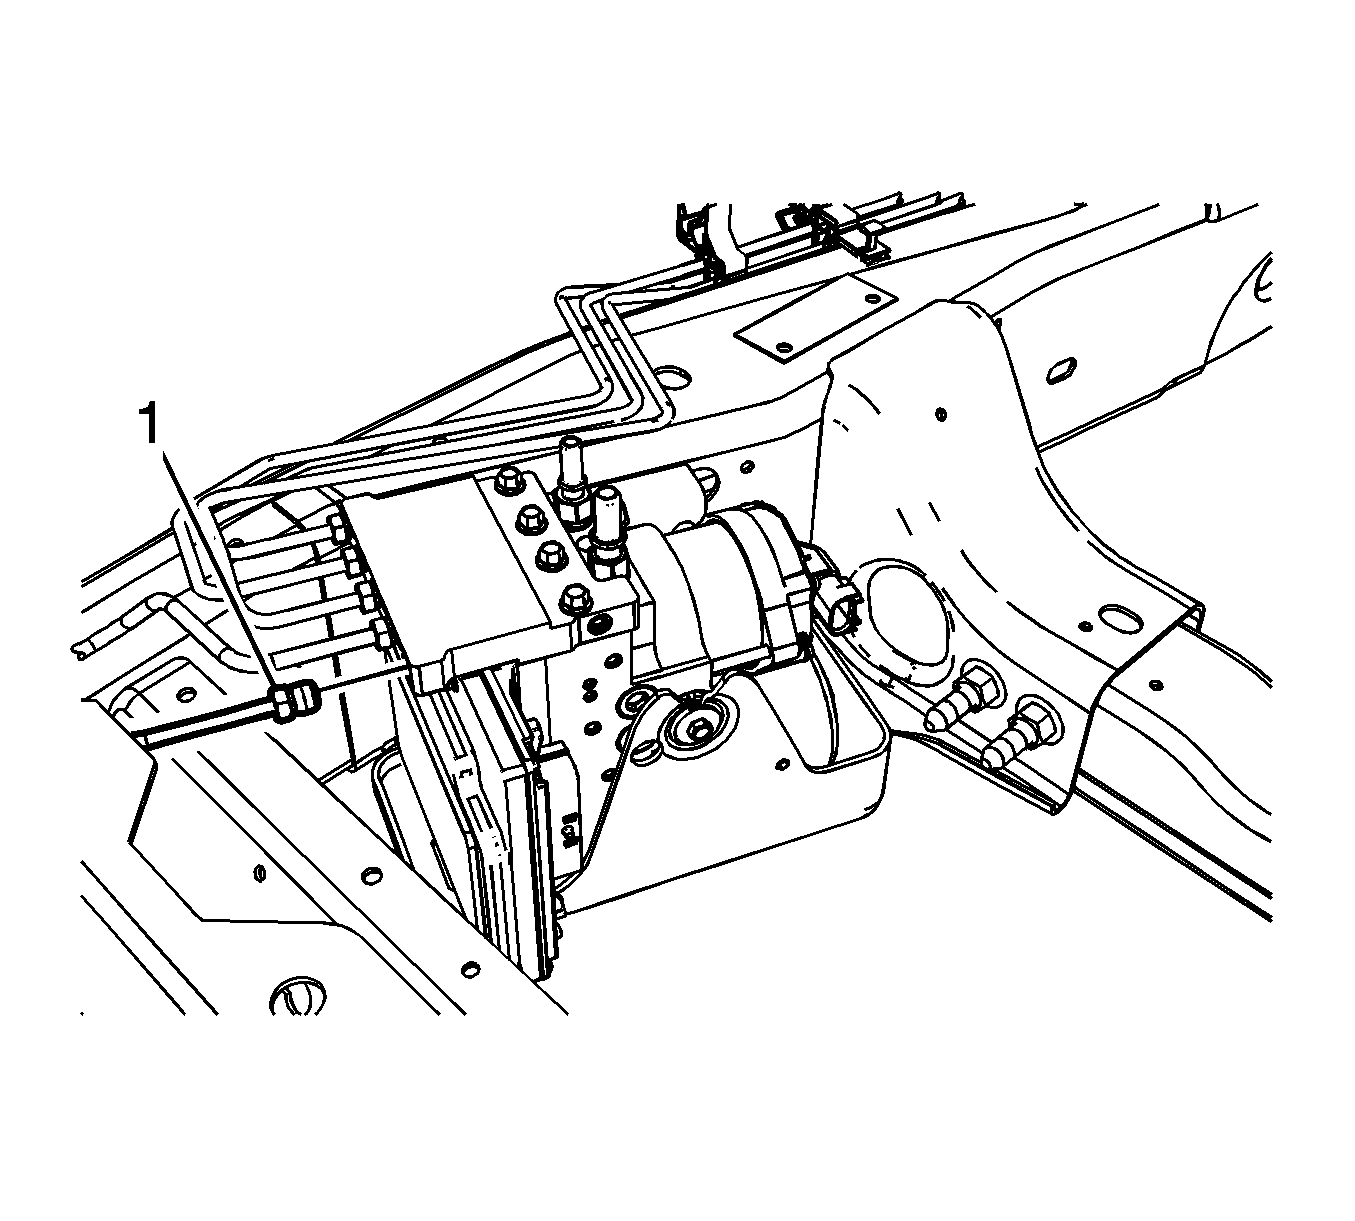
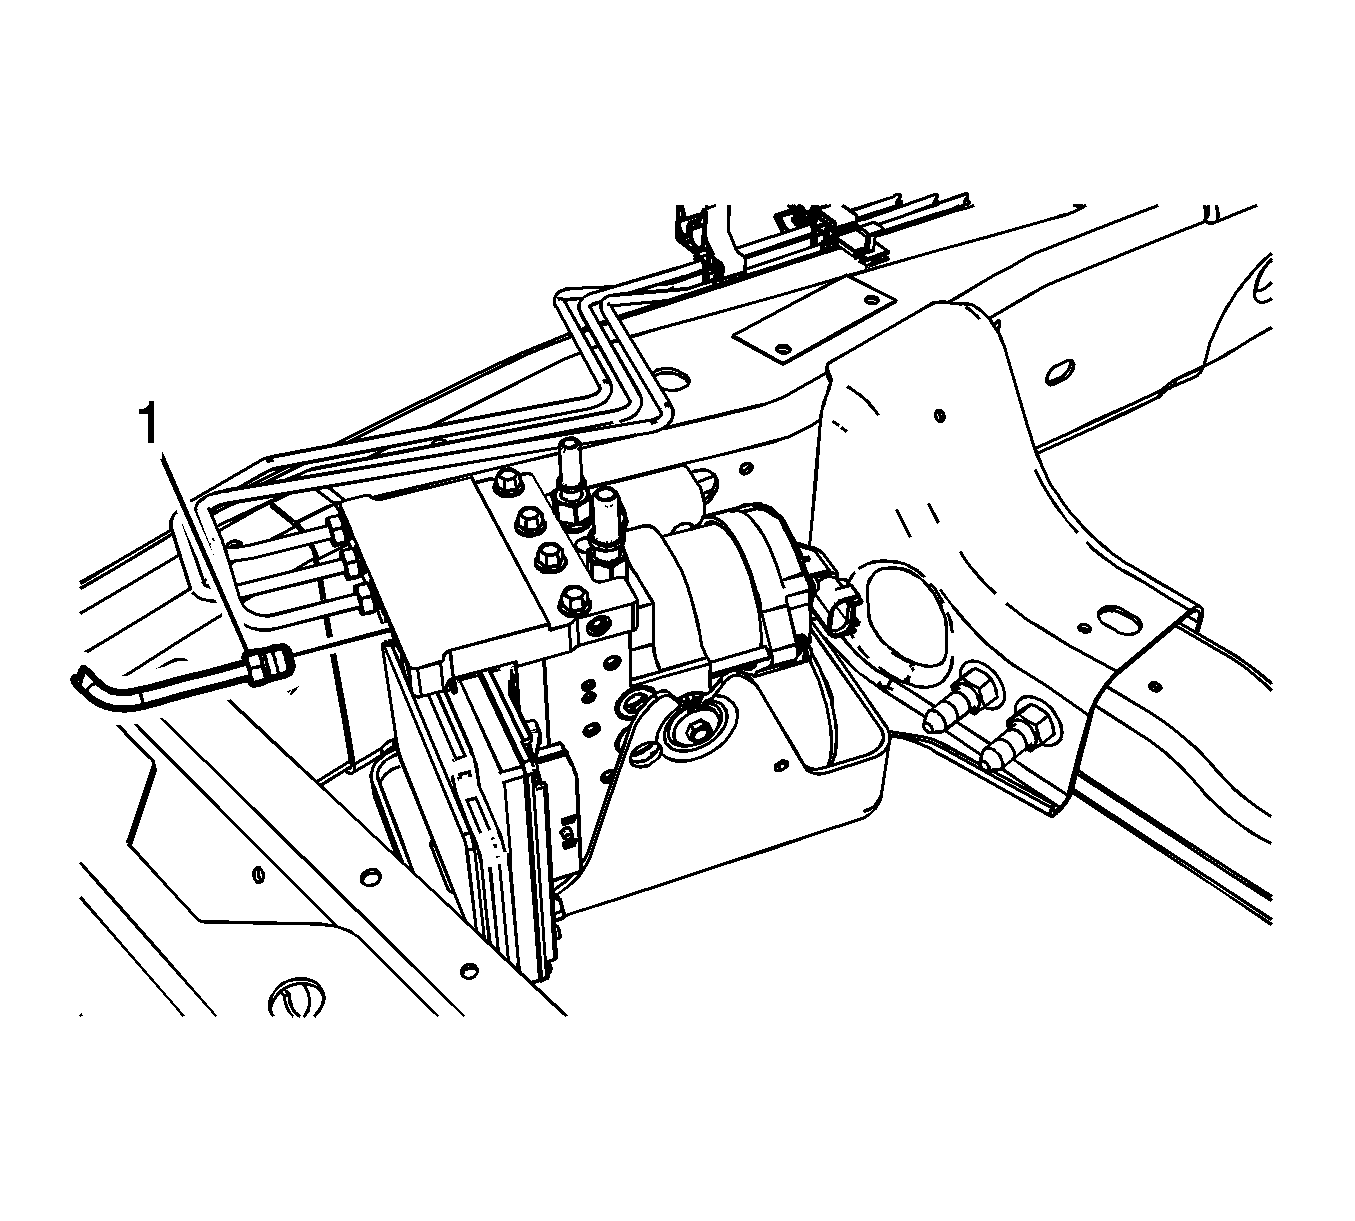
- Disconnect the RR brake pipe fitting (1).
- Disconnect the LR brake pipe fitting (1).
- Disconnect the primary brake pipe fitting (1).
- Disconnect the RH supply brake pipe fitting (1).
- Disconnect the LH supply brake pipe fitting (1).
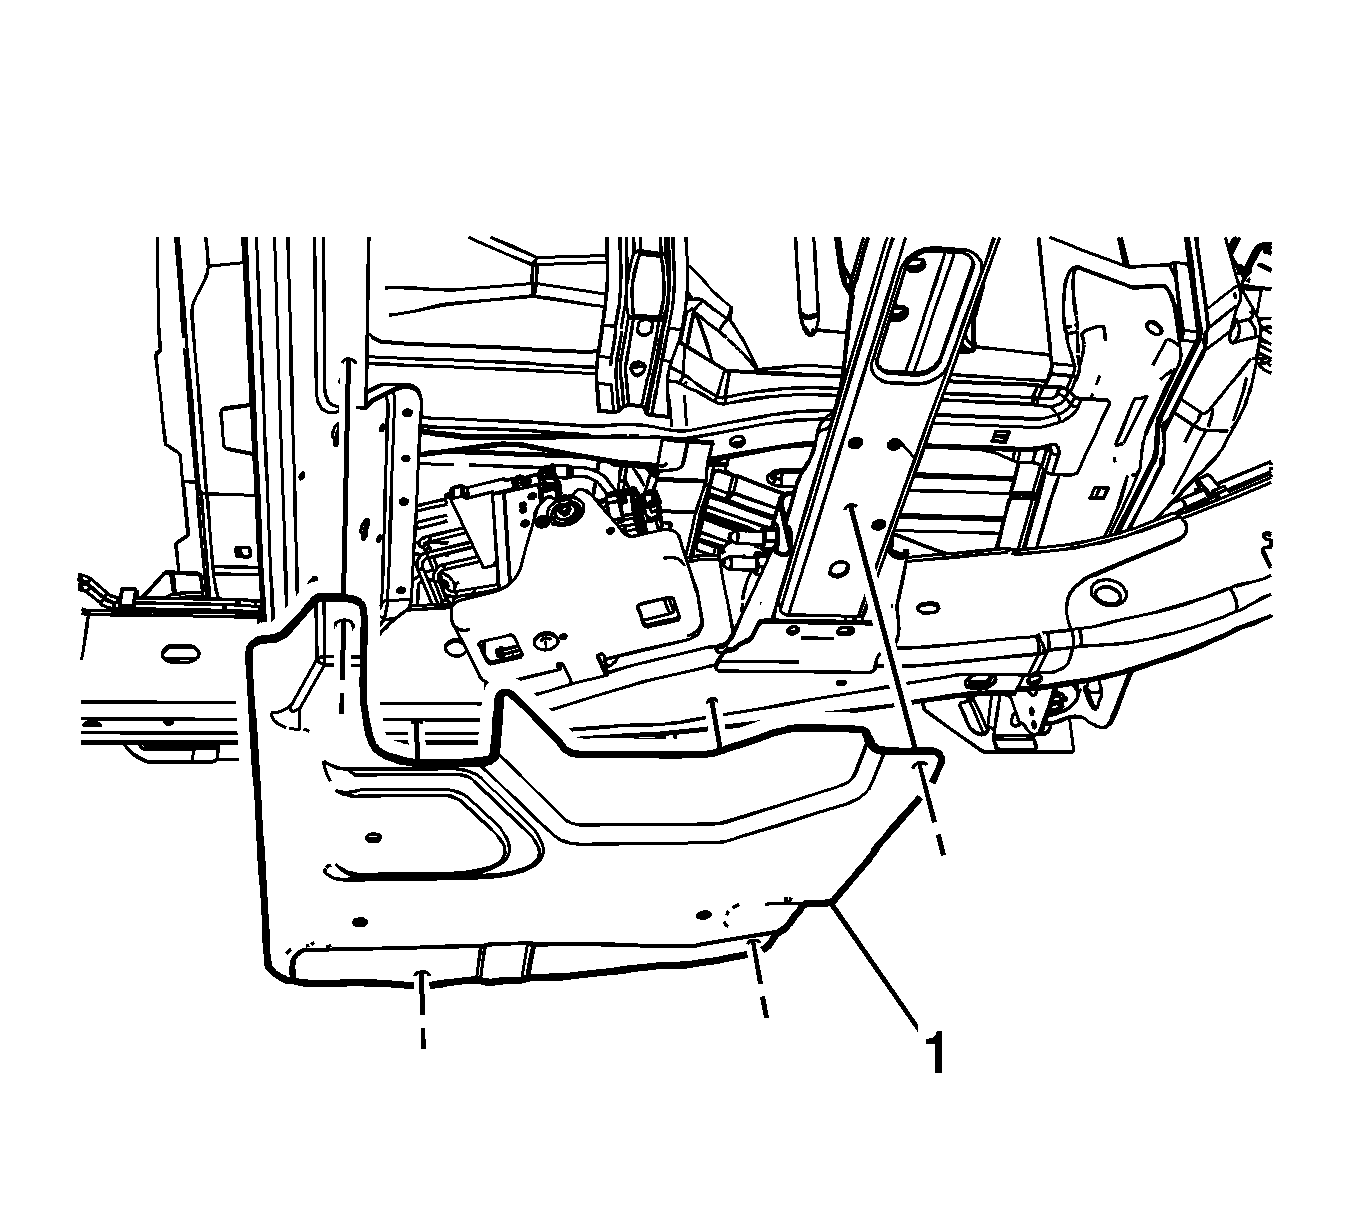
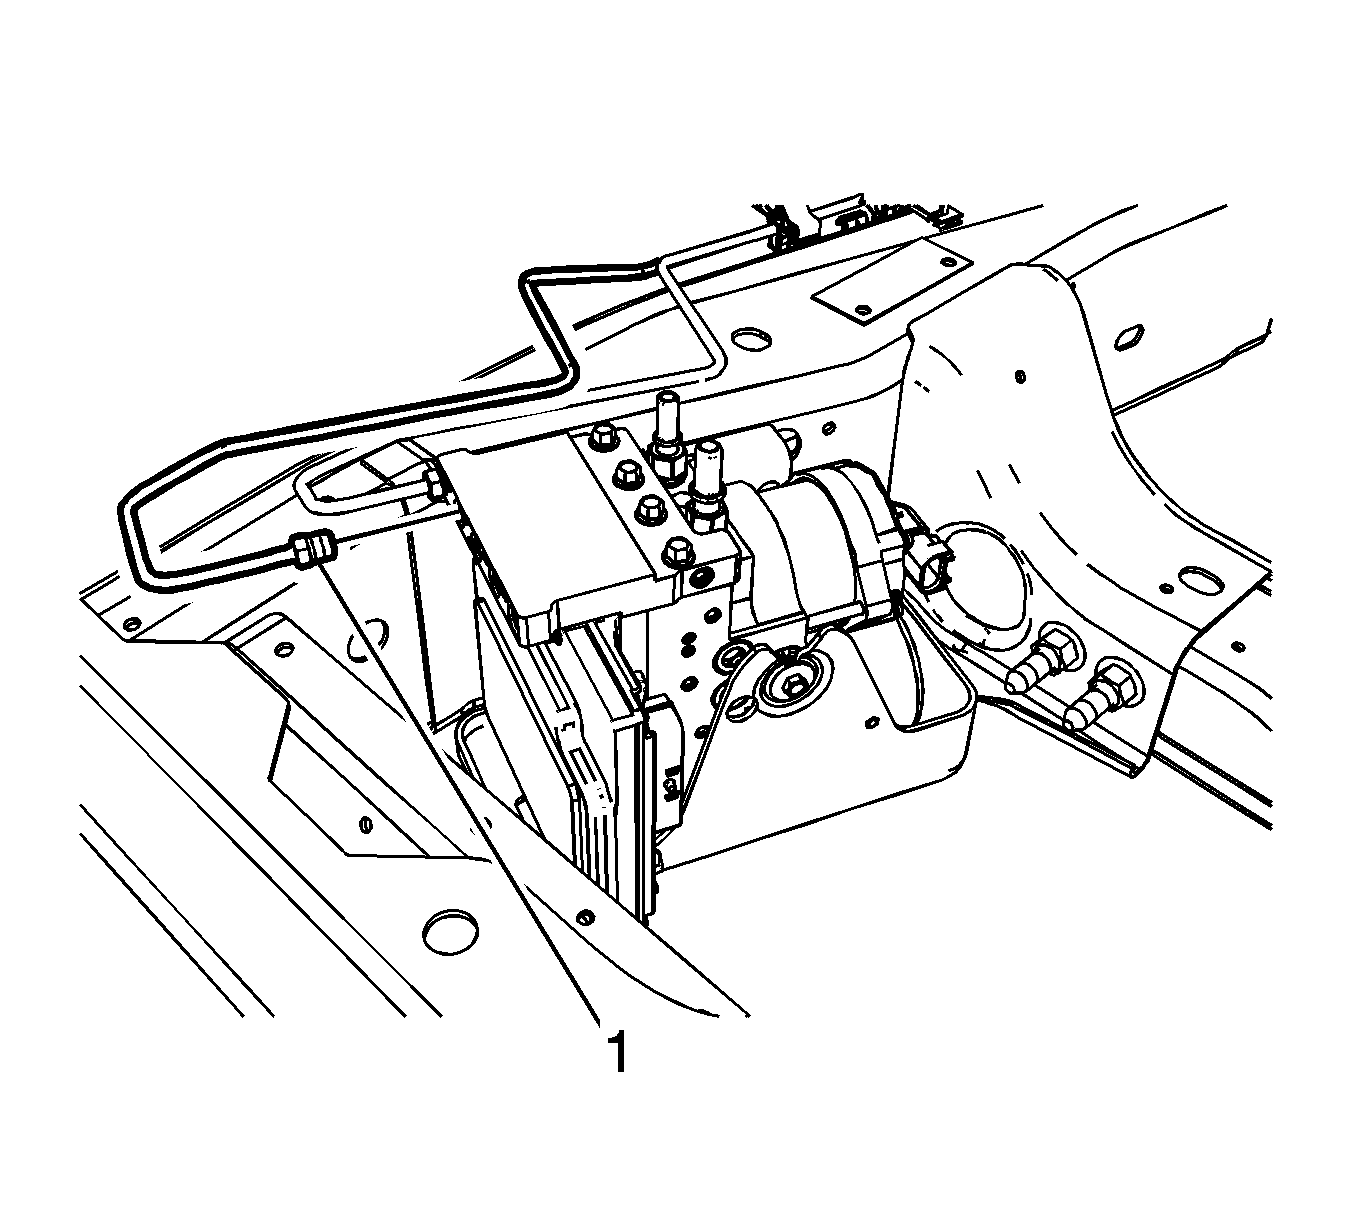
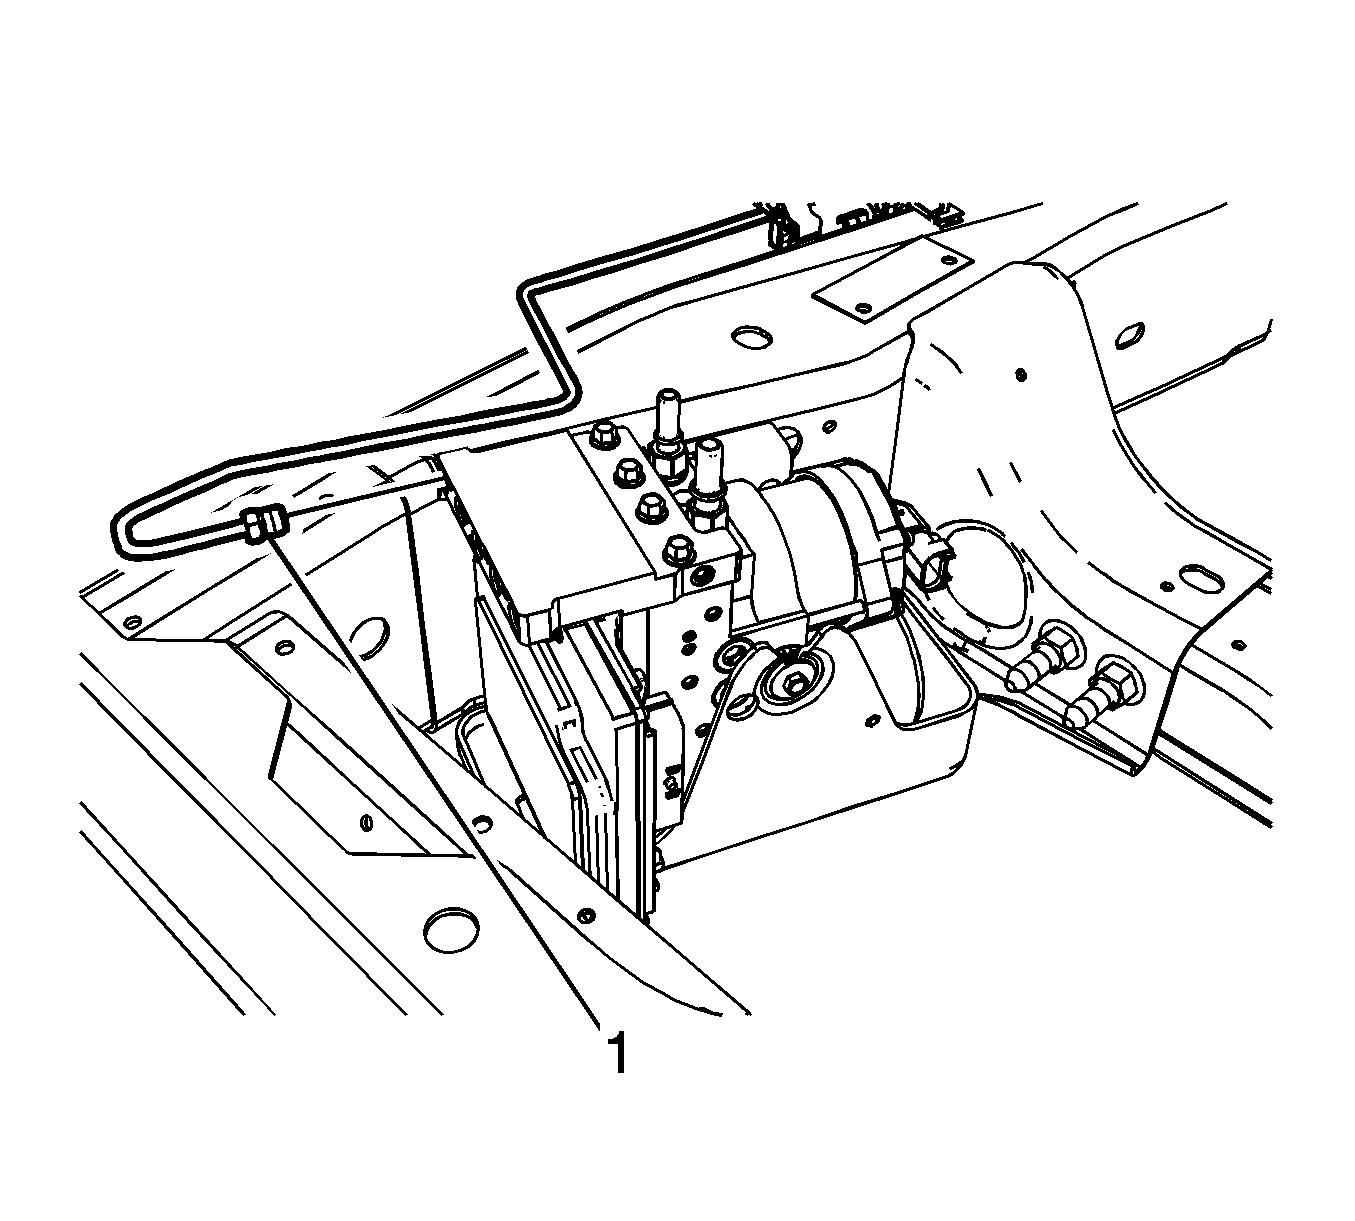
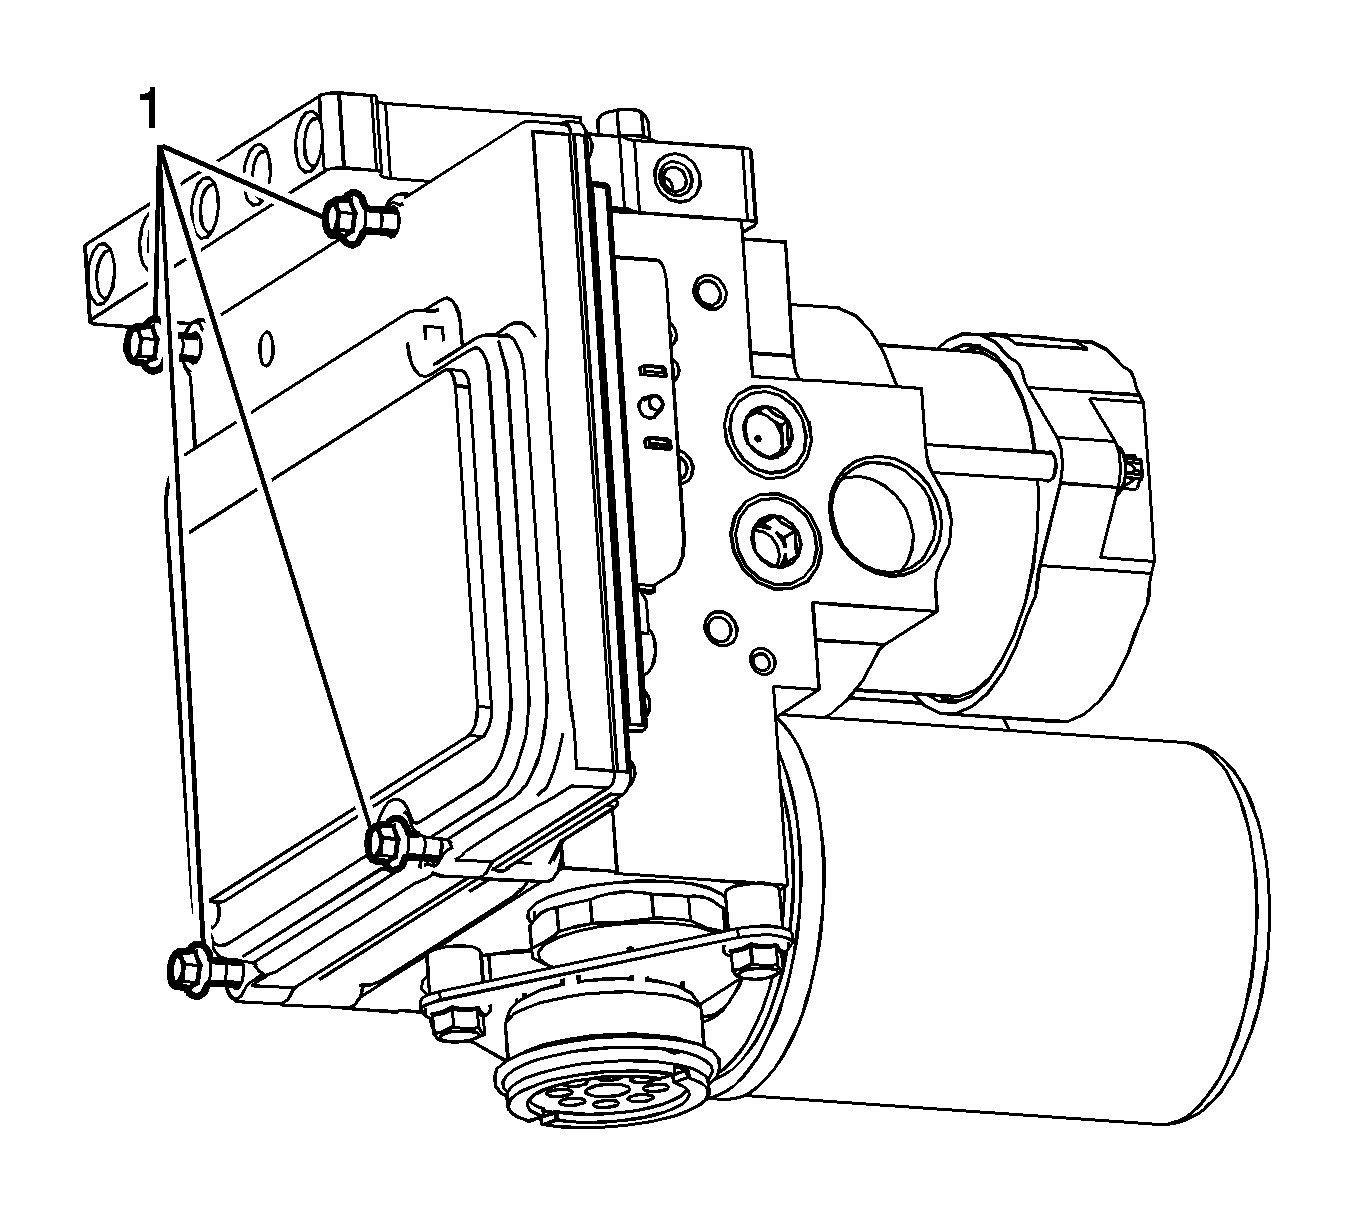
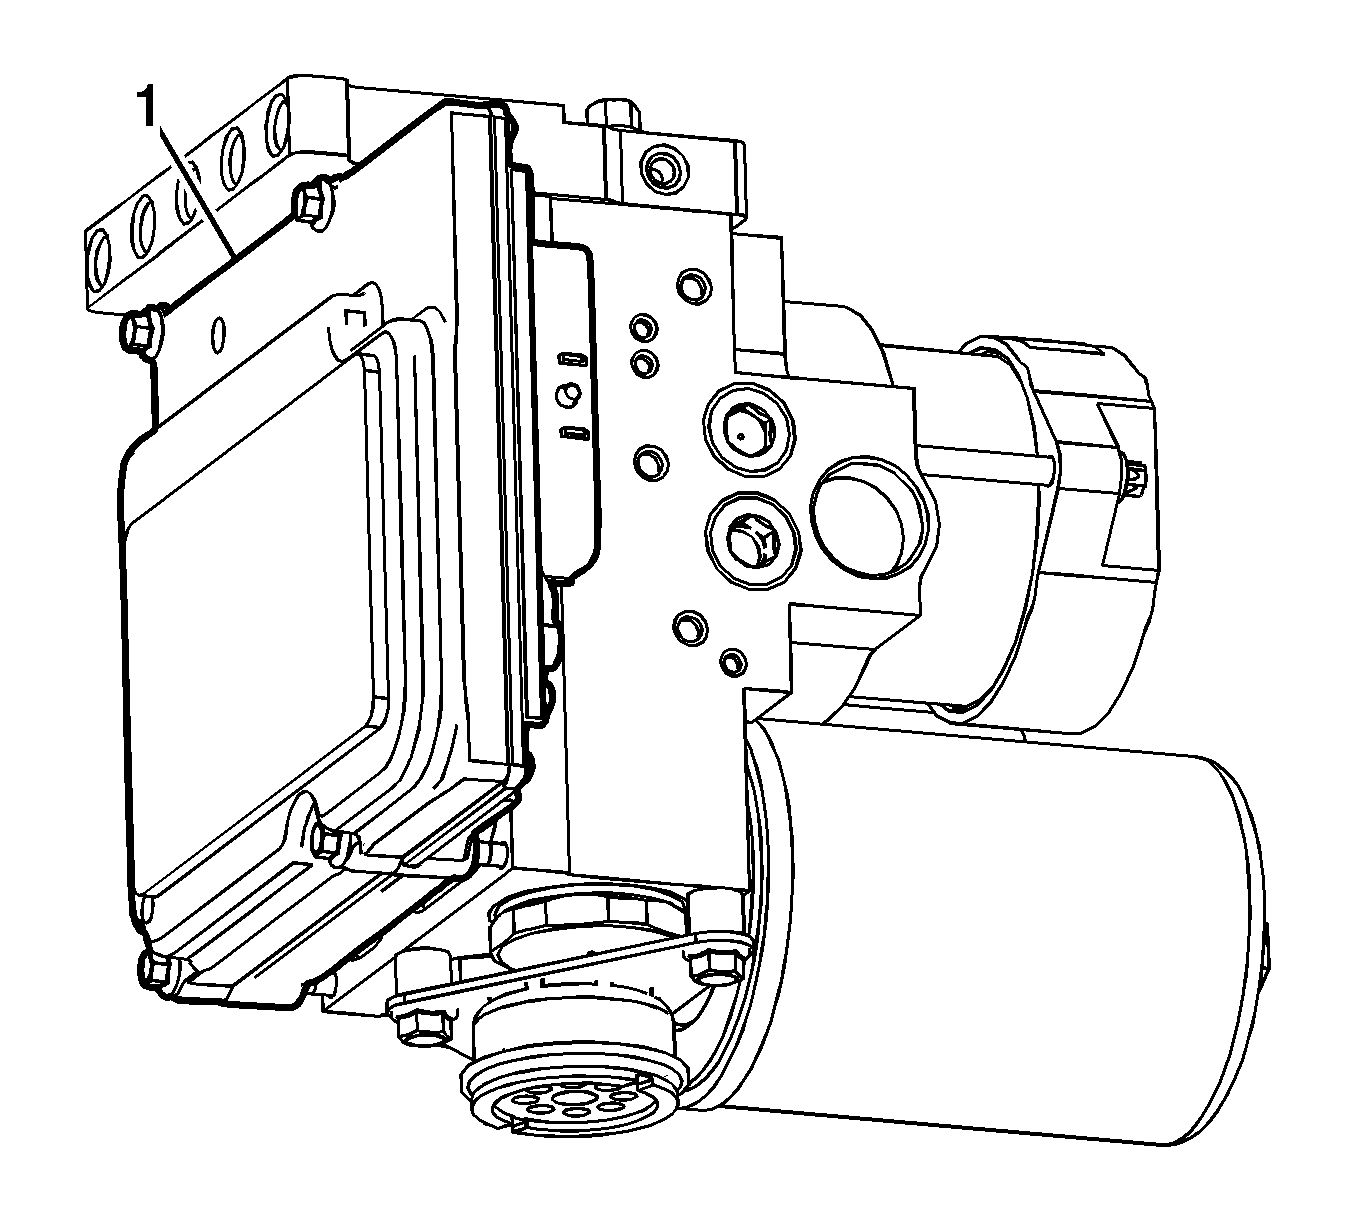
- From the outboard of the vehicle frame, access and loosen the 3 BPMV bracket bolts (1).
- Slide the EBCM/BPMV and bracket assembly (1) toward the front of the vehicle and remove the assembly from the vehicle frame.
- Place the EBCM/BPMV and bracket assembly on a clean work surface.
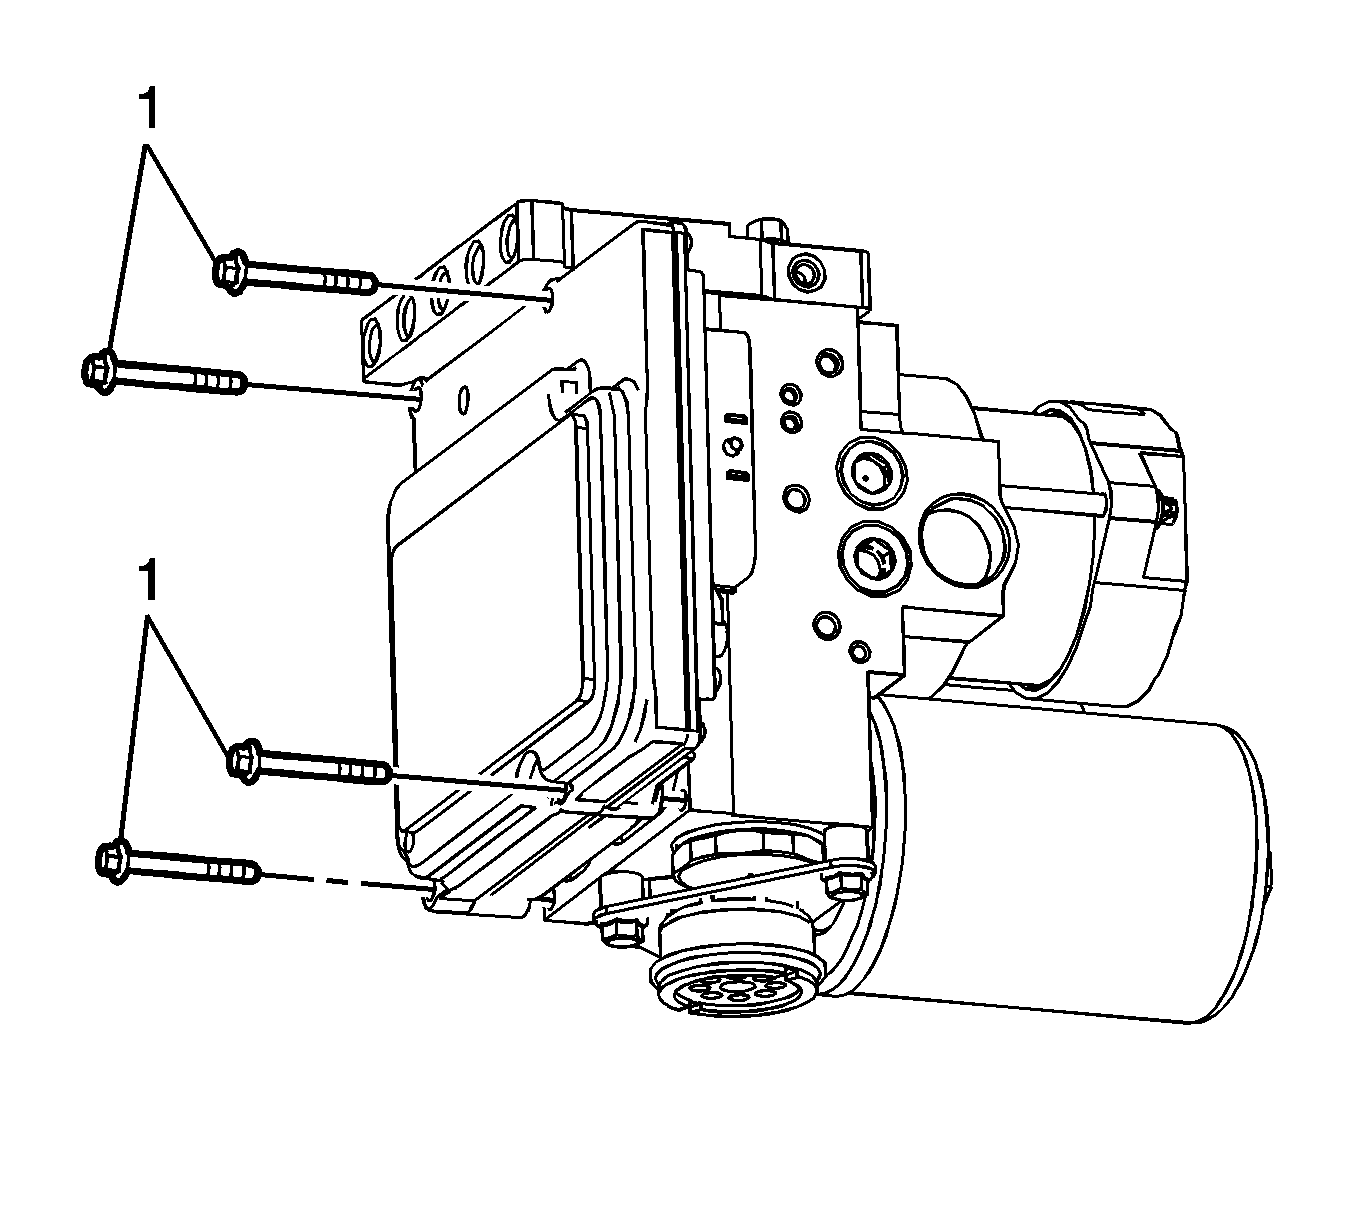
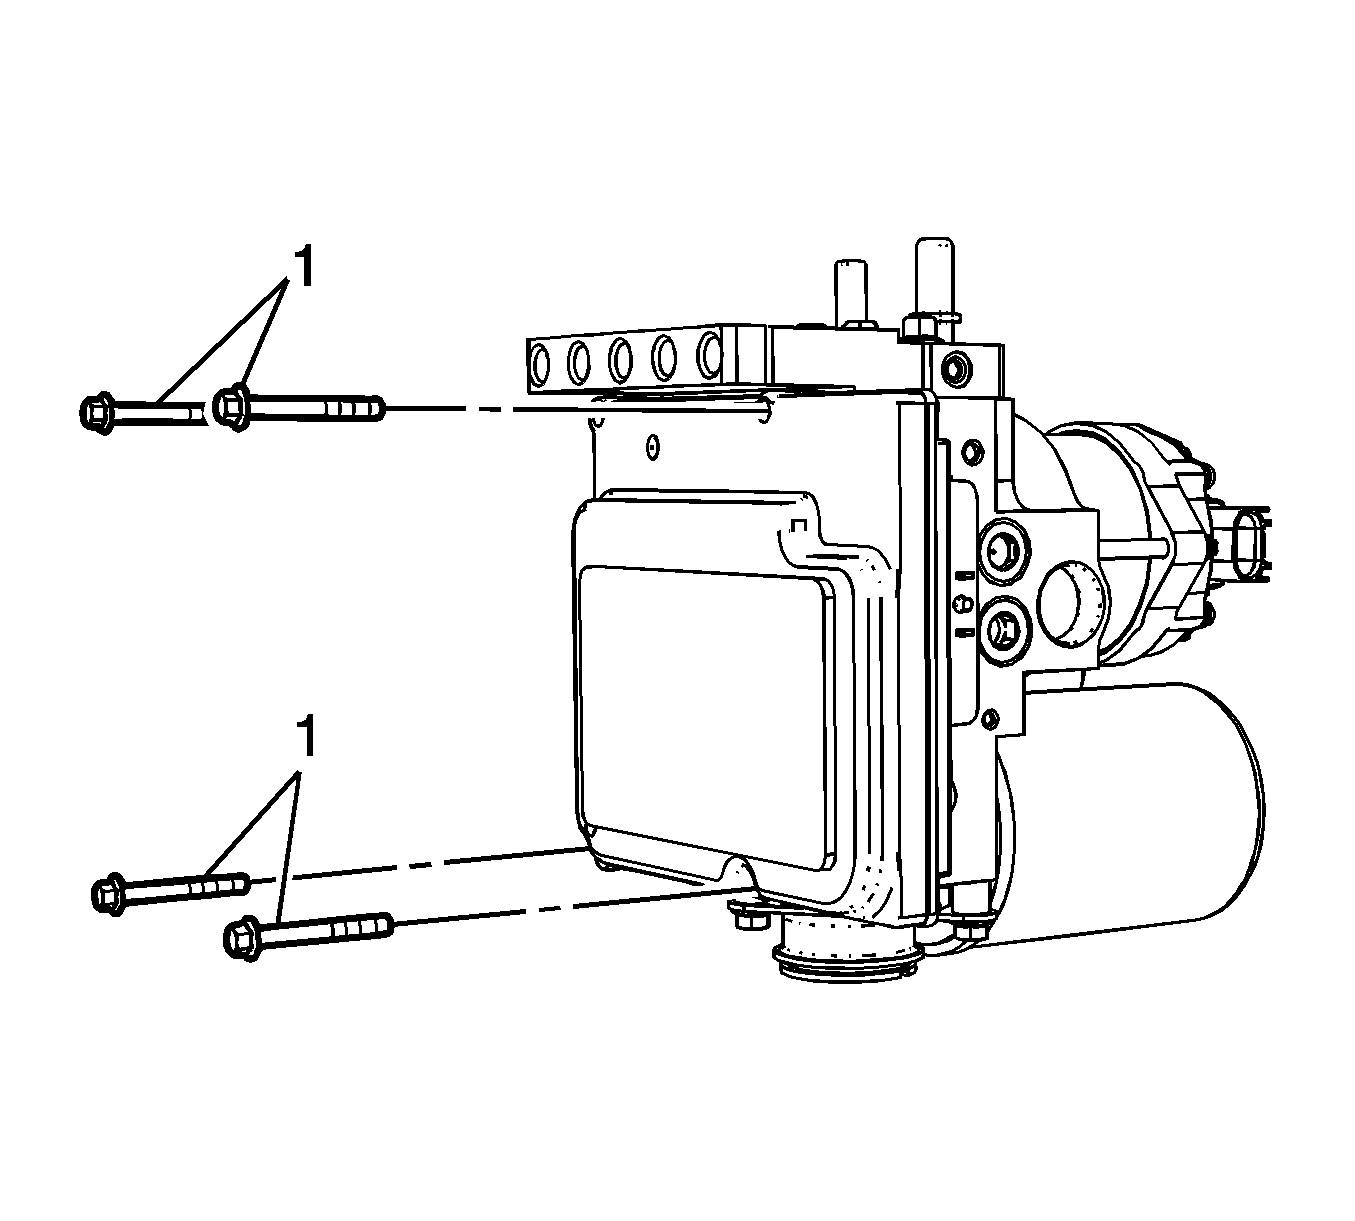
- Remove the 2 BPMV bolts (1).
- Remove the BPMV assembly from the bracket (1).
- Remove the sleeves and insulators from the BPMV, if necessary.
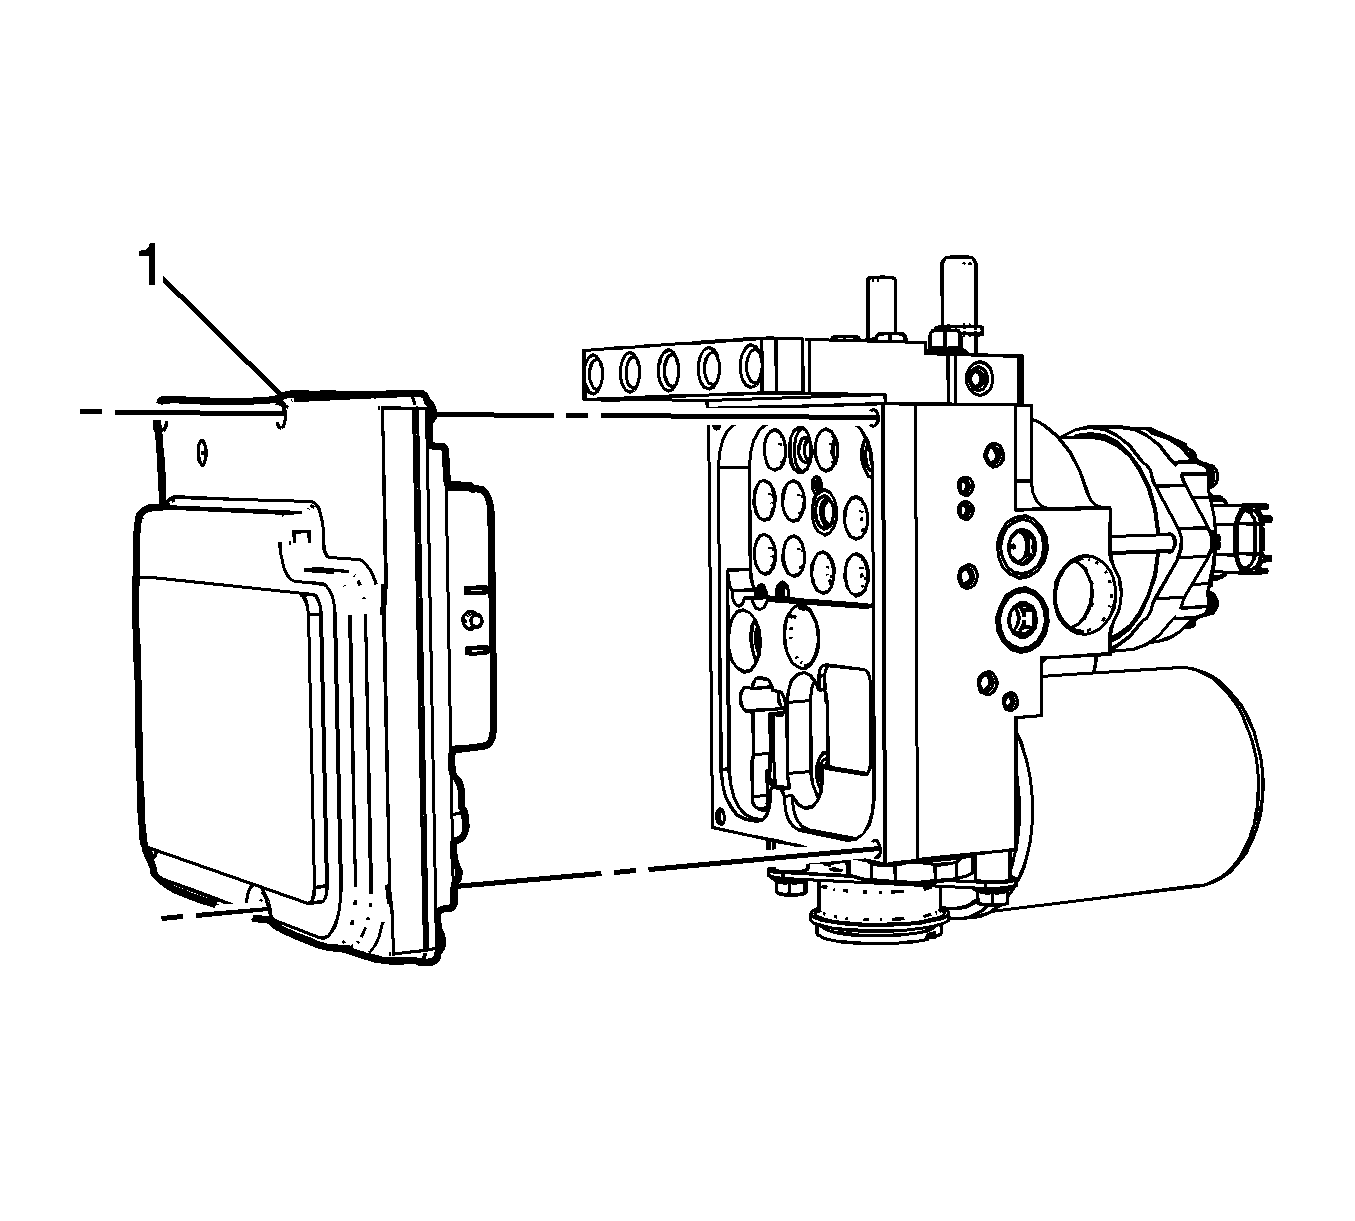
- If replacing the BPMV, loosen but do not remove the EBCM bolts (1).
- Using the loosened bolts as a guide, carefully pull the EBCM (1) evenly from the BPMV to release the electrical connectors.
- Remove the EBCM bolts (1).
- Remove the EBCM (1).
Remove the ignition key.
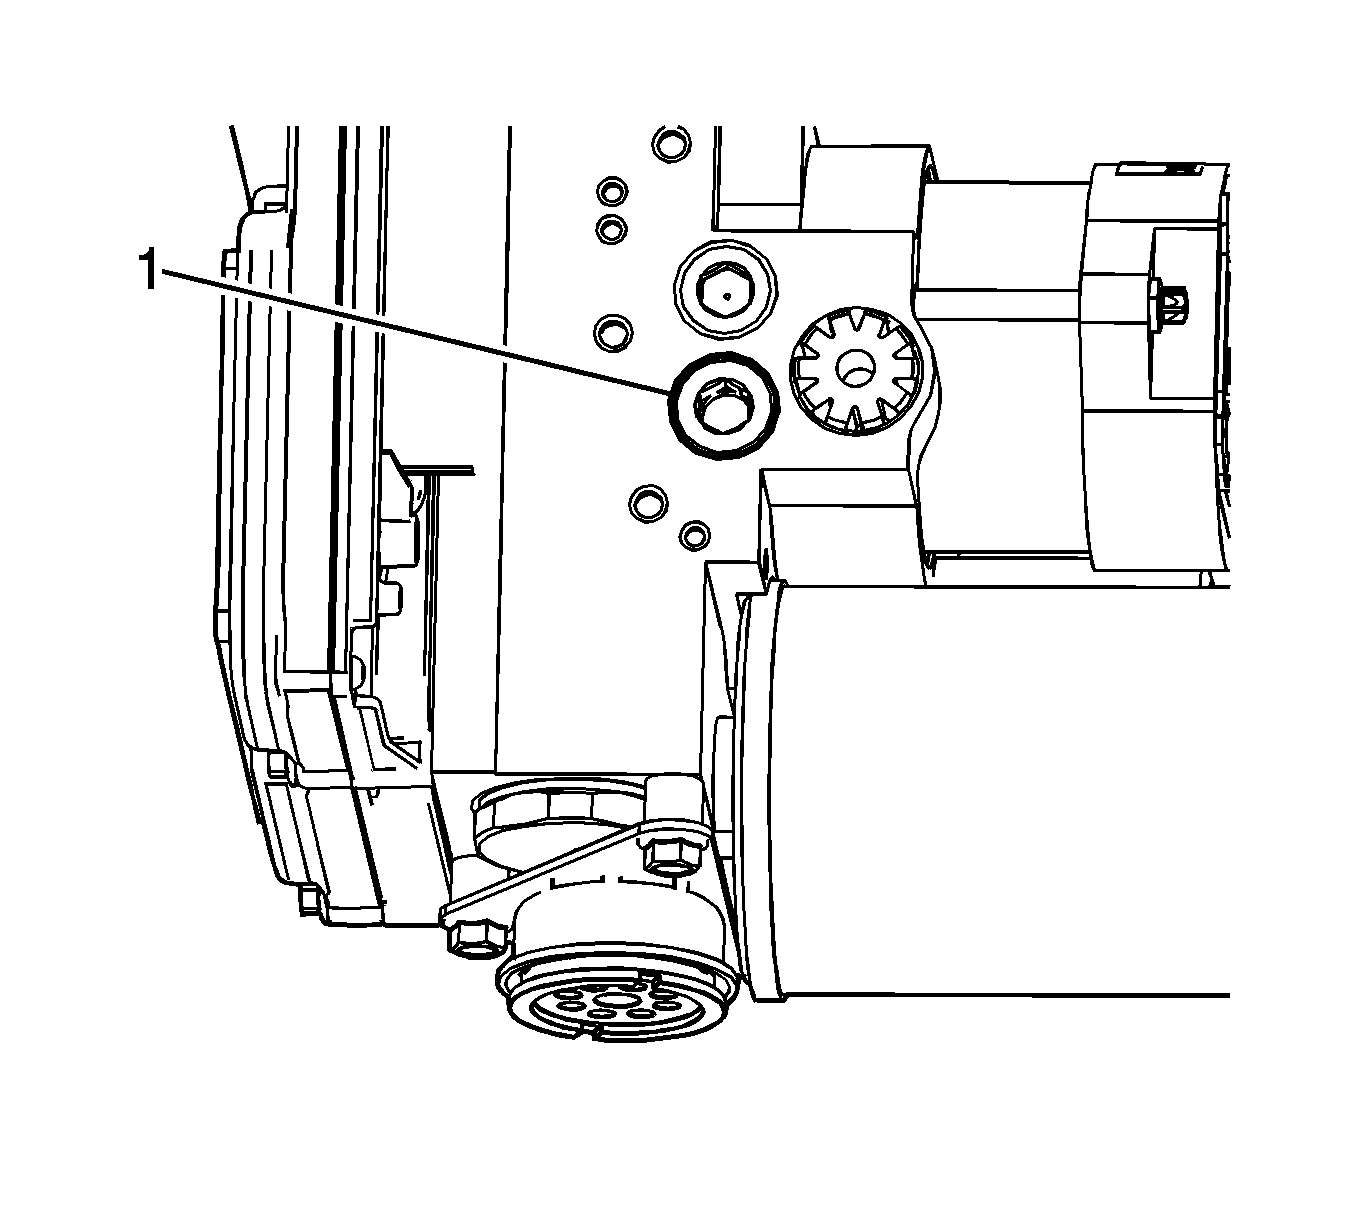
Note: To ensure brake modulator and HPA pressure relief has occurred, the manual pressure relief valve must be opened momentarily.
Cap the BPMV inlet port and plug the supply hose to prevent brake fluid loss and contamination.
Cap the BPMV outlet port and plug the return hose to prevent brake fluid loss and contamination.
Cap the brake pipe fitting and plug the BPMV outlet port to prevent brake fluid loss and contamination.
Cap the brake pipe fitting and plug the BPMV outlet port to prevent brake fluid loss and contamination.
Cap the brake pipe fitting and plug the BPMV inlet port to prevent brake fluid loss and contamination.
Cap the brake pipe fitting and plug the BPMV outlet port to prevent brake fluid loss and contamination.
Cap the brake pipe fitting and plug the BPMV outlet port to prevent brake fluid loss and contamination.
Note: It is not necessary to remove the BPMV bracket bolts.

Note: Do not pry the EBCM from the BPMV. The EBCM must be pulled back evenly.

Installation Procedure
- Install the EBCM (1) to the BPMV, if removed.
- Install the EBCM bolts (1).
- Install the sleeves and insulators to the BPMV, if removed.
- Install the BPMV assembly to the bracket (1).
- Install the 2 BPMV bolts (1).
- Position the hydraulic control unit and bracket assembly (1) to the frame rail. Slide the assembly toward the rear of the vehicle and install the assembly to the vehicle frame.
- From the outboard of the vehicle frame, access and tighten the 3 BPMV bracket bolts (1).
- Connect the LH supply brake pipe fitting (1).
- Connect the RH supply brake pipe fitting (1).
- Connect the primary brake pipe fitting (1).
- Connect the LR brake pipe fitting (1).
- Connect the RR brake pipe fitting (1).
- Connect the BPMV return hose quick connect (1).
- Connect the BPMV supply hose quick connect (1).
- Connect the EBCM electrical connector.
- Connect the electronic brake control position sensor electrical connector.
- Tighten the brake modulator manual pressure relief valve (1).
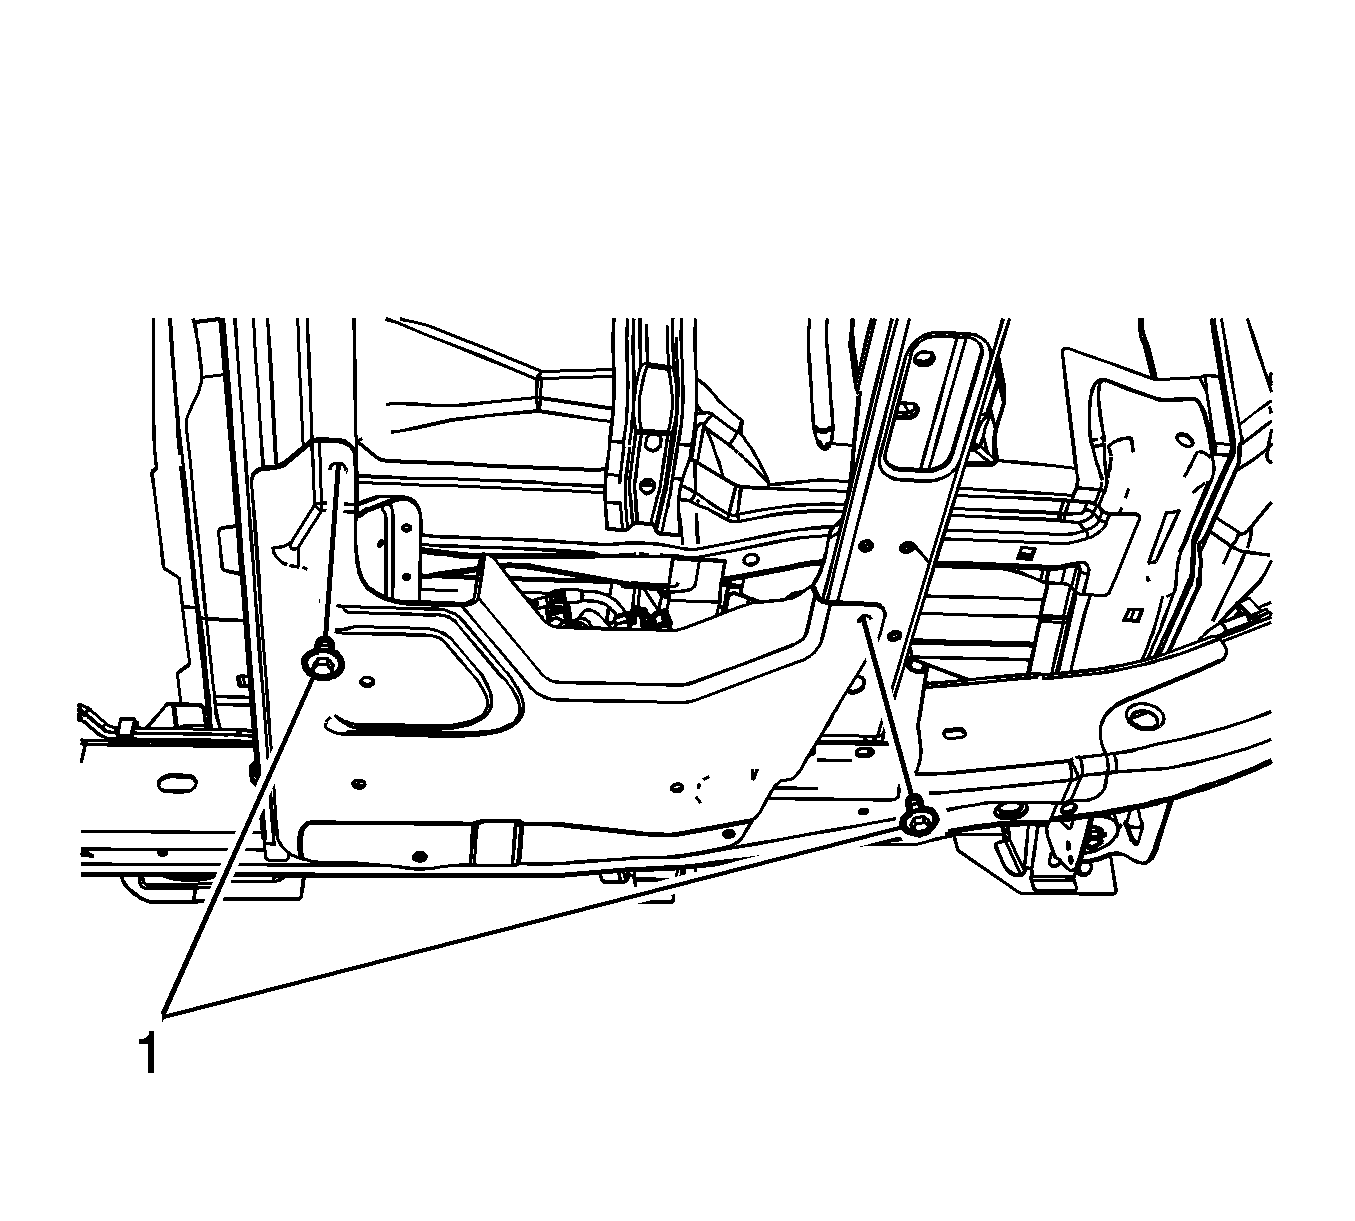
- Install the ABS module splash shield (1).
- Install the ABS module splash shield bolts (1).
- Install the ABS module splash shield retainers (1).
- Install the assist step motor, if equipped. Refer to Assist Step Motor Replacement.
- If installing a new EBCM, the EBCM must be programmed. Refer to Control Module References.
- Perform the Antilock Brake System Automated Bleed Procedure.
Caution: Refer to Fastener Caution in the Preface section.
Tighten
Tighten the bolts in an X pattern to 3 N·m (27 lb in).
Tighten
Tighten the bolts to 9 N·m (80 lb in).
Tighten
Tighten the bolts to 22 N·m (16 lb ft).
Tighten
Tighten the fitting to 18 N·m (13 lb ft).
Tighten
Tighten the fitting to 18 N·m (13 lb ft).
Tighten
Tighten the fitting to 18 N·m (13 lb ft).
Tighten
Tighten the fitting to 18 N·m (13 lb ft).
Tighten
Tighten the fitting to 18 N·m (13 lb ft).
Ensure the return hose quick connect is fully engaged by attempting to pull the return hose from the outlet fitting.
Ensure the supply hose quick connect is fully engaged by attempting to pull the supply hose from the inlet fitting.
Tighten
Tighten the valve to 40 N·m (30 lb ft).
Tighten
Tighten the bolts to 20 N·m (15 lb ft).
Follow the procedure completely to ensure the sensor and boost valve calibration and EBCM learn processes have been completed.
