Removal Procedure
- Perform the high voltage disabling. Refer to High Voltage Disabling.
- Remove the power inverter module (PIM) 3 phase cable terminal fasteners (1).
- Remove the PIM 3 phase cable mounting fasteners (2, 4).
- Remove the PIM 3 phase cables (3, 5) from the PIM distribution box.
- Remove and discard the seals (6).
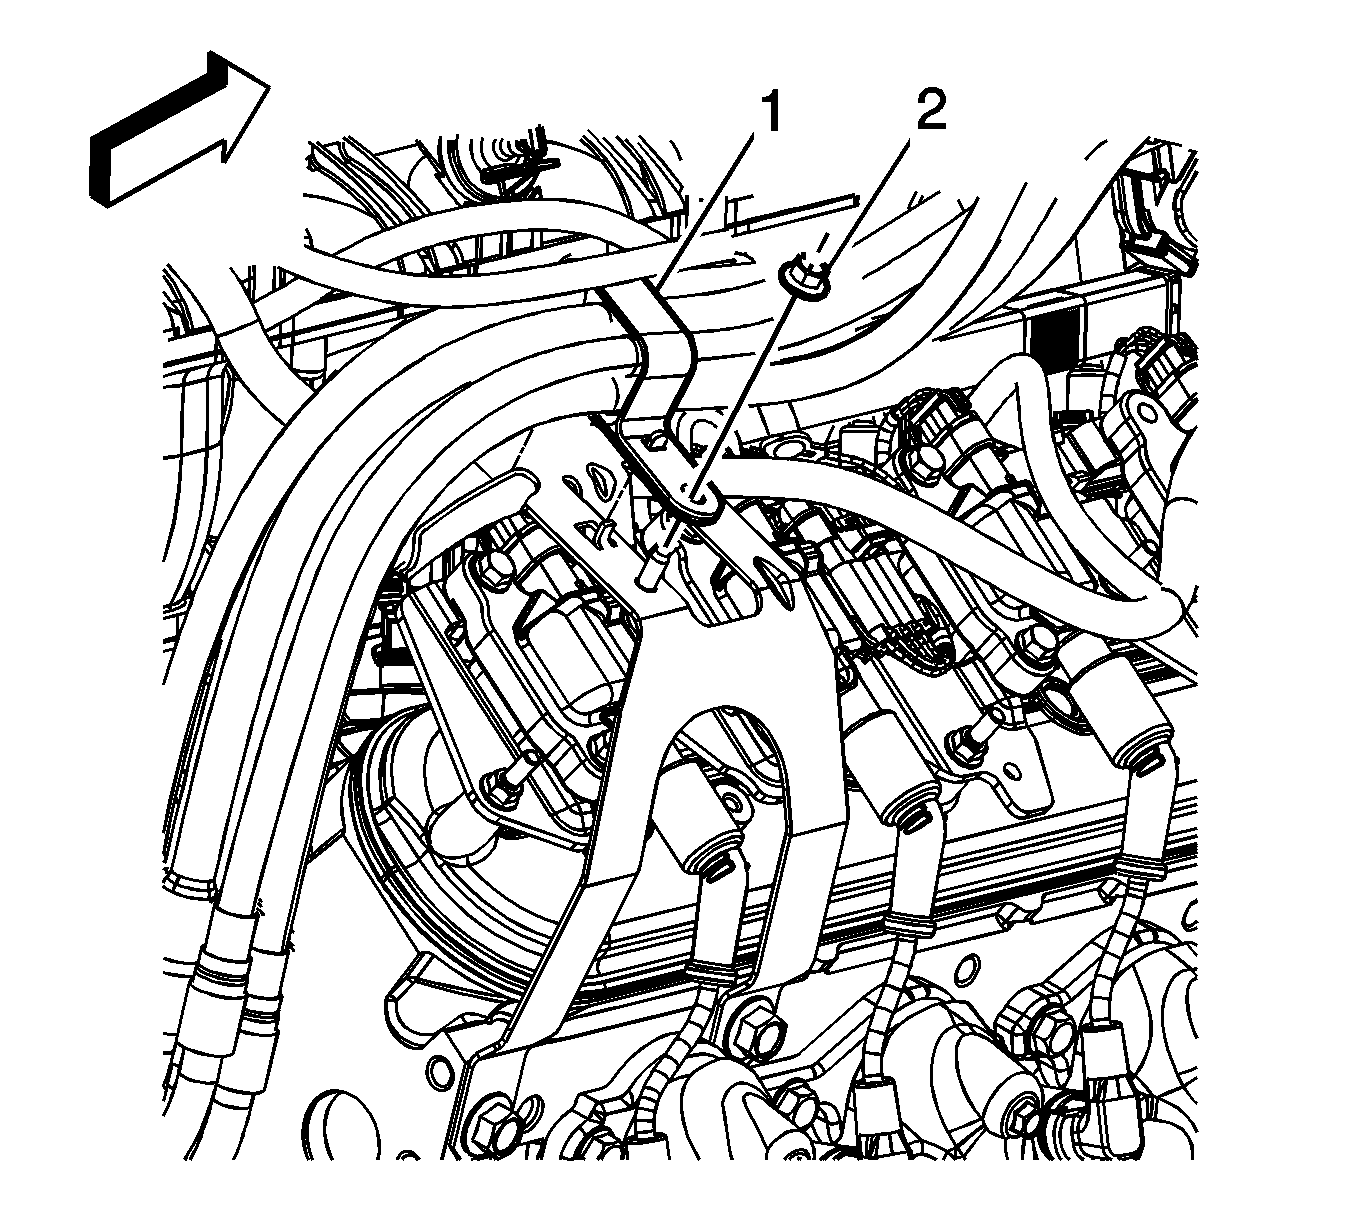
- Remove the 3 phase cable retainer nut (2).
- Remove the 3 phase cable retainer (1) from the bracket.
- Remove and lower the transmission enough to gain access to the 3 phase cable bracket bolts (1). Refer to Transmission Replacement.
- Remove the 3 phase cable bracket bolts (1).
- Remove the 3 phase cover bolts (9) and transmission cover terminal housing (8).
- Remove the 3 phase cover (7).
- Disconnect the 3 phase cable cover connector.
- Remove the 3 phase cable bolt protective cover (5).
- Remove the 3 phase cable retaining bolts (4).
- Remove the 3 phase cables and housing (3).
- Finish removal of the transmission while allowing the 3 phase cables to remain in the vehicle. Refer to Transmission Replacement.
- Remove the 3 phase cables from the vehicle.
Danger: Always perform the High Voltage Disabling procedure prior to servicing any High Voltage component or connection. Personal Protection Equipment (PPE) and proper procedures must be followed.
The High Voltage Disabling procedure will perform the following tasks:| • | Identify how to disable high voltage. |
| • | Identify how to test for the presence of high voltage. |
| • | Identify condition under which high voltage is always present and personal protection equipment (PPE) and proper procedures must be followed. |

Caution: Always remove and install the High Voltage terminal fasteners with a magnet tipped socket. Never touch the exposed electronic circuit board surface or components. Dropped fasteners or physical contact may result in electronic circuit board damage.

Installation Procedure
Caution: To avoid high voltage 3-phase cable or vehicle damage properly attach the cables and brackets, and check for and correct any interference.
- Position the 3 phase cables in the vehicle.
- Begin installation of the transmission. Refer to Transmission Replacement.
- Install a new 3 phase cable housing seal (2).
- Install the 3 phase cables and housing (3).
- Install the 3 phase cable retaining bolts (4).
- Install the 3 phase cable bolt protective cover (5).
- Install a new 3 phase cable cover seal (6).
- Reconnect the 3 phase cable cover connector.
- Install the 3 phase cable cover (7).
- Install the transmission cover terminal housing (8).
- Install the 3 phase cable cover bolts (9).
- Install the 3 phase cable bracket bolts (1).
- Complete installation of the transmission. Refer to Transmission Replacement.
- Lower the vehicle.
- Install the 3 phase cable retainer (1) to the bracket.
- Install the 3 phase cable retainer nut (2).
- Install the PIM 3 phase cables (3, 5) into the PIM distribution box with new seals (6).
- Install the PIM 3 phase cable mounting fasteners (2, 4).
- Install the PIM 3 phase cable terminal fasteners (1).
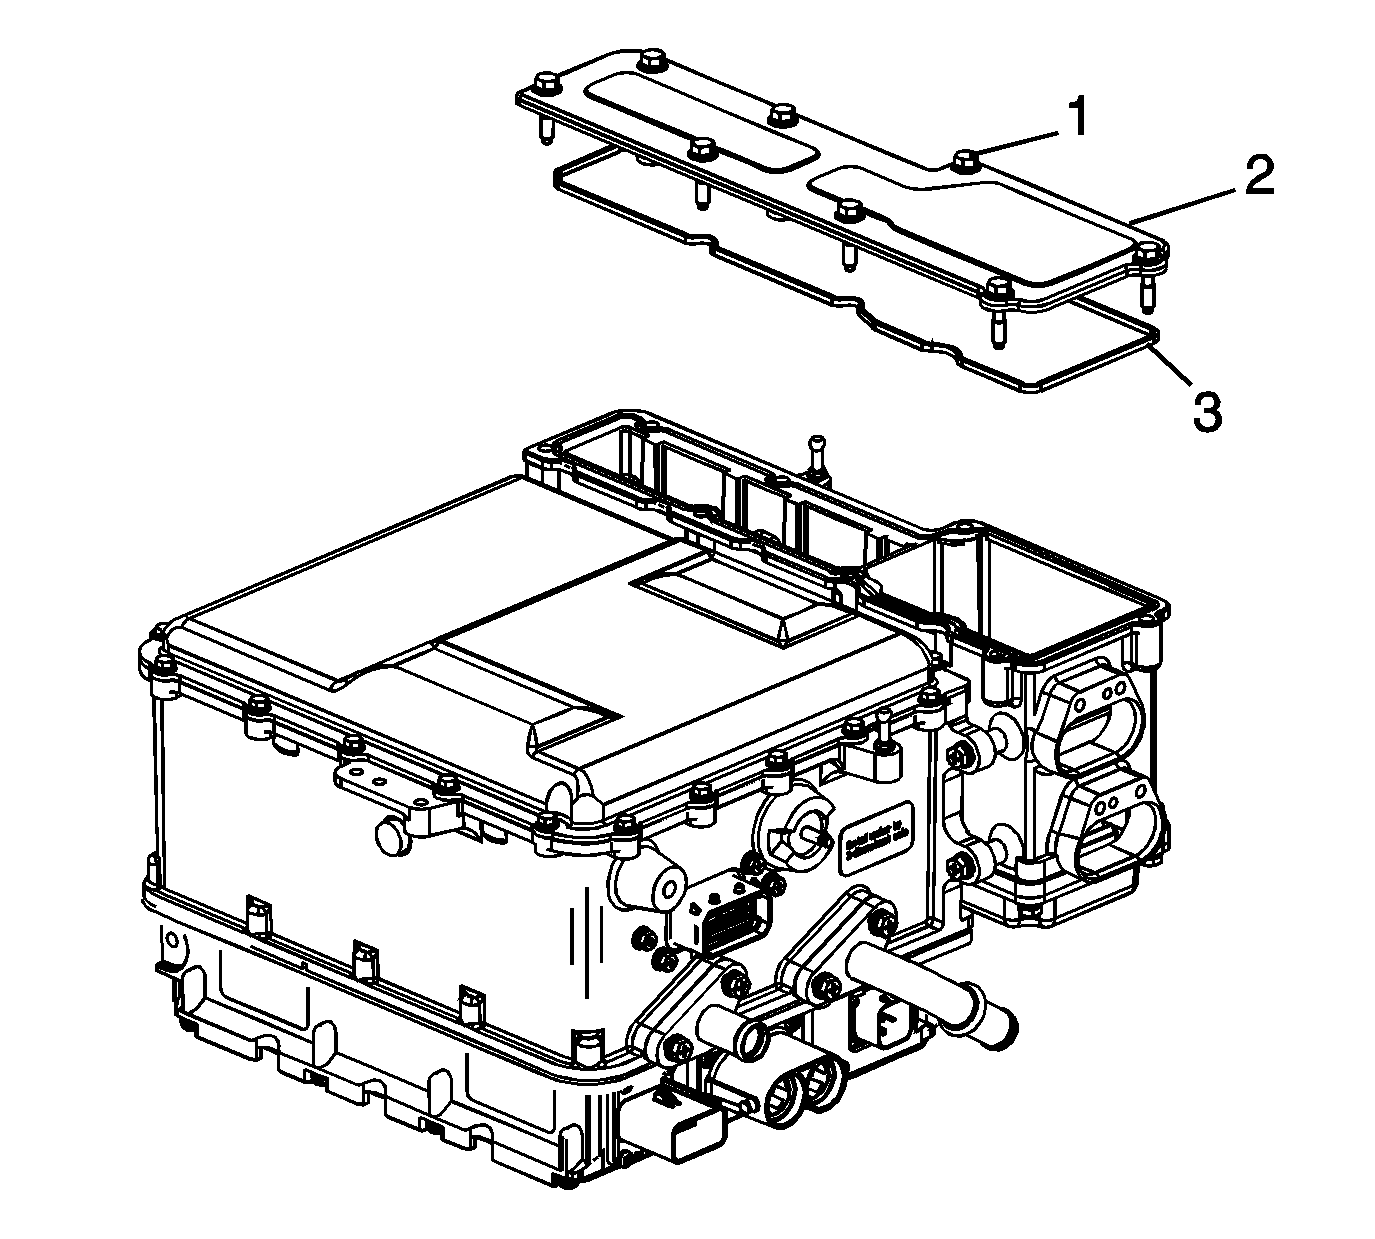
- Install a new seal (3) on the PIM distribution box.
- Position the terminal cover (2) onto the PIM distribution box ensuring the seal remains in place.
- Tighten the terminal cover fasteners (1).
- Perform the high voltage enabling. Refer to High Voltage Enabling.
Caution: Refer to Fastener Caution in the Preface section.
Tighten
Tighten the bolts to 12 N·m (106 lb in).
Tighten
Tighten the bolts to 12 N·m (106 lb in).
Tighten
Tighten the bolts to 12 N·m (106 lb in).
Tighten
Tighten the nut to 9 N·m (80 lb in).
Tighten
Tighten the mounting fastener to 9 N·m (80 lb in).
Caution: Always remove and install the High Voltage terminal fasteners with a magnet tipped socket. Never touch the exposed electronic circuit board surface or components. Dropped fasteners or physical contact may result in electronic circuit board damage.
Tighten
Tighten the terminal fastener to 9 N·m (80 lb in).
Tighten
Tighten the fasteners to 9 N·m (80 lb in).
