For 1990-2009 cars only
Air Conditioning Compressor Bracket Replacement HP2
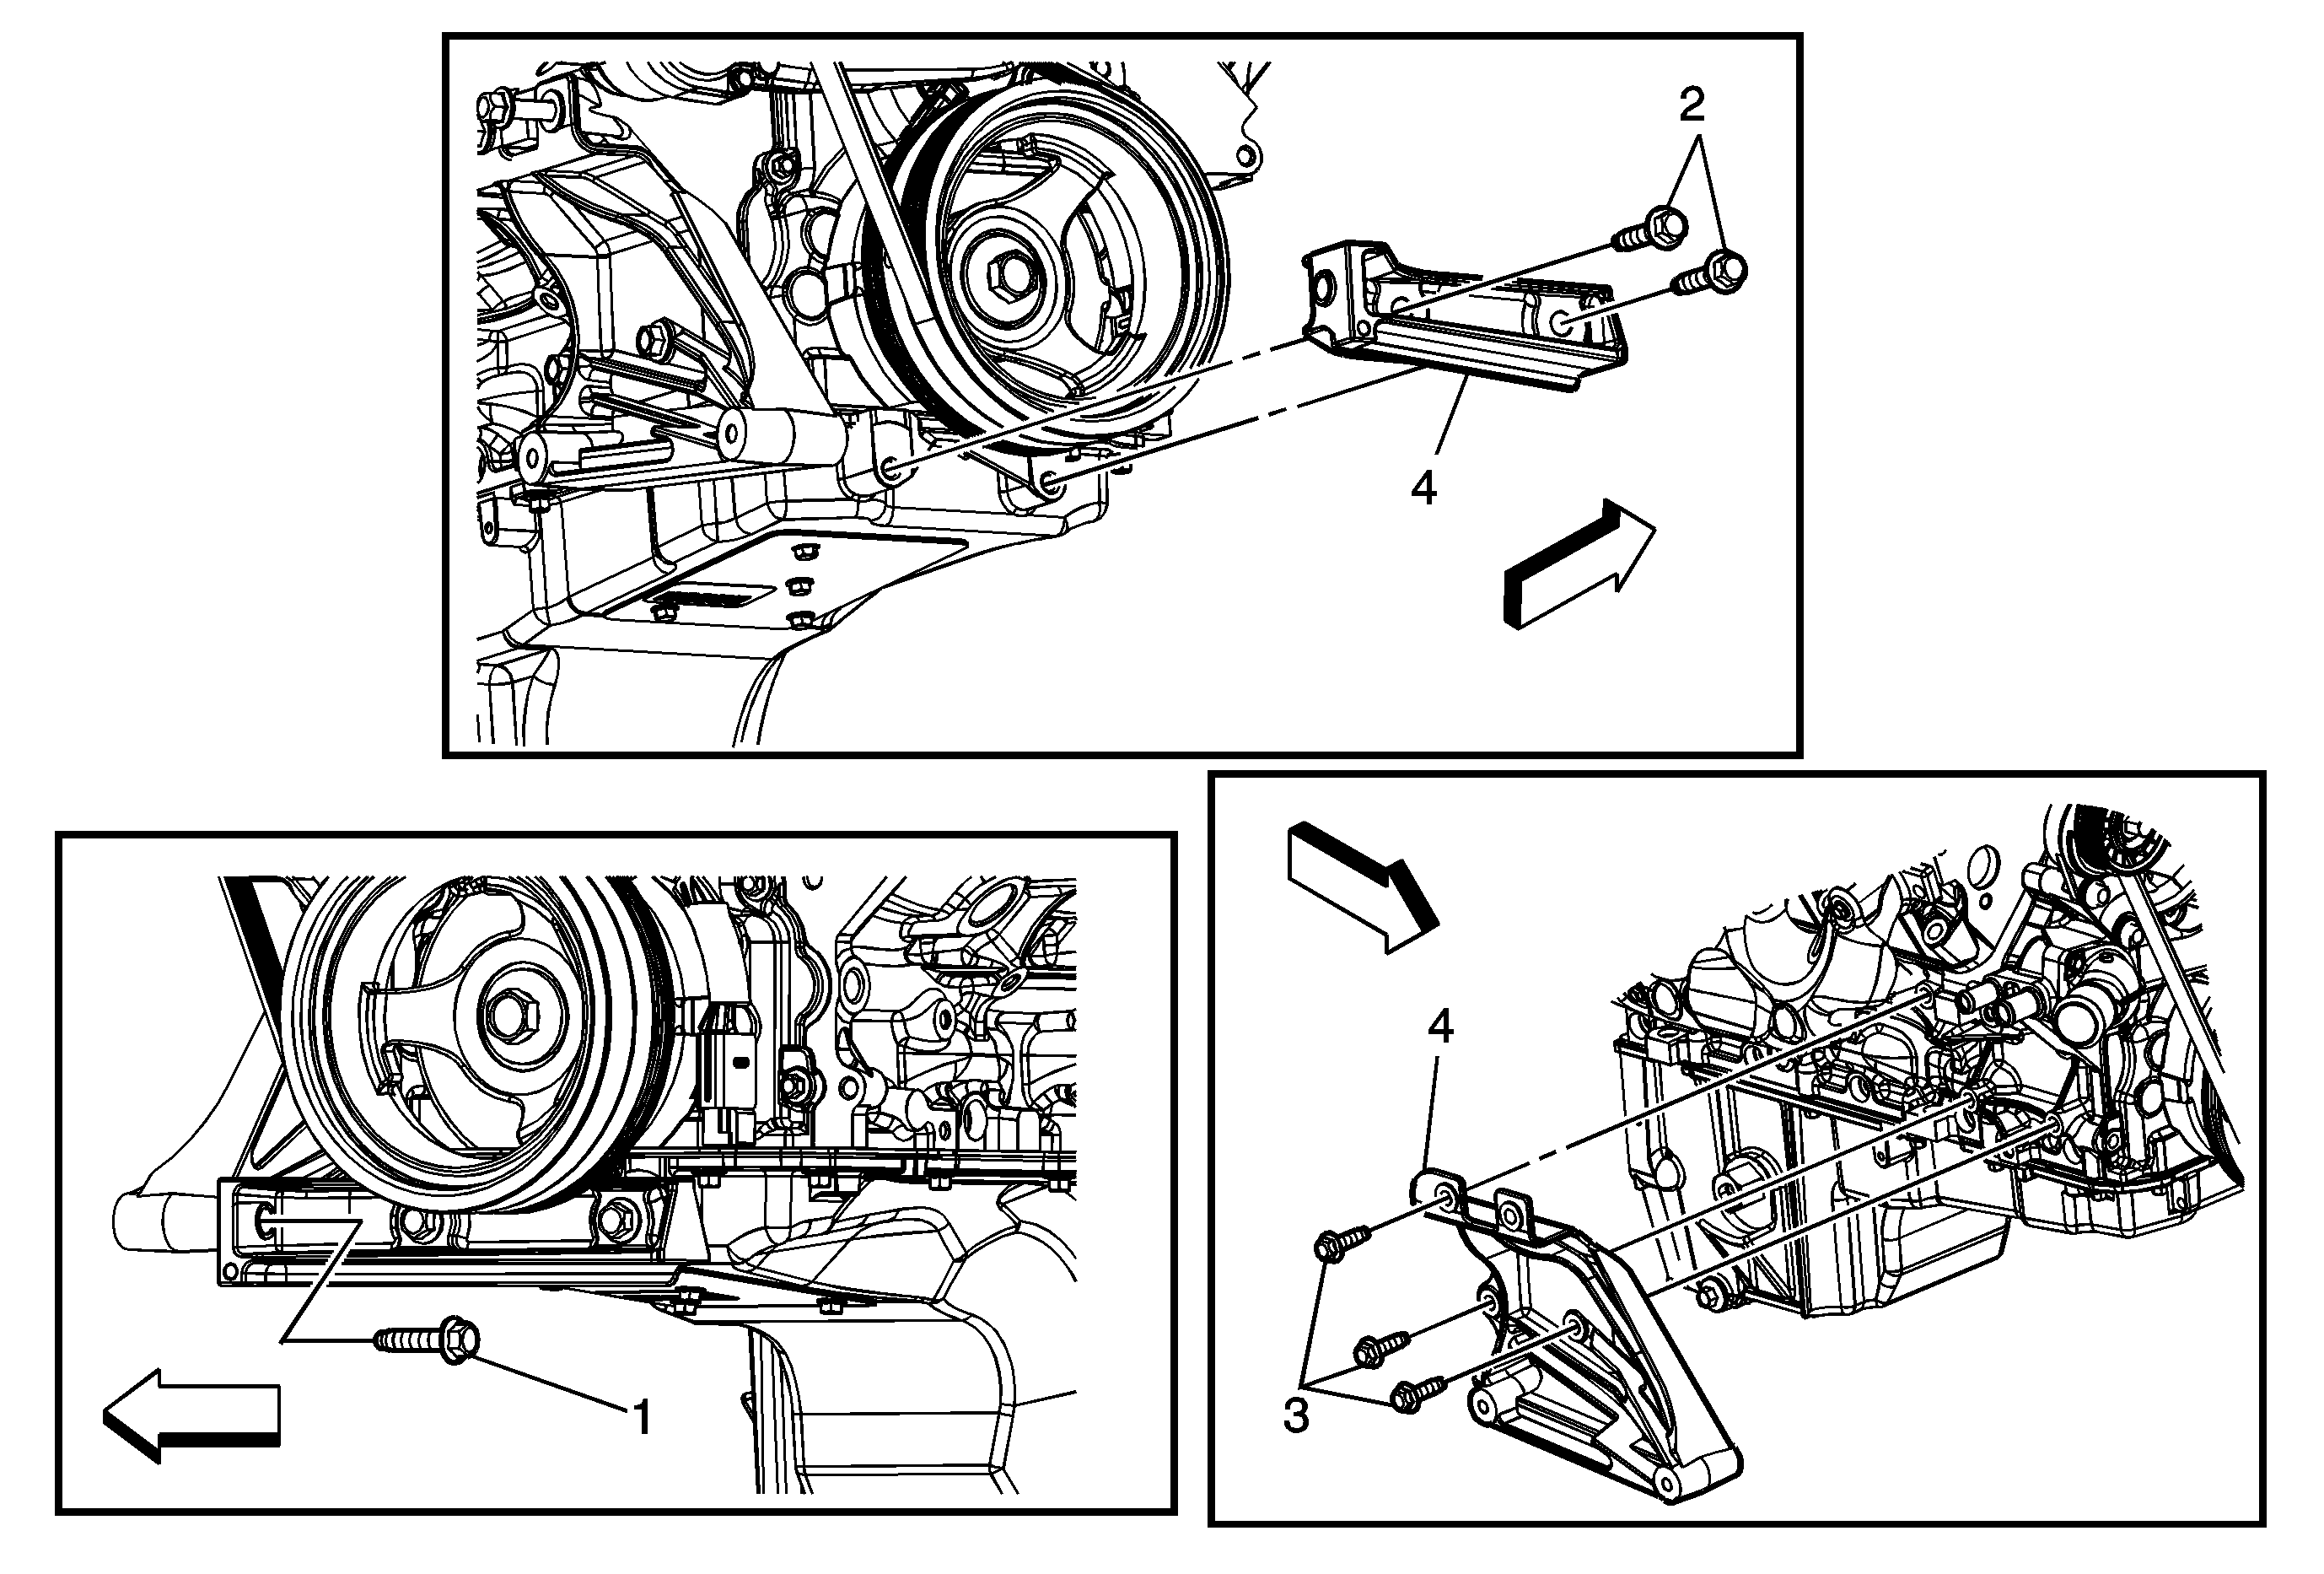
Callout | Component Name |
|---|---|
Preliminary Procedures
| |
1 | A/C Compressor Bracket Bolt Caution: Refer to Fastener Caution in the Preface section. Tighten |
2 | A/C Compressor Bracket Bolt (Qty: 2) Tighten |
3 | A/C Compressor Bracket Bolt (Qty: 3) Tighten |
4 | A/C Compressor Bracket |
Air Conditioning Compressor Bracket Replacement Non-HP2
Removal Procedure
- Remove the A/C compressor. Refer to Air Conditioning Compressor Replacement.
- Remove the A/C belt tensioner bolts.
- Remove the A/C belt tensioner.
- Remove the A/C compressor bracket mounting bolts.
- Remove the A/C compressor bracket.

Installation Procedure
- Install the A/C compressor bracket.
- Install the A/C compressor bracket mounting bolts and tighten to 50 N·m (37 lb ft).
- Install the A/C belt tensioner.
- Install the A/C belt tensioner bolts and tighten to 50 N·m (37 lb ft).
- Install the A/C compressor. Refer to Air Conditioning Compressor Replacement.
Caution: Refer to Fastener Caution in the Preface section.
