Fuel Pressure Relief With CH 48027
Special Tools
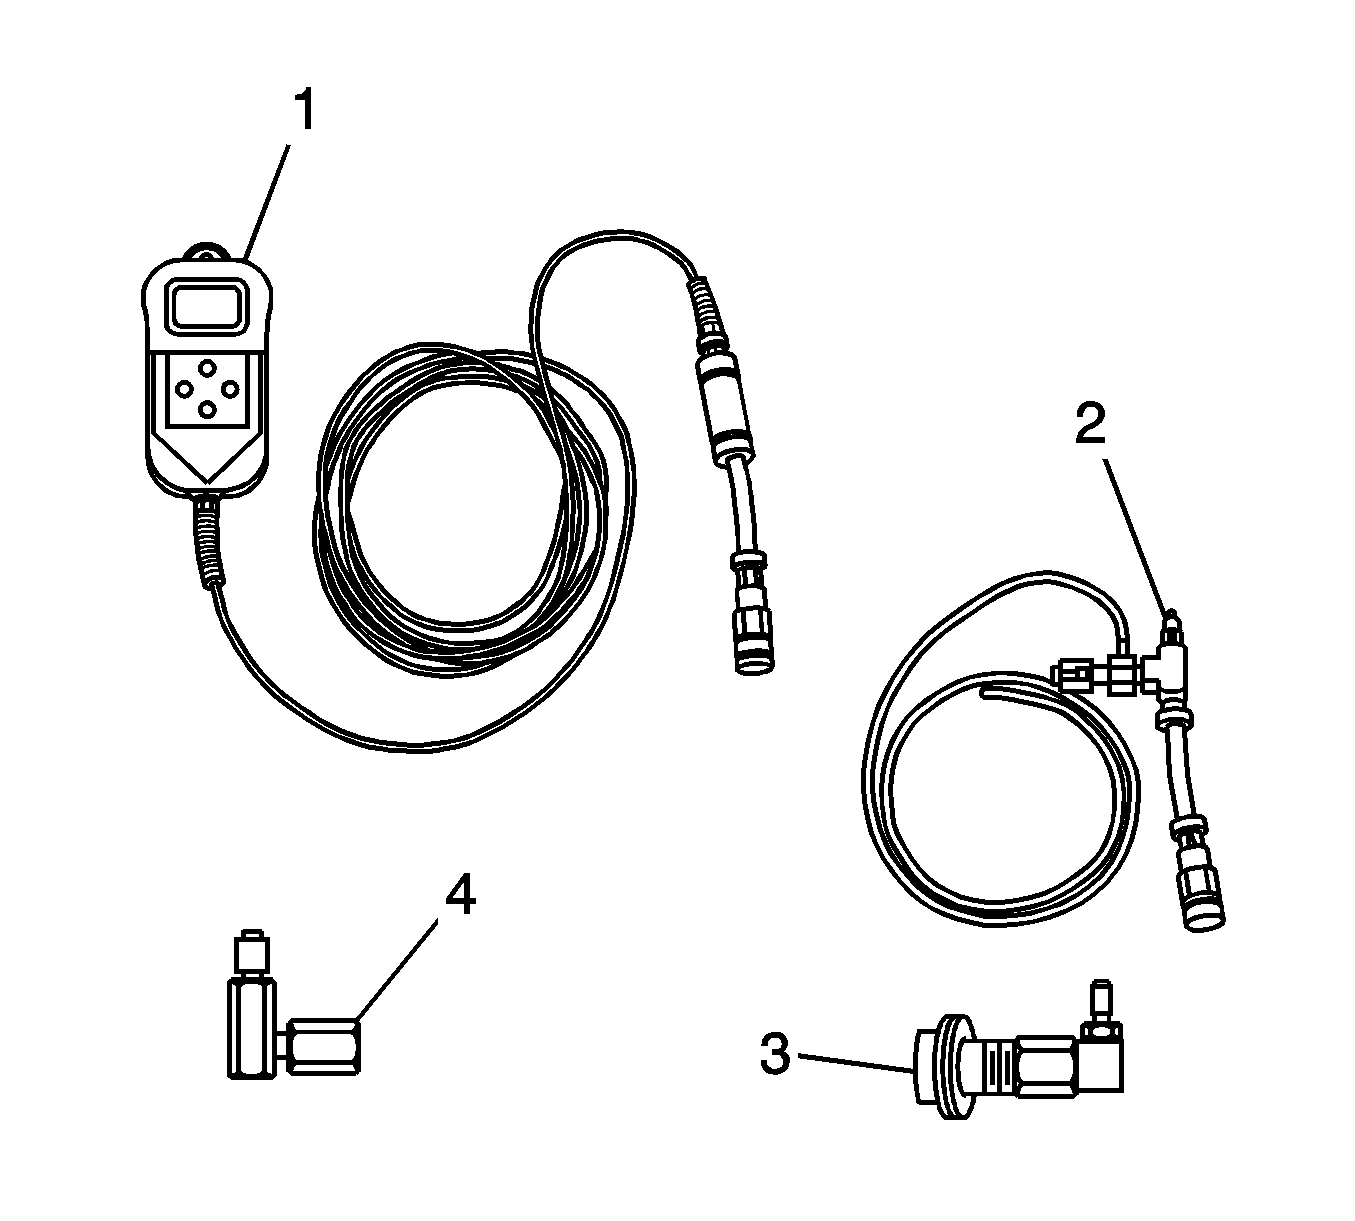
CH-48027 Digital Pressure Gage
Caution: Refer to Gasoline/Gasoline Vapors Caution in the Preface section.
Caution: Remove the fuel tank cap and relieve the fuel system pressure before servicing the fuel system in order to reduce the risk of personal injury. After you relieve the fuel system pressure, a small amount of fuel may be released when servicing the fuel lines, the fuel injection pump, or the connections. In order to reduce the risk of personal injury, cover the fuel system components with a shop towel before disconnection. This will catch any fuel that may leak out. Place the towel in an approved container when the disconnection is complete.
- If the fuel system requires repair, prevent fuel spillage by removing the fuel pump fuse. Refer to Electrical Center Identification Views.
- Remove the engine cover, if required.
- Loosen the fuel fill cap in order to relieve the fuel tank vapor pressure.
- Remove the fuel rail service port cap.
- Wrap a shop towel around the fuel rail service port.
- Connect the CH-48027-3 (4) to the fuel rail service port.
- Connect the CH-48027-2 (2) to the CH-48027-3 (4).
- Place the hose on the CH-48027-2 (2) into an approved gasoline container.
- Open the valve on the CH-48027-2 (2) in order to bleed any fuel from the fuel rail.
- Close the valve on the CH-48027-2 (2).
- Remove the hose on the CH-48027-2 (2) from the approved gasoline container.
- Disconnect the CH-48027-2 (2) from the CH-48027-3 (4).
- Disconnect the CH-48027-3 (4) from the fuel rail service port.
- Remove the shop towel from around the fuel rail service port, and place in an approved gasoline container.
- Install the fuel rail service port cap.
- Install the engine cover, if required.
- Tighten the fuel fill cap.
Caution: Wrap a shop towel around the fuel pressure connection in order to reduce the risk of fire and personal injury. The towel will absorb any fuel leakage that occurs during the connection of the fuel pressure gage. Place the towel in an approved container when the connection of the fuel pressure gage is complete.
Notice: Clean all of the following areas before performing any disconnections
in order to avoid possible contamination in the system:
• The fuel pipe connections • The hose connections • The areas surrounding the connections
Important: If relieving the fuel pressure for the fuel pressure gage installation and removal, it is NOT necessary to proceed with the following steps.
Fuel Pressure Relief Without CH 48027
Caution: Refer to Gasoline/Gasoline Vapors Caution in the Preface section.
Caution: Remove the fuel tank cap and relieve the fuel system pressure before servicing the fuel system in order to reduce the risk of personal injury. After you relieve the fuel system pressure, a small amount of fuel may be released when servicing the fuel lines, the fuel injection pump, or the connections. In order to reduce the risk of personal injury, cover the fuel system components with a shop towel before disconnection. This will catch any fuel that may leak out. Place the towel in an approved container when the disconnection is complete.
- If the fuel system requires repair, prevent fuel spillage by removing the fuel pump fuse. Refer to Electrical Center Identification Views.
- Loosen the fuel fill cap in order to relieve the fuel tank vapor pressure.
- Remove the engine cover, if required.
- Remove the fuel rail service port cap.
- Wrap a shop towel around the fuel rail service port and using a small flat-bladed tool, depress (open) the fuel rail test port valve.
- Remove the shop towel from around the fuel rail service port, and place in an approved gasoline container.
- Install the fuel rail service port cap.
- Install the engine cover, if required.
- Tighten the fuel fill cap.
