For 1990-2009 cars only
Removal Procedure
Important: Clean the area around the camshaft position (CMP) sensor before removal in order to prevent debris from entering the engine.
- Raise and suitably support the vehicle. Refer to Lifting and Jacking the Vehicle .
- Remove the engine shield. Refer to Engine Shield Replacement .
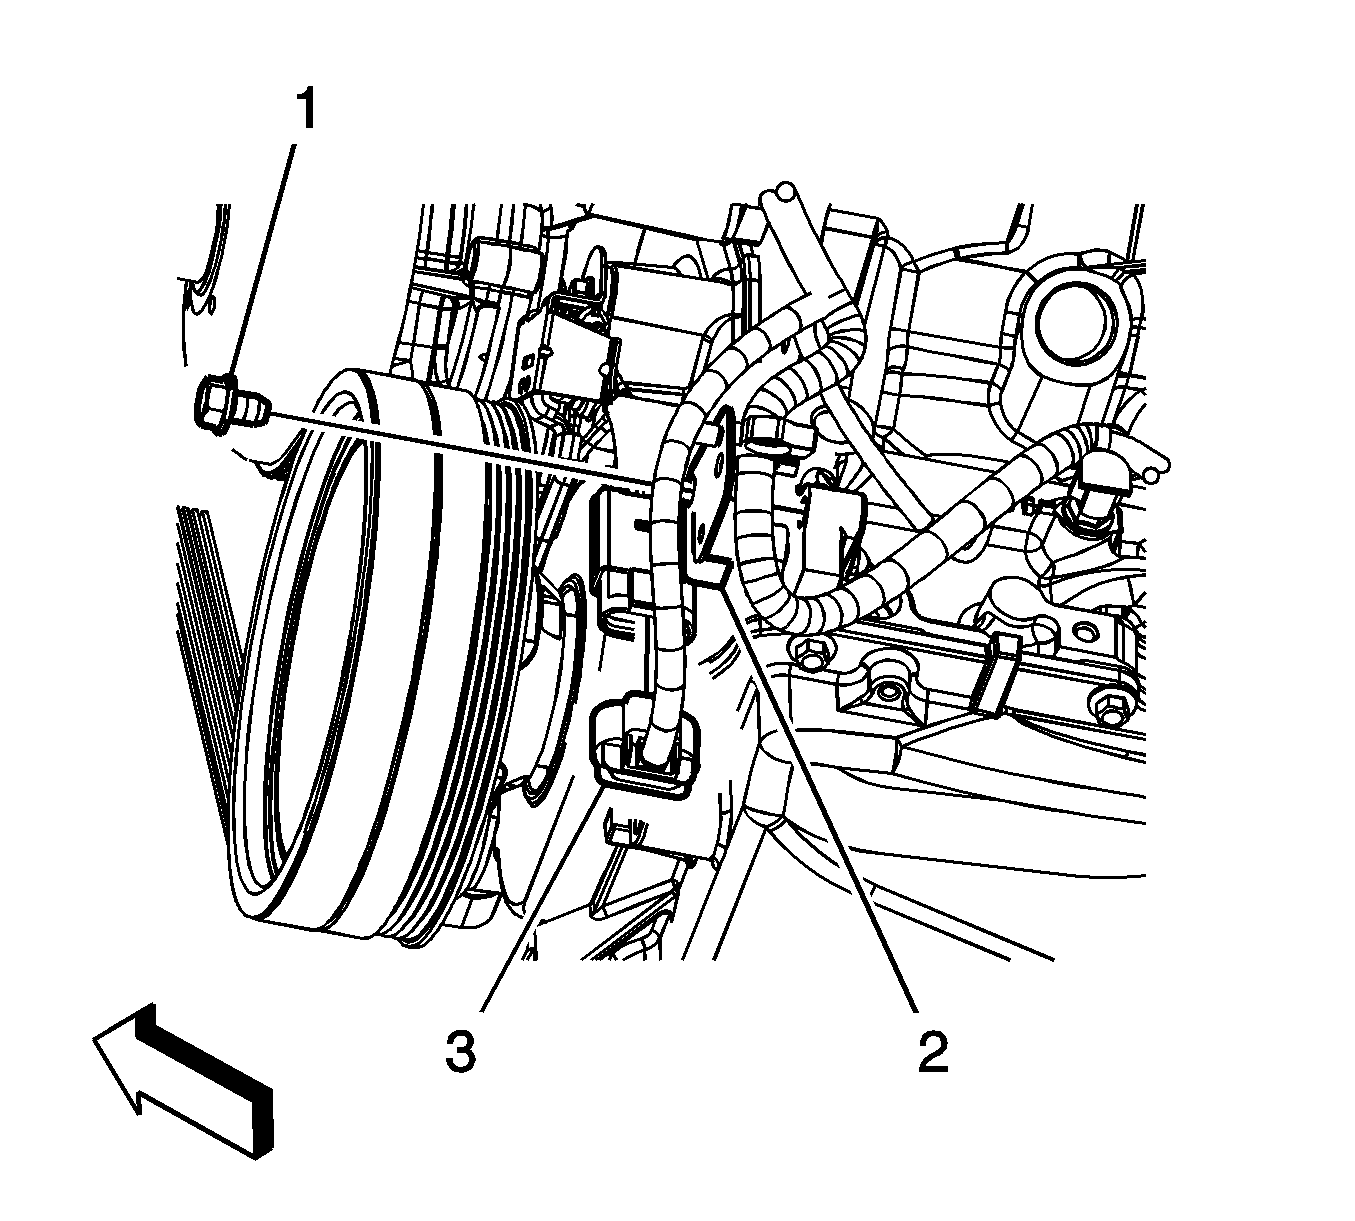
- Disconnect the engine wiring harness electrical connector (3) from the CMP sensor wire harness.
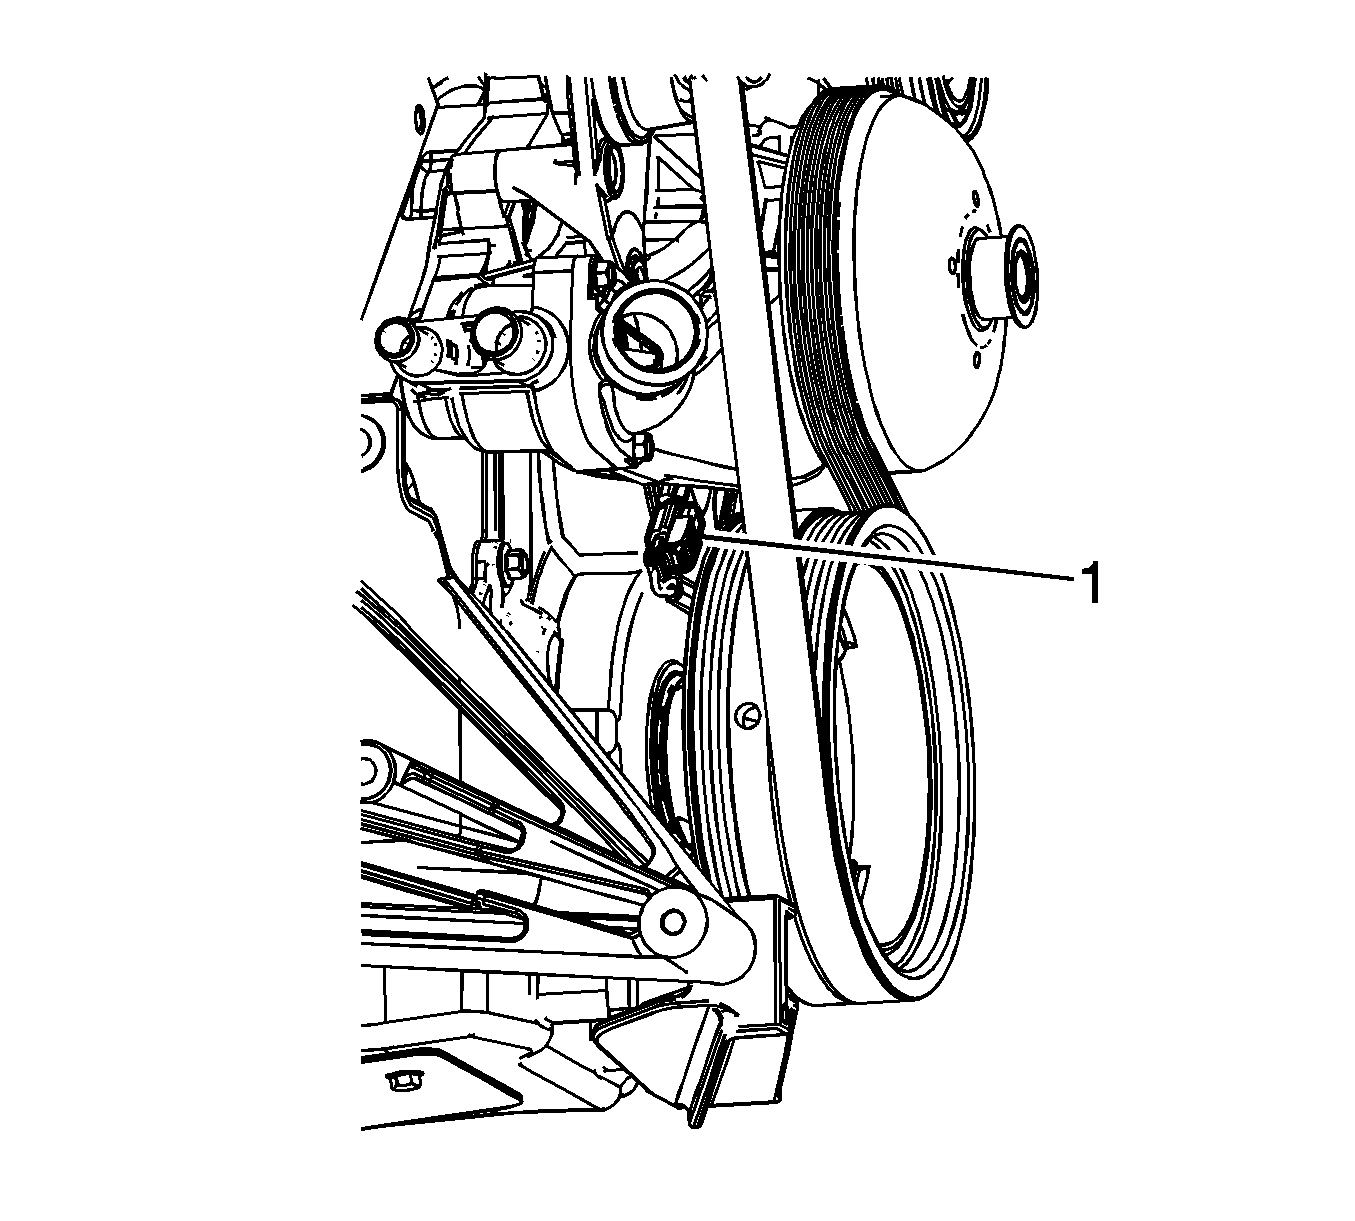
- Disconnect the CMP sensor wire harness electrical connector (1) from the CMP actuator magnet.
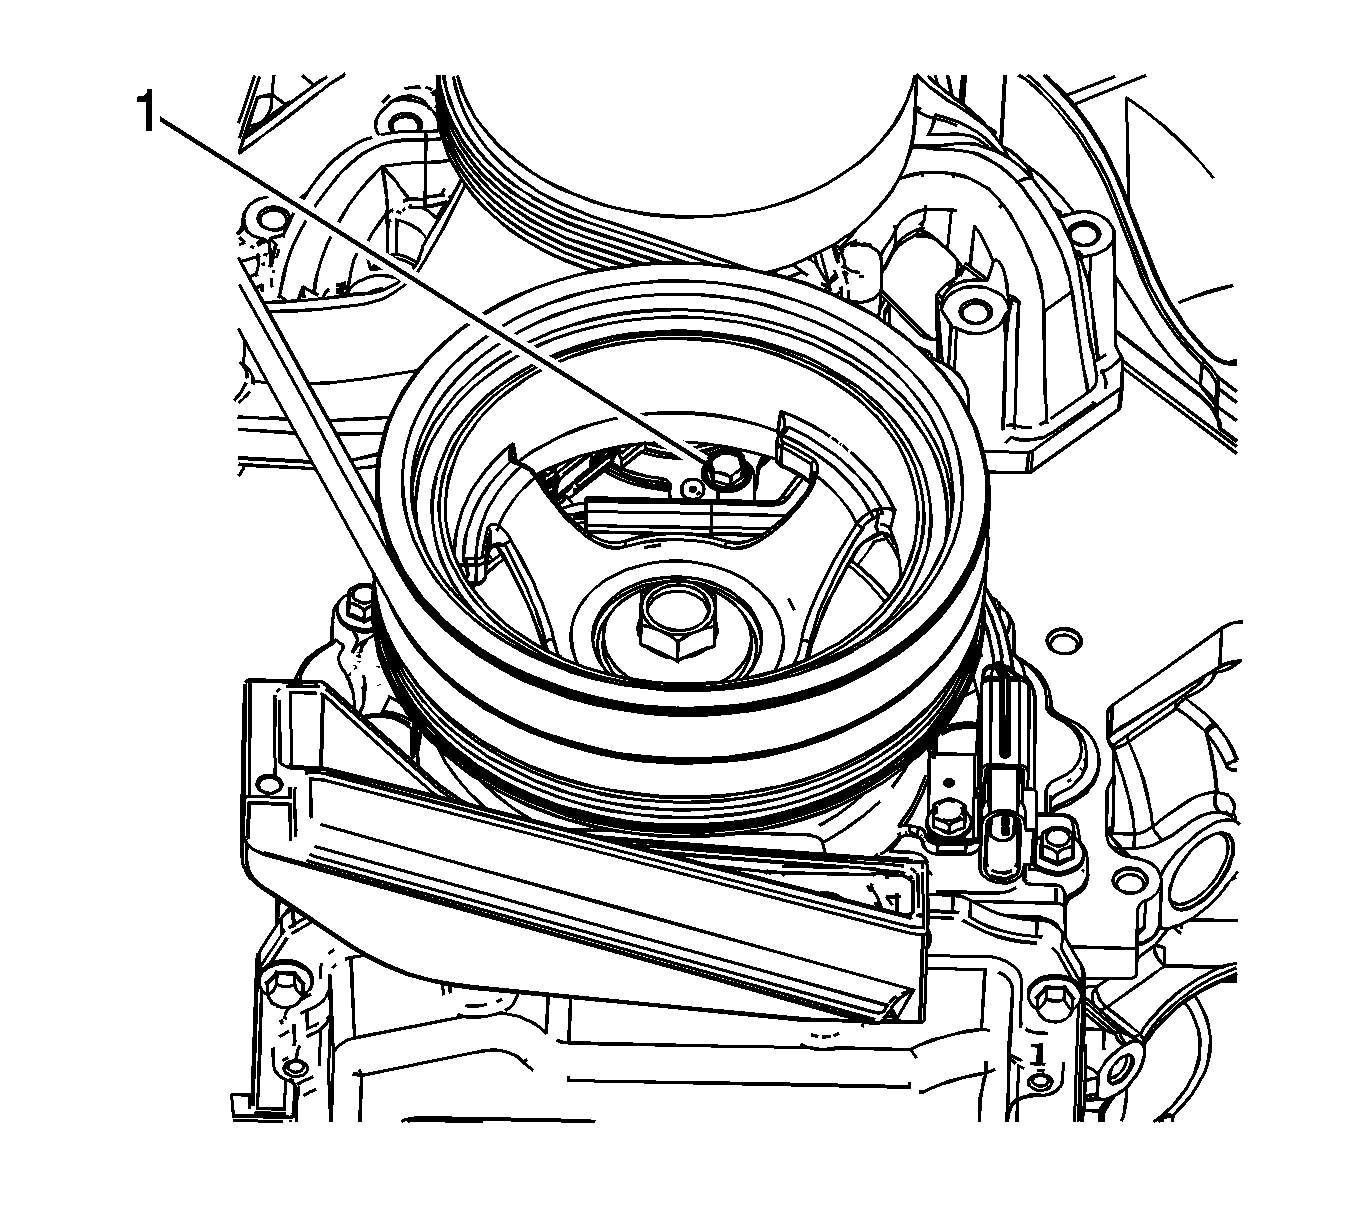
- Working through the crankshaft balancer opening, loosen the CMP sensor wire harness bolt (1) 2 turns using a box wrench.
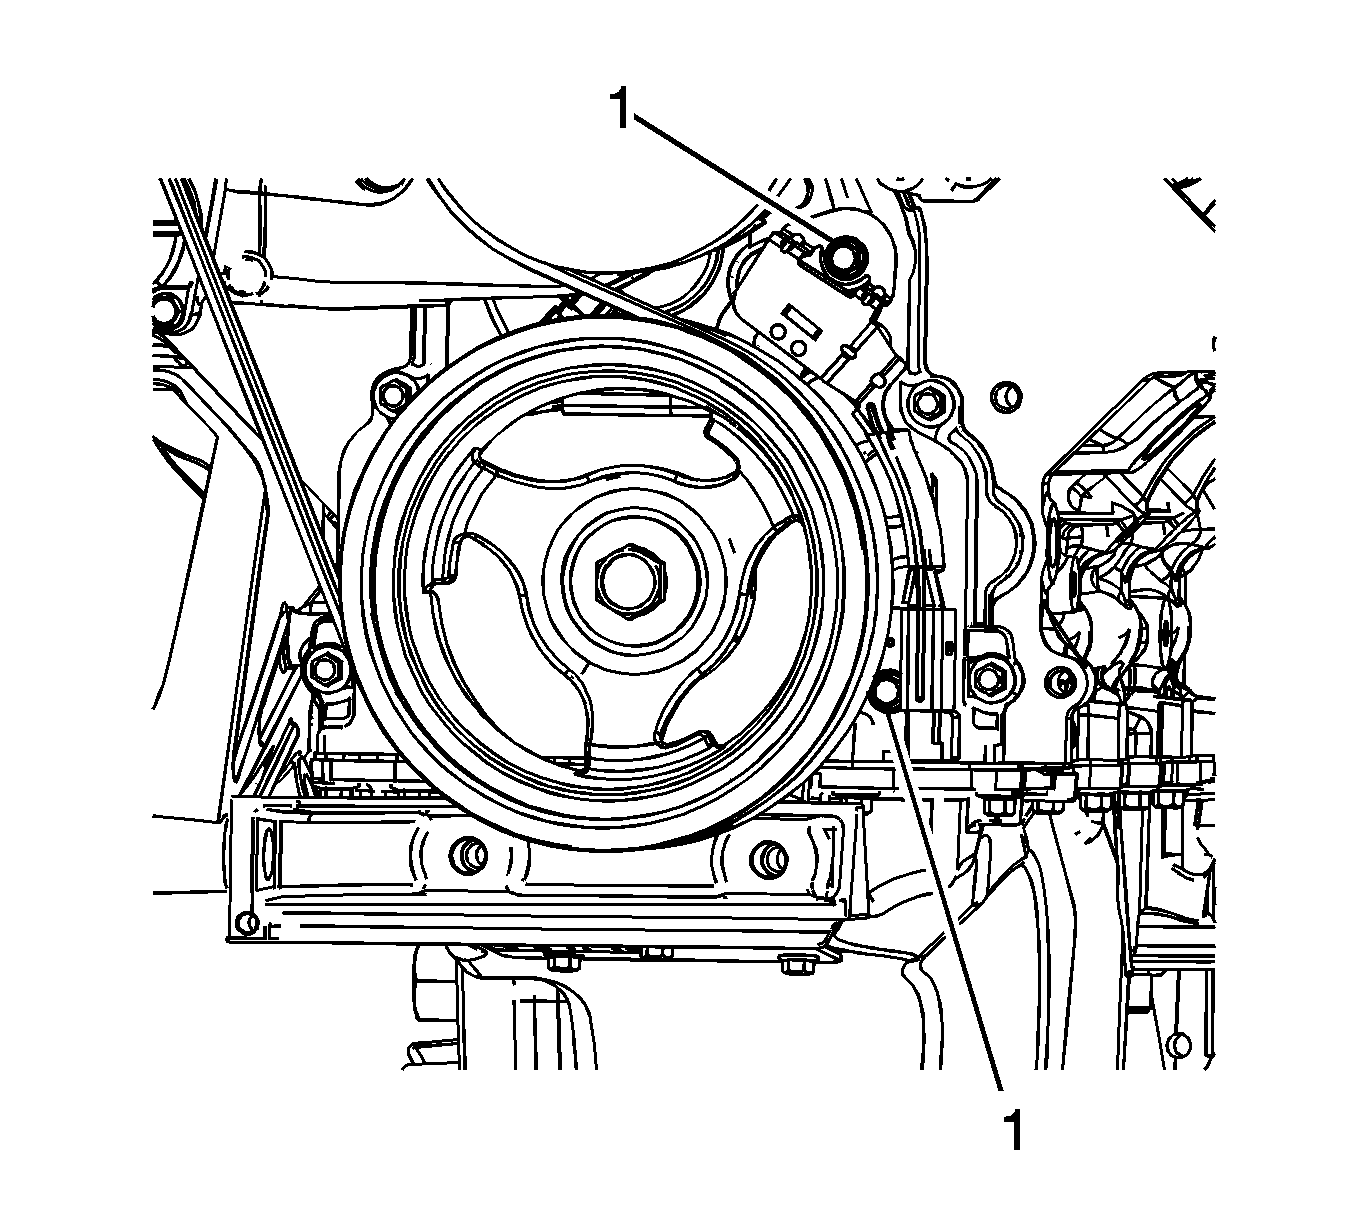
- Remove the 2 remaining CMP sensor wire harness bolts (1).
- Lower the vehicle.
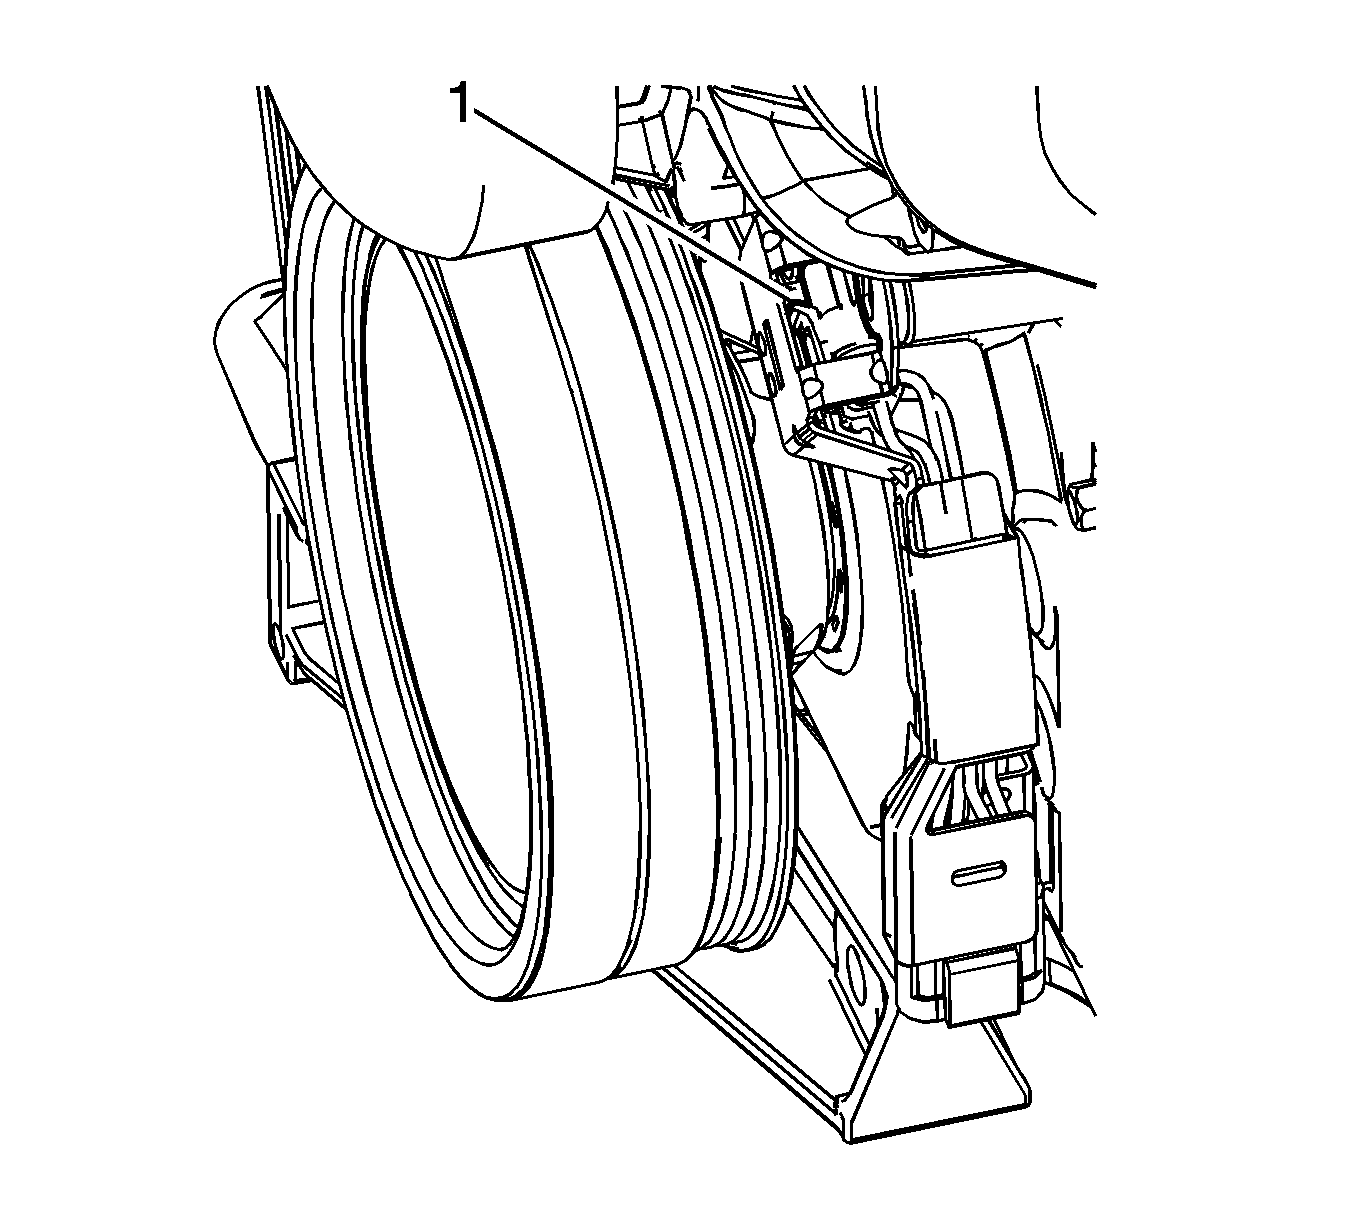
- Using a small flat bladed tool, disengage the CMP sensor wire harness electrical connector retainer (1) from the CMP sensor.
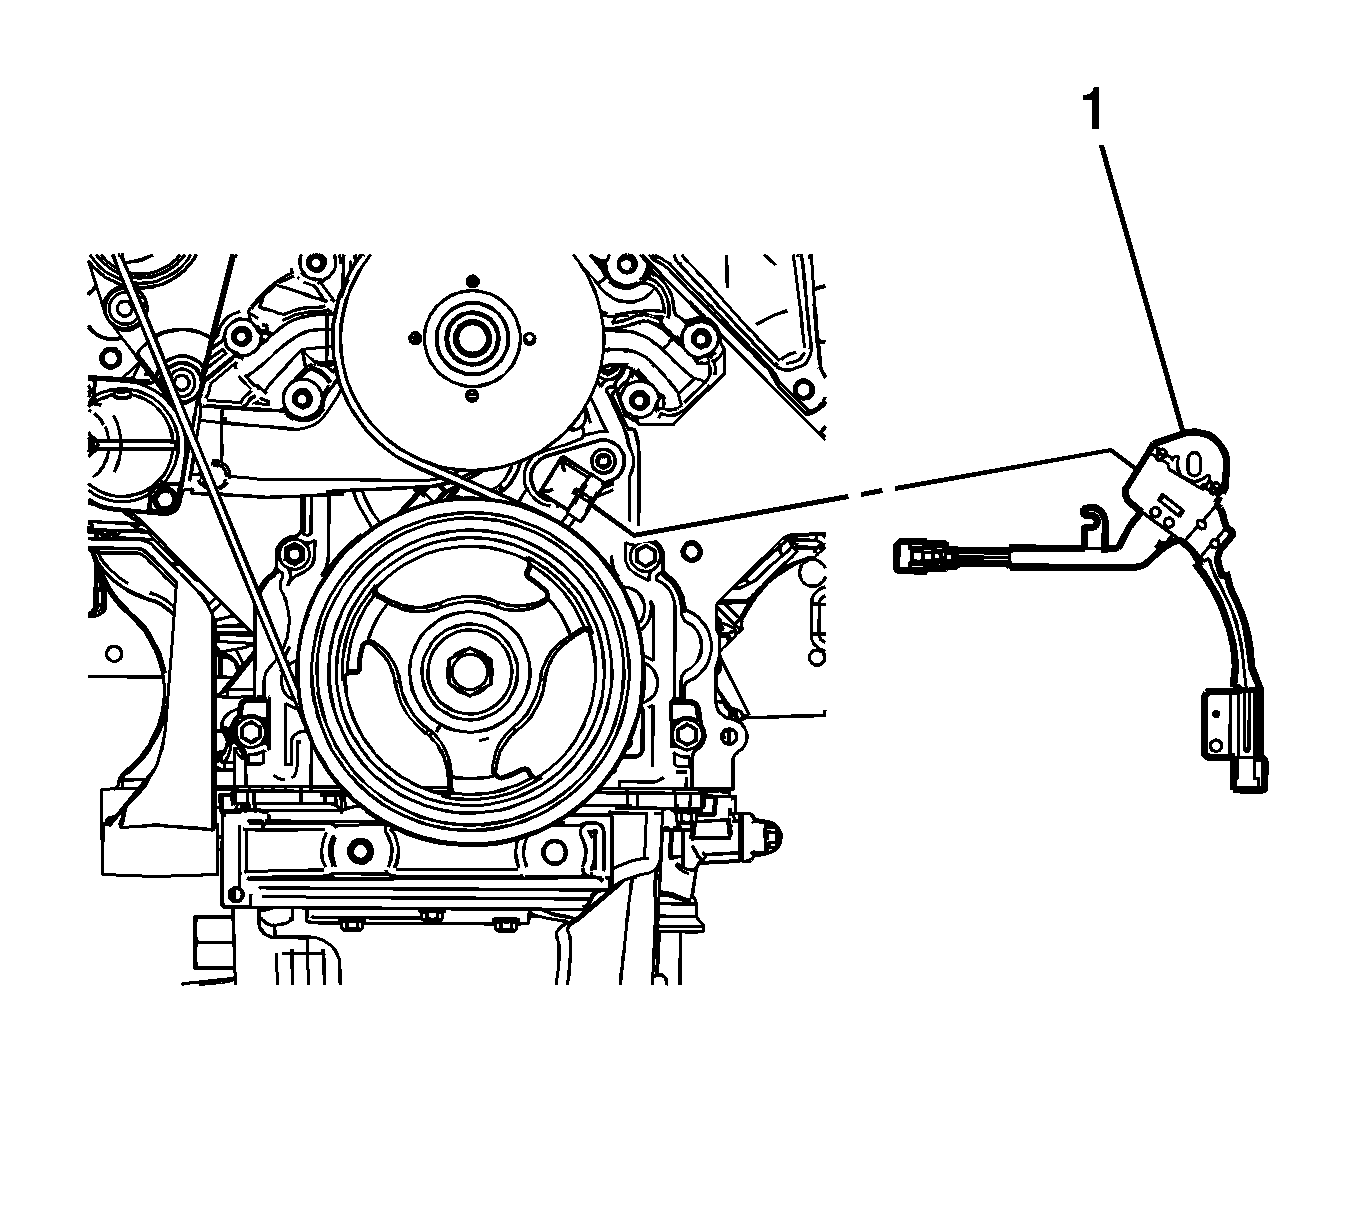
- Remove the CMP sensor wire harness (1).
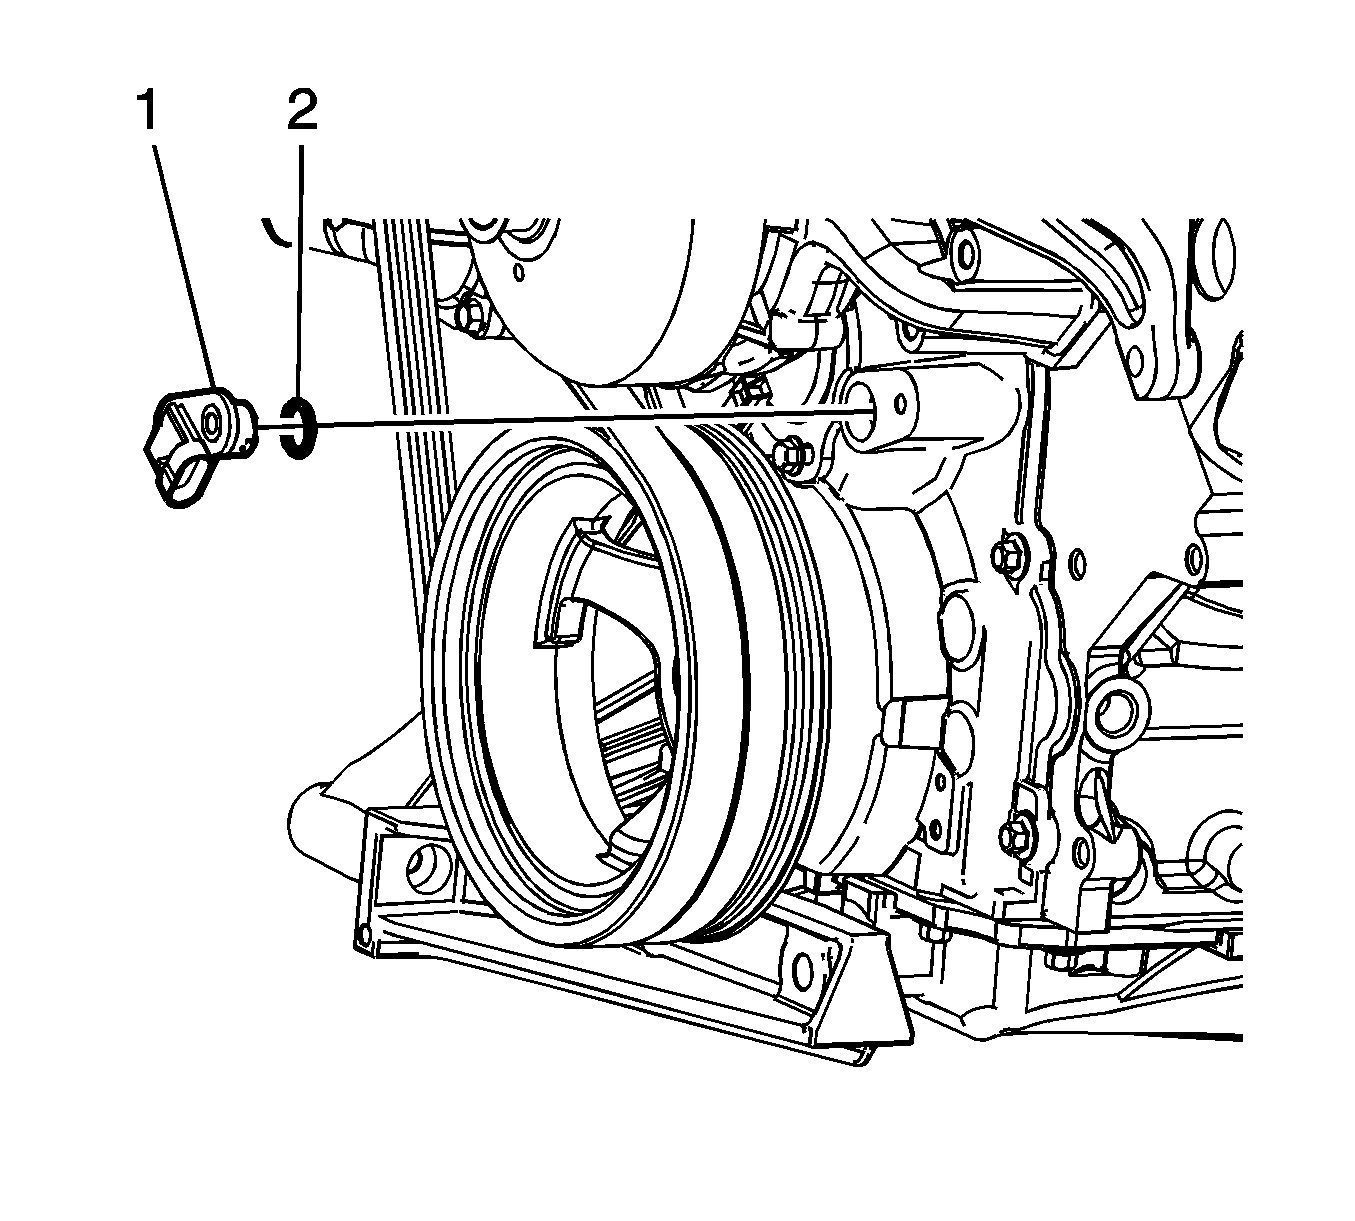
- Remove the CMP sensor (1) and O-ring seal (2).
Installation Procedure
- Inspect the CMP O-ring seal (2) for cuts or damage. If the seal is not damaged, it may be reused.
- Lubricate the O-ring seal with clean engine oil.
- Install the O-ring seal onto the sensor.
- Instal the CMP sensor (1) to the front cover.
- Install the CMP sensor wire harness (1).
- Connect the CMP sensor wire harness electrical connector, ensure that the retainer (1) fully engages the CMP sensor.
- Raise and suitably support the vehicle.
- Install the 2 rear CMP sensor wire harness bolts (1).
- Working through the crankshaft balancer opening, tighten the CMP sensor wire harness bolt (1) using a box wrench.
- Connect the CMP sensor wire harness electrical connector (1) to the CMP actuator magnet.
- Connect the engine wiring harness electrical connector (3) to the CMP sensor wire harness.
- Install the engine shield. Refer to Engine Shield Replacement .


Notice: Refer to Fastener Notice in the Preface section.

Tighten
Tighten the bolt to 12 N·m (106 lb in).


