For 1990-2009 cars only
Important: Never swap OnStar® vehicle integration units (VIU) or vehicle communication units (VCU) from other vehicles. Transfer of OnStar® components from other vehicles should not be done. Each OnStar® component has a unique identification number. The VIU has a specific station identification (STID) and the VCU has a specific electronic serial number (ESN). These identification numbers are used by the National Cellular Telephone Network and OnStar® systems, and are stored in the General Motors vehicle history files by VIN.
Removal Procedure
- Remove the dash trim bezel. Refer to Instrument Panel Cluster Trim Plate Bezel Replacement .
- Remove the garnish molding on the windshield pillar. Refer to Windshield Pillar Garnish Molding Replacement .
- Remove the dash trim pad. Refer to Instrument Panel Upper Trim Pad Replacement .
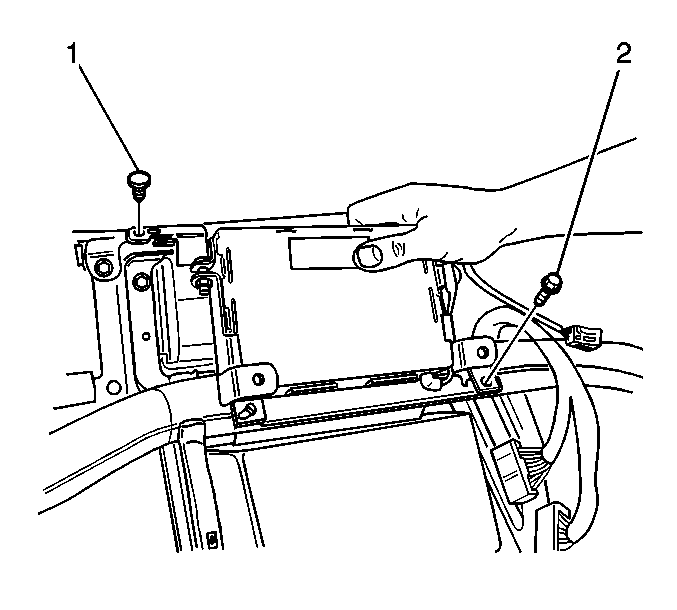
- Remove the screws (2) securing the VIU bracket to the instrument panel (I/P) metal brace.
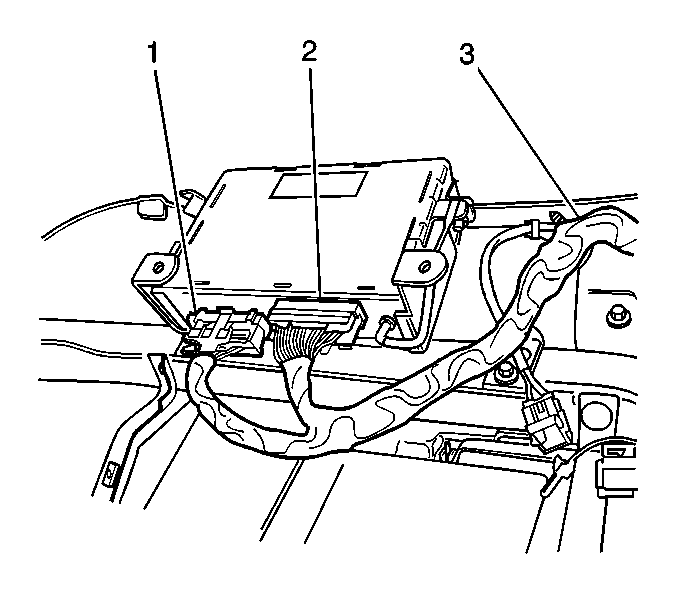
- Disconnect the red 32-way electrical connectors (1) and the blue 32-way electrical connector (2).
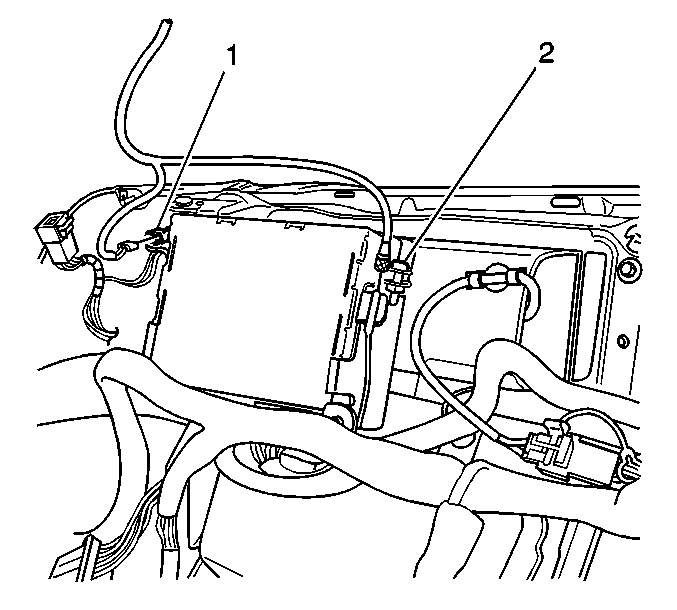
- Disconnect the microphone (1) and global position system (GPS) cables (2) from the VIU.
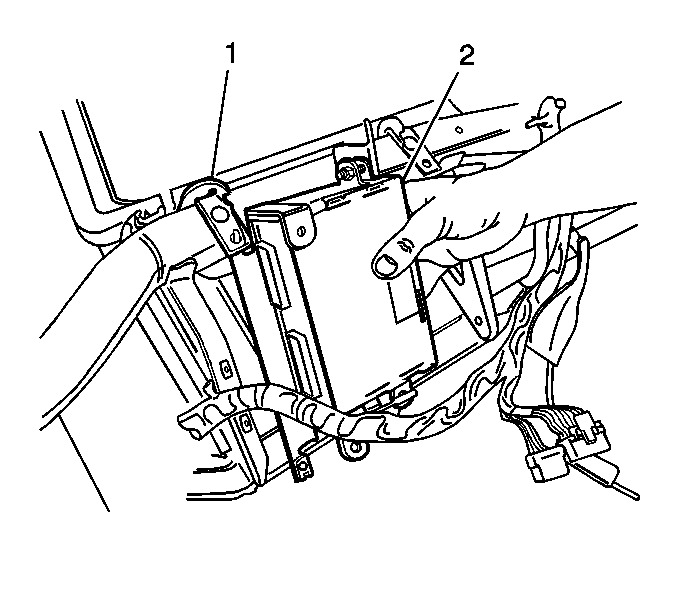
- Remove the VIU (2) from the bracket by rotating the module upwards to release the hook tab (1).
- The old VIU must be returned for core credit.
Installation Procedure
- Record the 10-digit STID number from the label on the VIU module.
- Install the VIU (2) to the bracket by rotating the unit downwards into the hook tab (1).
- Reconnect the microphone (1) and GPS cables (2) from the VIU.
- Reconnect the red 32-way electrical connectors (1) and the blue 32-way electrical connector (2).
- Install the screw (2) securing the VIU bracket to the I/P metal brace.
- Install the dash trim pad. Refer to Instrument Panel Upper Trim Pad Replacement .
- Install the garnish molding on the windshield pillar. Refer to Windshield Pillar Garnish Molding Replacement .
- Install the dash trim bezel. Refer to Instrument Panel Cluster Trim Plate Bezel Replacement .
- Reconfigure the Onstar® system. Refer to OnStar Reconfiguration .
Notice: Refer to Fastener Notice in the Preface section.
Tighten
Tighten the screw to 9 N·m (80 lb in).
The STID number recorded will be needed by the Onstar® Dealer support line.
