For 1990-2009 cars only
Special Tools
| Pinion Flange Holder and Remover |
| • | J 23444-A Extreme Press Lubricant - 1/4-Ounce Tube |
| • | J 29369-2 Bushing and Bearing Remover - 2-3 in |
| • | J-44873-2 Shoulder Bolts |
| • | J 44882 Pinion Press Support Bar |
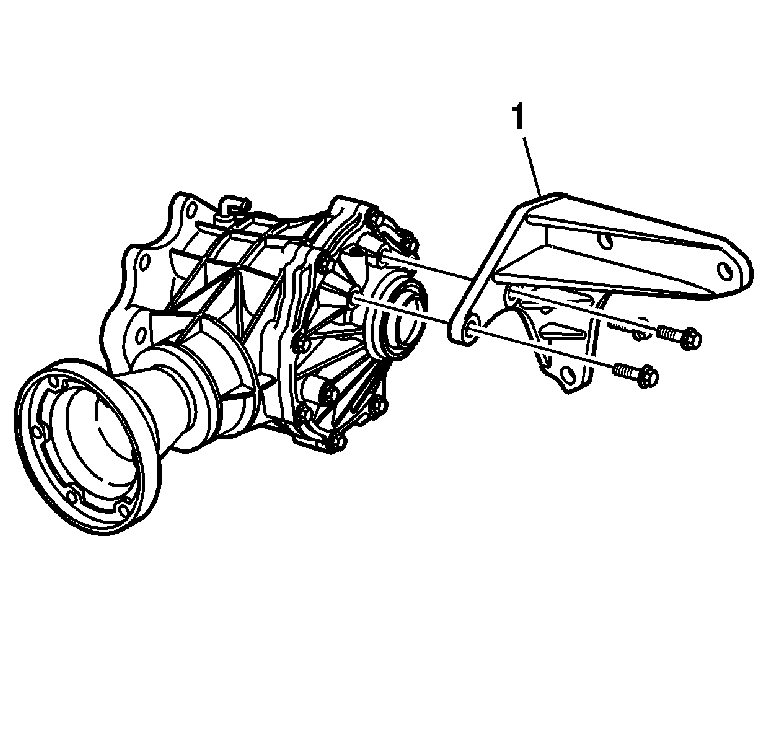
- Remove the 3 bolts from the bracket (1).
- Remove the bracket (1).
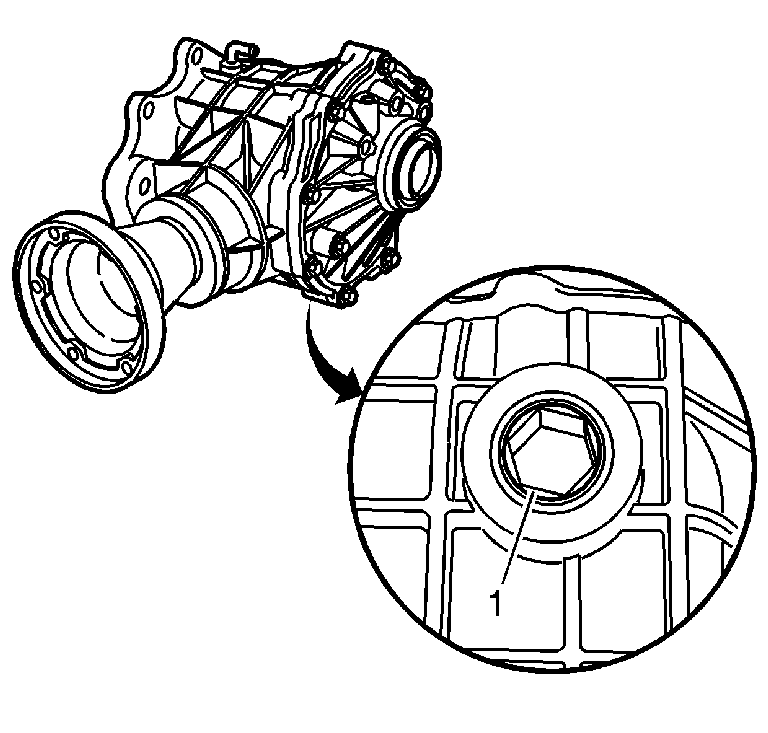
- Remove the drain plug (1).
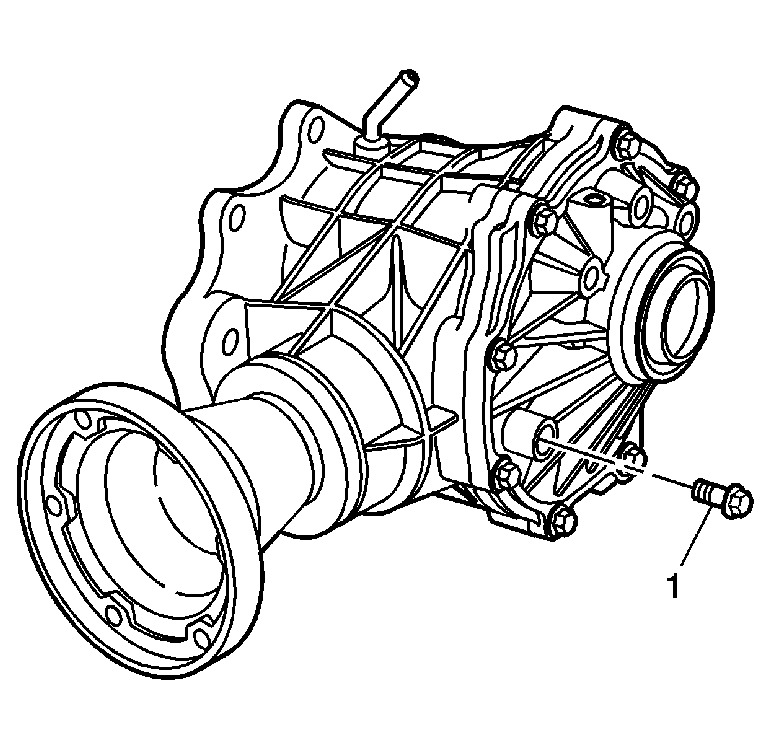
- Remove the fill plug (1) and drain the fluid.
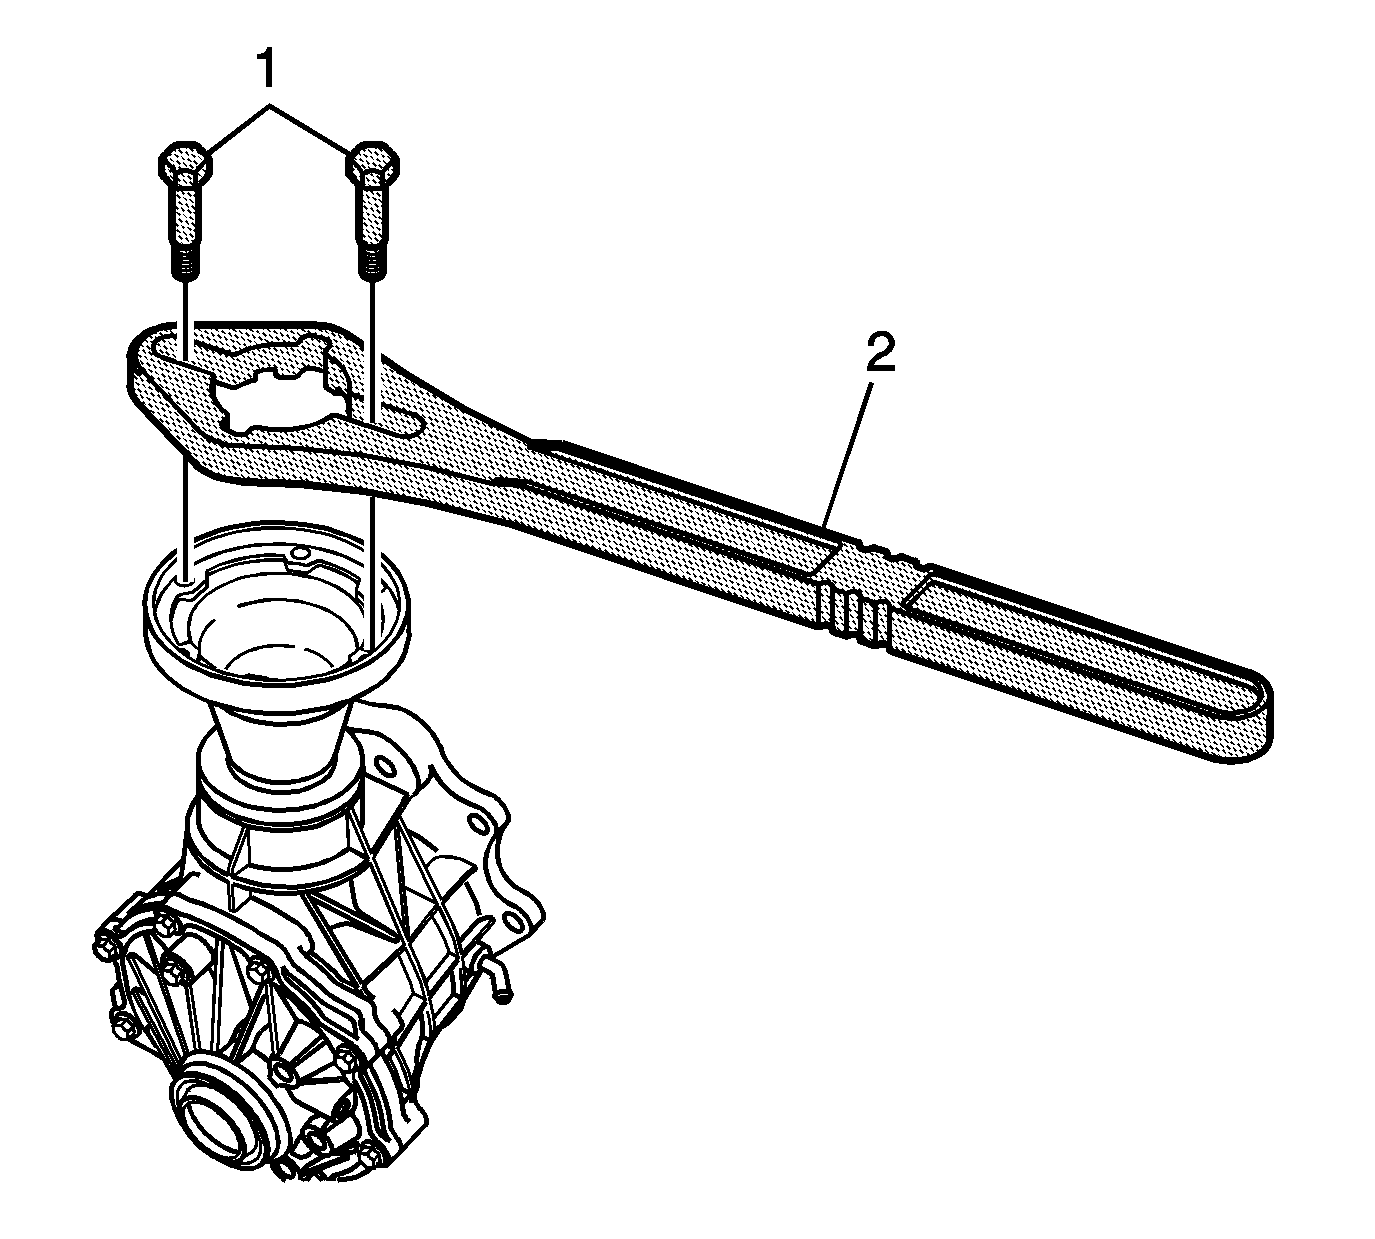
- Install J-08614-A (2) and J-44873-2 (1) to the pinion flange.
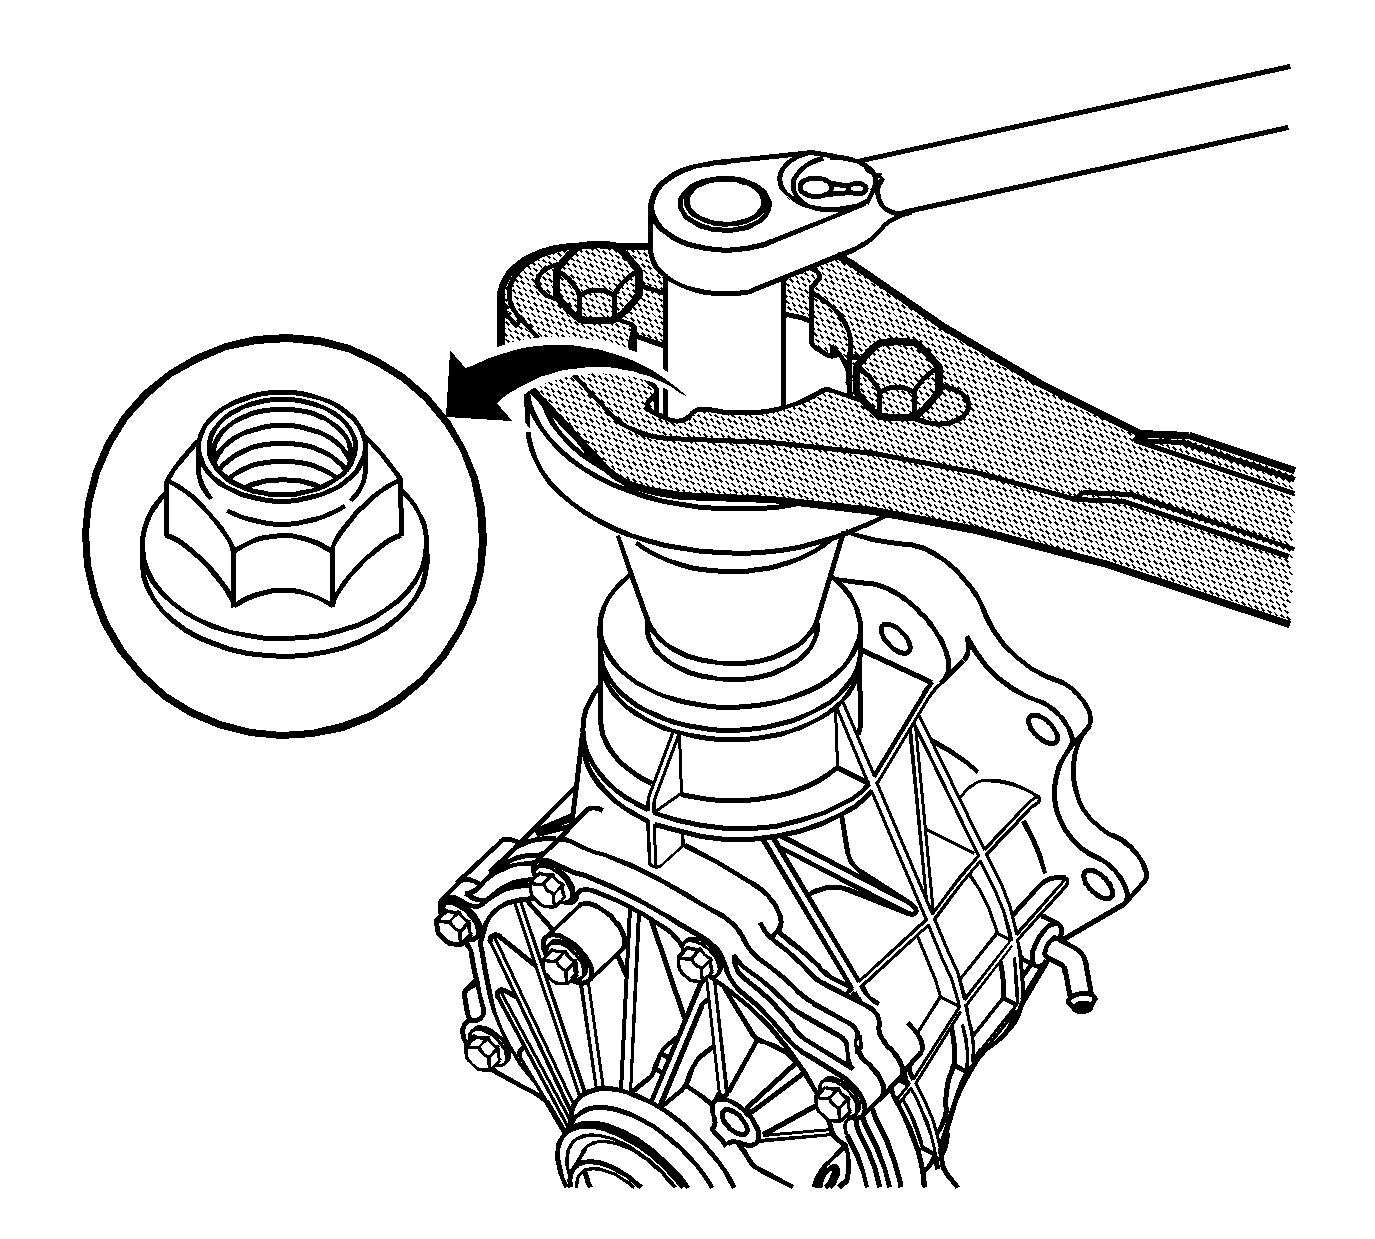
- Using a ratchet with a 27 mm socket, remove the pinion nut.
- Insert the forcing screw assembly (1) through the slots in J-08614-A (2).
- Turn the blue collar (1) until it locks into the grooves on the under side of the J-08614-A (2).
- Tighten the forcing screw to remove the pinion flange.
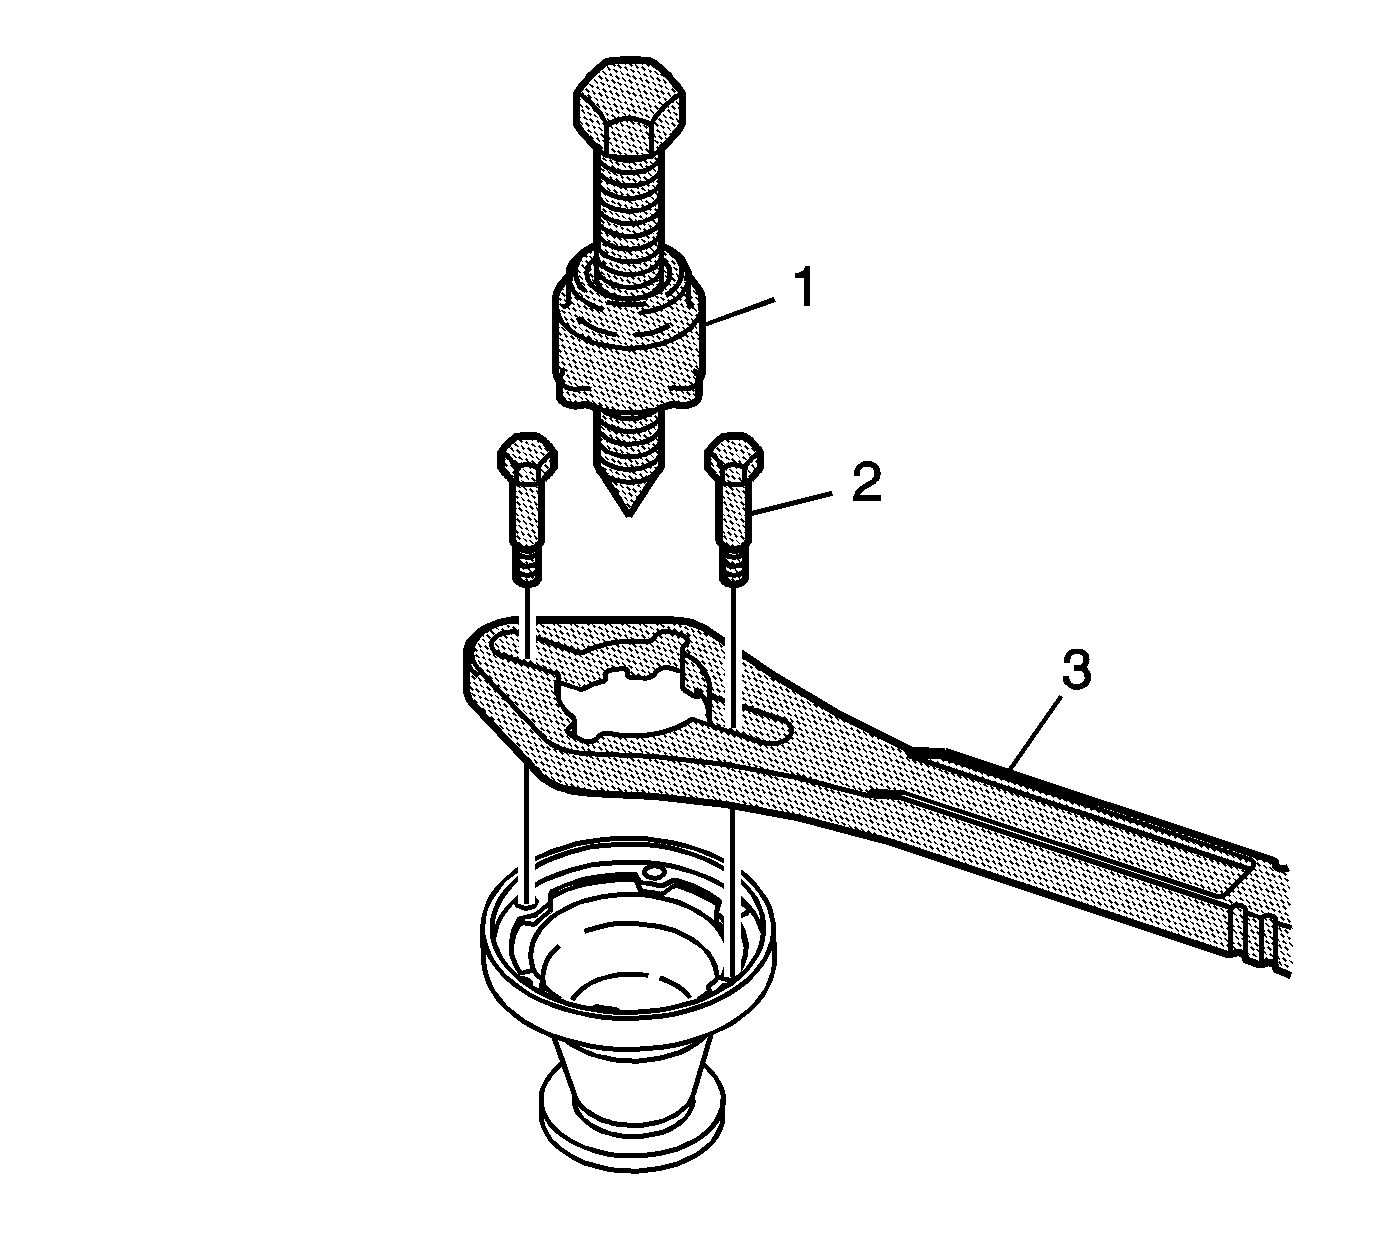
- Remove the J-08614-A (3), the J-44873-2 (2), and the forcing screw assembly (1) from the pinion flange.
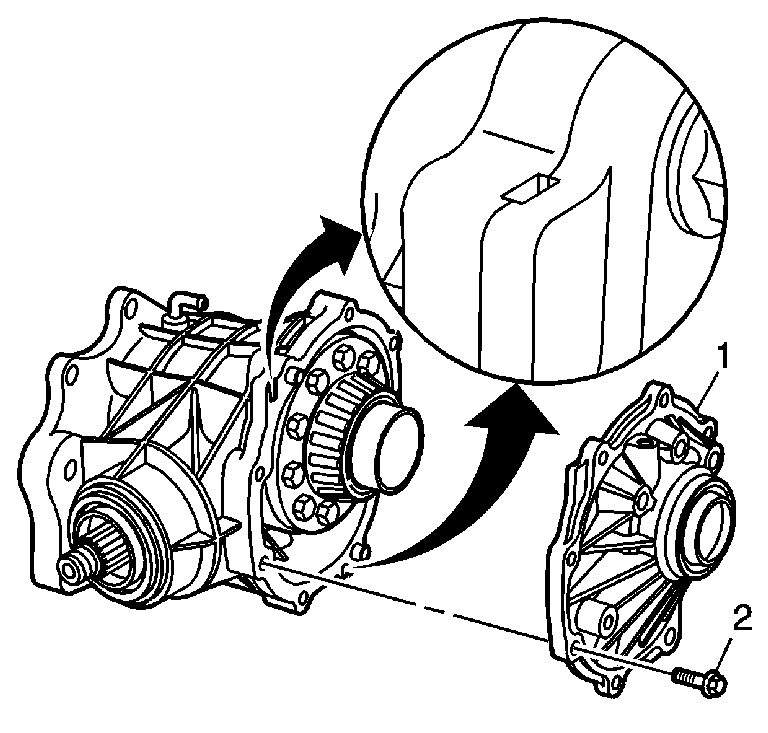
- Remove all bolts (2) from the side cover (1).
- Use pry point relief slots to remove the cover.
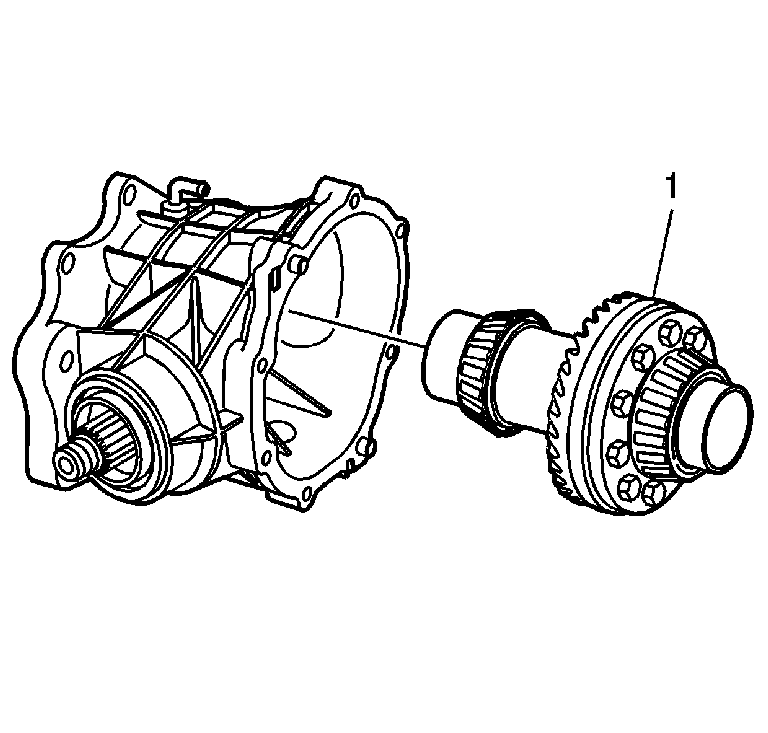
- Remove the carrier assembly (1) from the housing.
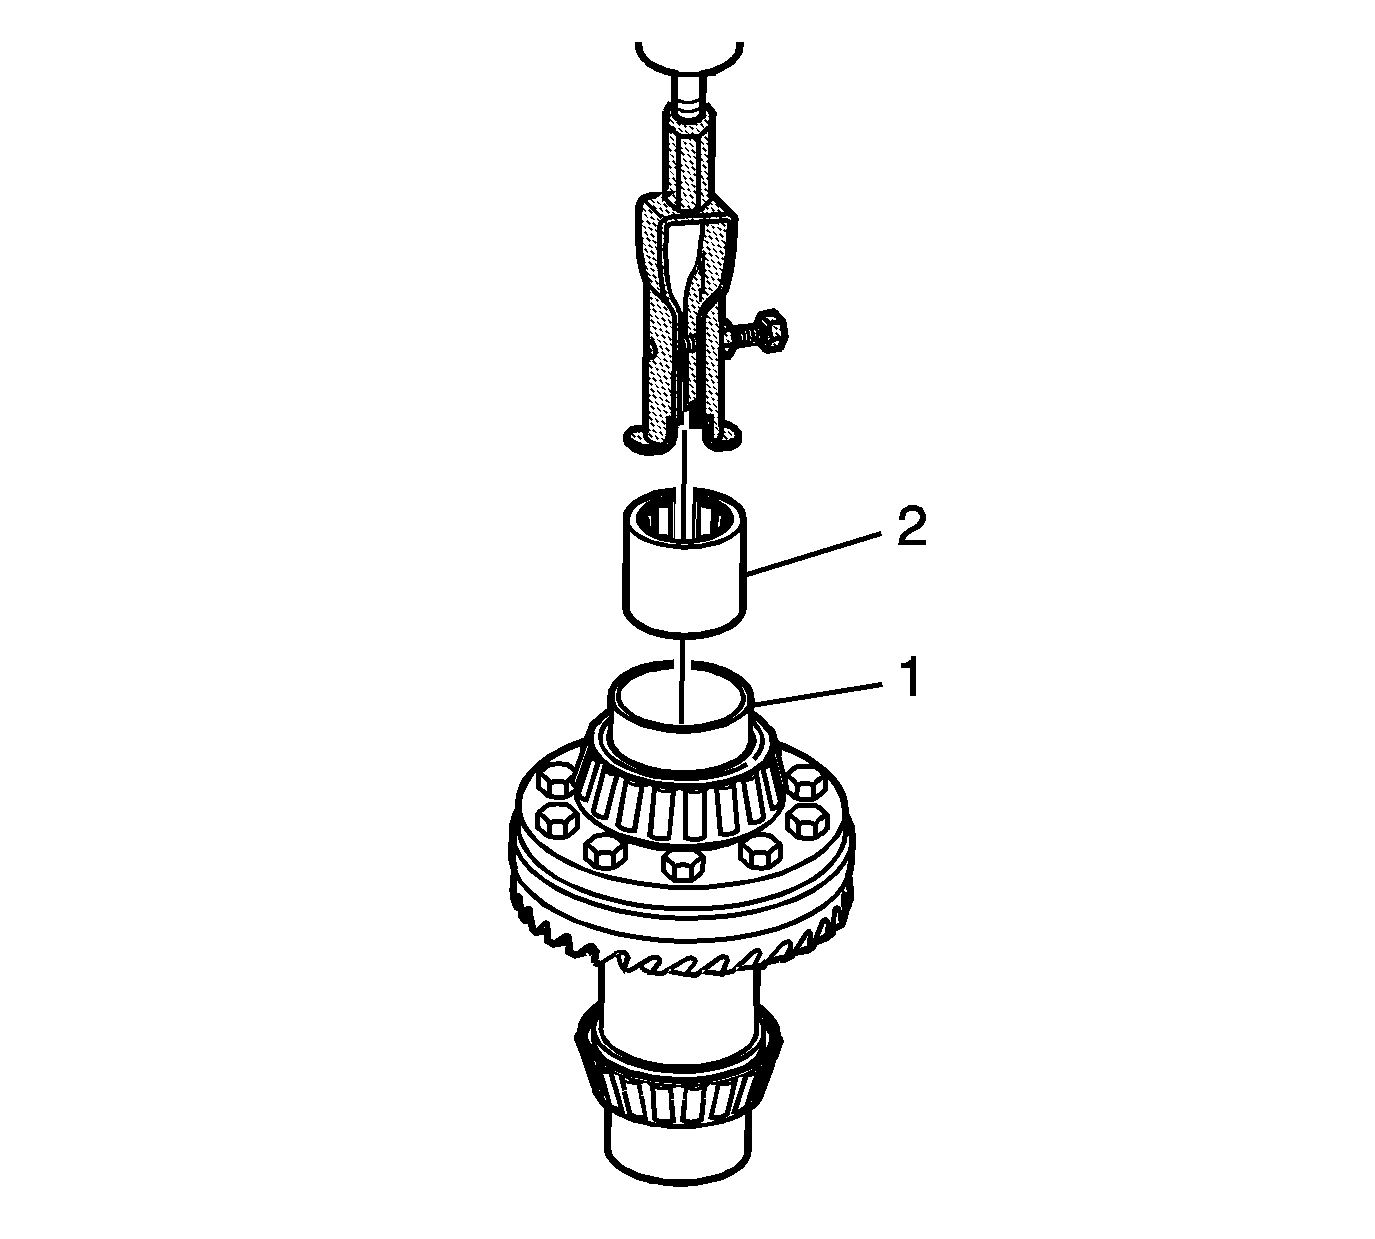
- Using the J 29369-2 and a slide hammer, remove the stub shaft inner bearing (2) from the carrier bore (1).
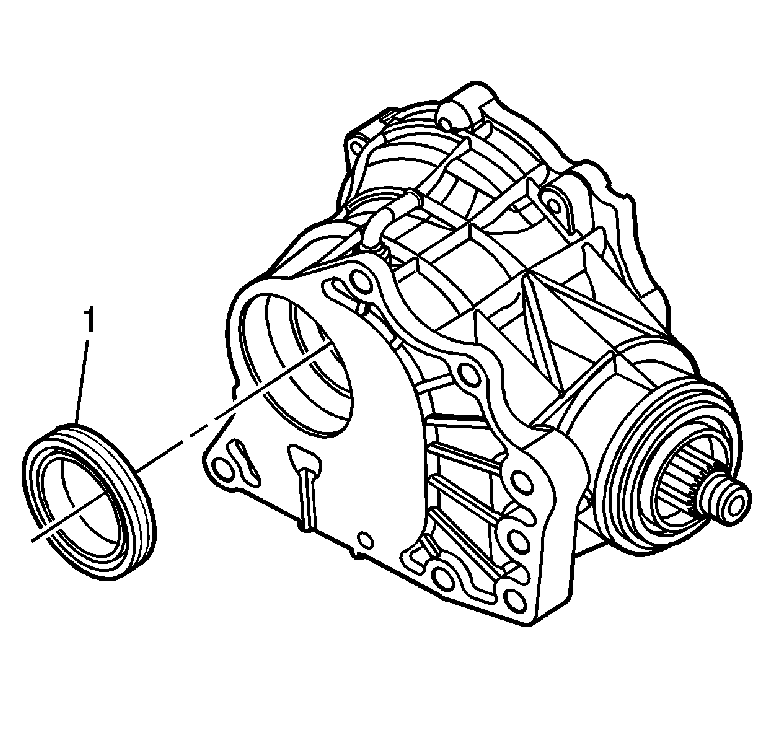
- Drive the seal (1) out from the inside of the carrier assembly housing.
- Remove the bearing cup (1), shims (2) and seal (3) from the side cover (4).
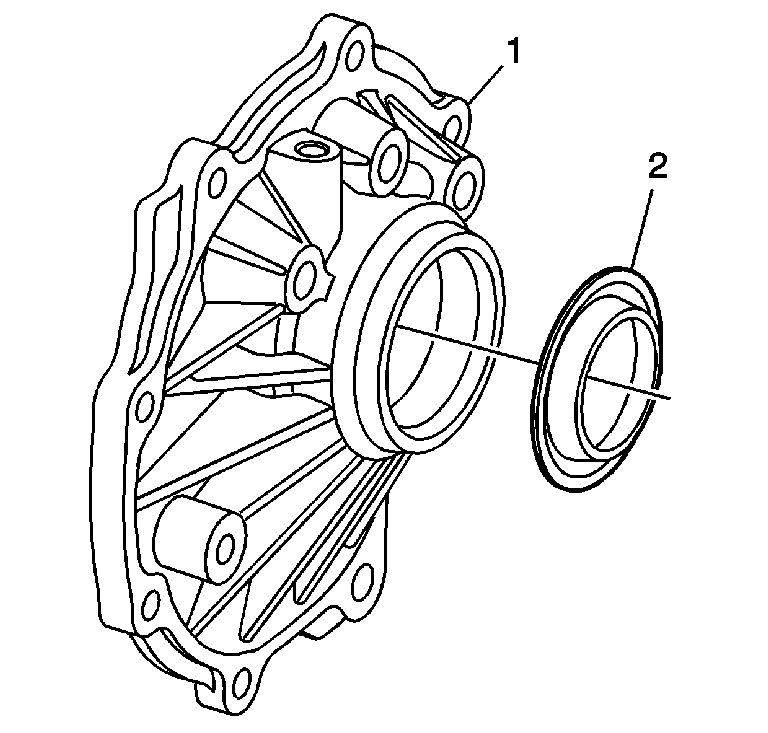
- Remove the axle seal (2) from the side cover (1).
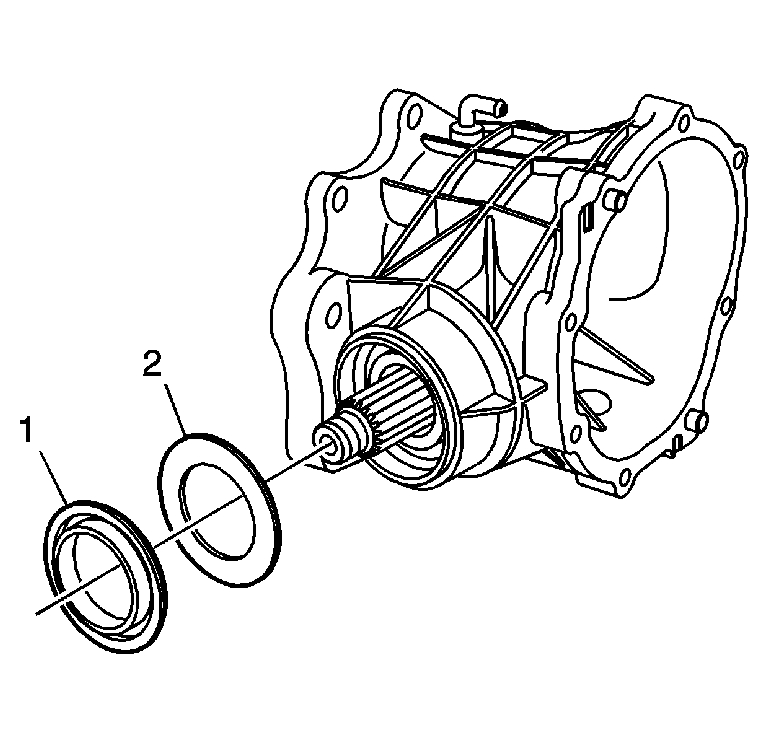
- Remove the pinion oil seal (1) and slinger washer (2) from the housing.
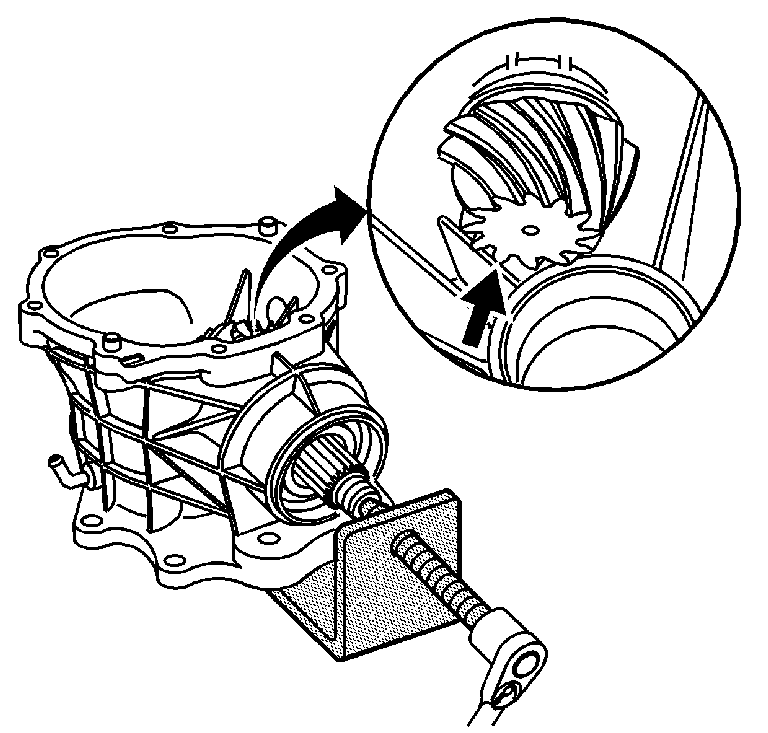
- Tighten the forcing screw in order to push out the pinion gear. The gear will spin when it is being pushed out. When the gear stops spinning, stop pushing. The gear teeth will contact the housing.
- Remove the J 44882 .
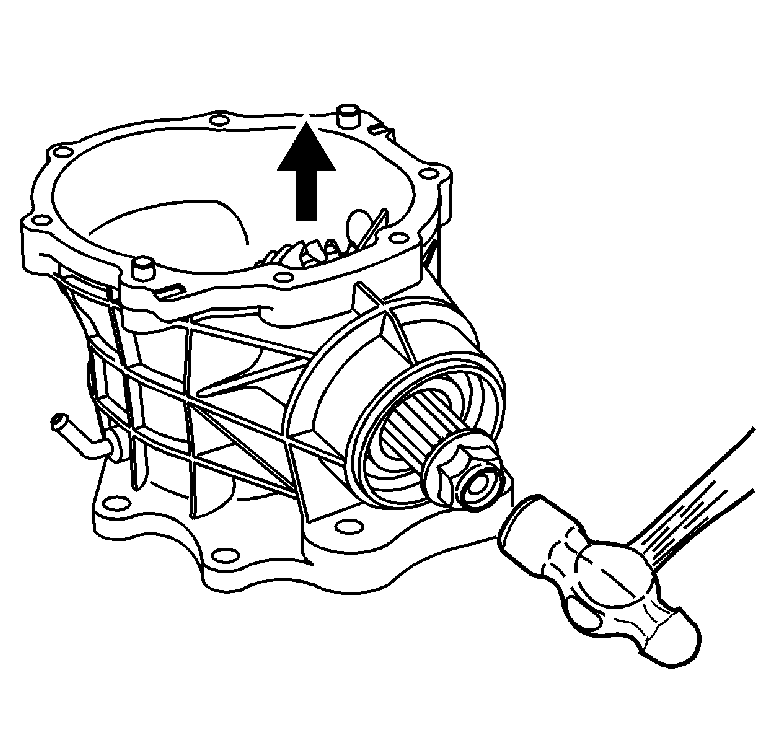
- Install the old pinion nut on the threads of the pinion shaft. Hold the shaft so the gear head faces up, and drive out the pinion shaft, so that it does not contact the housing.
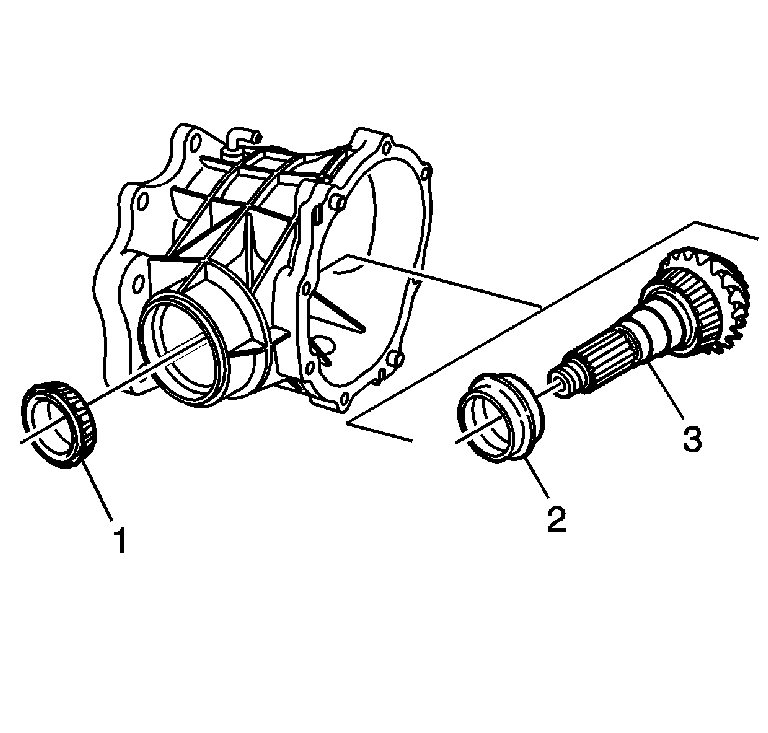
- Remove the bearing (1), collapsible spacer (2), and pinion shaft (3) from the housing.
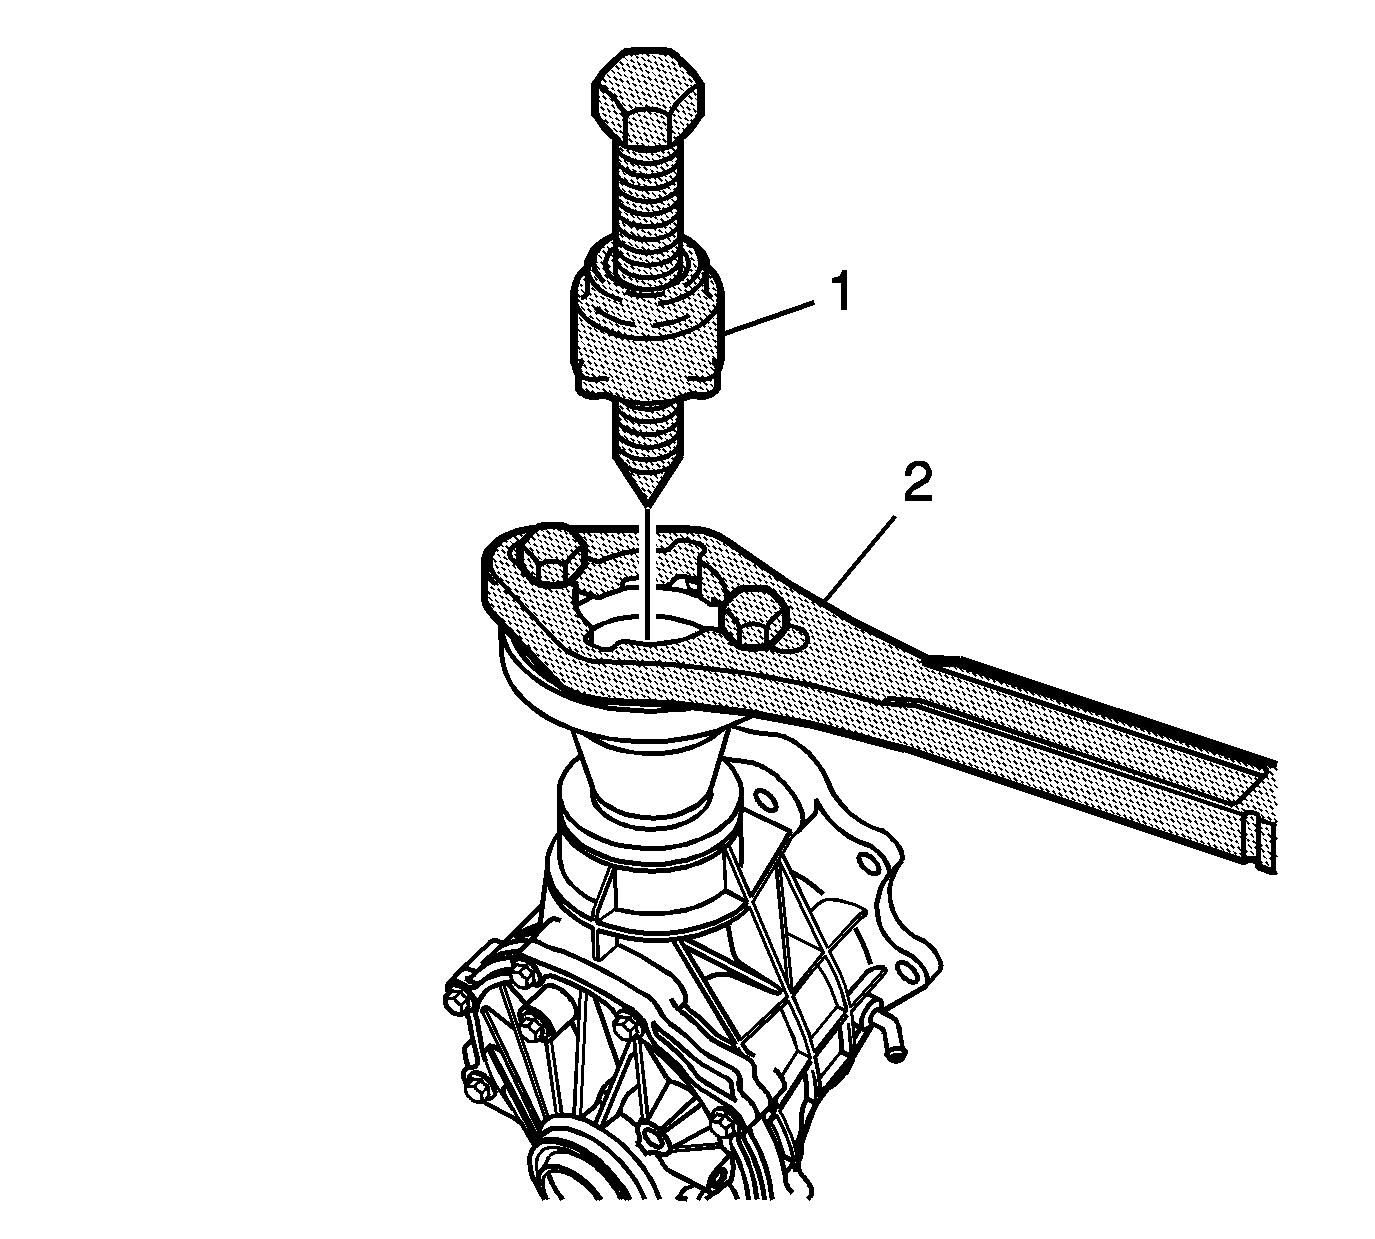
Note: Use high pressure grease J 23444-A on the screw threads.
Note: Perform this step ONLY if the bearing needs to be replaced. DO NOT use old bearing.
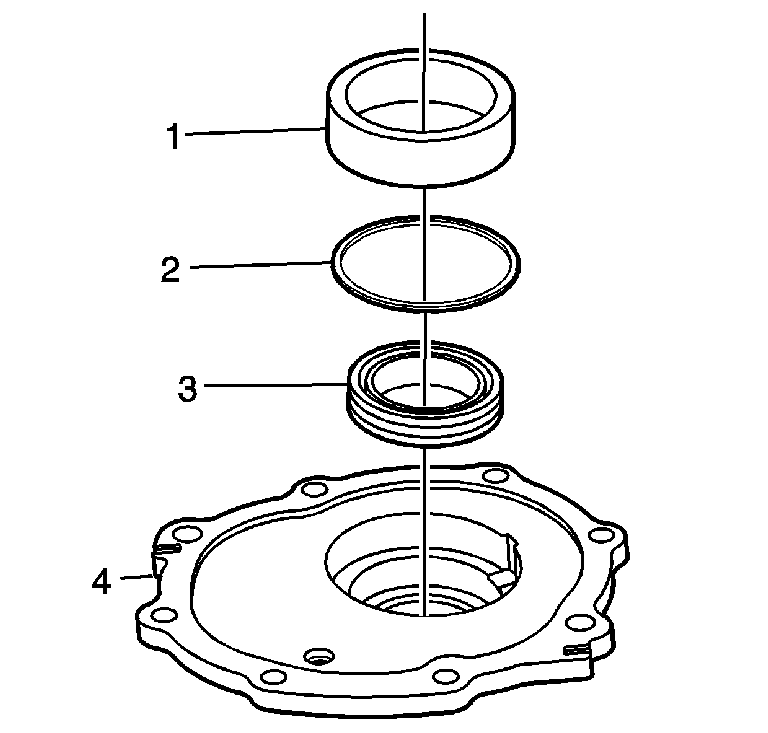
Caution: The bearing cup shims must be removed before the seal can be removed. Installing the seal through the bearing cup will damage the new seal. It may be necessary to heat the housing in order to remove the cup.
Mark or tag the bearing cup (1) and shims (2) for proper assembly.
