Tools Required
J 26900-7 Dial
Caliper
Removal Procedure
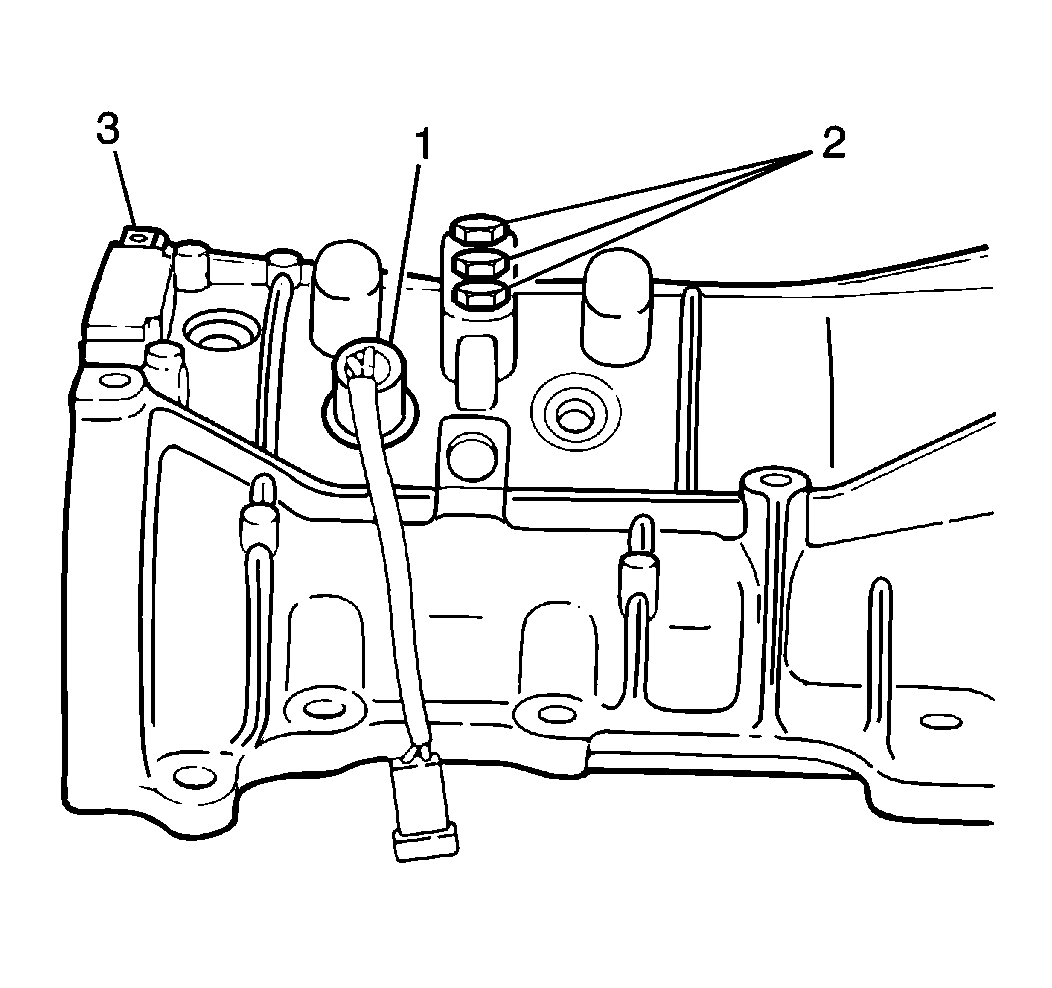
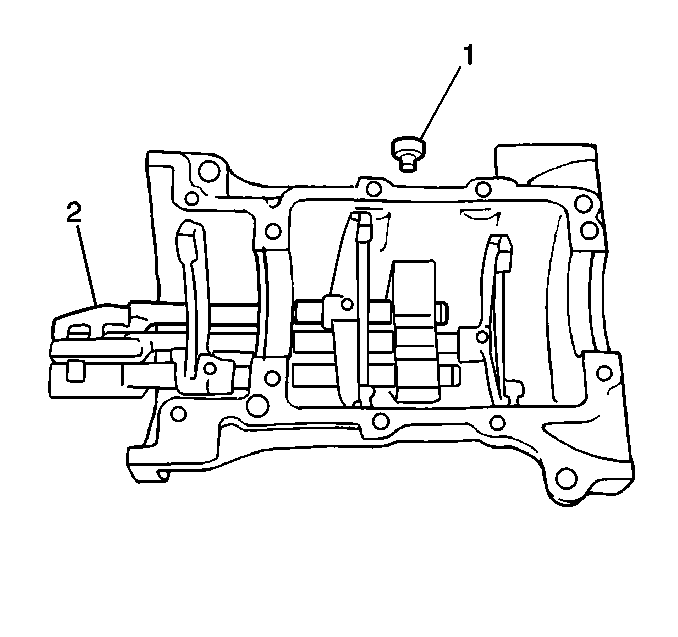
- Remove the backup lamp
switch (1) from the upper case (3).
- Remove the following components from the upper case (3):
| 2.1. | The 3 locating spring bolts (2) |
| 2.3. | The 3 locating springs |
| 2.4. | The 3 locating balls |
Important: When removing any gearshift shaft, the interlock system will prevent
gearshift shaft removal unless the other two gearshift shafts are in the neutral
position.
- Place all 3 of the gearshift shafts in the neutral position.
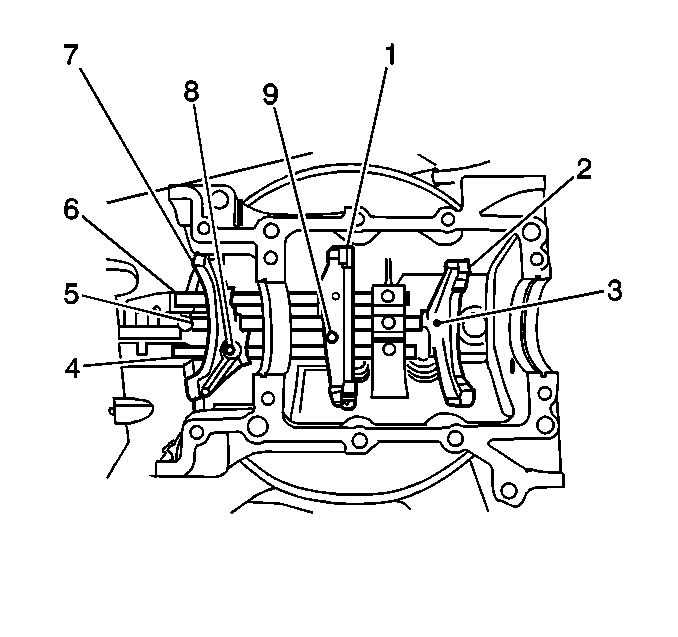
- Remove the following components
from the upper case:
| 4.1. | The low speed gearshift fork roll pin (9) |
| 4.2. | The low speed gearshift fork (1) |
| 4.3. | The low speed gearshift shaft (6) |
- Remove the following components from the upper case:
| 5.1. | The high speed gearshift fork roll pin (3) |
| 5.2. | The high speed gearshift fork (2) |
| 5.3. | The high speed gearshift shaft (5) |
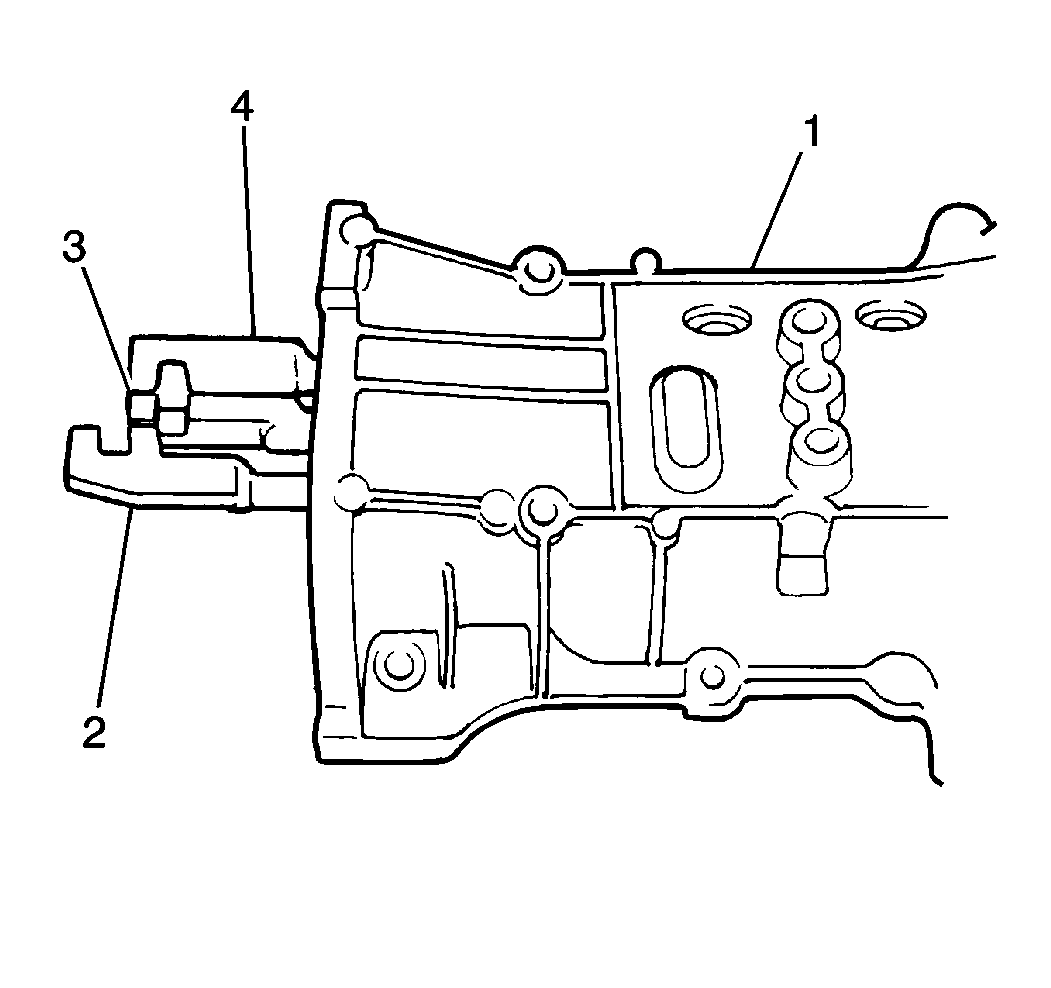
- Remove the reverse gearshift shaft from the upper case.
- Remove the following components from the reverse gearshift shaft (4):
| 7.1. | The reverse gearshift fork roll pin (8) |
| 7.2. | The reverse gearshift fork (7) |
- Remove the following components from the upper case:
| 8.2. | The 2 interlock balls |
- Remove the interlock pin from the high speed gearshift shaft.
- Use the following procedure
in order to inspect the gearshift shafts (2, 3, 4):
| 10.1. | Inspect the gearshift shafts for wear. |
| 10.2. | Pay particular attention to the locating groove (5) and gearshift
lever groove (1) in the gearshift shafts. |
| 10.3. | Replace any gearshift shaft that exhibits excessive wear or damage. |
| 10.4. | Insert each gearshift shaft into the upper case. |
| 10.5. | Test each gearshift for smooth operation while working back and
forth. |
| 10.6. | If any gearshift shaft binds, carefully sand the contact surfaces
with an emery cloth in order to correct the problem. |
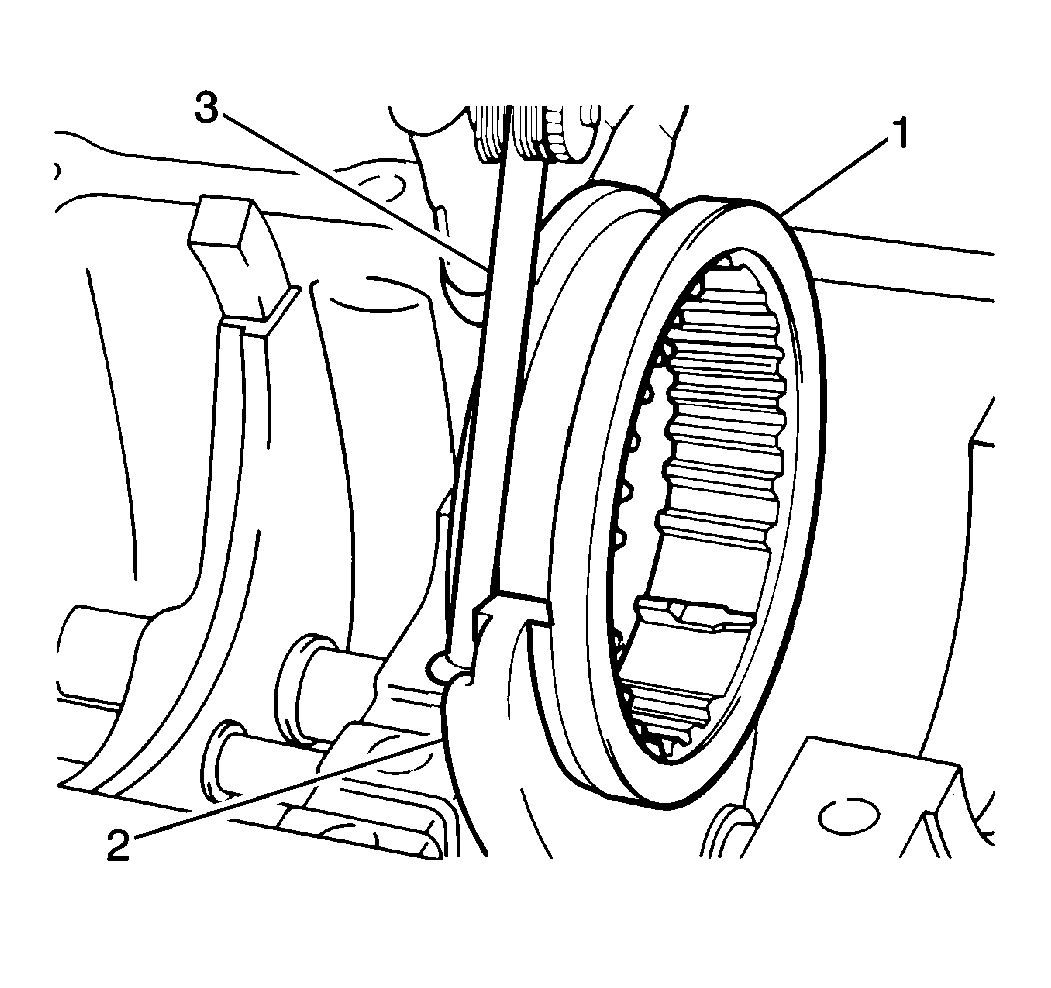
- Use a feeler gage (3)
in order to measure the clearance between the gearshift fork (2) and
the synchronizer sleeve (1).
If the clearance exceeds 1.0 mm (0.039 in), replace the
fork (2) and the synchronizer sleeve (1) as necessary.
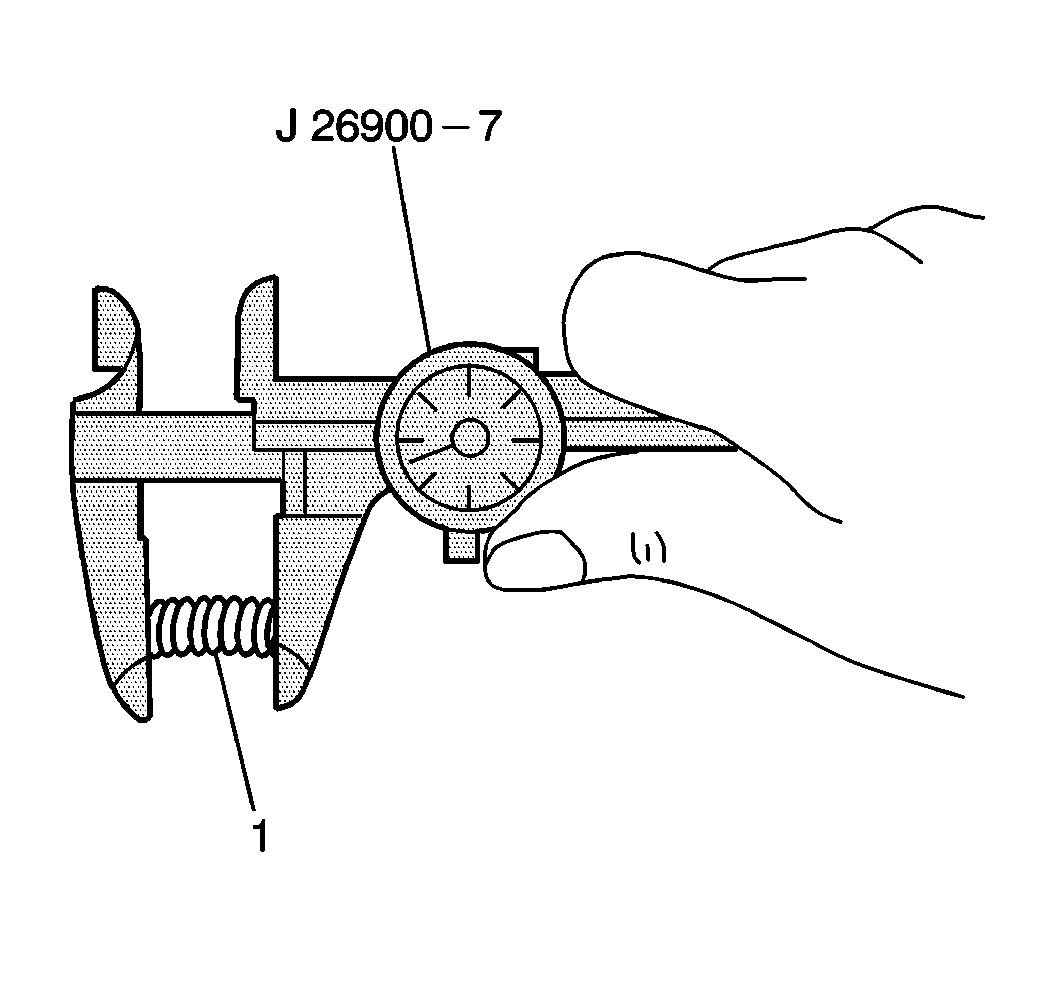
- Use the J 26900-7
in order to measure the locating
spring (1) length.
The standard locating spring length is 24.0 to 27.0 mm (0.945
to 1.063 in).
If a spring is less than 24.0 mm (0.945 in), replace the
spring.
Installation Procedure
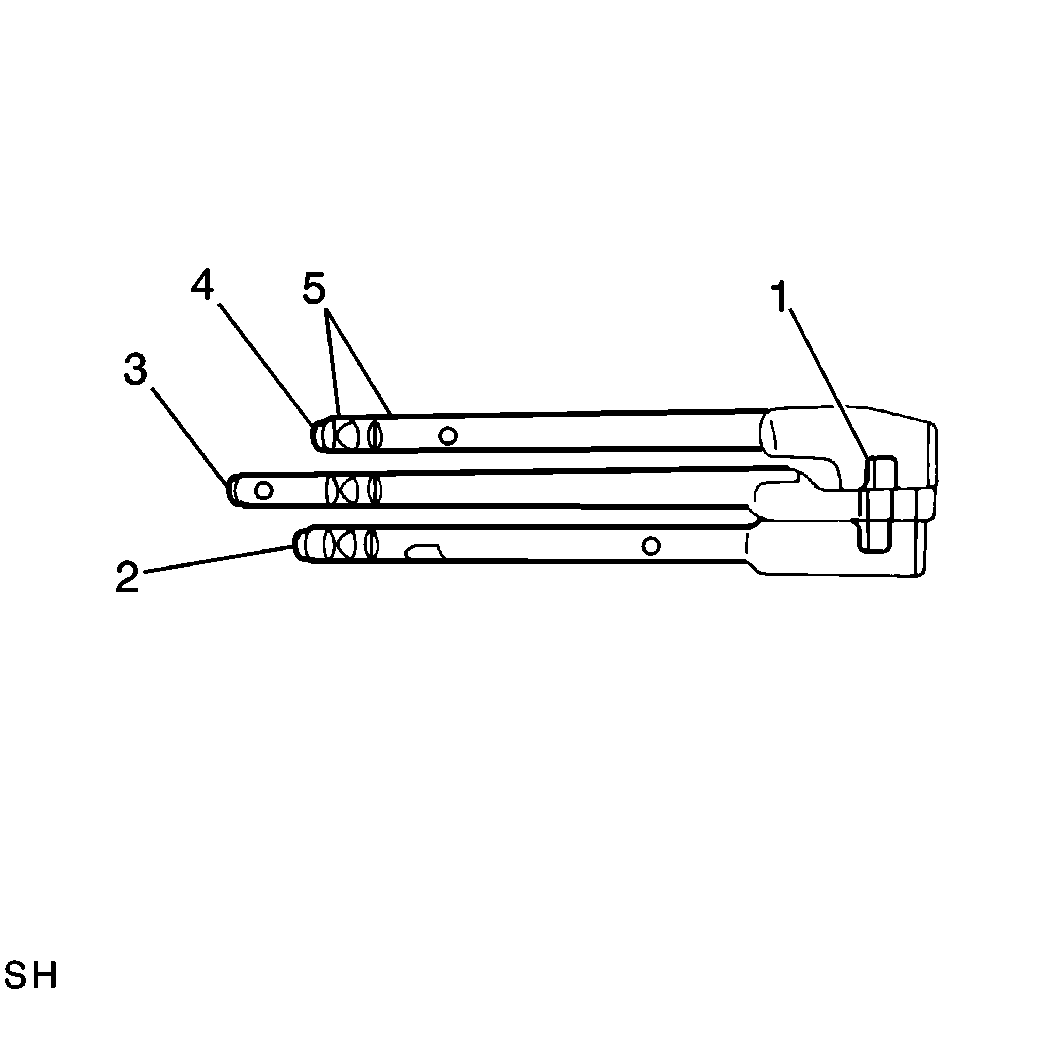
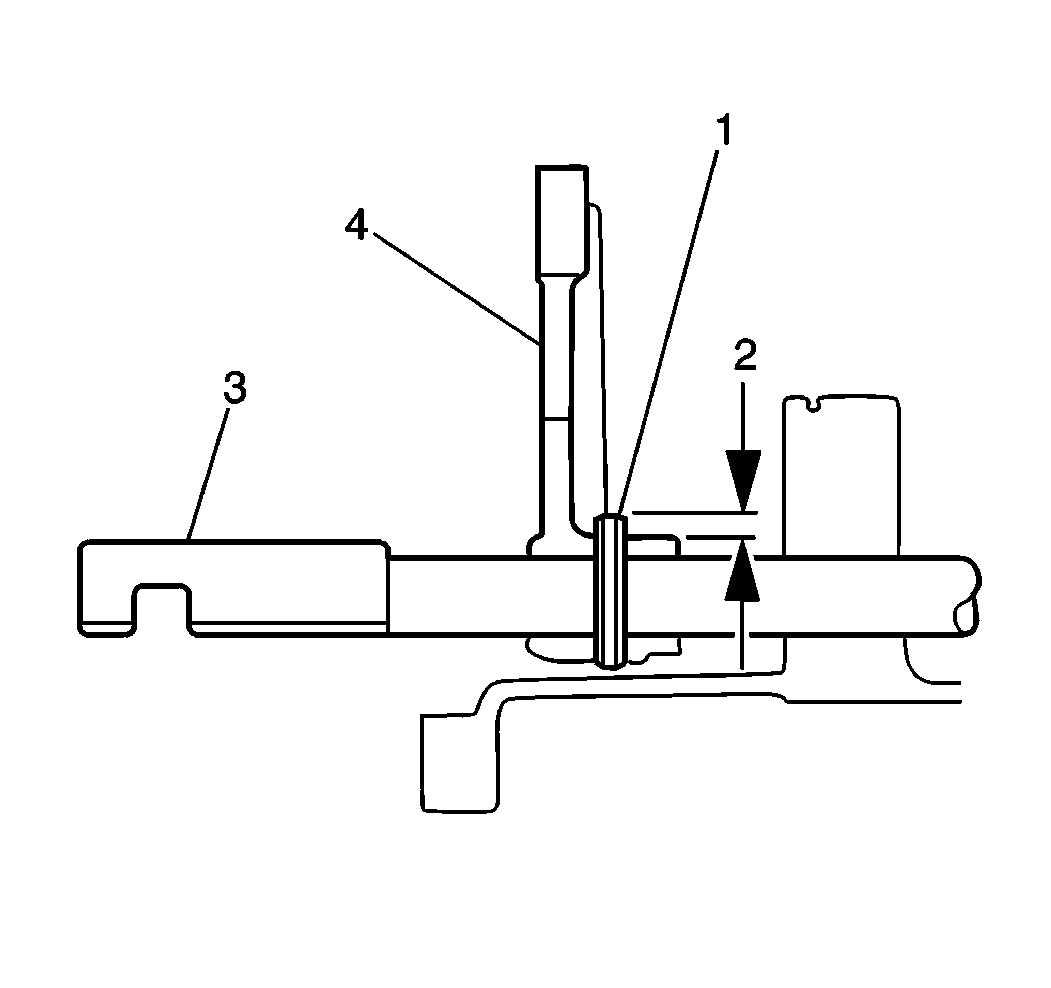
Important: The reverse gearshift fork roll pin (3) is 5 mm (0.187 in)
longer than the low speed gearshift fork roll pin (2) and the high speed gearshift
fork roll pin (1).
The clearance between the low speed and high speed gearshift forks and
the upper case will allow the removal of a roll pin that measures 25 mm
(0.98 in) or less.
If the reverse gear shift fork roll pin is installed in the low speed
or high speed gearshift fork, the reverse gearshift fork pin will contact
the upper case during any future disassembly.
This contact may inhibit transmission operation. It may also make gearshift
fork removal impossible.
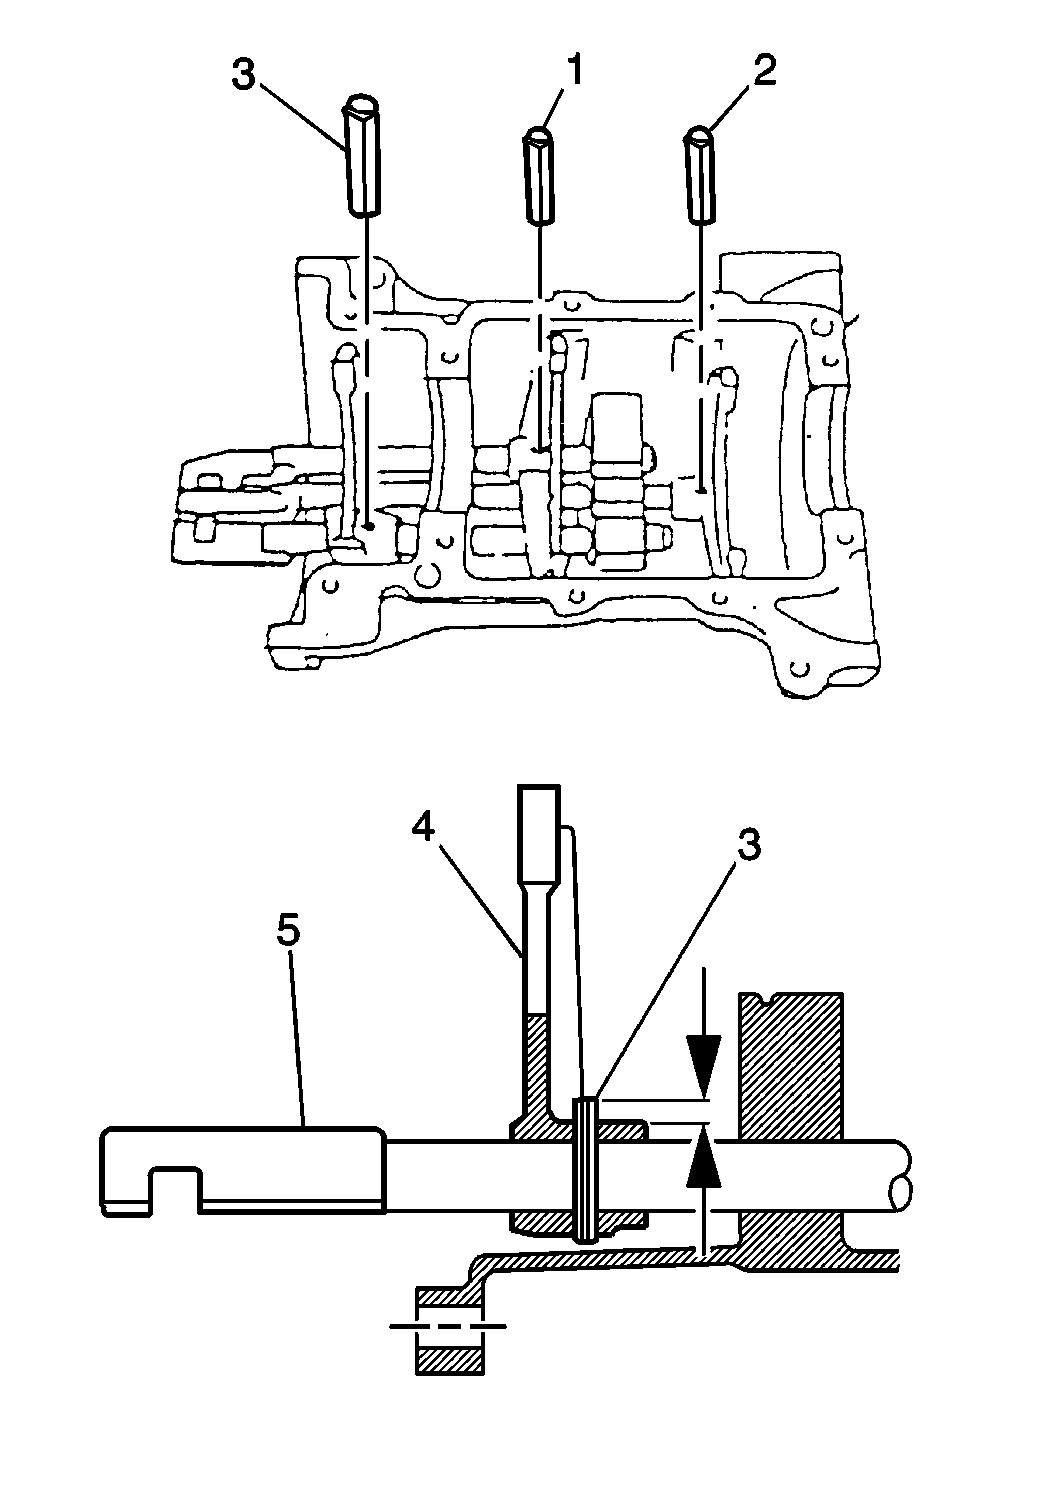
- Install the reverse gearshift
fork (4) to the reverse gearshift shaft (5).
Use the reverse gearshift fork roll pin (3) in order to secure the reverse
gearshift fork to the reverse gearshift shaft.
Important: When installing the reverse gearshift fork roll pin, do not press the
roll pin until it is flush with the gearshift fork.
Allow a 3.5-4.5 mm (0.138-0.177 in) protrusion
above the gearshift fork.
- Install the following
components into the upper case:
| 2.1. | The reverse gearshift shaft (3) |
- Place the reverse gearshift shaft into the neutral position.
- Fit the interlock pin into the high speed gearshift shaft.
- Install the high speed
gearshift shaft (3) into the upper case with the high speed gearshift fork.
Use the high speed gearshift fork roll pin in order to secure the high
speed gearshift shaft to the upper case.
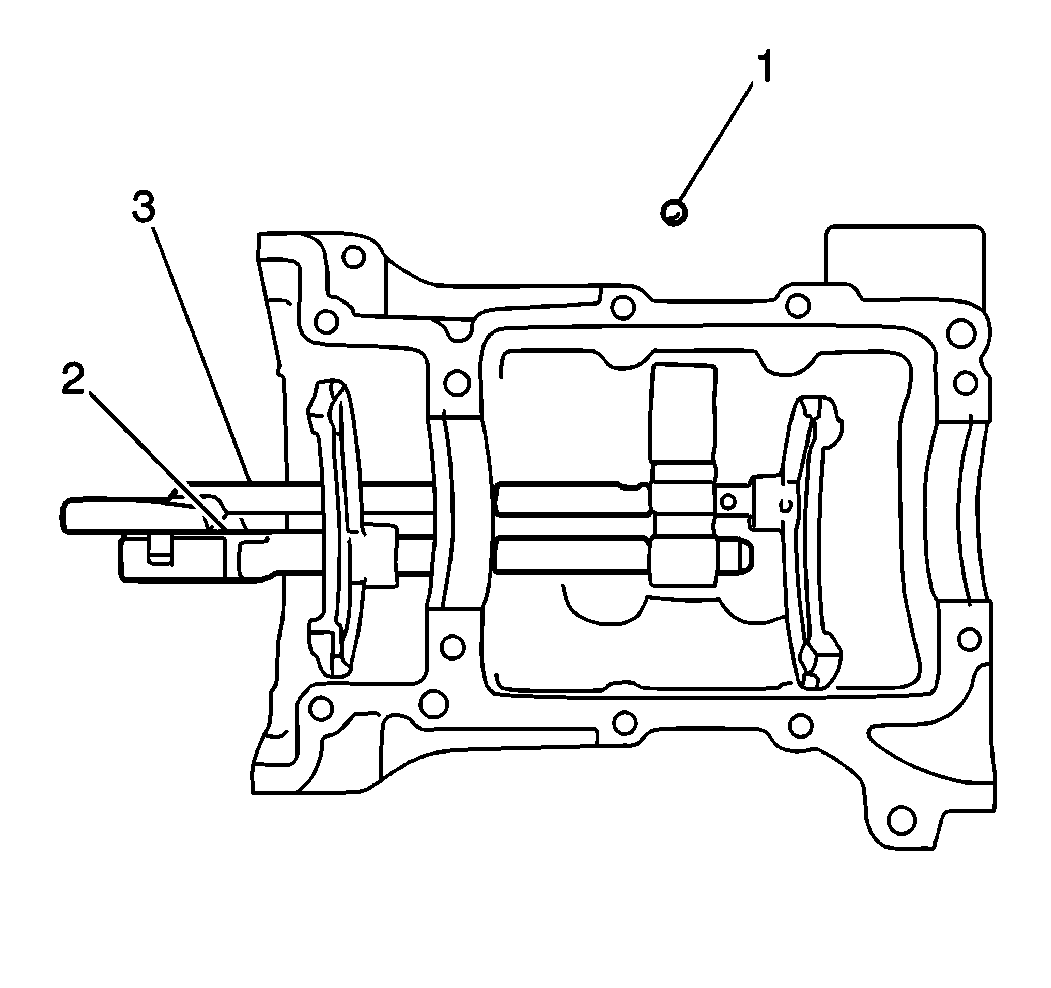
- Install the interlock balls (1) into the upper case.
- Place the high speed gearshift shaft into the neutral position.
- Install the low speed gearshift shaft into the upper case with
the low speed gearshift fork.
Use the low speed gearshift fork roll pin in order to secure the low
speed gearshift shaft to the upper case.
- Apply Loctite™ 599 RTV
silicone sealer or equivalent to the rubber plug (1).
- Install the rubber plug (1) into the upper case.
- Inspect the interlock
system operation:
| • | In first or second gear position, a third-to-fourth or a fifth-to-reverse
gearshift should not be possible. |
| • | In reverse gear position, a first-to-second or third-to-fourth
gearshift should not be possible. |

Notice: Use the correct fastener in the correct location. Replacement fasteners
must be the correct part number for that application. Fasteners requiring
replacement or fasteners requiring the use of thread locking compound or sealant
are identified in the service procedure. Do not use paints, lubricants, or
corrosion inhibitors on fasteners or fastener joint surfaces unless specified.
These coatings affect fastener torque and joint clamping force and may damage
the fastener. Use the correct tightening sequence and specifications when
installing fasteners in order to avoid damage to parts and systems.
- Install the following
components into the upper case:
| 12.1. | The 3 locating balls (8) |
| 12.2. | The locating springs |
| 12.4. | The 3 locating spring bolts |
Tighten
Tighten the locating spring bolts to 28 N·m (21 lb ft).
- Install the backup lamp
switch (1) into the upper case (3).
Tighten
Tighten the backup lamp switch to 20 N·m (15 lb ft).
