For 1990-2009 cars only
Removal Procedure
- Raise and suitably support the vehicle. Refer to Lifting and Jacking the Vehicle .
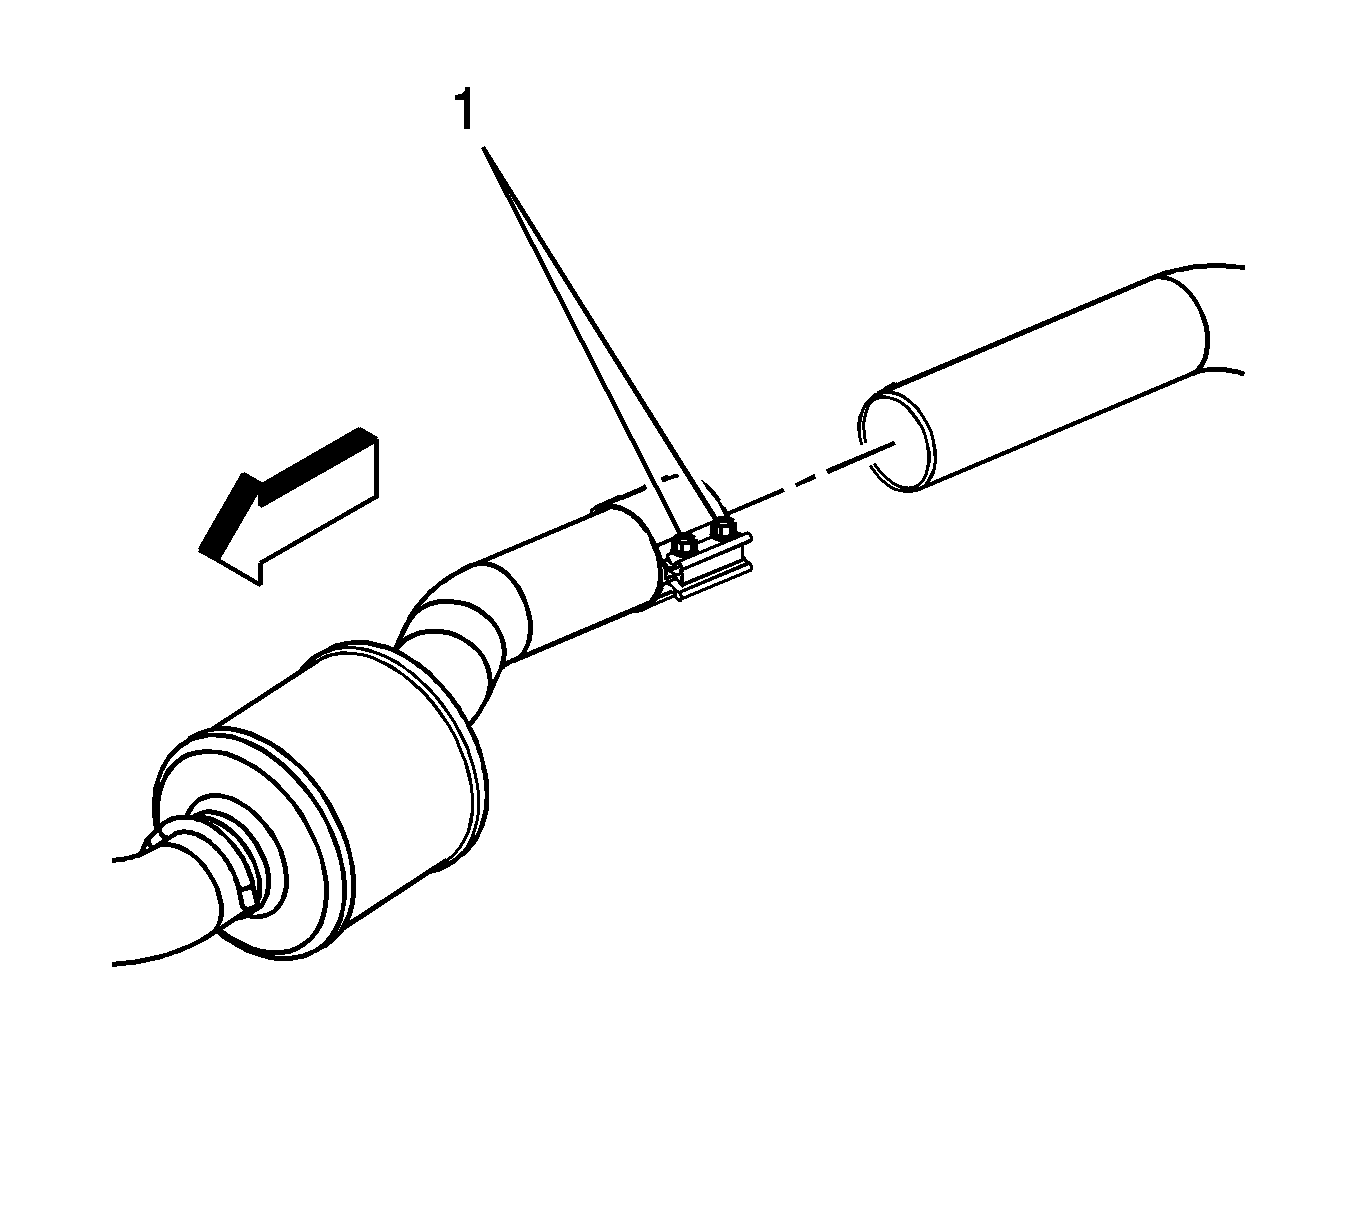
- Loosen the catalytic converter coupling nuts (1).
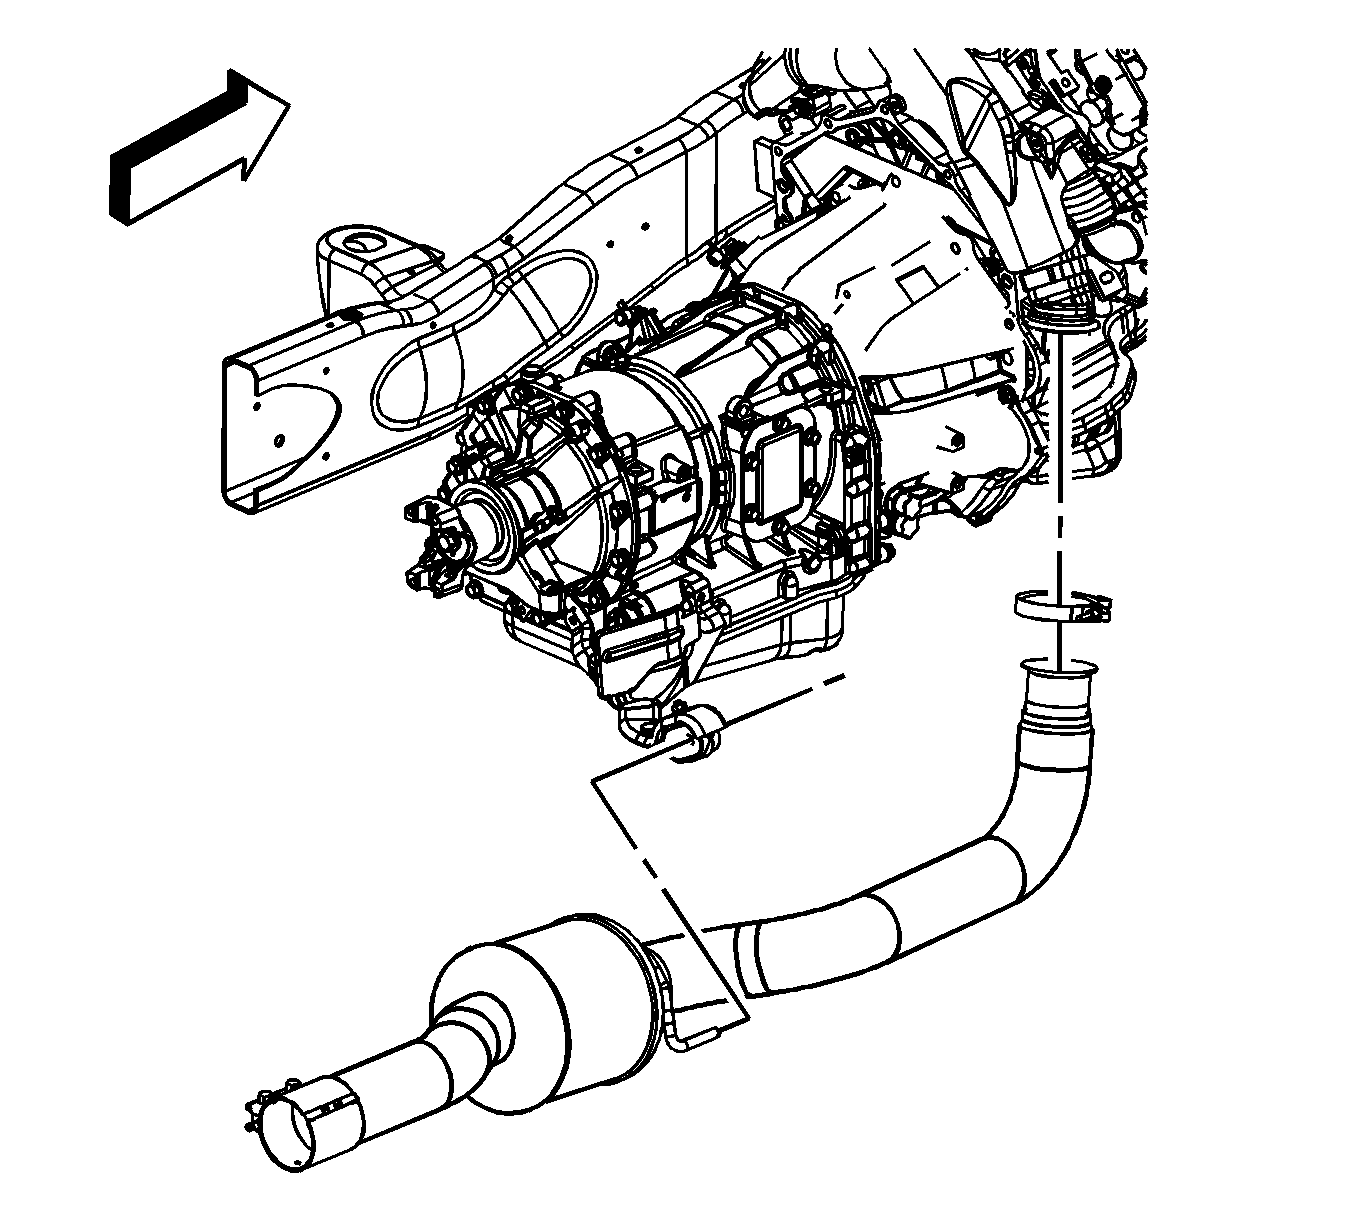
- Loosen the exhaust pipe clamp.
- Slide the exhaust pipe clamp up onto the exhaust pipe.
- Slide the catalytic converter hanger out from the insulator.
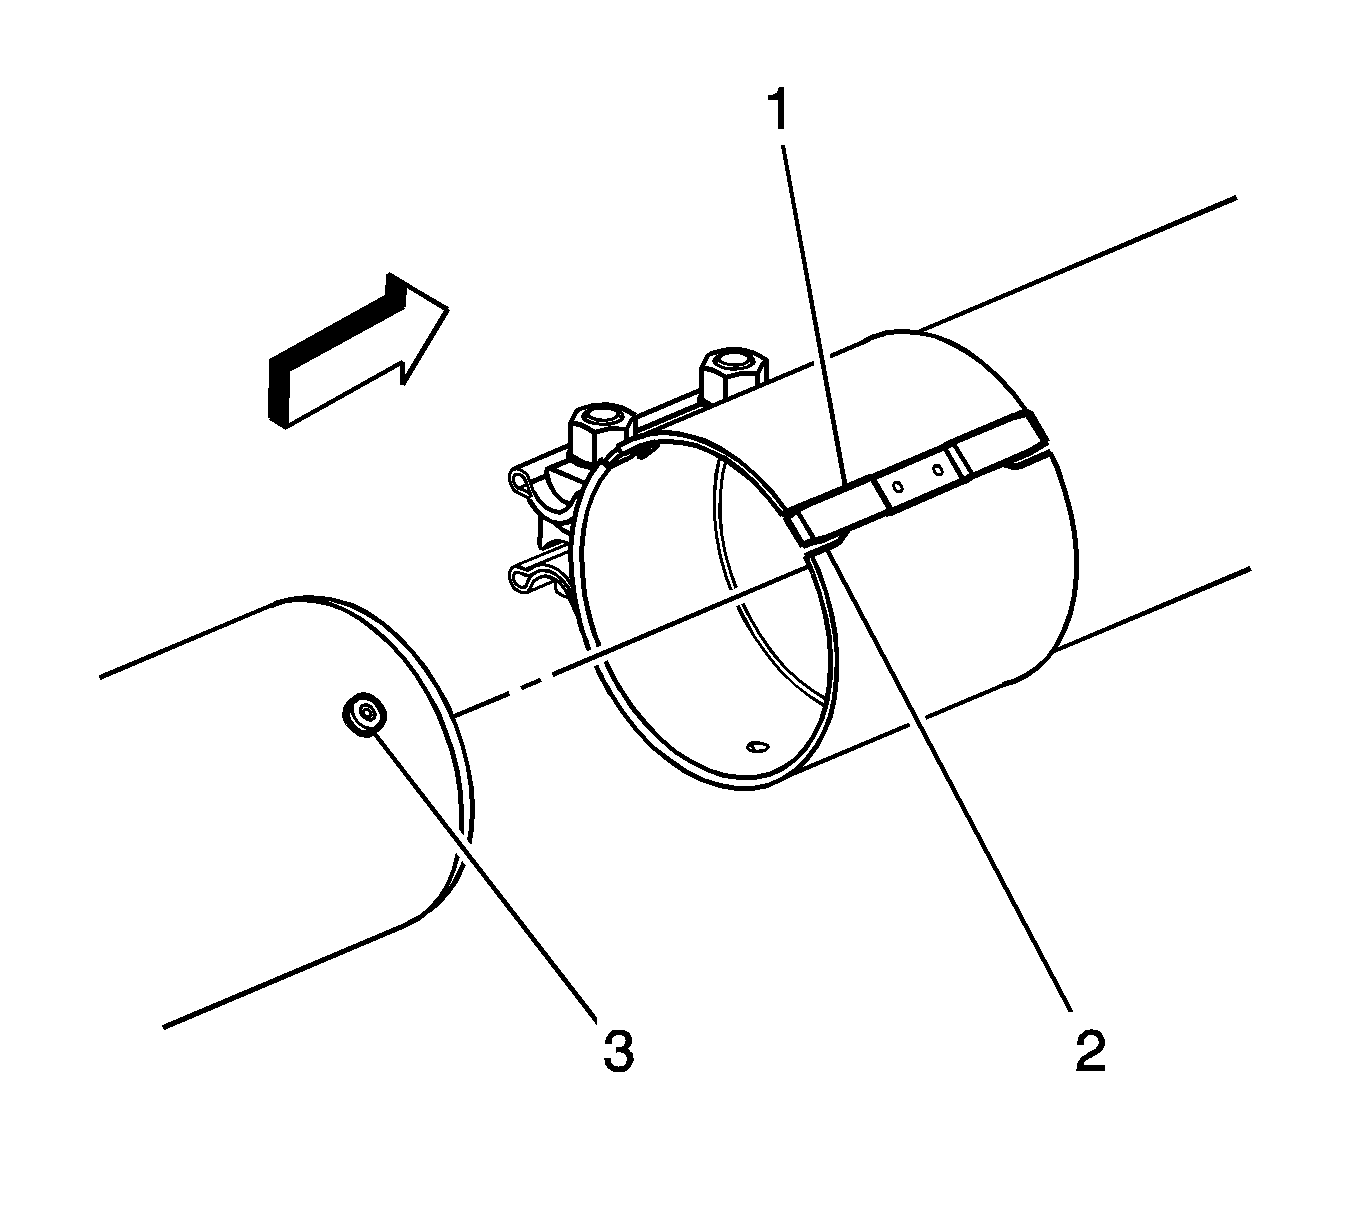
- Gently pry up the catalytic converter coupling clip (1) (on the muffler end) in order to disengage the locator button (3) from the coupling clip.
- Remove the catalytic converter.
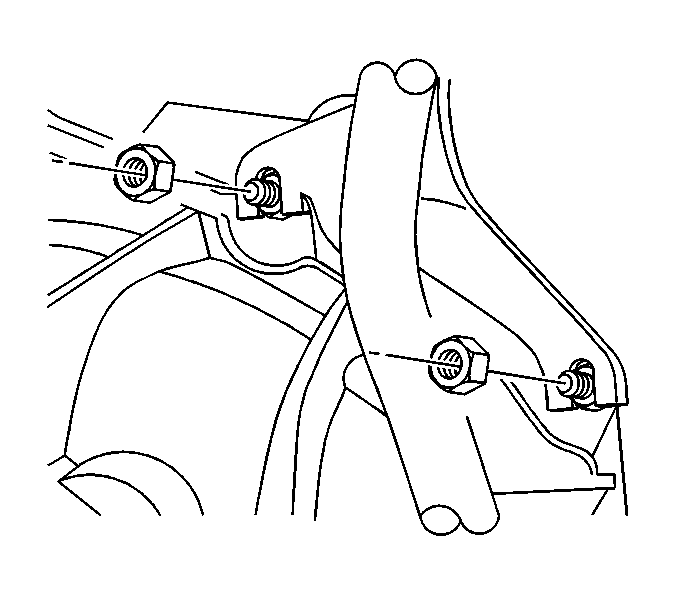
- If equipped with an automatic transmission, remove the transmission fluid fill tube to bellhousing nuts.
- Position the transmission fluid fill tube to the right side of the vehicle. The tube does not require removal from the transmission.
- Lower the vehicle.
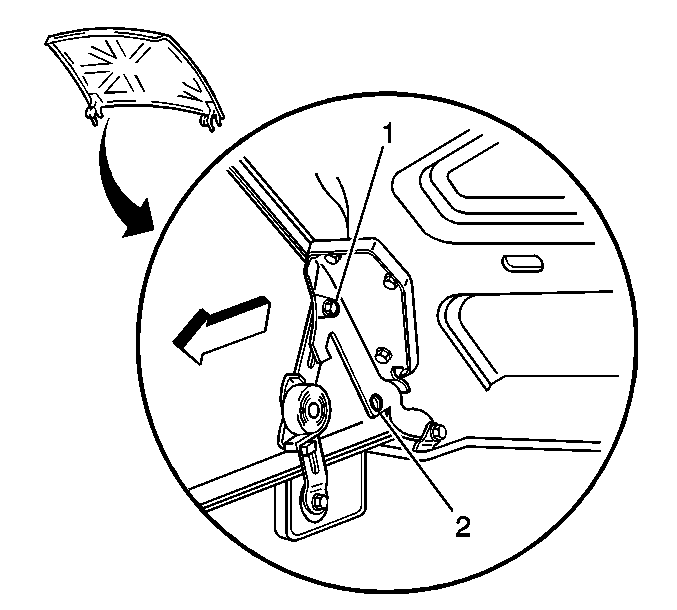
- Move the hood to the service position by moving the hood hinge bolts (1) to the service position (2).
- Remove the intake manifold cover. Refer to Intake Manifold Cover Replacement .
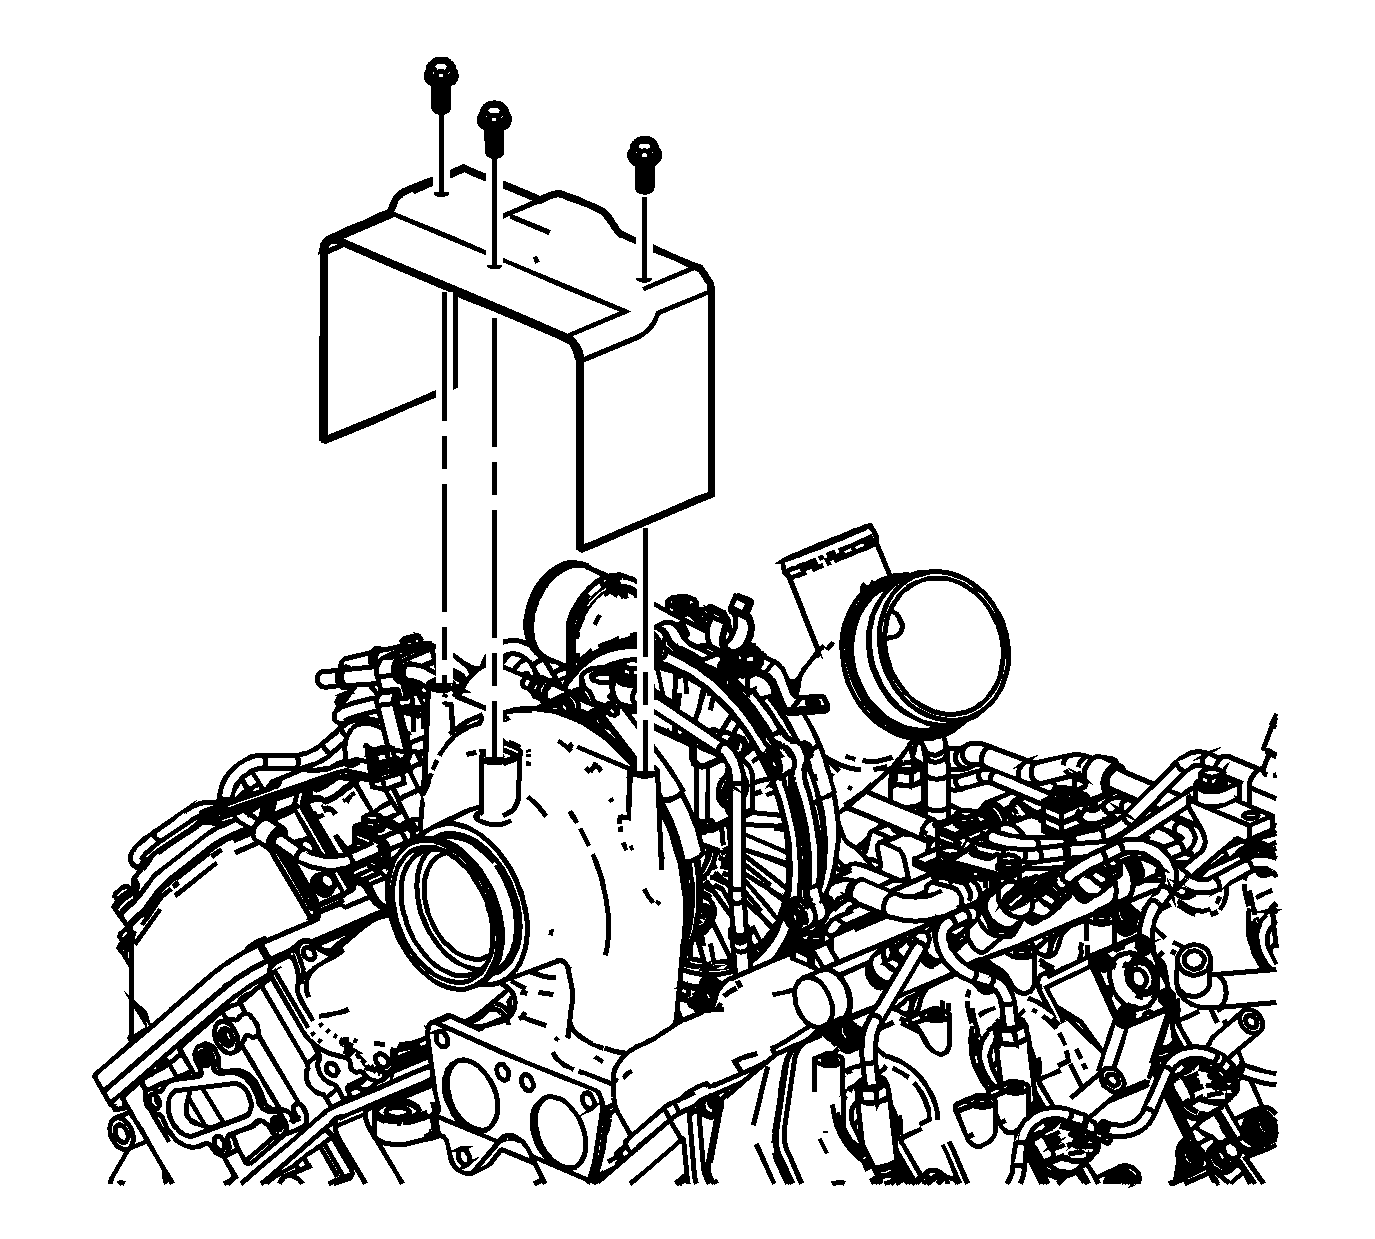
- Remove the turbocharger upper heat shield bolts.
- Remove the turbocharger upper heat shield.
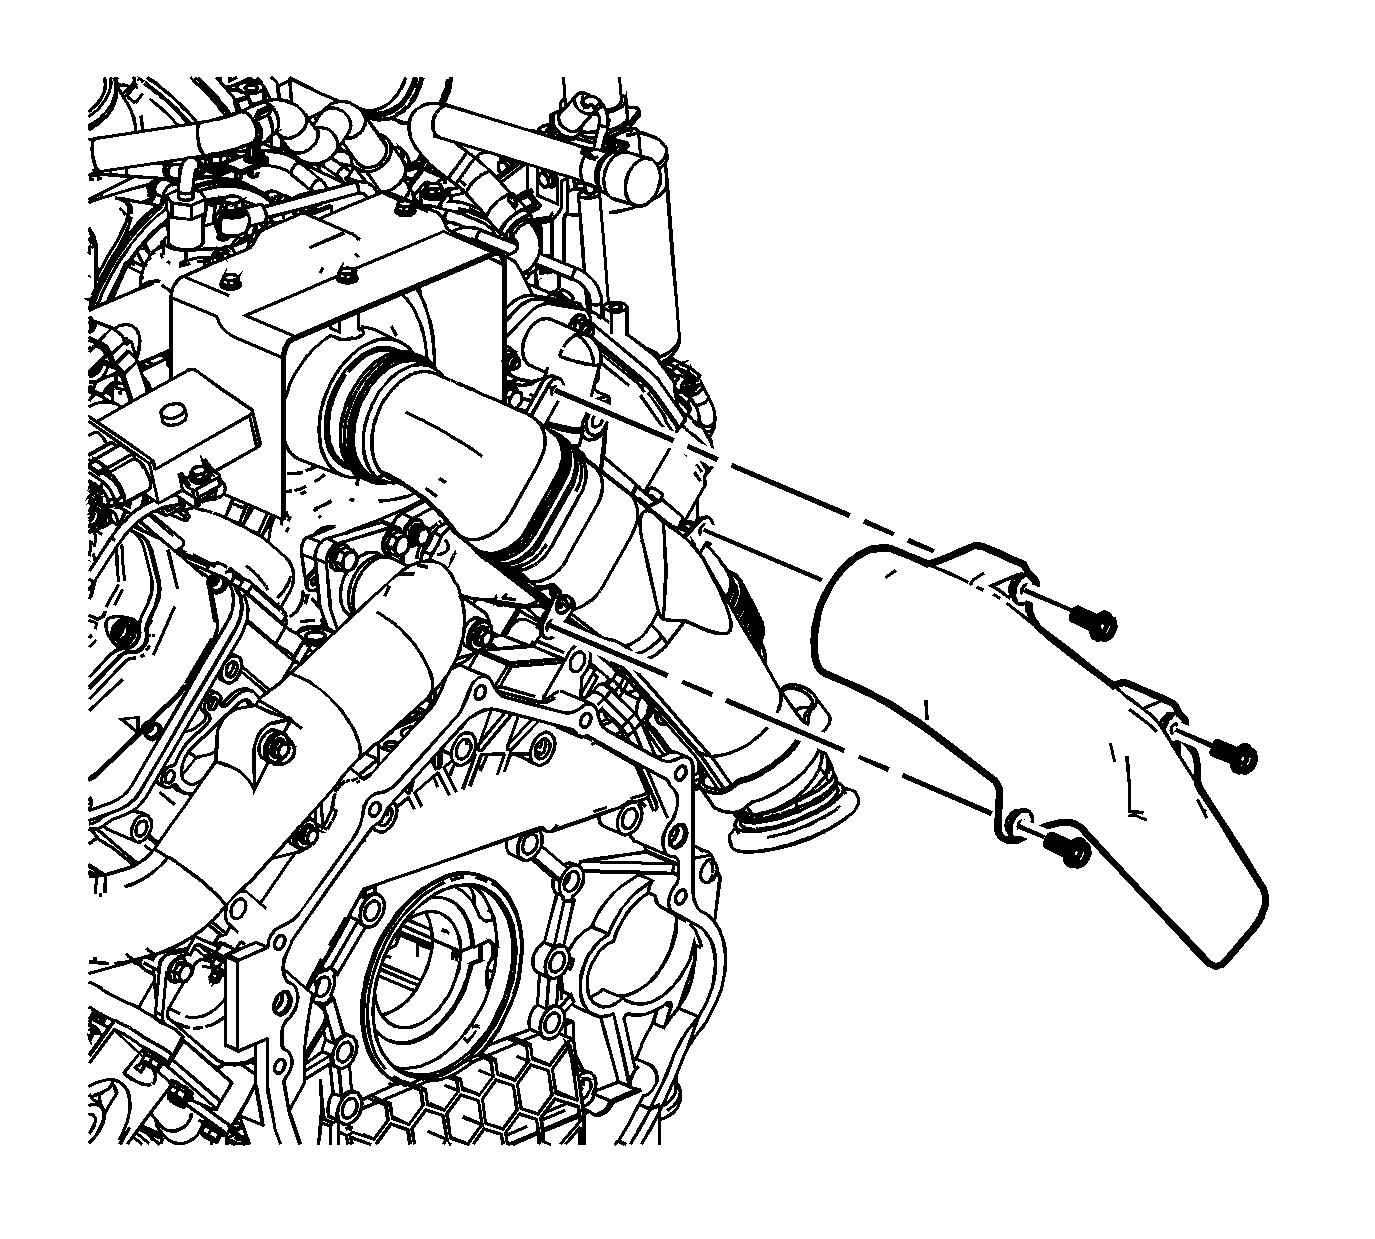
- Remove the exhaust outlet heat shield bolts.
- Remove the exhaust outlet heat shield.
- Remove the exhaust outlet to right exhaust pipe bracket bolt.
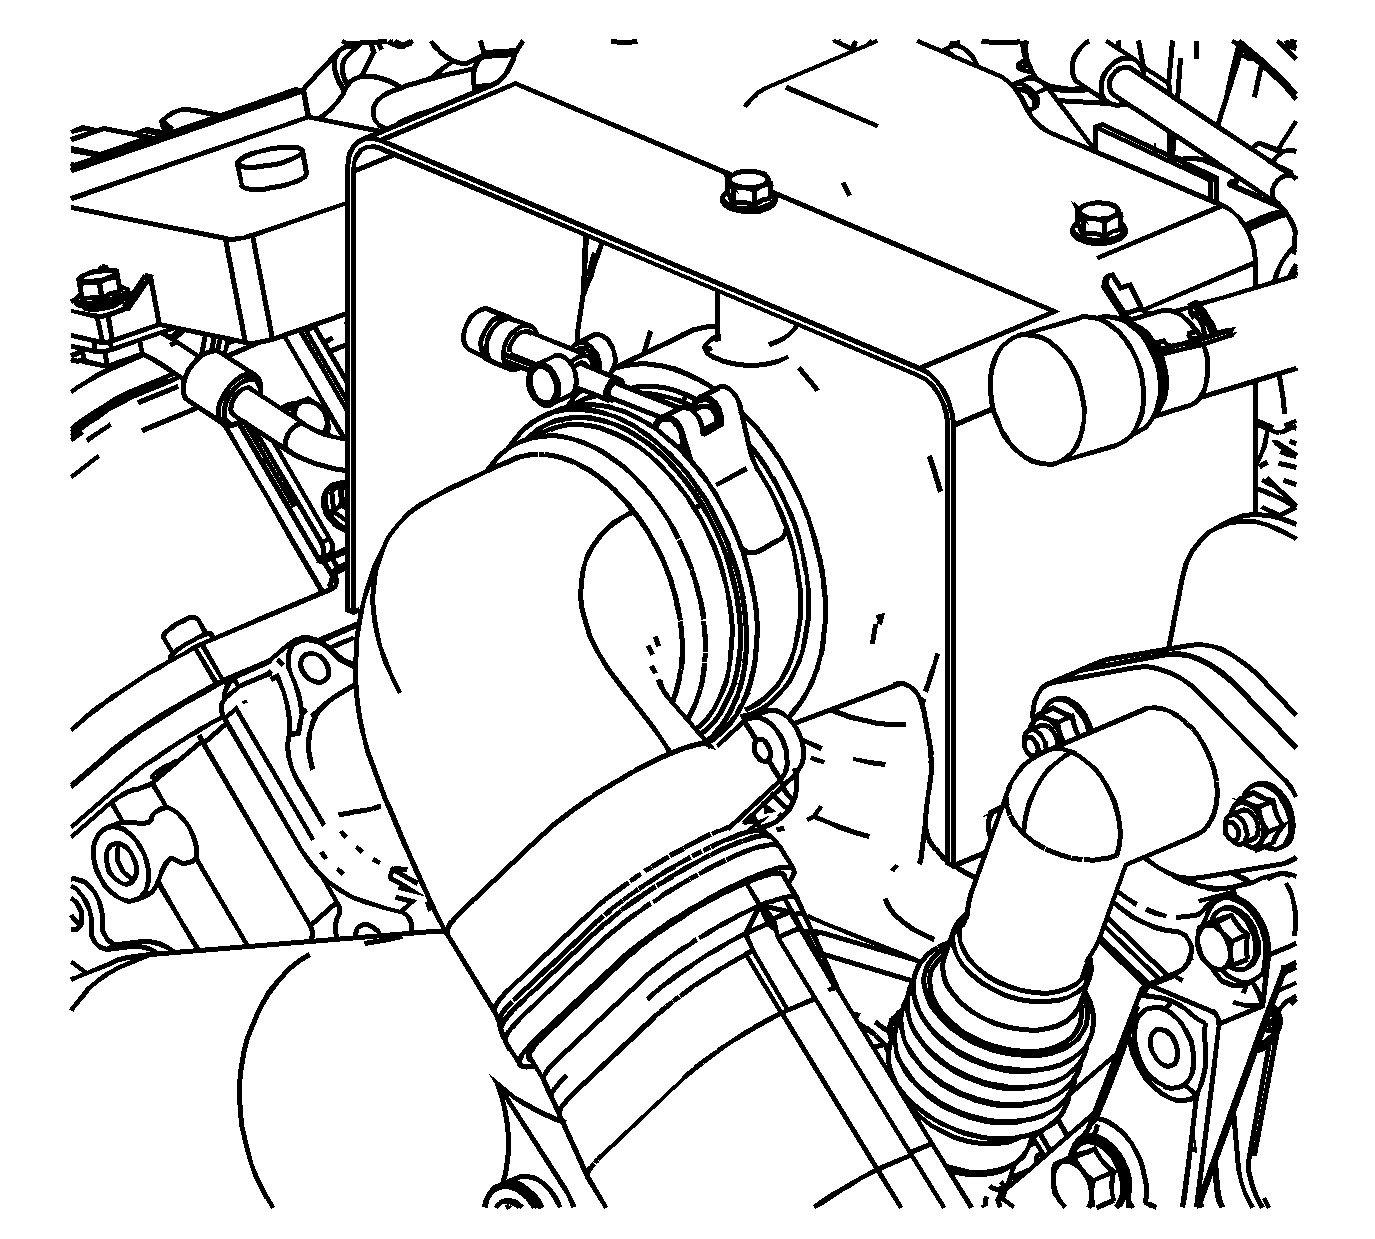
- Loosen the exhaust outlet pipe clamp.
- Remove the exhaust outlet pipe.
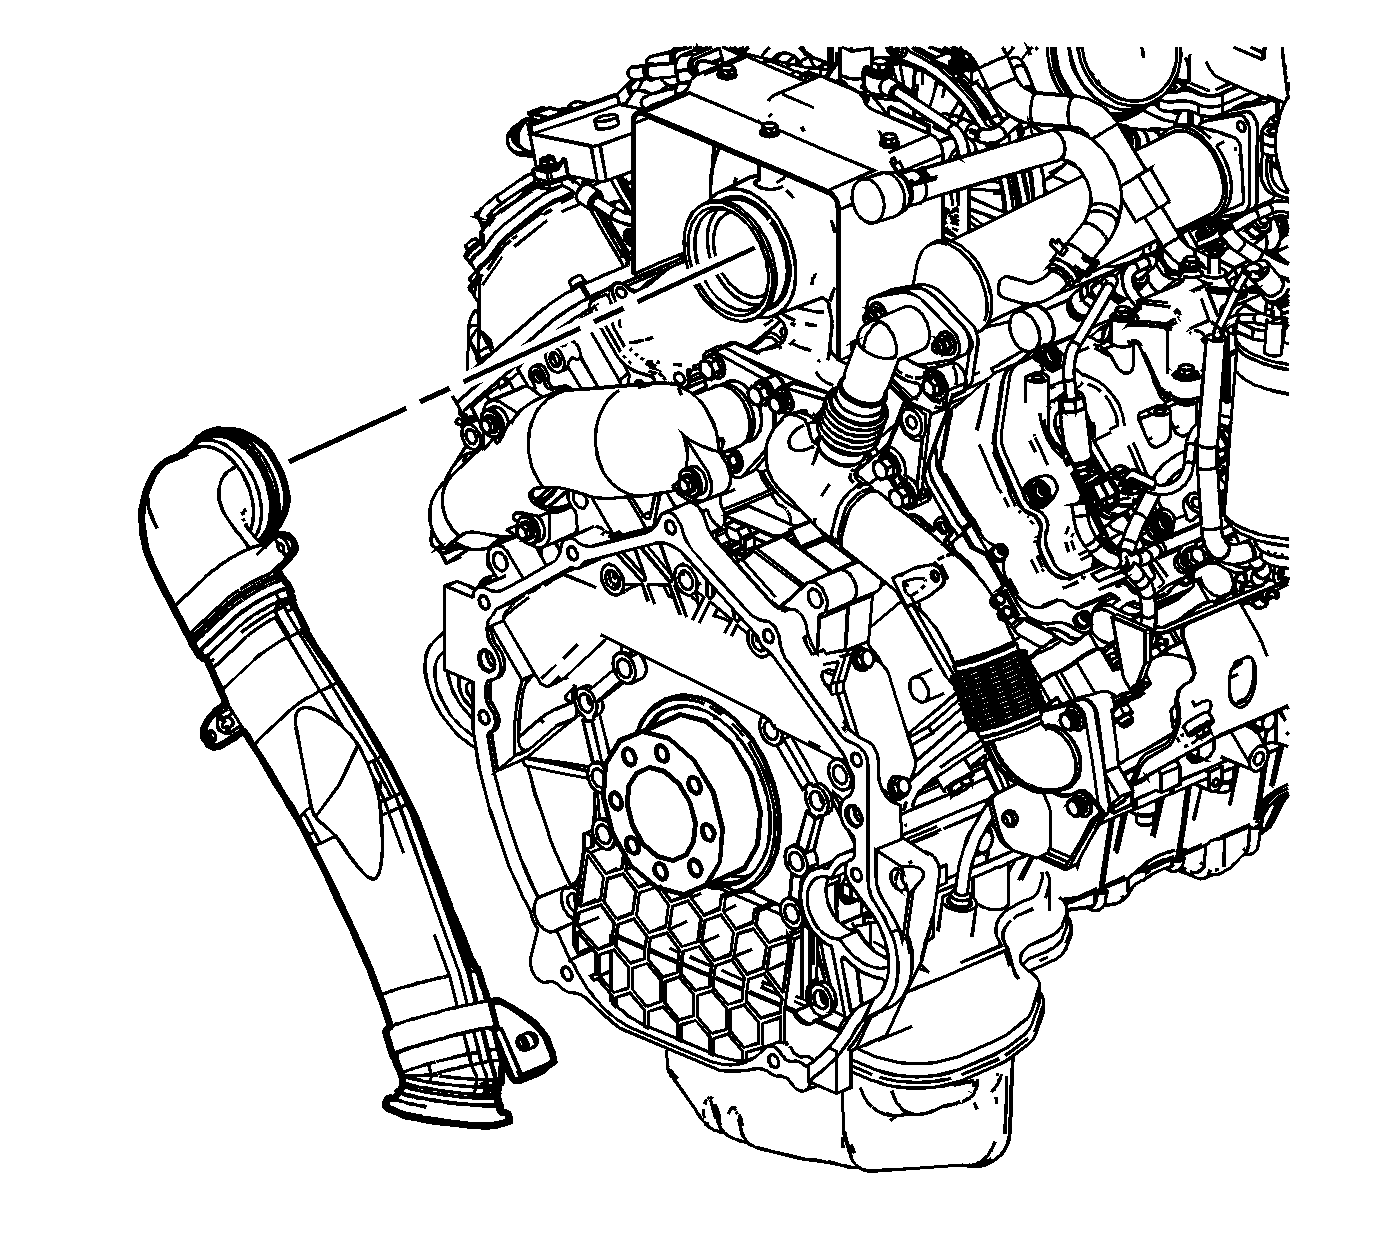
Installation Procedure
- Install the exhaust outlet pipe.
- Tighten the exhaust outlet pipe clamp.
- Install the exhaust outlet to right exhaust pipe bracket bolt.
- Install the exhaust outlet heat shield.
- Install the exhaust outlet heat shield bolts.
- Install the turbocharger upper heat shield.
- Install the turbocharger upper heat shield bolts.
- Install the intake manifold cover. Refer to Intake Manifold Cover Replacement .
- Remove the hood hinge bolts (1) from the service position (2) and position the hood in the normal position.
- Raise the vehicle.
- If equipped with an automatic transmission, position the transmission fluid fill tube to the studs.
- Install the transmission fluid fill tube to bellhousing nuts.
- Position the catalytic converter.
- Align the catalytic converter coupling groove (2) to the muffler locator button (3).
- Install the catalytic converter until the muffler locator button is fully engaged by the coupling clip (1).
- Slide the catalytic converter hanger into the insulator.
- Slide the exhaust pipe clamp down.
- Tighten the exhaust pipe clamp.
- Tighten both catalytic converter coupling nuts (1) until snug.
- Once snug, tighten the catalytic converter coupling nuts to specifications.
- Lower the vehicle.

Notice: Refer to Fastener Notice in the Preface section.

Tighten
Tighten the clamp to 15 N·m (11 lb ft).

Tighten
Tighten the bolt to 34 N·m (25 lb ft).
Tighten
Tighten the bolts to 8 N·m (71 lb in).

Tighten
Tighten the bolts to 9 N·m (80 lb in).

Tighten
Tighten the bolts to 25 N·m (18 lb ft).

Tighten
Tighten the nuts to 18 N·m (13 lb ft).


Tighten
Tighten the clamp to 15 N·m (11 lb ft).

Tighten
Tighten the nuts to 45 N·m (33 lb ft).
