For 1990-2009 cars only
Relay Replacement Within an Electrical Center
Special Tools
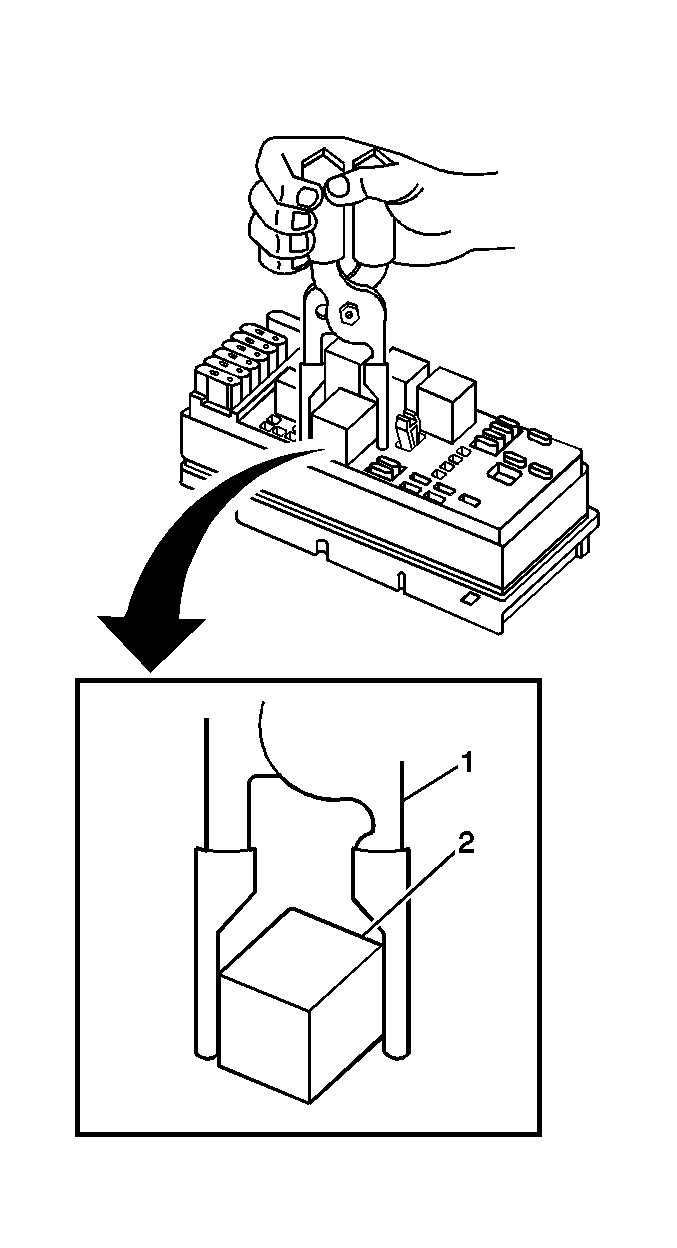
J 43244 Relay Puller Pliers
Removal Procedure
- Remove the electrical center cover.
- Locate the relay. Refer to Electrical Center Identification Views to locate the electrical center where the relay exists.
- Using the J 43244 (1) position the tool on opposing corners of the relay (2).
- Remove the relay (2) from the electrical center.
Important:
• Always note the orientation of the relay. • If equipped with a notch style relay; observe the location of the notch on the old relay to verify the new relay is installed with the notch in the same location. • Ensure that the electrical center is secure, as not to put added stress on the wires or terminals.

Notice: Use J43244 to pull the relay straight out from the electrical center terminals. The use of pliers or a flat bladed tool could damage the electrical center.
Installation Procedure
- Install the relay (2) in the same position as removed.
- Install the electrical center cover.

Relay Replacement Attachedto Wire Harness
Removal Procedure
- Locate the relay. Refer to the Master Electrical Component List to locate the relay in the vehicle.
- Remove any fasteners which hold the relay in place.
- Remove any connector position assurance (CPA) devices or secondary locks.
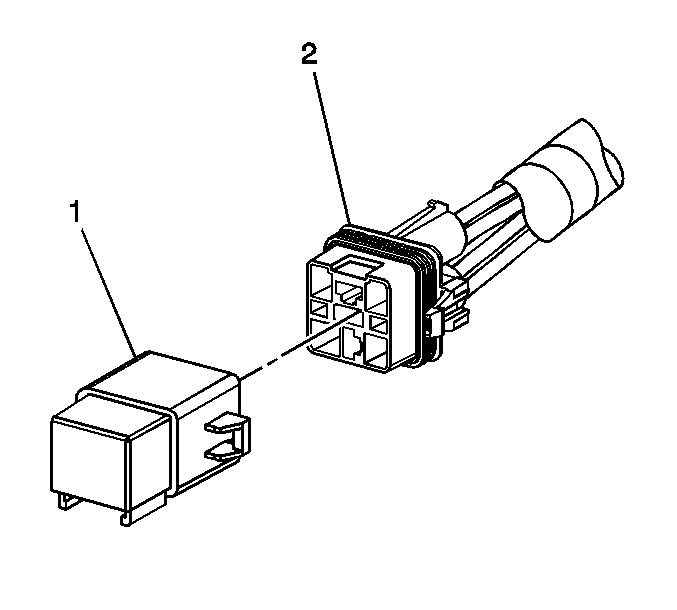
- Separate the relay (1) from the wire harness connector (2).

Note: Use care when removing a relay in a wiring harness when the relay is secured by fasteners or tape.
Installation Procedure
- Connect the relay (1) to the wire harness connector (2).
- Install any connector position assurance (CPA) devices or secondary locks.
- Install the relay using any fasteners or tape that originally held the relay in place.

