- Ensure the key is in the ON position.
- Press and hold the Set button in normal mode to enter programming mode:
| • | 2 seconds for Level 1 |
| • | 5 seconds for Level 2 |
The programming mode indicator will be displayed.
Indicators Displayed
These gage indicators will display during programming. The lit indicator will informer the user as to which section is being programmed.
Level 1
| • | Cold Pressure |
| • | Tire Rotation |
| • | Low Pressure Warning |
| • | Pressure Deviation |
| • | High Temperature Alert |
| • | Units Selection |
Level 2
| • | Slope |
| • | Learn Transmitter ID |
Programming - Level 1
Cold Inflation Pressure
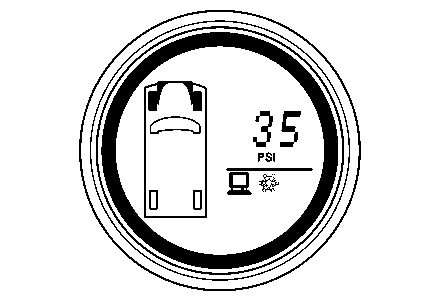
See Capacities and Specifications for Tire Pressure Monitoring System Setting Chart for setting value specifications.
This function changes the cold inflation pressure for each axle. Factory default setting is 35 PSI (2.41 Bar).
To Program
- Enter Level 1 Programming Mode, see Entering Programming Mode.
- Press the TIRE button to scroll to the desired axle. The tires of the selected axle are filled in.
- Press the MODE button to view the current value.
- Press the TIRE button to increase the value.
- Press the MODE button to decrease the value.
- Press the SET button to save when the desired value is reached.
- Press the SET button to exit.
- Press the SET button again to revert to normal view.
Repeat programming steps 2-6 until Cold Inflation Pressure levels are set for all axles as desired.
Low-Pressure Warning
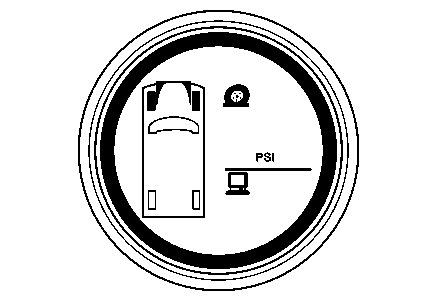
This function changes the low-pressure warning threshold for each axle. Factory default setting is 18 PSI (1.24 Bar).
See Capacities and Specifications for Tire Pressure Monitoring System Setting Chart for setting value specifications.
To Program
- Enter Level 1 Programming Mode, see Entering Programming Mode.
- To enter this function press the MODE button until the flat tire icon and pressure units are displayed.
- Press the TIRE button to scroll to the desired axle. The tires of the selected axle are filled in.
- Press the MODE button to view the current value.
- Press the TIRE button to increase the value.
- Press the MODE button to decrease the value.
- Press the SET button to save when the desired value is reached.
- Press the SET button to exit.
- Press the SET button again to revert to normal view.
Repeat programming steps 2-7 until Low-Pressure warning levels are set for all axles as desired.
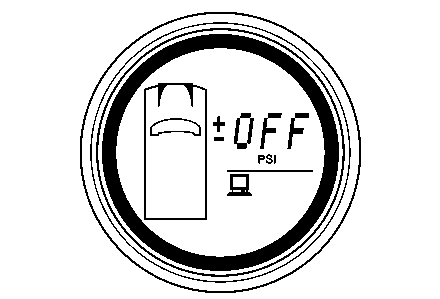
Pressure Deviation Alert ±
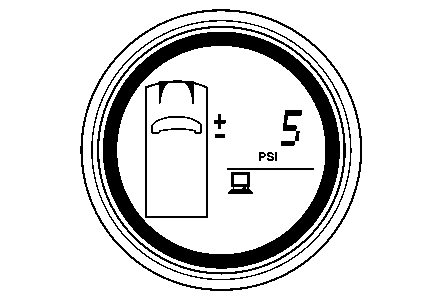
This function sets the pressure deviation alert threshold for all tires. Factory default setting is 5 PSI (0.34 Bar).
To Program
- Enter Level 1 Programming Mode, see Entering Programming Mode.
- To enter this function press the MODE button until the flat tire icon and pressure units are displayed.
- Press the TIRE button to scroll to the desired axle. The tires of the selected axle are filled in.
- Press the MODE button to display the current value.
- Press the TIRE button to increase the value.
- Press the MODE button to decrease the value.
- To disable this feature press the MODE button until the display shows OFF.
- Press the SET button to save when the desired value is reached.
- Press the SET button twice to revert to normal view.
Temperature Compensated Pressure
When a tire heats up, the air pressure inside the tire can also increase. For example, a normal or required pressure at 64 °F (18 °C) may be 34 PSI or (2.34 Bar) and a normal pressure at 120 °F (49 °C) may be 39 PSI (2.70 Bar). Both pressure readings are correct at their respective temperatures. The amount of deviation from the required pressure at any temperature can be read by using the Pressure Deviation mode of this system. If at any time you are uncertain that the Actual Pressure reading on the gage is the correct tire pressure, switch to the Pressure Deviation (± ) readout. A blank display indicates that the reading on the display is the correct one. Any (+) or (-) value indicates the tire pressure is incorrect by that value. This value can then be used to correctly inflate the tire.
High Temperature Alert
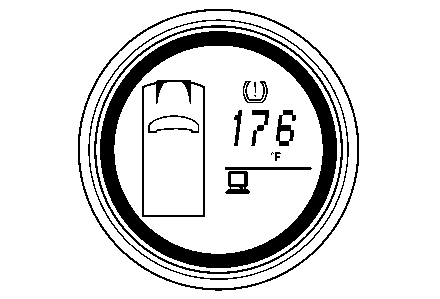
This function changes the high-temperature alert threshold. Factory default setting is 176 °F (80 °C).
To Program
- Enter Level 1 Programming Mode, see Entering Programming Mode.
- To enter this function press the MODE button until the alert icon and temperature units are displayed.
- Press the TIRE button to display the current value of High Temperature Alert.
- Press the TIRE button to increase the value.
- Press the MODE button to decrease the value.
- To disable this feature press the MODE button until the display reads OFF.
- Press the SET button to save and exit this mode when the desired value is reached.
- Press the SET again to revert to normal mode.

Measurement Selection-Metric or Imperial
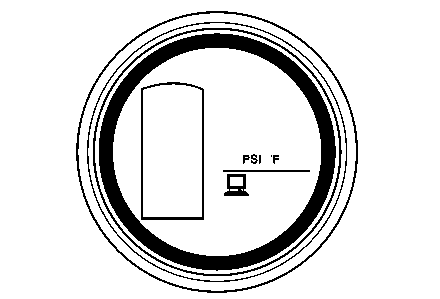
Use this mode to select the combination of pressure and temperature units.
Unit combinations are PSI -°F, Bar -°F, Bar -°C, PSI -°C.
To Program
- Enter Level 1 Programming Mode, see Entering Programming Mode.
- To enter this function press the MODE button until the pressure and temperature units are displayed. (PSI/Bar, °C/°F).
- Press the TIRE button to enter.
- Use the TIRE or MODE button to scroll through the four combinations of unit settings.
- When the desired combination is displayed press the SET button to save and exit this mode.
- Press the SET button again to revert to normal mode.
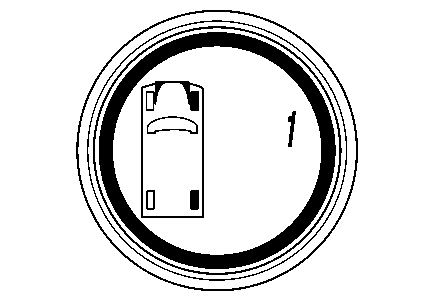
Tire Rotation Mode
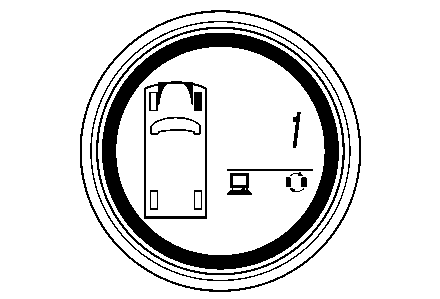
This function is used after tires are rotated and the new positions need to be updated. This procedure is valid for four tire locations only.
To Program
- Enter Level 1 Programming Mode, see Entering Programming Mode.
- To enter this function press the MODE button until the tire rotation icon is displayed.
- Press the TIRE button to scroll to a tire position.
- Press the MODE button to select it for editing.
- Use the TIRE or MODE button to adjust the value to the number determined in step 4.
- Press the SET button when the number representing the desired sensor is achieved. This returns the display to the tire selection menu. Scroll to a different tire location and edit the sensor numbers as above.
- Press SET button to save and exit this mode.
- Press SET button again to revert to normal mode.
Note: The current tire position number will be displayed.
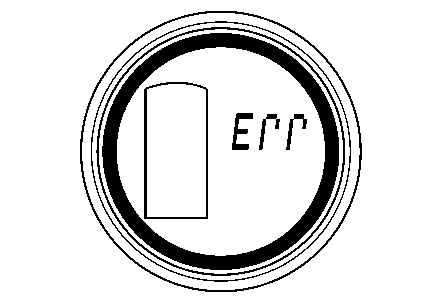
If more than one tire location contains the same sensor number, the display will prompt an error with the conflicting tires filled in and the associated sensor number. Press any button to return the tire selection menu and make necessary corrections.
Note: This display indicates that ID 1 is programmed in two locations causing the error.
Advanced Programming - Level 2
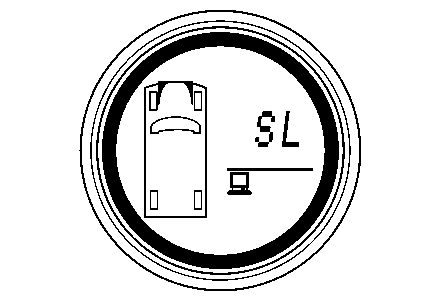
Slope Mode SL
See the Tire Pressure Monitoring System Setting Chart for setting value specifications.
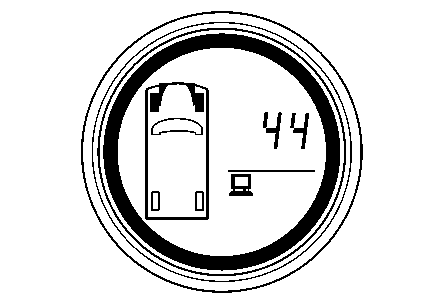
The Slope is a value corresponding to the rate of pressure change due to temperature for a particular tire. This value affects the calculation to determine pressure deviation value. The factory default setting is 44.
To Program
- Enter Level 2 Programming Mode, see Entering Programming Mode.
- Press the TIRE button to scroll to the desired axle, the tires of the selected axle are filled in.
- Press the MODE button to display the current value of slope for the selected axle.
- Press the TIRE button to increase the value.
- Press the MODE button to decrease the value. The minimum value is 10 and the maximum is 160.
- Press the SET button to save the value.
- Press the SET button to exit.
- Press the SET again to revert to normal mode.
Repeat steps 2-6 until the slope level is set for all axles as desired.
Learn Mode
This mode is used to add or remove transmitters from the system.
To Program
- Enter Level 2 Programming Mode, see Entering Programming Mode.
- Press the MODE button to select the learn mode icon.
- Press the TIRE button to display the ten possible wheel positions for the towing vehicle. The currently installed transmitter positions are now indicated with a filled in tire indicator.
- Use the TIRE button to scroll to the desired position. The outline of the wheel position to be programmed will flash.
- A new transmitter identification can be learned by inflating or deflating the tire by more than 3 PSI (0.20 Bar).
- To remove the transmitter from the selected tire location, press the MODE button.
- Press the TIRE button to scroll to another position and repeat step 4 or 5 as required.
- Press the SET button to save and exit.
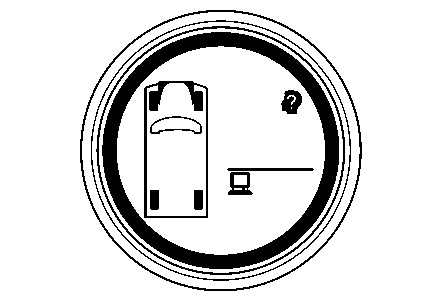
- If more than one tire location contains the same sensor ID, the display will prompt an error and flash between this message and the gage display, with the conflicting tires filled in. If so indicated repeat the programming procedure above.
This method must be carried out while the transmitters are in gage fill mode. This mode is entered for 15 minutes after the vehicle has been driven above 6 mph (10 kph). Each transmitter "learn operation" must be carried out at least 90 seconds apart. If it is not possible to complete the learn operation for all transmitters within 15 minutes, the vehicle must again be driven above 6 mph (10 kph) and then the process can be continued.
Note: To prevent the last identification from being erased, scroll to the next tire position before driving. A beep and rapid flashing of the gage light indicate a transmission was received. The new ID is stored.
If no error is found, the system will reset and go to normal mode.
