Use the following pictures and instructions to remove the flat tire and raise the vehicle.
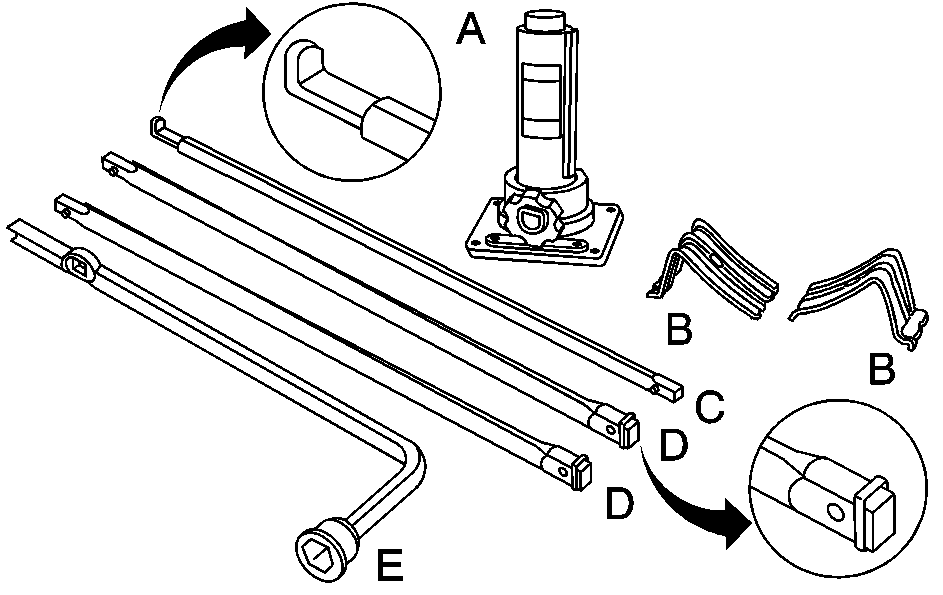
The tools you will be using include the jack (A), the wheel blocks (B), the jack handle (C), the jack handle extensions (D), and the wheel wrench (E).
- If the vehicle has a center cap with wheel nut caps, the wheel nut caps are designed to stay with the center cap after they are loosened. Remove the entire center cap.
- If the wheel has a smooth center cap, place the chisel end of the wheel wrench in the slot on the wheel, and gently pry out.
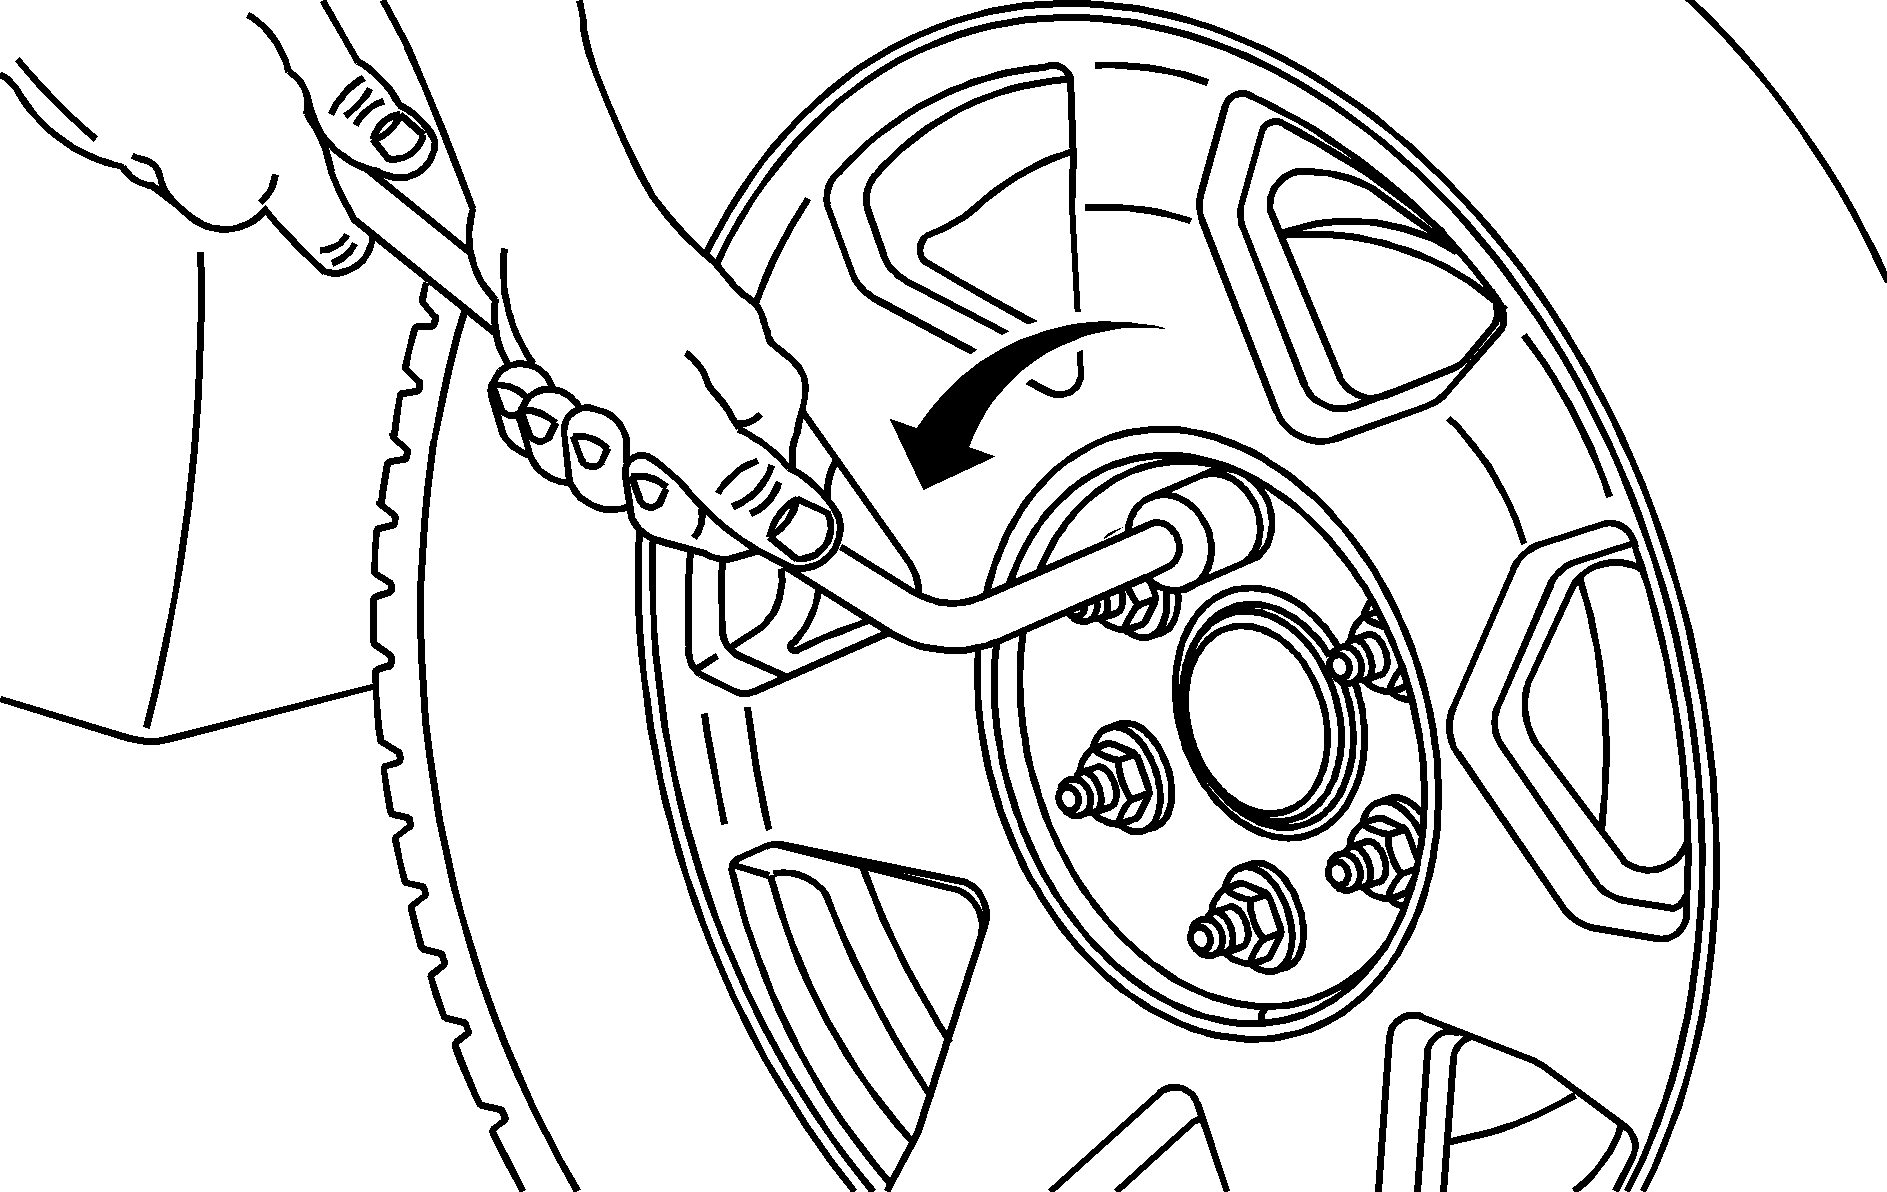
- Use and turn the wheel wrench counterclockwise to loosen the wheel nuts. Don't remove the wheel nuts yet.
- Position the jack under the vehicle as shown. If the flat tire is on the front of the vehicle (two-wheel-drive 1500 Series vehicles), position the jack under the bracket attached to the vehicle's frame, behind the flat tire. If the flat tire is on the front of the vehicle (all other models), position the jack on the frame behind the flat tire.
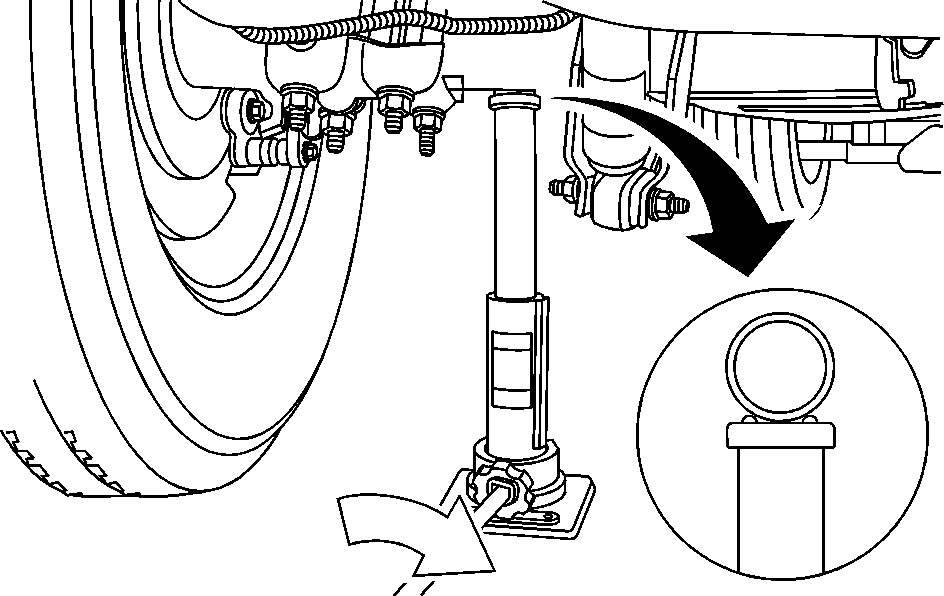
- Make sure the jack head is positioned so that the rear axle is resting securely between the grooves that are on the jack head. Turn the wheel wrench clockwise to raise the vehicle. Raise the vehicle far enough off the ground so there is enough room for the spare tire to fit under the wheel well.
- Install the spare tire.
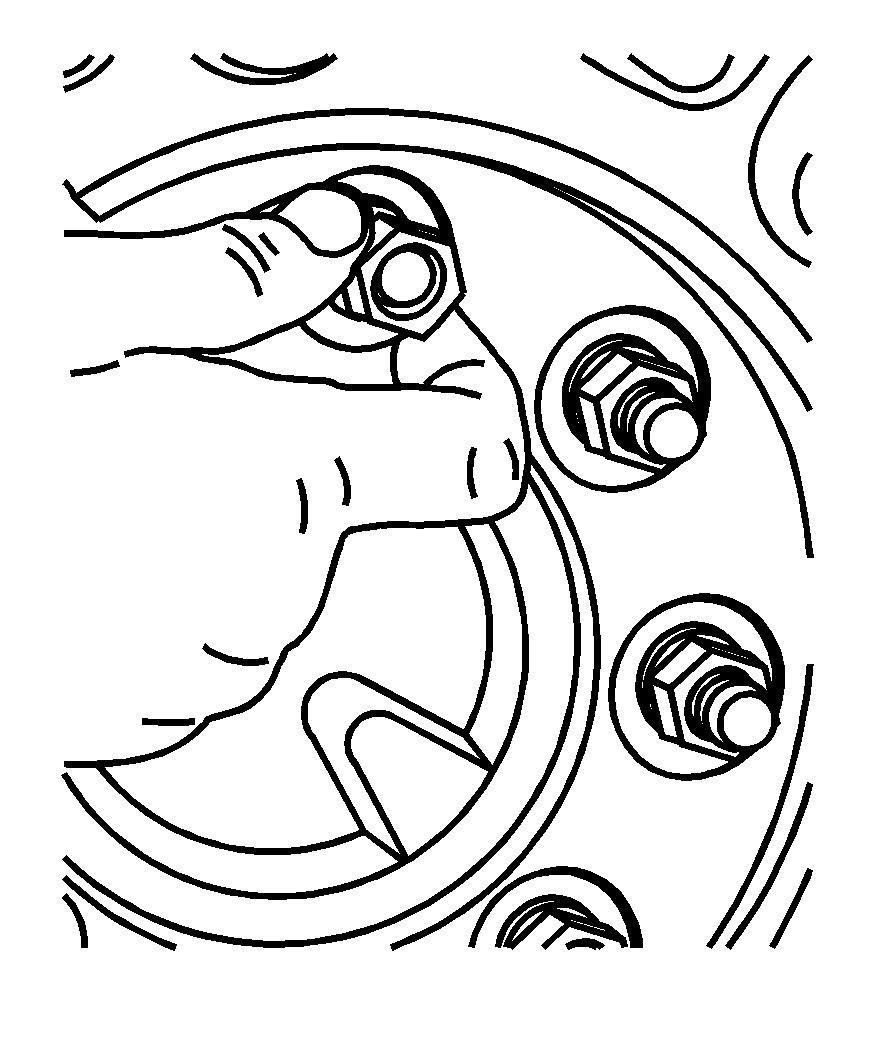
- Put the wheel nuts back on with the rounded end of the nuts toward the wheel.
- Tighten each wheel nut by hand. Then use the wheel wrench to tighten the nuts until the wheel is held against the hub.
- Turn the wheel wrench counterclockwise to lower the vehicle. Lower the jack completely.
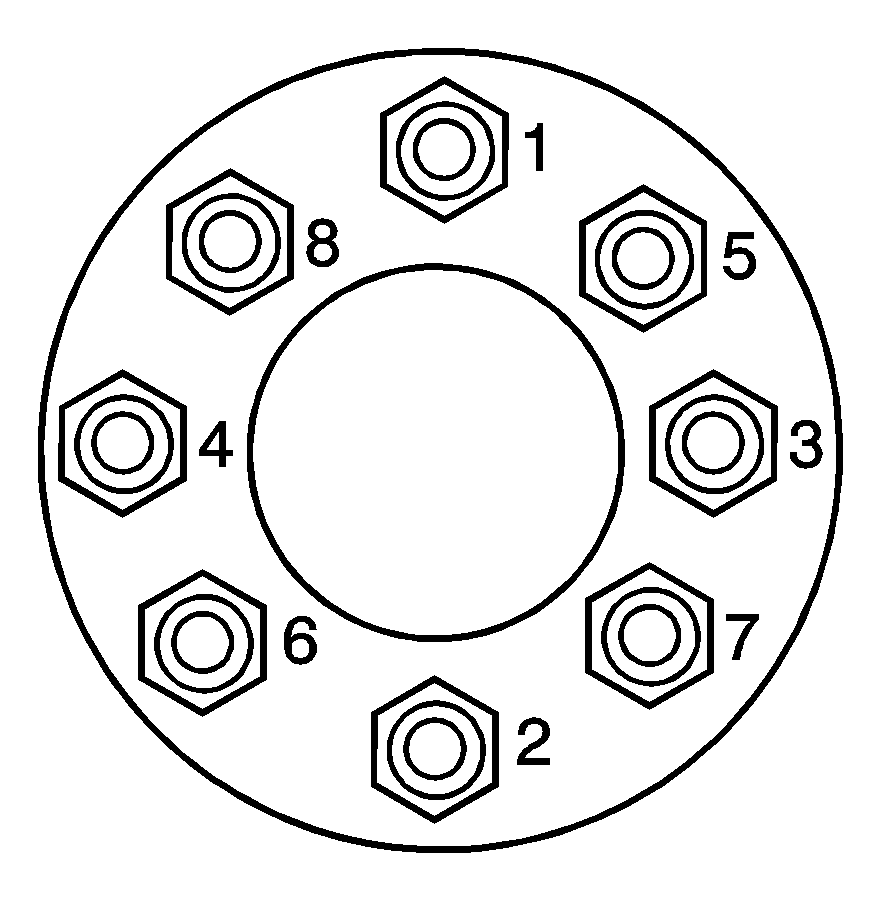
- Tighten the nuts firmly in a crisscross sequence as shown by turning the wheel wrench clockwise.
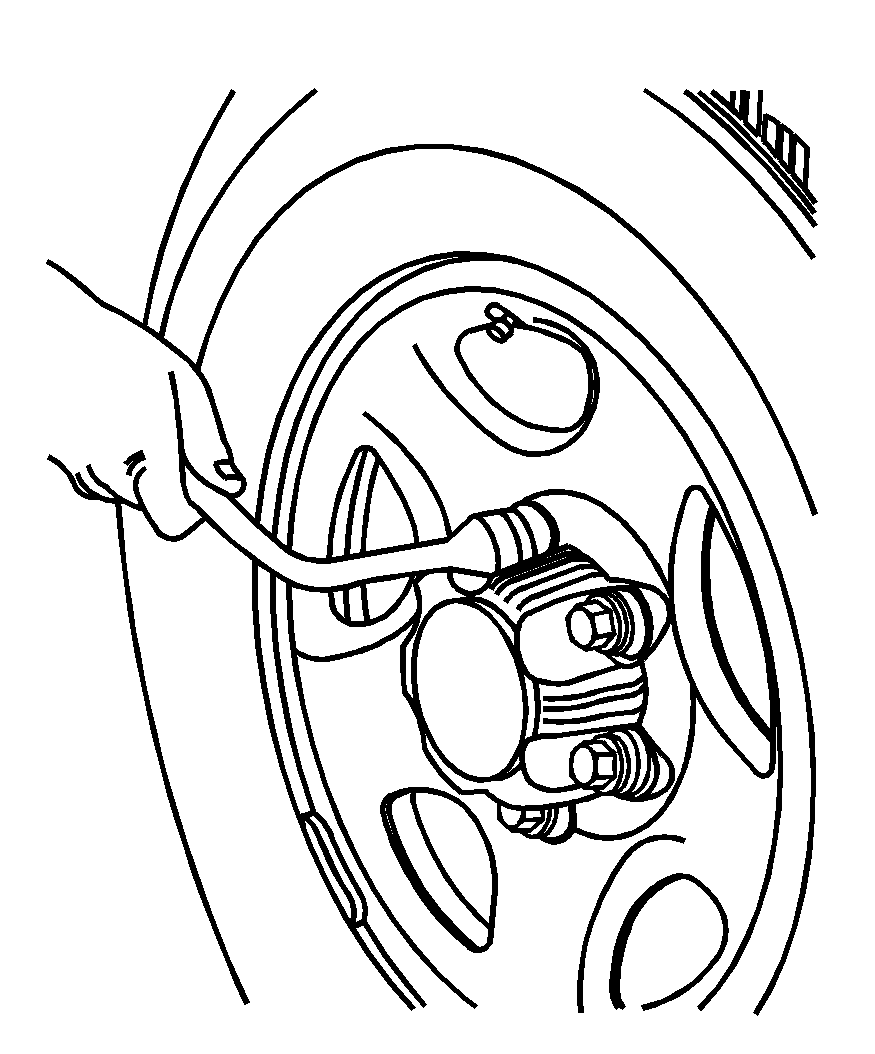
If your vehicle has wheel nut caps, loosen them by turning the wheel wrench counterclockwise.
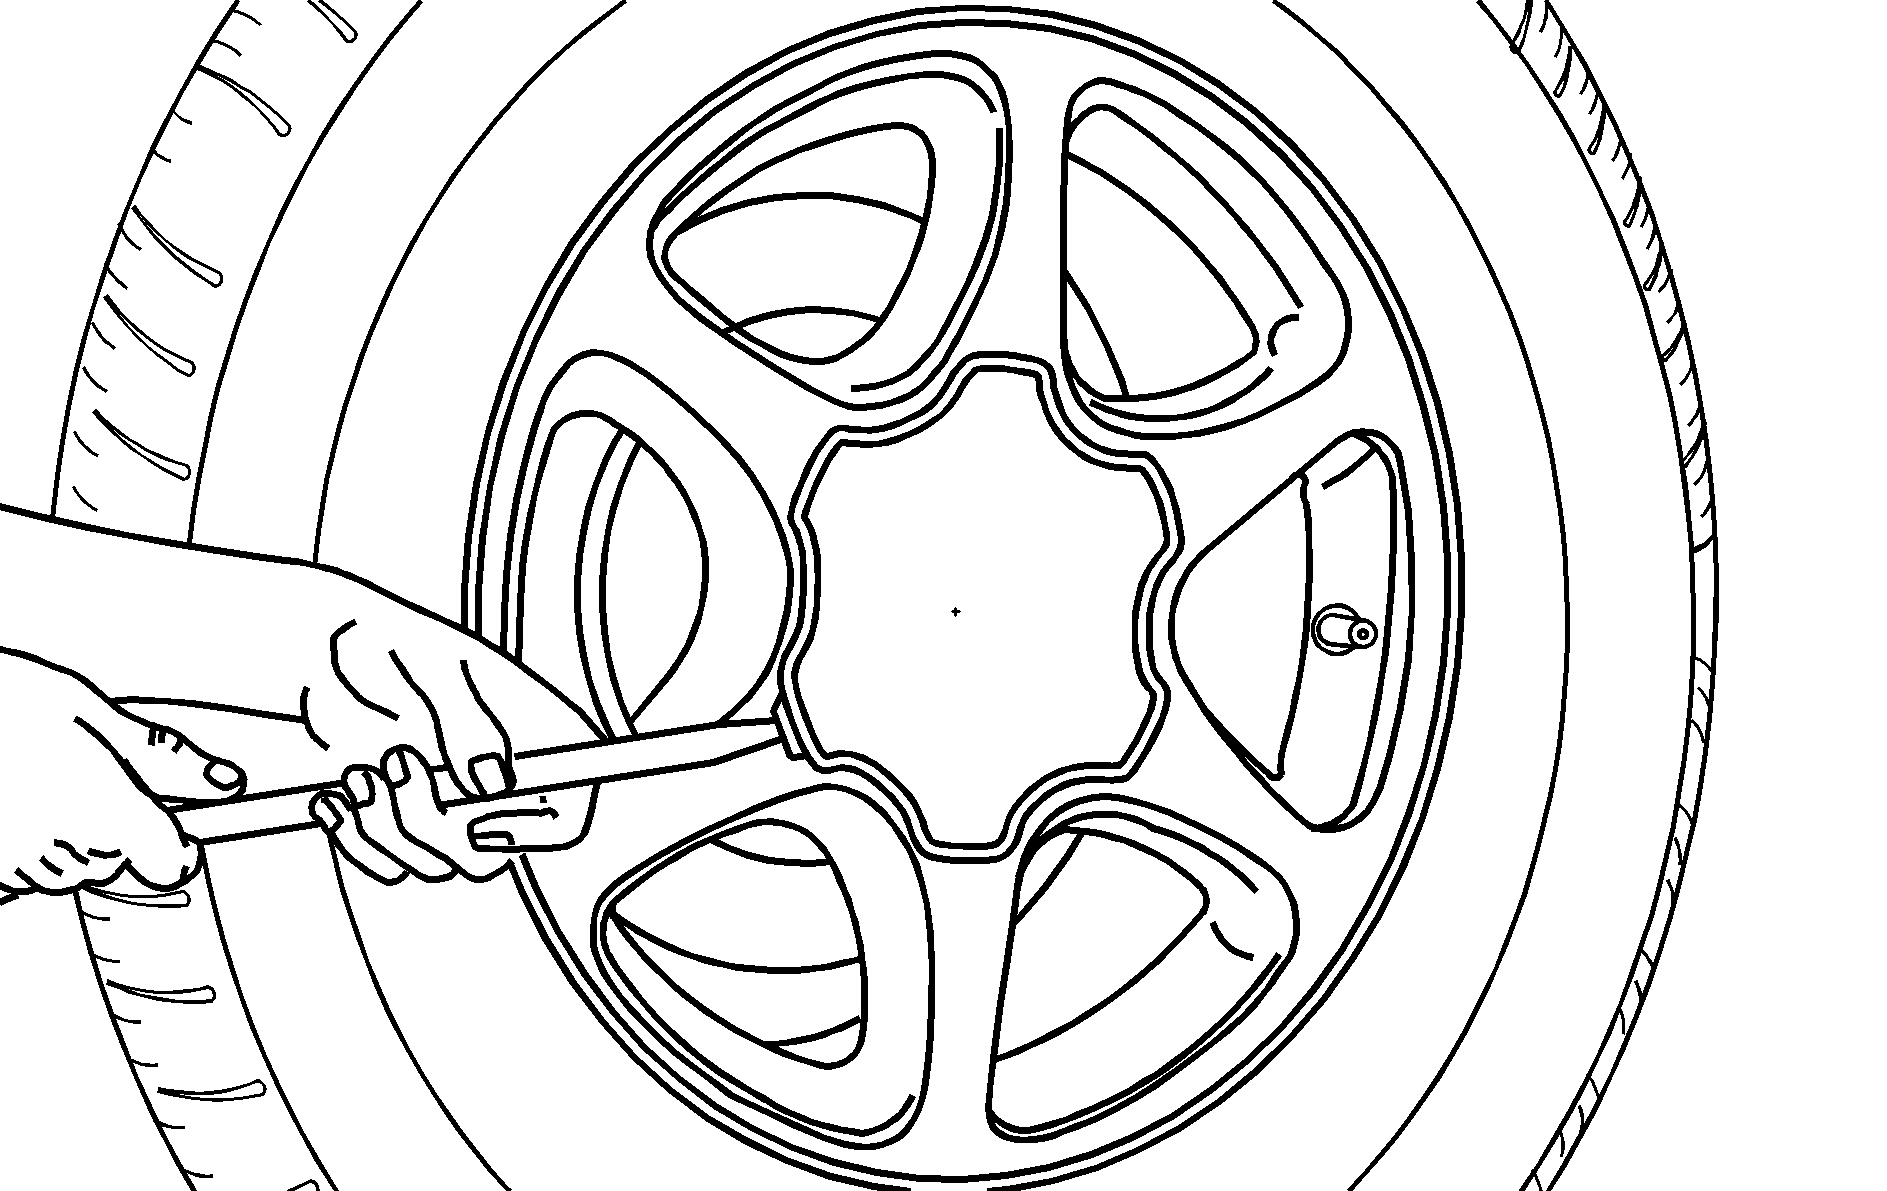
If the wheel has bolt-on wheel covers, loosen the plastic nut caps by turning the wheel wrench in a counterclockwise direction. If needed, finish loosening them by hand. The nut caps will not come off. Using the flat end of the wheel wrench, pry along the edge of the cover until it comes off.
Notice: If your vehicle has QUADRASTEER™ and you use a jack to raise the vehicle without positioning it correctly, you could damage the QUADRASTEER™ system. When raising your vehicle on a jack, avoid contact with tie rods and tie rod boots.
Jacking Locations
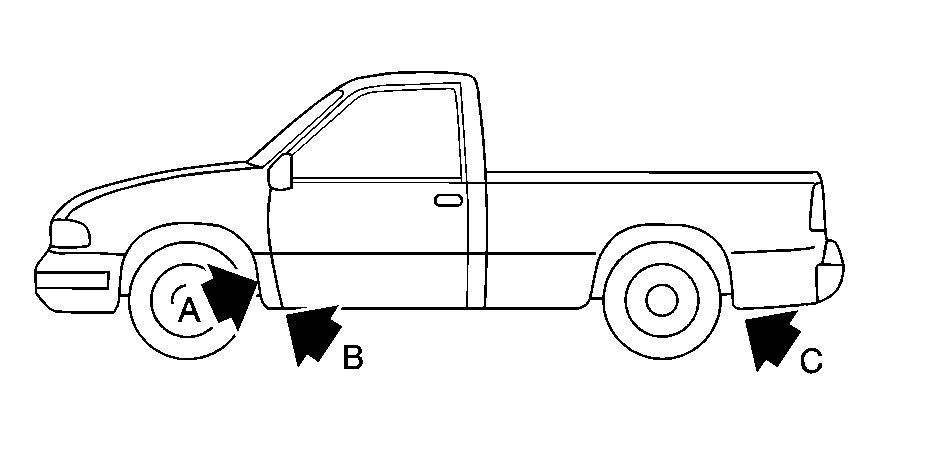
Front Location (Two-Wheel-Drive 1500 Series)
Front Location (All Other Series)
Rear Location (All Series)
If the flat tire is on the rear, position the jack under the rear axle between the spring anchor and the shock absorber bracket.
If you have added a snow plow to the front of your vehicle, lower the snow plow fully before raising the vehicle.
Caution: Getting under a vehicle when it is jacked up is dangerous. If the vehicle slips off the jack you could be badly injured or killed. Never get under a vehicle when it is supported only by a jack.
Caution: Raising your vehicle with the jack improperly positioned can damage the vehicle and even make the vehicle fall. To help avoid personal injury and vehicle damage, be sure to fit the jack lift head into the proper location before raising the vehicle.
Front Position -- 2WD 1500 Series
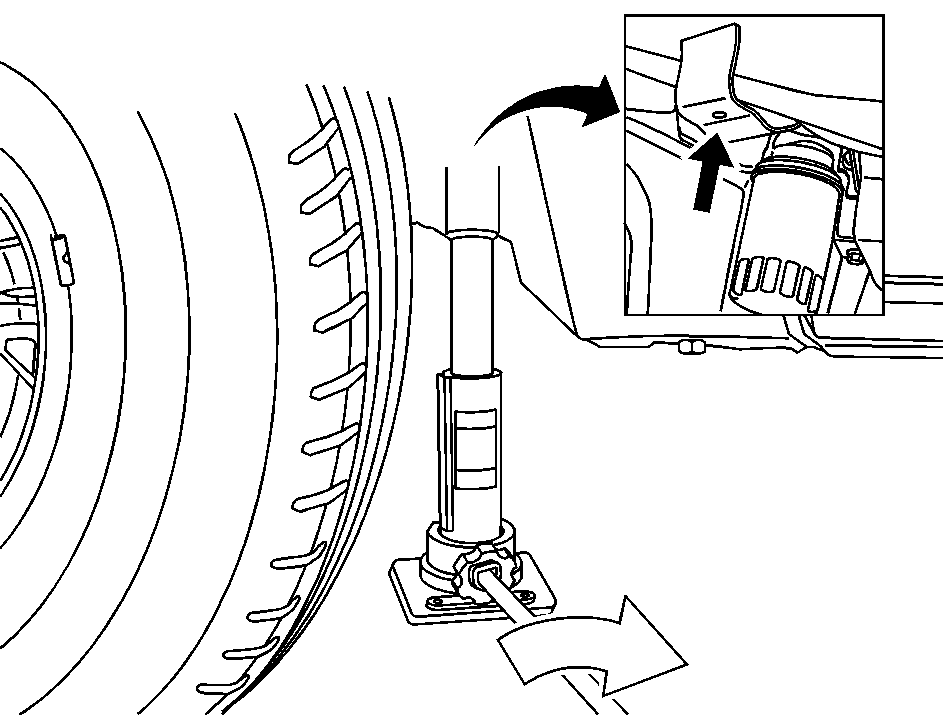
Front Position -- All Other Models
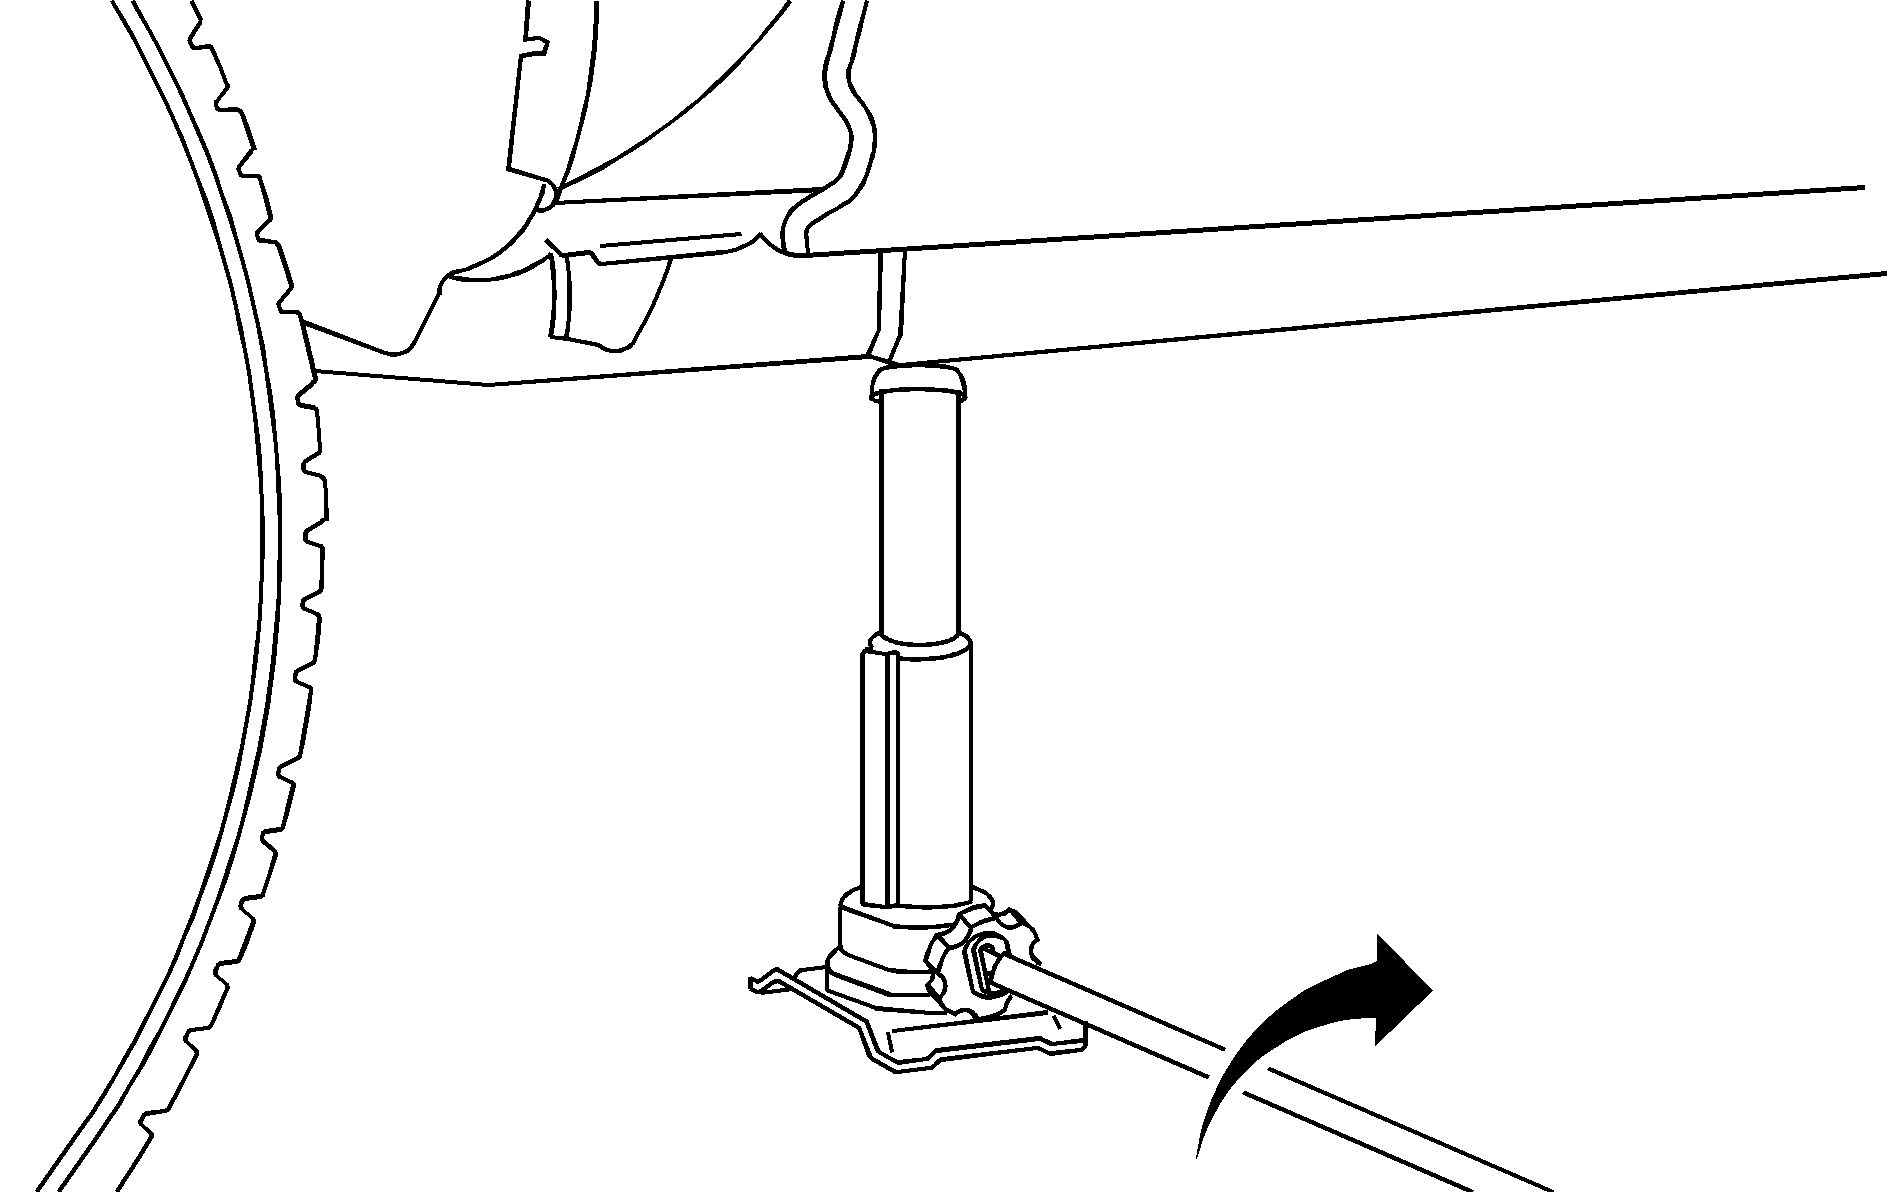
Rear Position
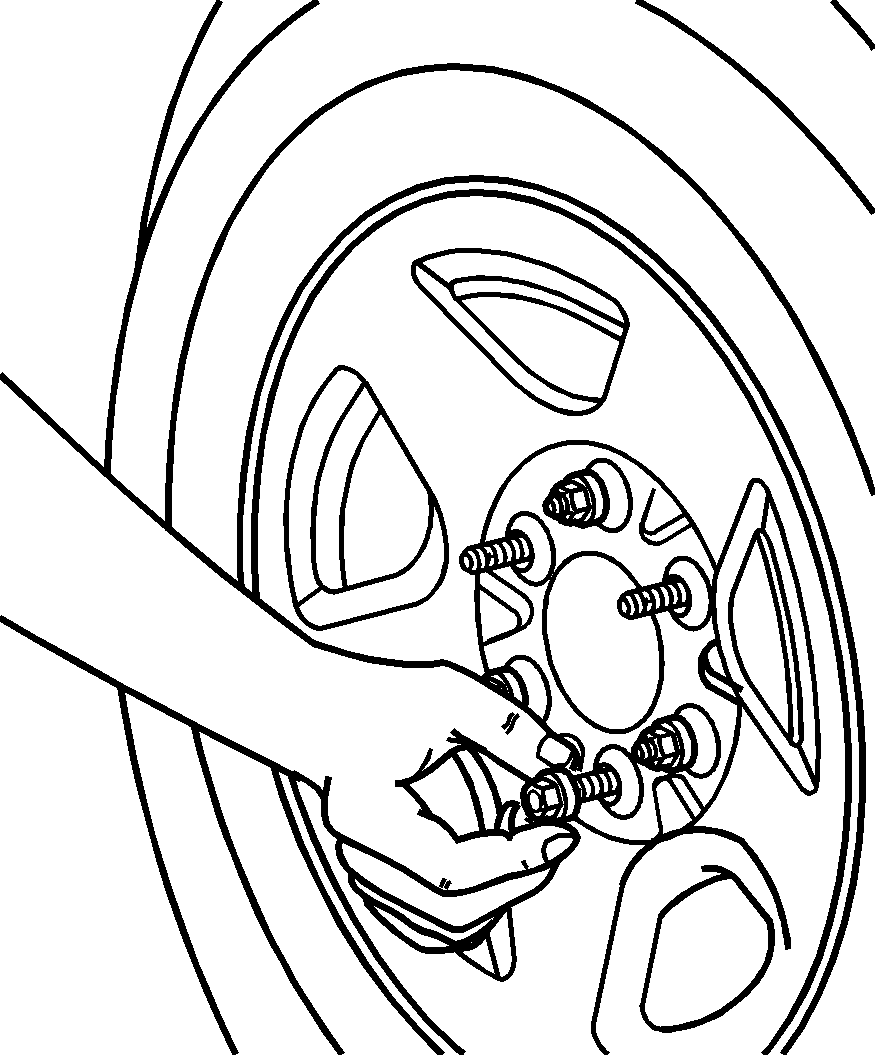
Remove all the wheel nuts and take off the flat tire.
Caution: Rust or dirt on a wheel or other parts to which it is fastened, can make the wheel nuts become loose and eventually the wheel could come off and cause a crash. Always remove all rust and dirt from wheels and other parts.
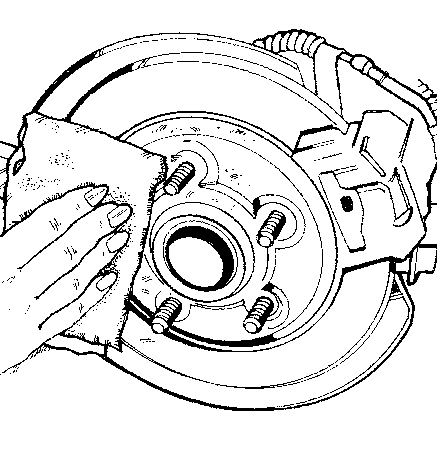
Remove any rust or dirt from the wheel bolts, mounting surfaces and spare wheel.
Caution: Never use oil or grease on bolts or nuts because the nuts might come loose. The vehicle's wheel could fall off, causing a crash.
Front Position -- All Models
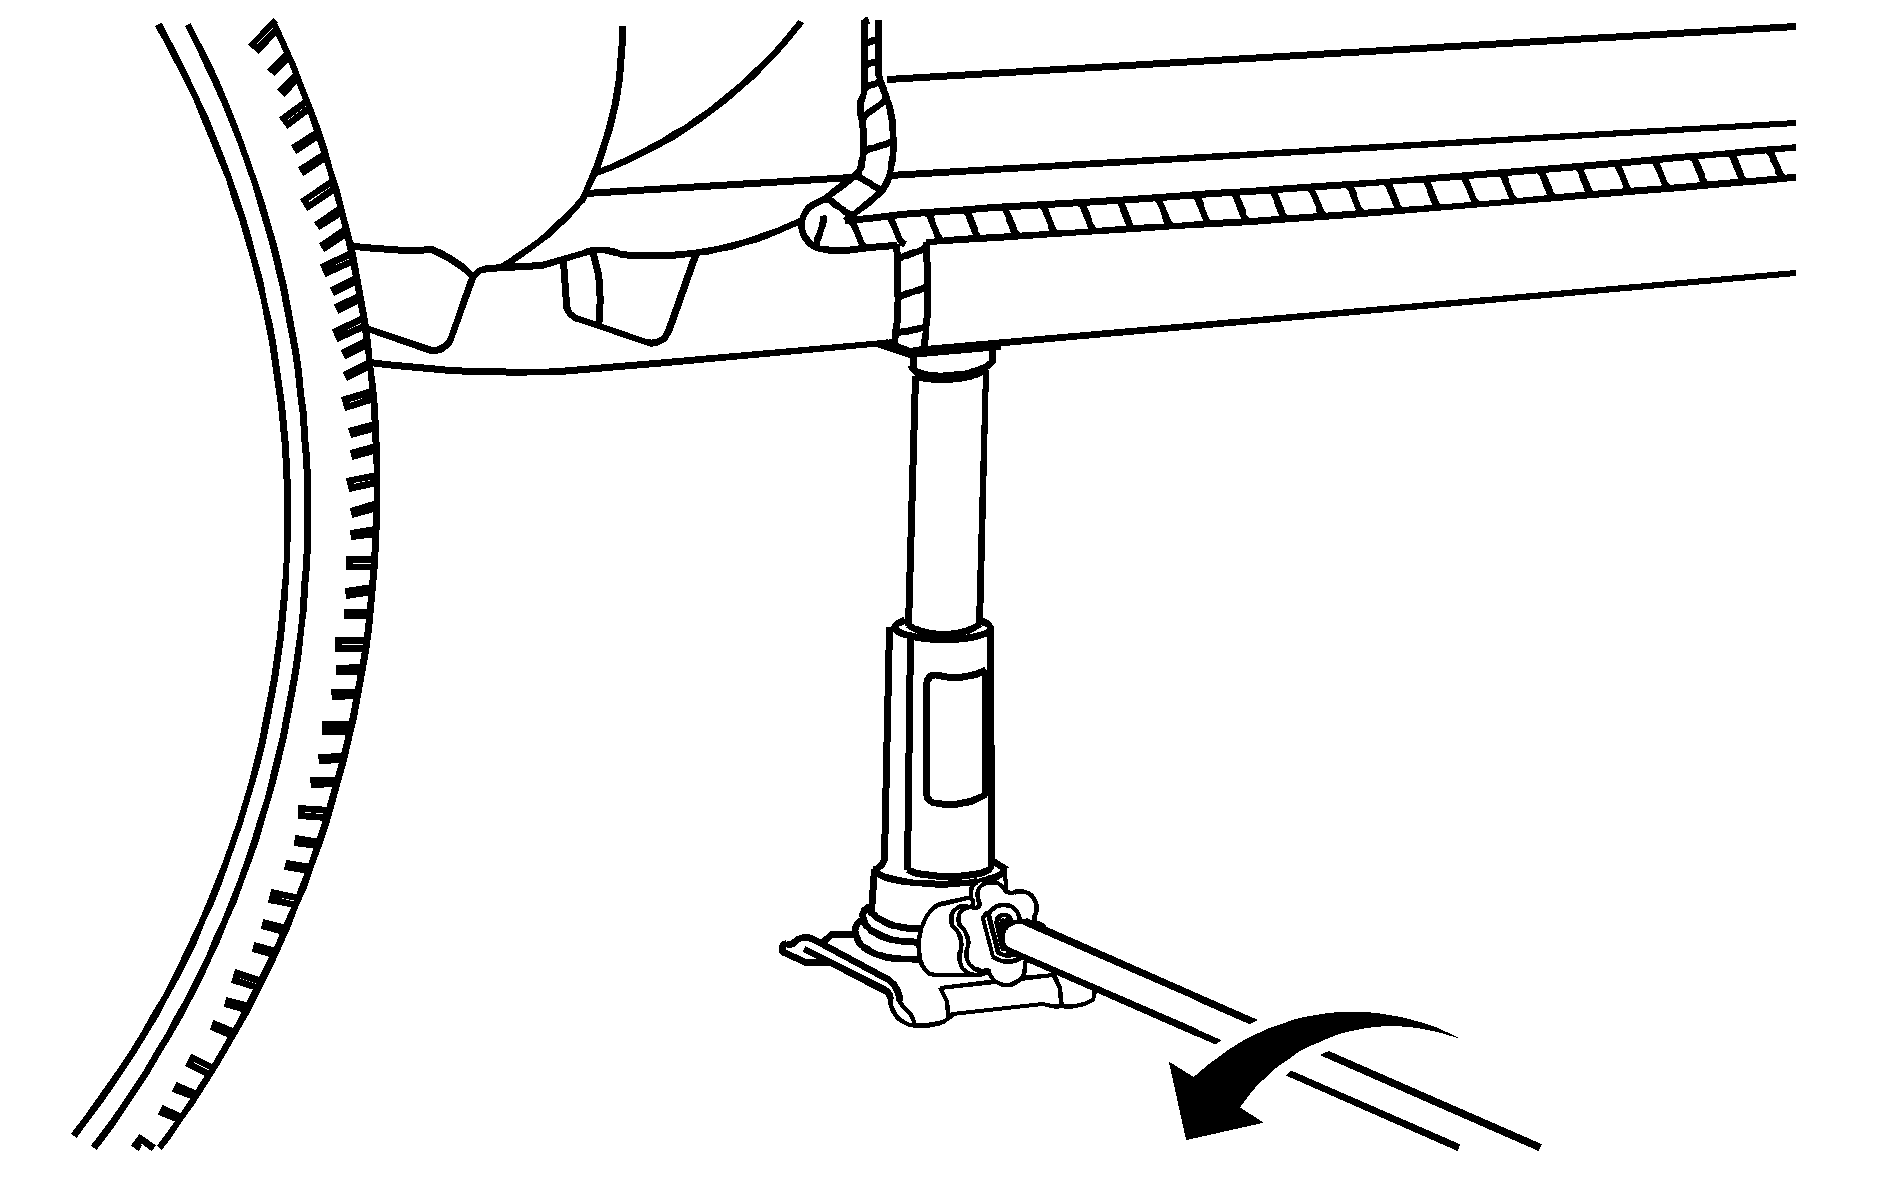
Front Position -- 2WD 1500 Series
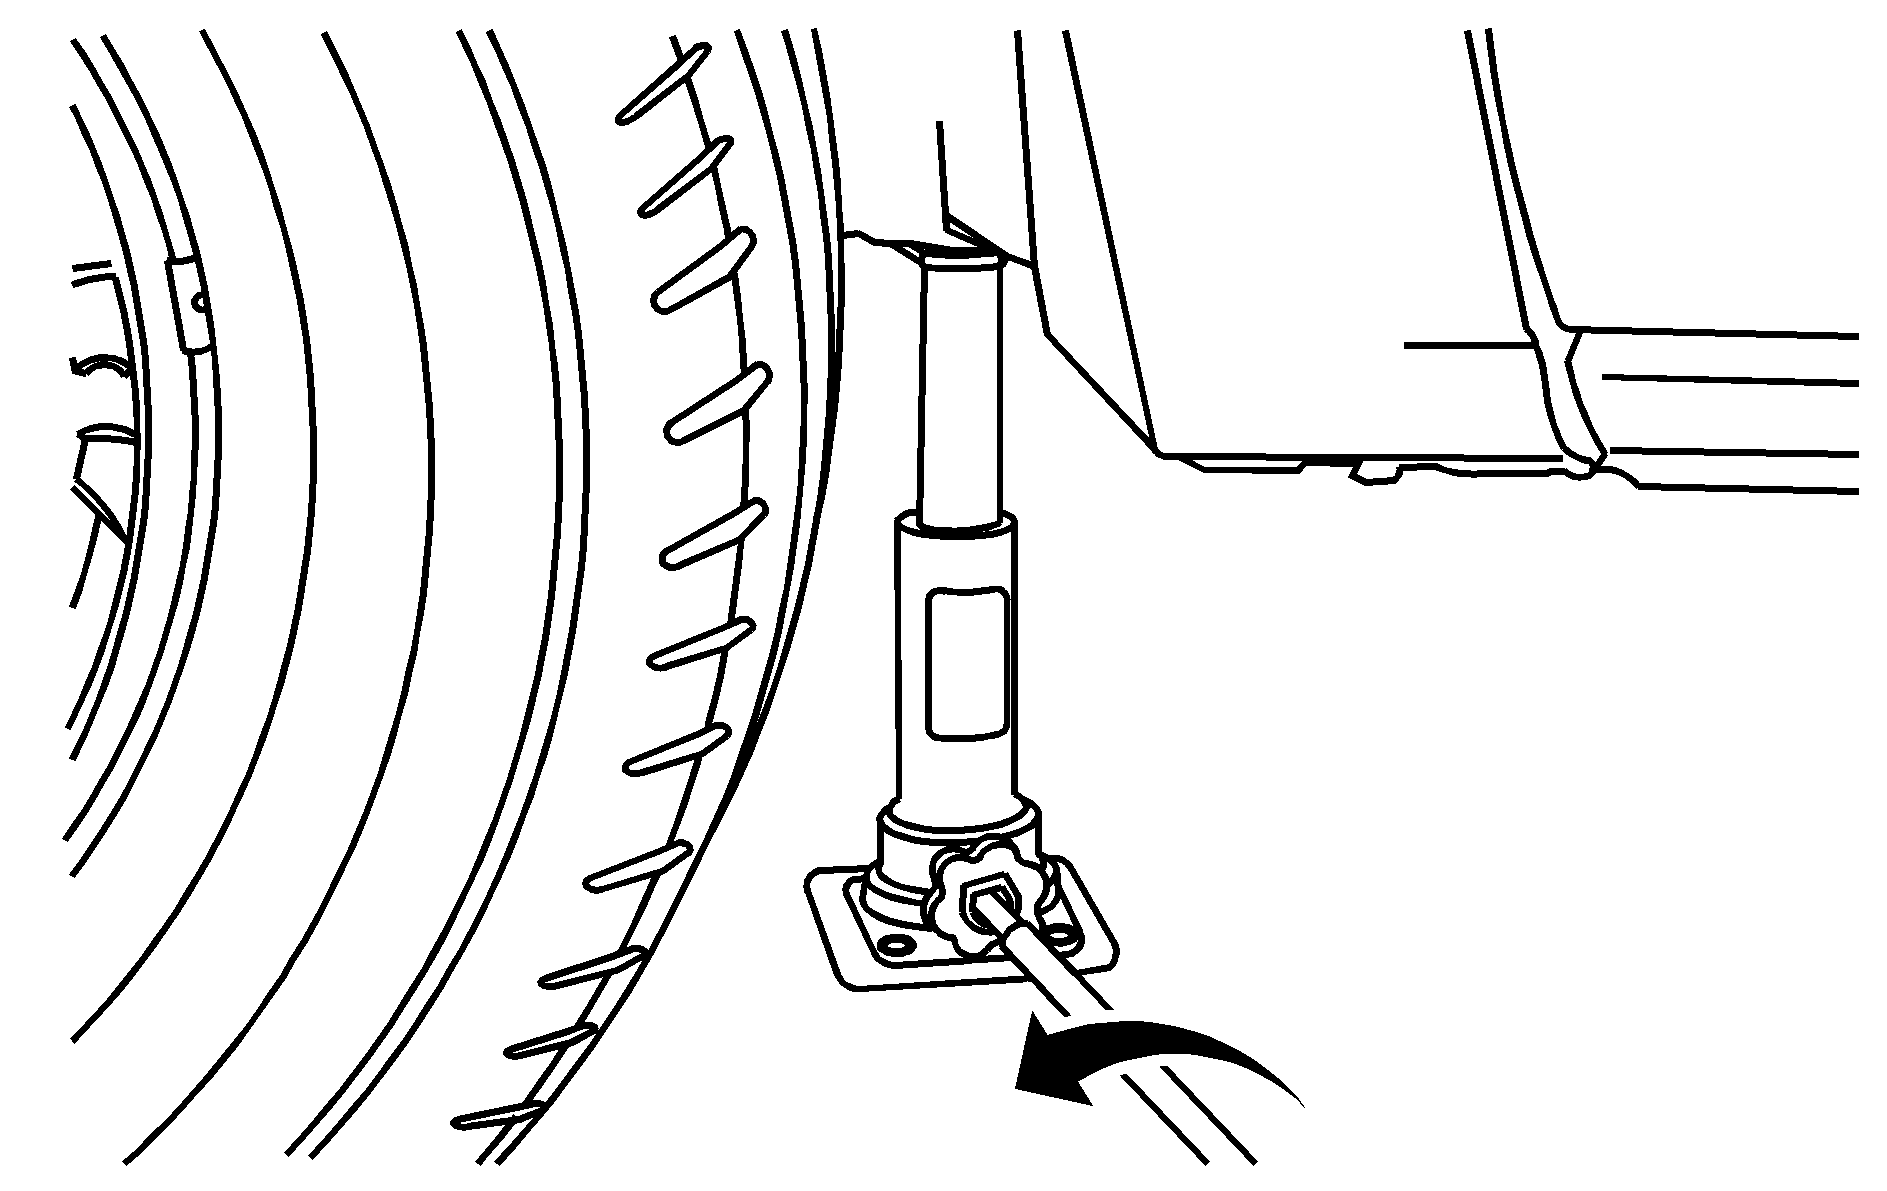
Rear Position
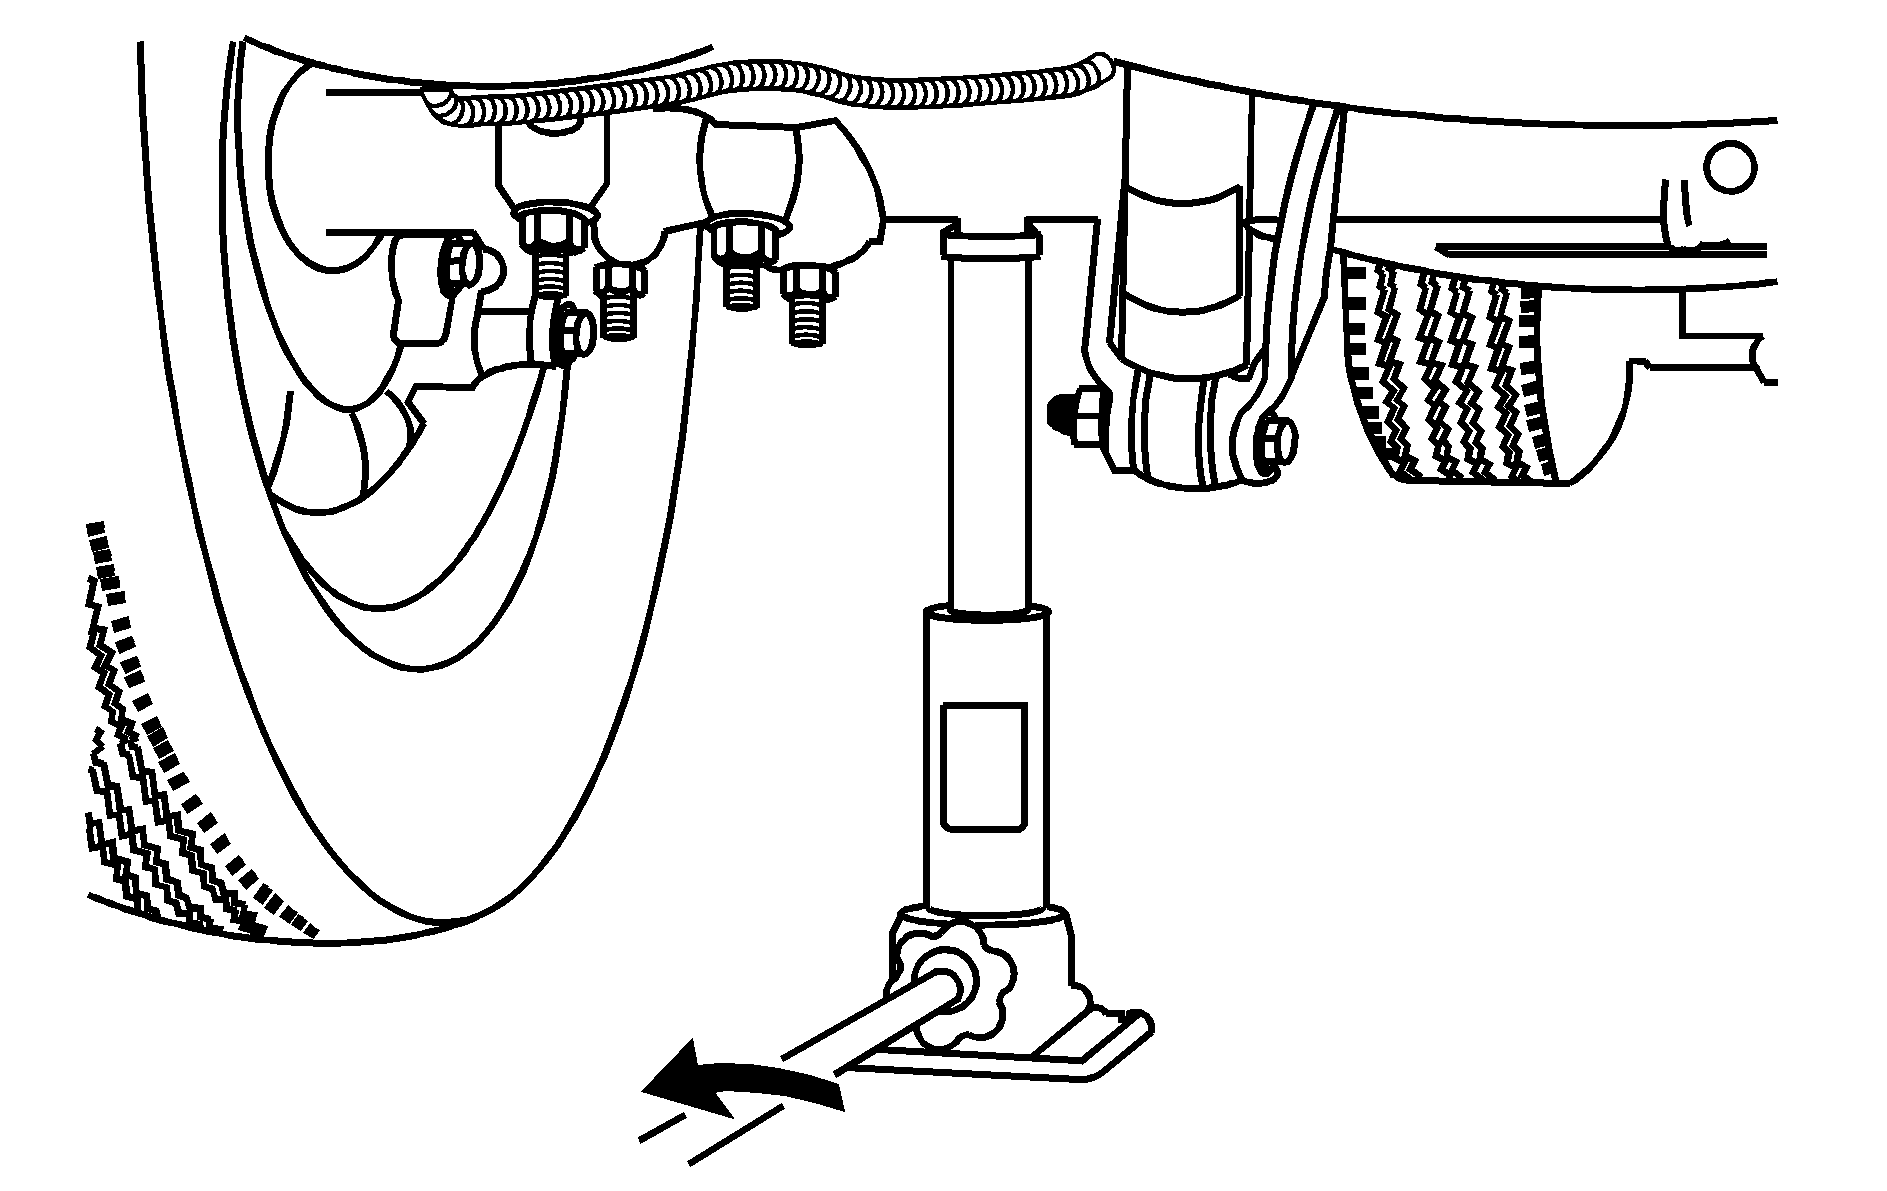
Caution: Incorrect or improperly tightened wheel nuts can cause the wheel to come loose and even come off. This could lead to a crash. If you have to replace them, be sure to get new original equipment wheel nuts. Stop somewhere as soon as you can and have the nuts tightened with a torque wrench to the proper torque specification. See Capacities and Specifications for wheel nut torque specification.
Notice: Improperly tightened wheel nuts can lead to brake pulsation and rotor damage. To avoid expensive brake repairs, evenly tighten the wheel nuts in the proper sequence and to the proper torque specification. See Capacities and Specifications for the wheel nut torque specification.
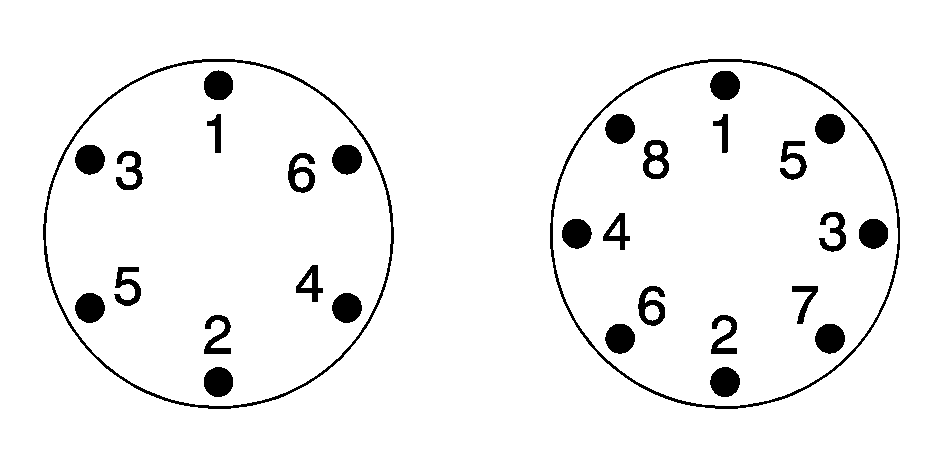
When you reinstall the regular wheel and tire, you must also reinstall either the center cap, or bolt-on hub cap, depending on what your vehicle is equipped with. For center caps, place the cap on the wheel and tap it into place until it seats flush with the wheel. The cap only goes on one way. Be sure to line up the tab on the center cap with the indentation on the wheel. For bolt-on hub caps, align the plastic nut caps with the wheel nuts and then tighten by hand. Then use the wheel wrench to tighten.
This applies to vehicle's featuring Option Code EMP (Enhanced Mobility Package) Only. For vehicle without EMP refer to the 2005 Vehicle Owner Manual.
Use the following pictures and instructions to remove the flat tire and raise the vehicle.
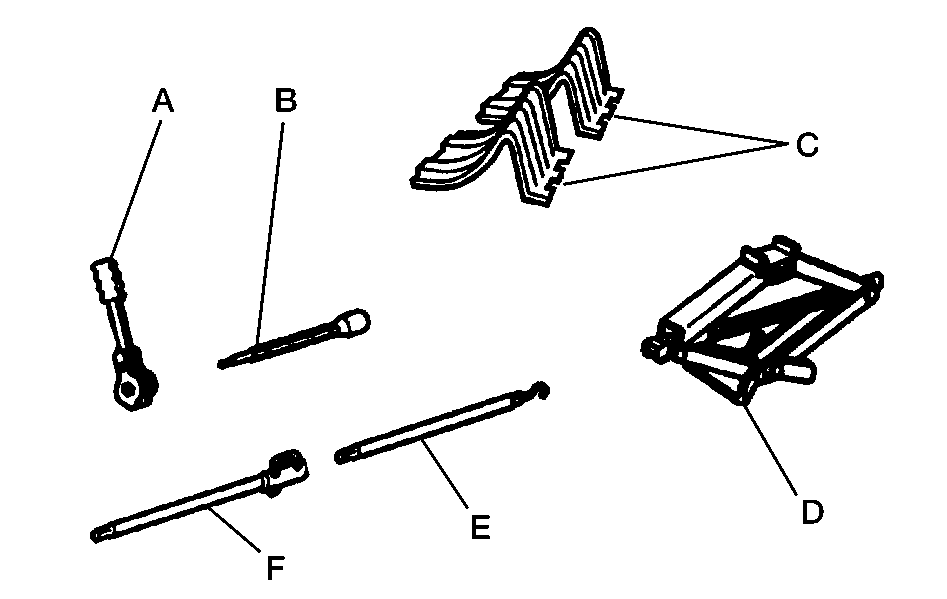
The tools you will be using include the ratchet (A), the wheel wrench (B), the wheel blocks (C), the jack (D), the jack handle (E), and the extension (F).
- Ensure that the vehicle is parked on a level surface.
- Ensure that the vehicle’s transmission is in PARK (P) and the transfer case is NOT in NEUTRAL (N).
- Set the vehicle parking brake.
- Using the wheel blocks, block the opposite tire that is being changed.
- Use the ratchet and wheel wrench to loosen all the wheel nuts. Turn the wheel wrench counterclockwise to loosen the wheel nuts. Don’t remove the wheel nuts yet.
- Assemble the jacking components.
- Raise the tire OFF the ground.
- Remove all the wheel nuts and take off the flat tire.
- Remove any rust or dirt from the wheel bolts, mounting surfaces and spare wheel.
- After mounting the spare, put the wheel nuts back on with the rounded end of the nuts toward the wheel. Tighten each wheel nut by hand. Then use the wheel wrench to tighten the nuts until the wheel is held against the hub.
- Turn the wheel wrench counterclockwise to lower the vehicle and remove the jack.
- Tighten the nuts firmly in a crisscross sequence as shown by turning the wheel wrench clockwise.
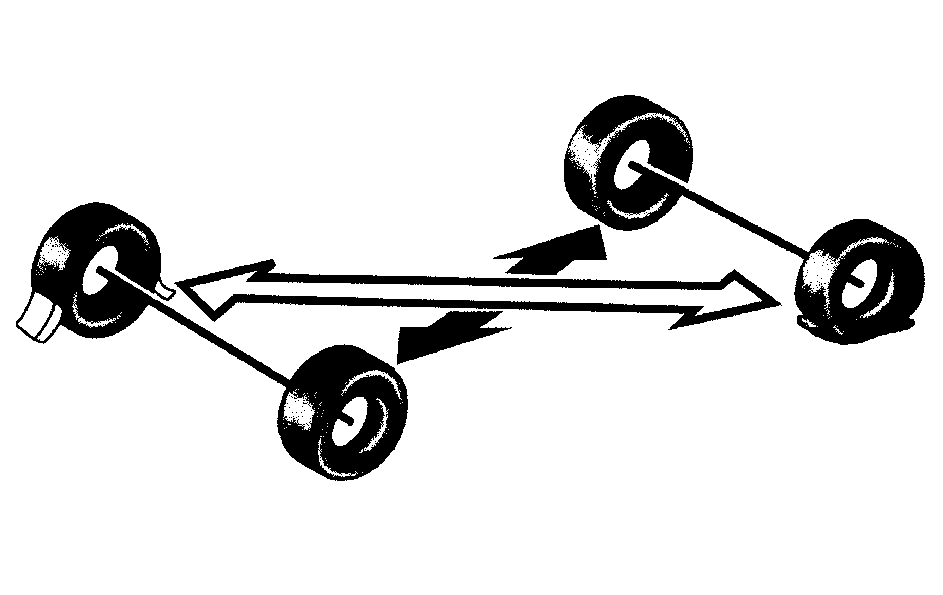
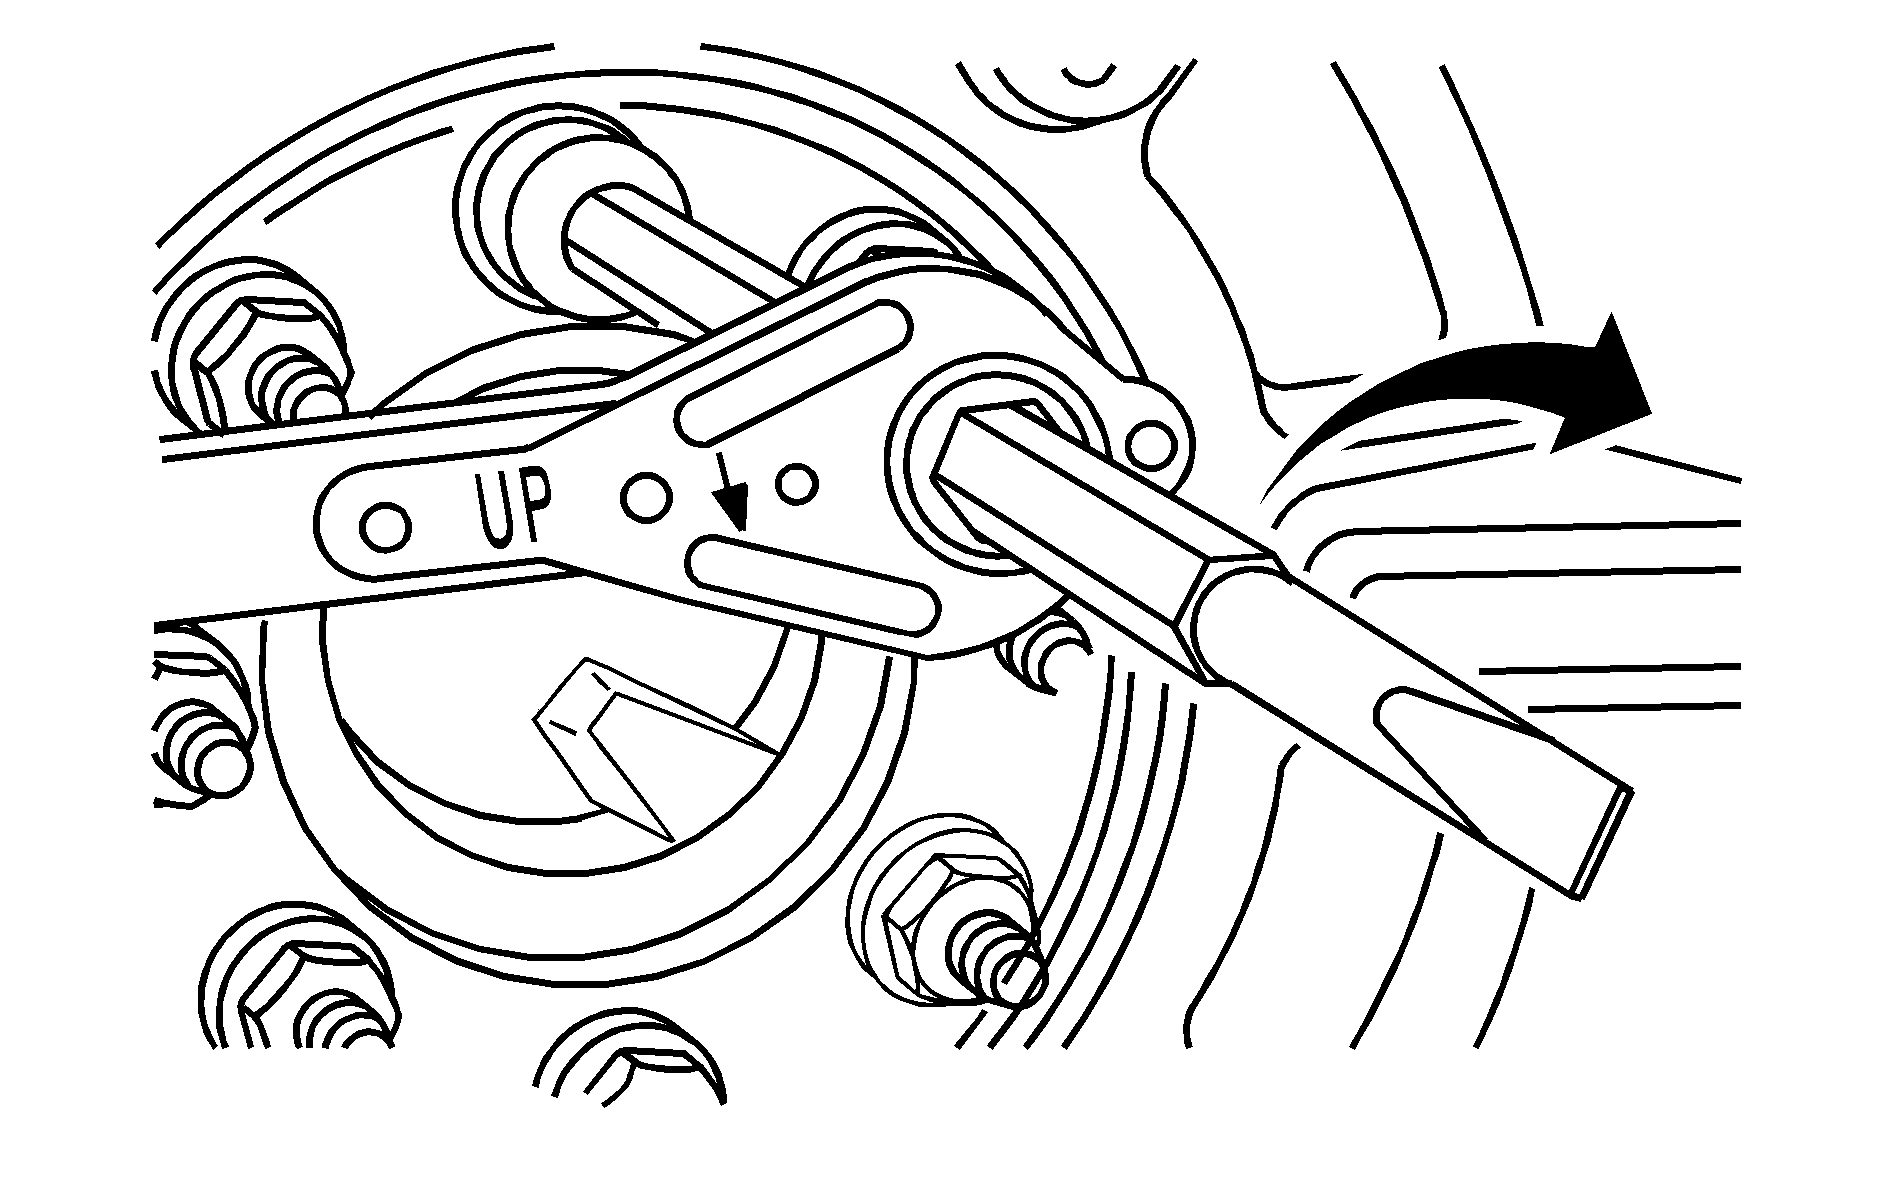

Place the jack only at the appropriate jack point.
Front Flat Tire
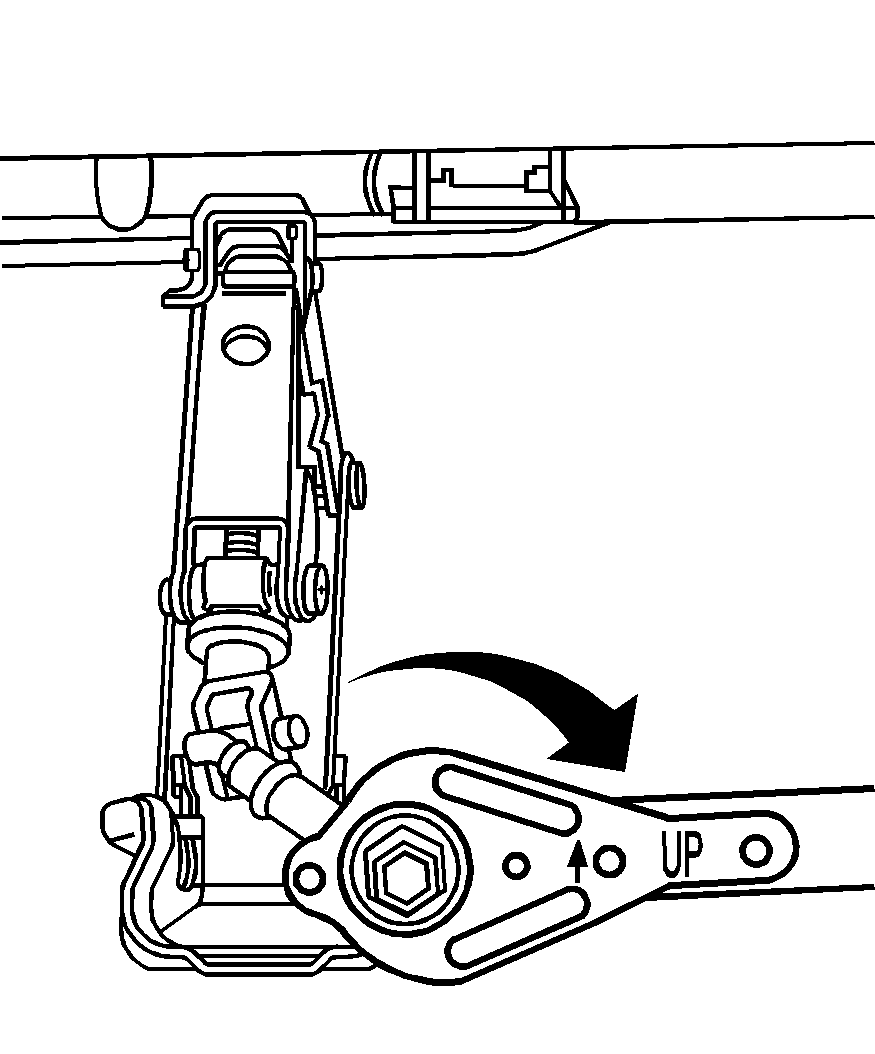
Front Flat Tire: Position the jack under the vehicle on the frame behind the flat tire where the frame sections overlap. See the following graphic for an approximate location of the jack on the frame.
Rear Flat Tire
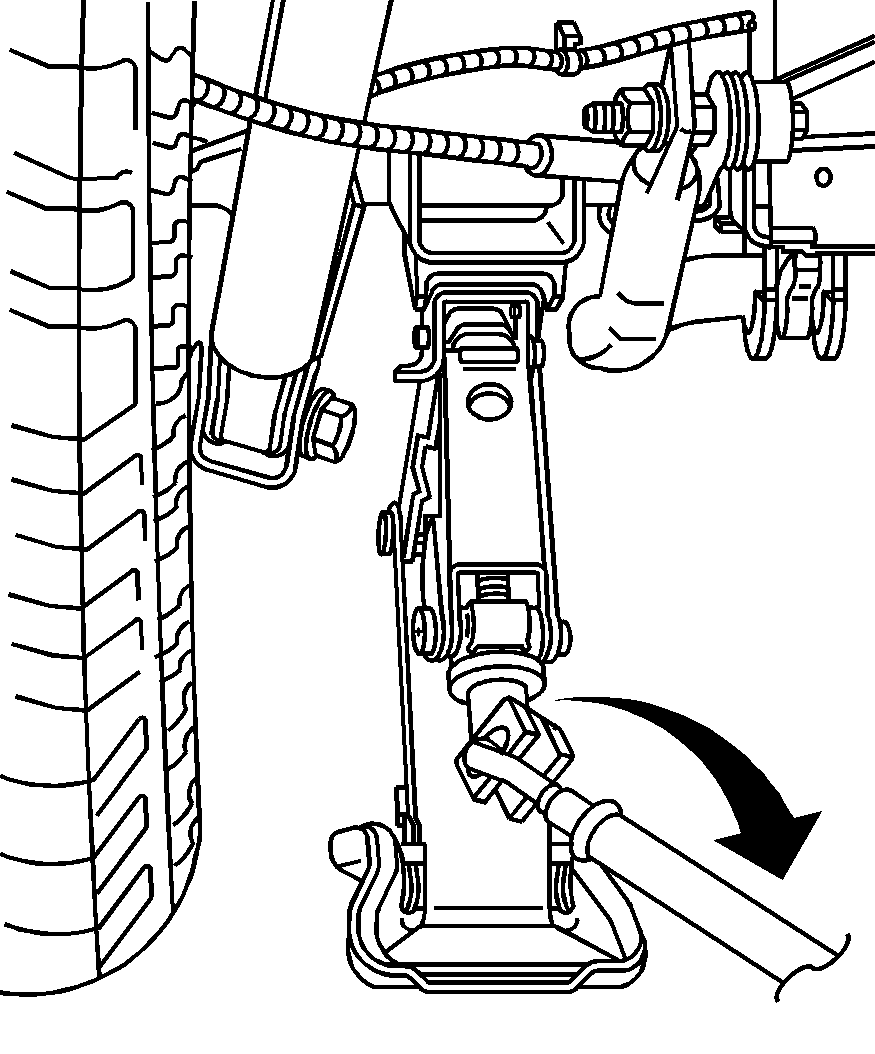
Rear Flat Tire: Place the jack under the curved rear axle pad. Make sure the jack head is positioned so that the rear axle pad is resting securely on the jack head.
Caution: Getting under a vehicle when it is jacked up is dangerous. If the vehicle slips off the jack, you could be badly injured or killed. Never get under a vehicle when it is supported only by a jack.
Caution: Raising the vehicle with the jack improperly positioned can damage the vehicle or the vehicle may fall and cause your or others injury.

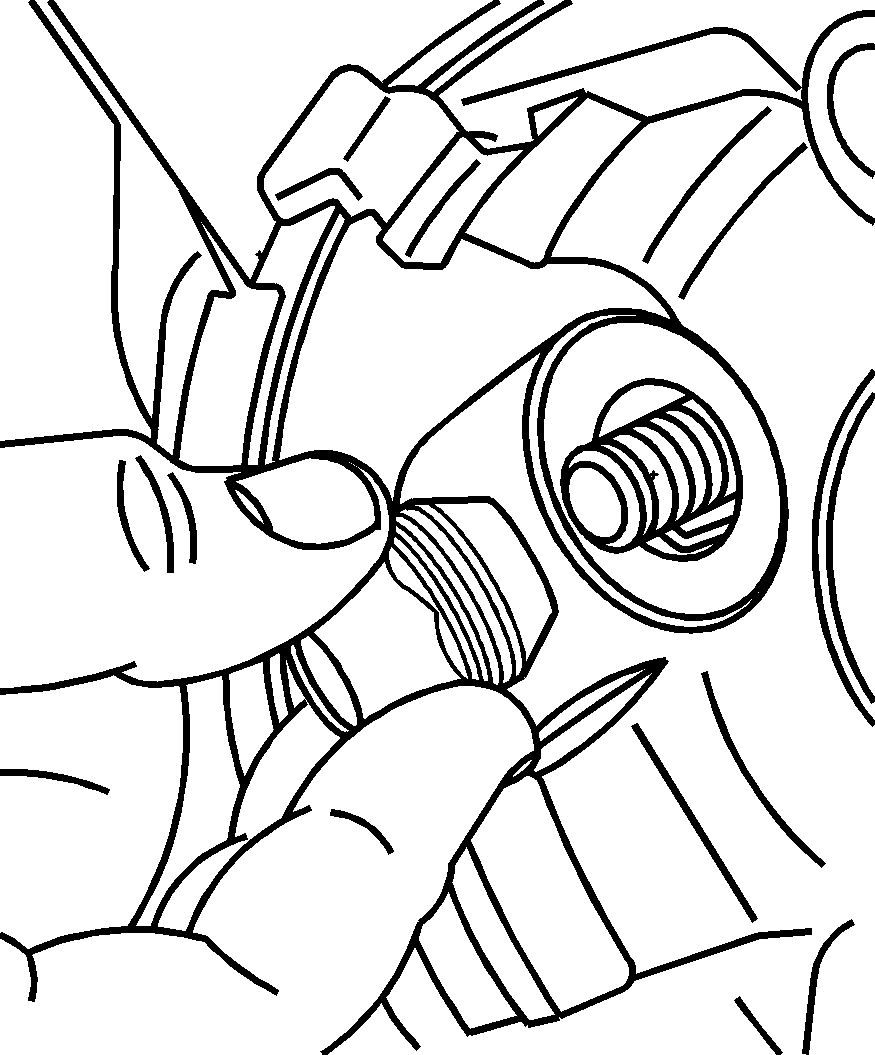
Caution: Rust or dirt on a wheel or other parts to which it is fastened, can make the wheel nuts become loose and eventually the wheel could come off and cause a crash. Always remove all rust and dirt from wheels and other parts.
Caution: Never use oil or grease on bolts or nuts because the nuts might come loose. The vehicle's wheel could fall off, causing a crash.
Caution: Incorrect or improperly tightened wheel nuts can cause the wheel to come loose and even come off. This could lead to a crash. If you have to replace them, be sure to get new original equipment wheel nuts. Stop somewhere as soon as you can and have the nuts tightened with a torque wrench to the proper torque specification. See Capacities and Specifications for wheel nut torque specification.
Notice: Improperly tightened wheel nuts can lead to brake pulsation and rotor damage. To avoid expensive brake repairs, evenly tighten the wheel nuts in the proper sequence and to the proper torque specification. See Capacities and Specifications for the wheel nut torque specification.
