For 1990-2009 cars only
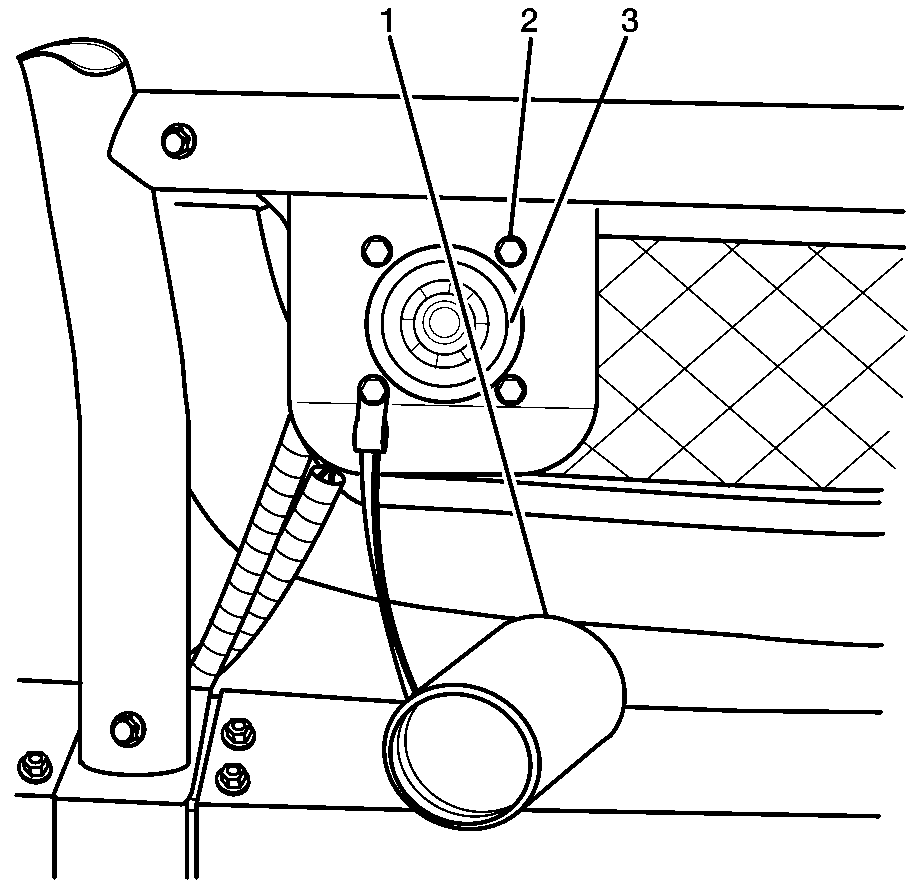
Slave Receptacle Replacement LSSV
Removal Procedure
- Disconnect the battery cables. Refer to Battery Cable Disconnect and Connection .
- Unscrew the slave receptacle cover (1).
- Remove the fasteners (2) securing the slave receptacle to the radiator grille guard bracket.
- Remove the slave receptacle (3).
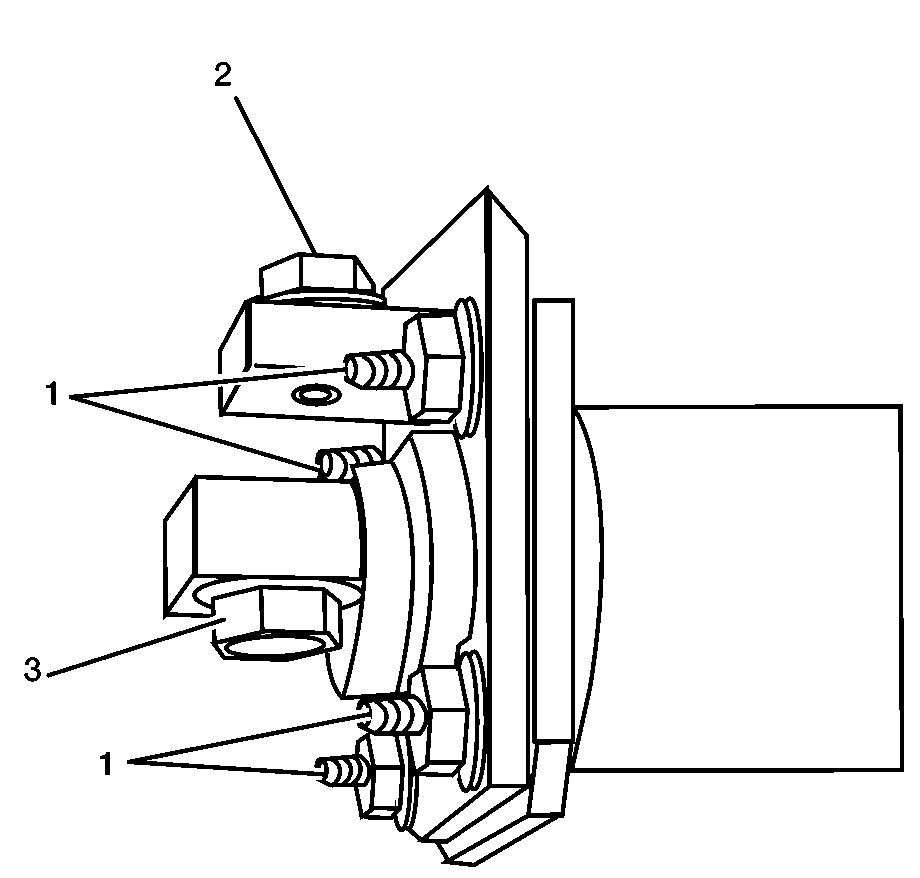
- Disconnect the negative cable connections (2).
- Remove the rubber cover from the rear of the positive cable connection.
- Disconnect the positive cable connection (3).
- Remove the slave receptacle and the gasket from the bracket.
Caution: Refer to Battery Disconnect Caution in the Preface section.
Installation Procedure
- Position the slave receptacle with the gasket onto the bracket.
- Install the positive cable onto the connection (3).
- Install the negative cable onto the connection (2).
- Install the rubber cover onto the rear of the positive cable connection.
- Position the slave receptacle cover onto the rear of the bracket.
- Install the fasteners (2) onto the slave receptacle (3) and the slave receptacle cover (1).
- Install the slave receptacle cover (1).
- Connect the battery cables. Refer to Battery Cable Disconnect and Connection .
Important: The gasket must mount to the square back of the slave start connector assembly.
Notice: Refer to Fastener Notice in the Preface section.
Tighten
Tighten the connections to 20 N·m (15 lb ft).
Tighten
Tighten the bolts to 8 N·m (71 lb in).
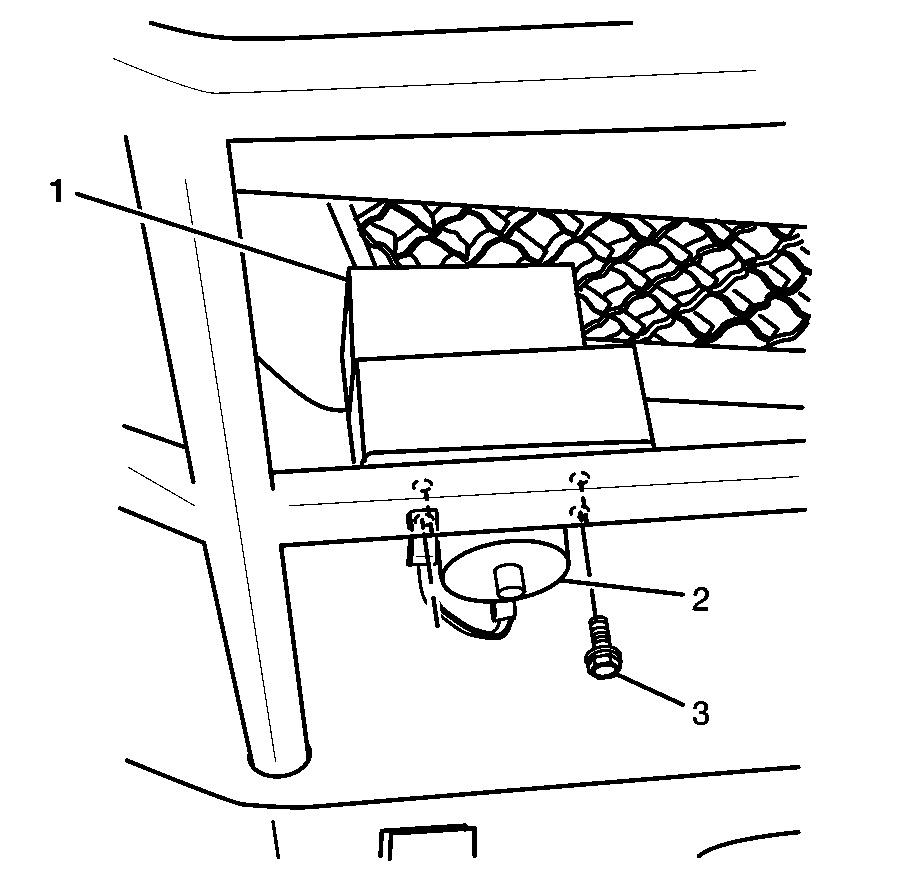
Slave Receptacle Replacement Ambulance/Maintenance Body
Removal Procedure
- Disconnect the battery cables. Refer to Battery Cable Disconnect and Connection .
- Unscrew the slave receptacle cover (2).
- Remove the fasteners (3) securing the slave receptacle to the slave receptacle and connect the rear connector cover (1).
- Remove the slave receptacle cover (2).
- Disconnect the negative cable connections (2).
- Remove the rubber cover from the rear of the positive cable connection.
- Disconnect the positive cable connection (3).
- Remove the slave receptacle and the gasket from the bracket.
Caution: Refer to Battery Disconnect Caution in the Preface section.
Installation Procedure
- Position the slave receptacle with the gasket onto the bracket.
- Install the positive cable onto the connection (3).
- Install the negative cable onto the connection (2).
- Install the rubber cover onto the rear of the positive cable connection.
- Position the slave receptacle cover (1) onto the rear of the bracket.
- Install the fasteners (3) onto the slave receptacle and through the slave receptacle rear connector cover.
- Install the slave receptacle cover (2).
- Connect the battery cables. Refer to Battery Cable Disconnect and Connection .
Important: The gasket must mount to the square back of the slave start connector assembly.
Notice: Refer to Fastener Notice in the Preface section.
Tighten
Tighten the connections to 20 N·m (15 lb ft).
Tighten
Tighten the bolts to 8 N·m (71 lb in).
