Rear Disc Brake Hardware Replacement 1500 Series w/o NYS
Caution: Refer to Brake Dust Caution in the Preface section.
Removal Procedure
- Inspect the fluid level in the brake master cylinder reservoir.
- If the fluid level is midway between the maximum - full point, and the minimum allowable level, no fluid needs to be removed from the reservoir before proceeding.
- If the fluid level is higher than midway between the maximum - full point, and the minimum allowable level, remove fluid to the midway point before proceeding.
- Remove the tire and wheel assembly. Refer to Tire and Wheel Removal and Installation in Tires and Wheels.
- Compress the brake caliper piston.
- Remove the brake caliper bolts.
- Remove the caliper from the caliper bracket.
- Remove the brake pads from the caliper bracket.
- Remove the brake pad retainers.
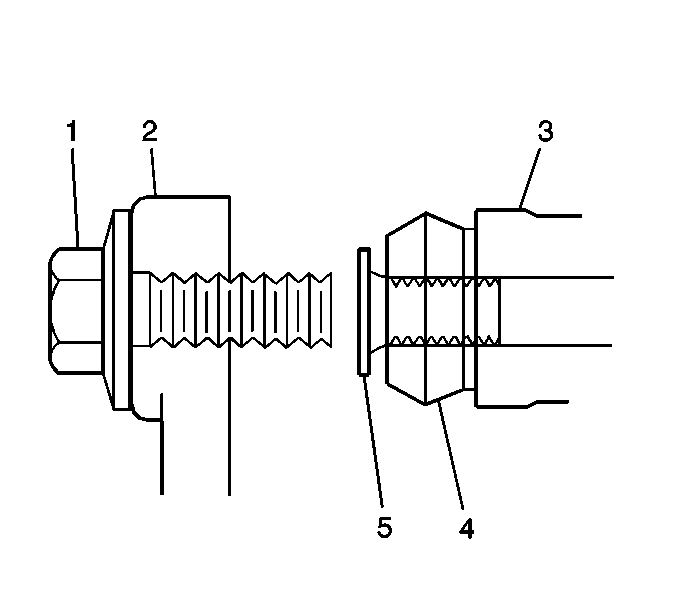
- Remove the slide pins (5) from caliper bracket (3).
- Remove the slide pin boots (4) from the caliper bracket.
- Inspect the disc brake hardware. Refer to Rear Disc Brake Mounting and Hardware Inspection .
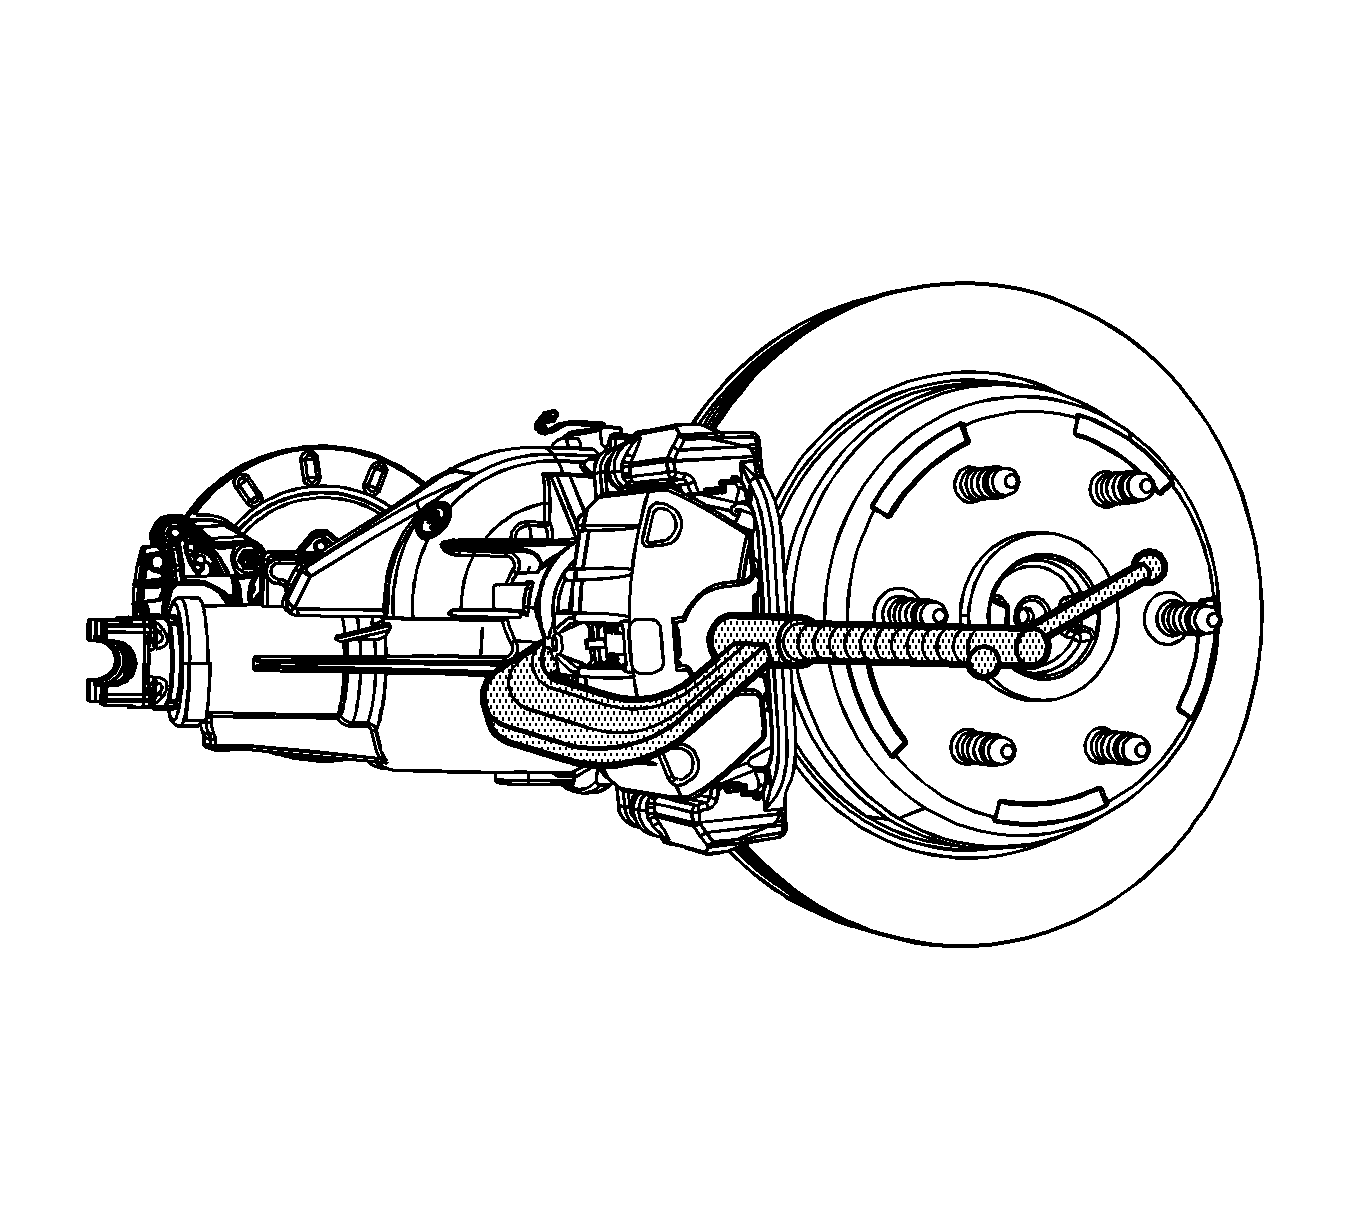
| 5.1. | Install a C-clamp over the top of the caliper housing and against the back of the outboard pad. |
| 5.2. | Slowly tighten the C-clamp until the pistons are pushed completely into the caliper bores. |
| 5.3. | Remove the C-clamp from the caliper. |
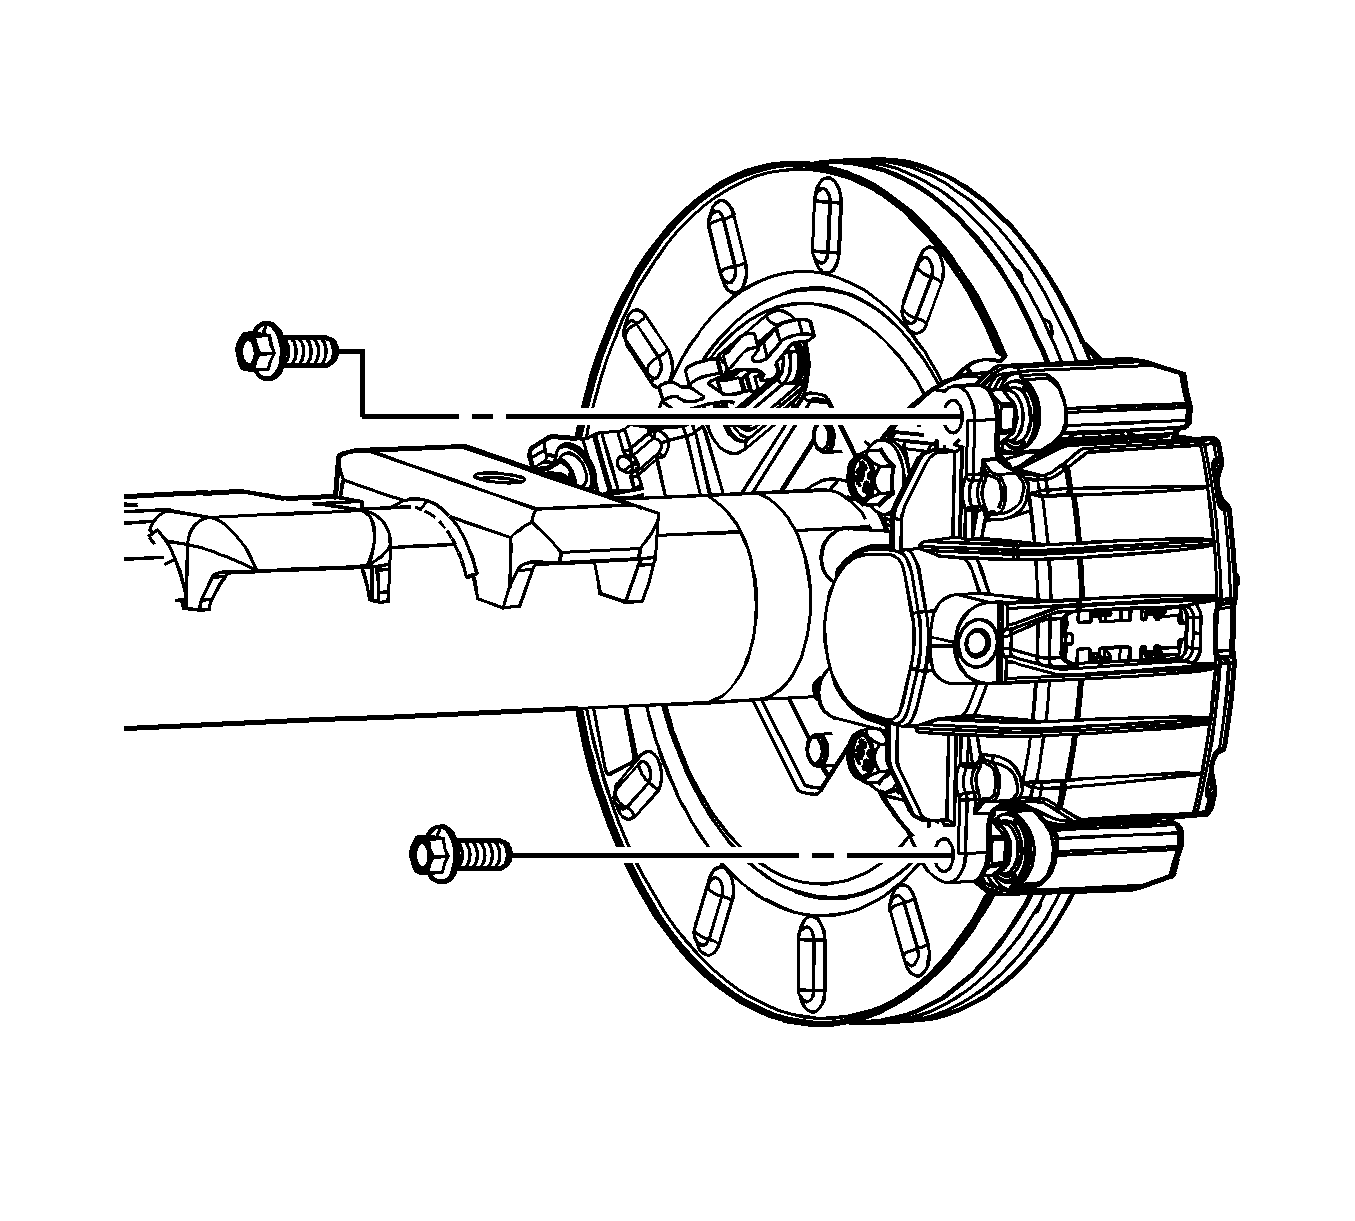
Notice: Refer to Brake Caliper Notice in the Preface section.
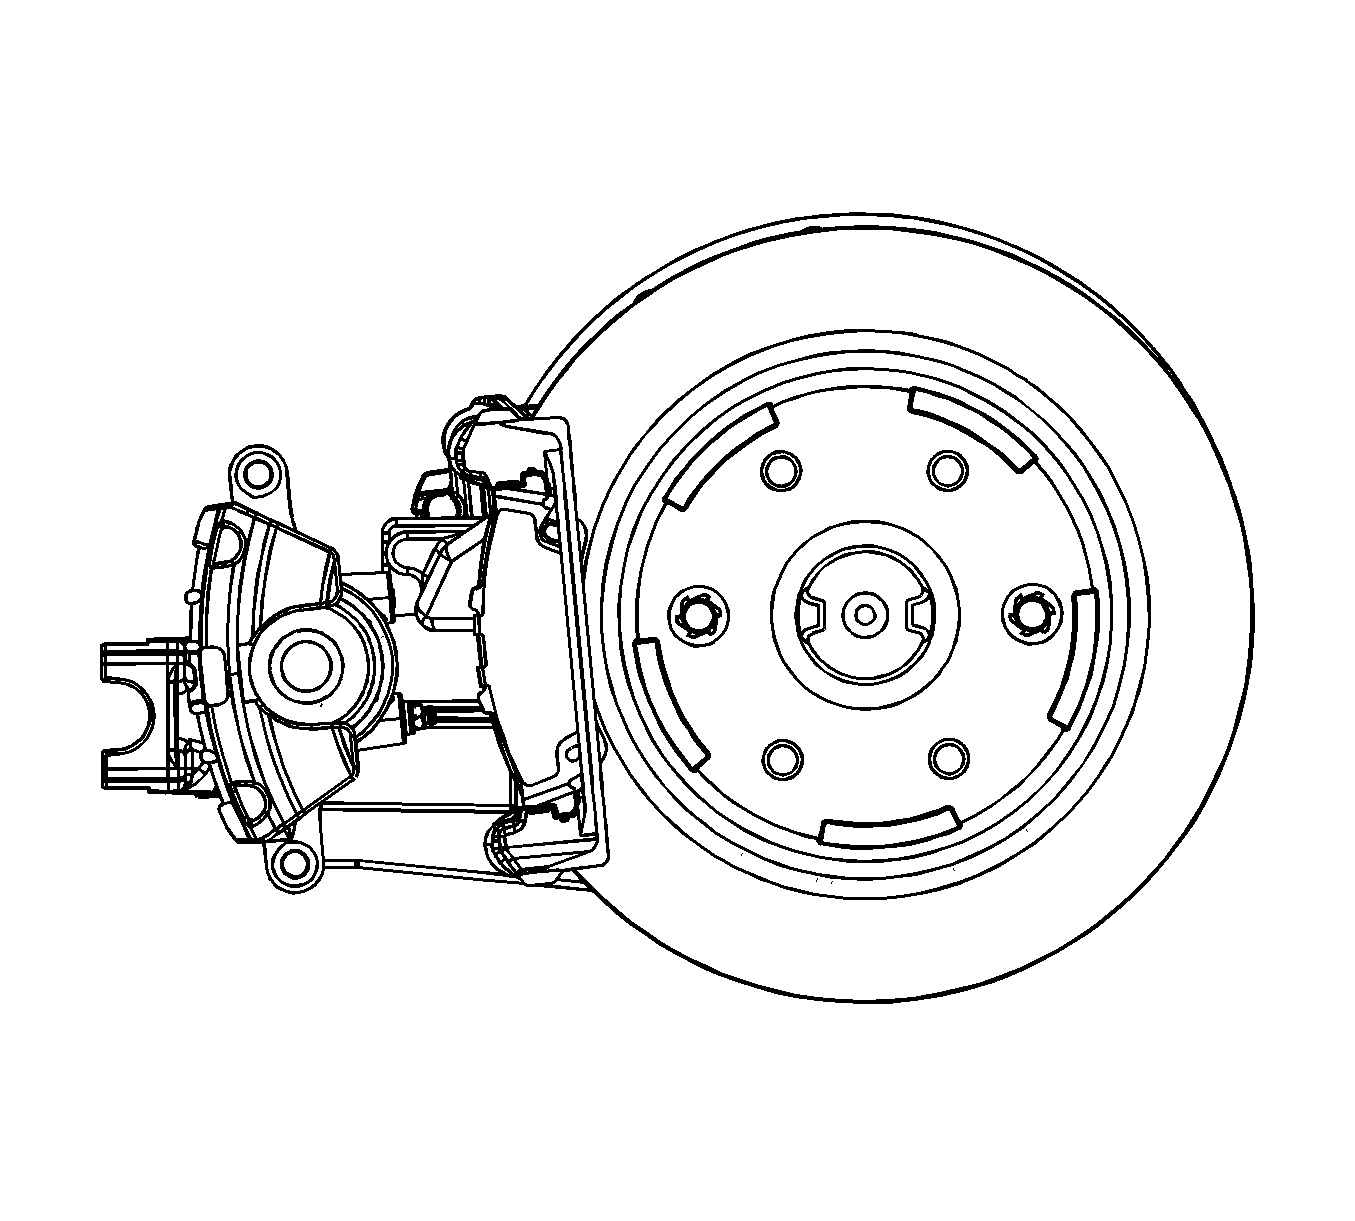
Support the caliper with heavy mechanic's wire or equivalent. DO NOT disconnect the hydraulic brake hose from the caliper.
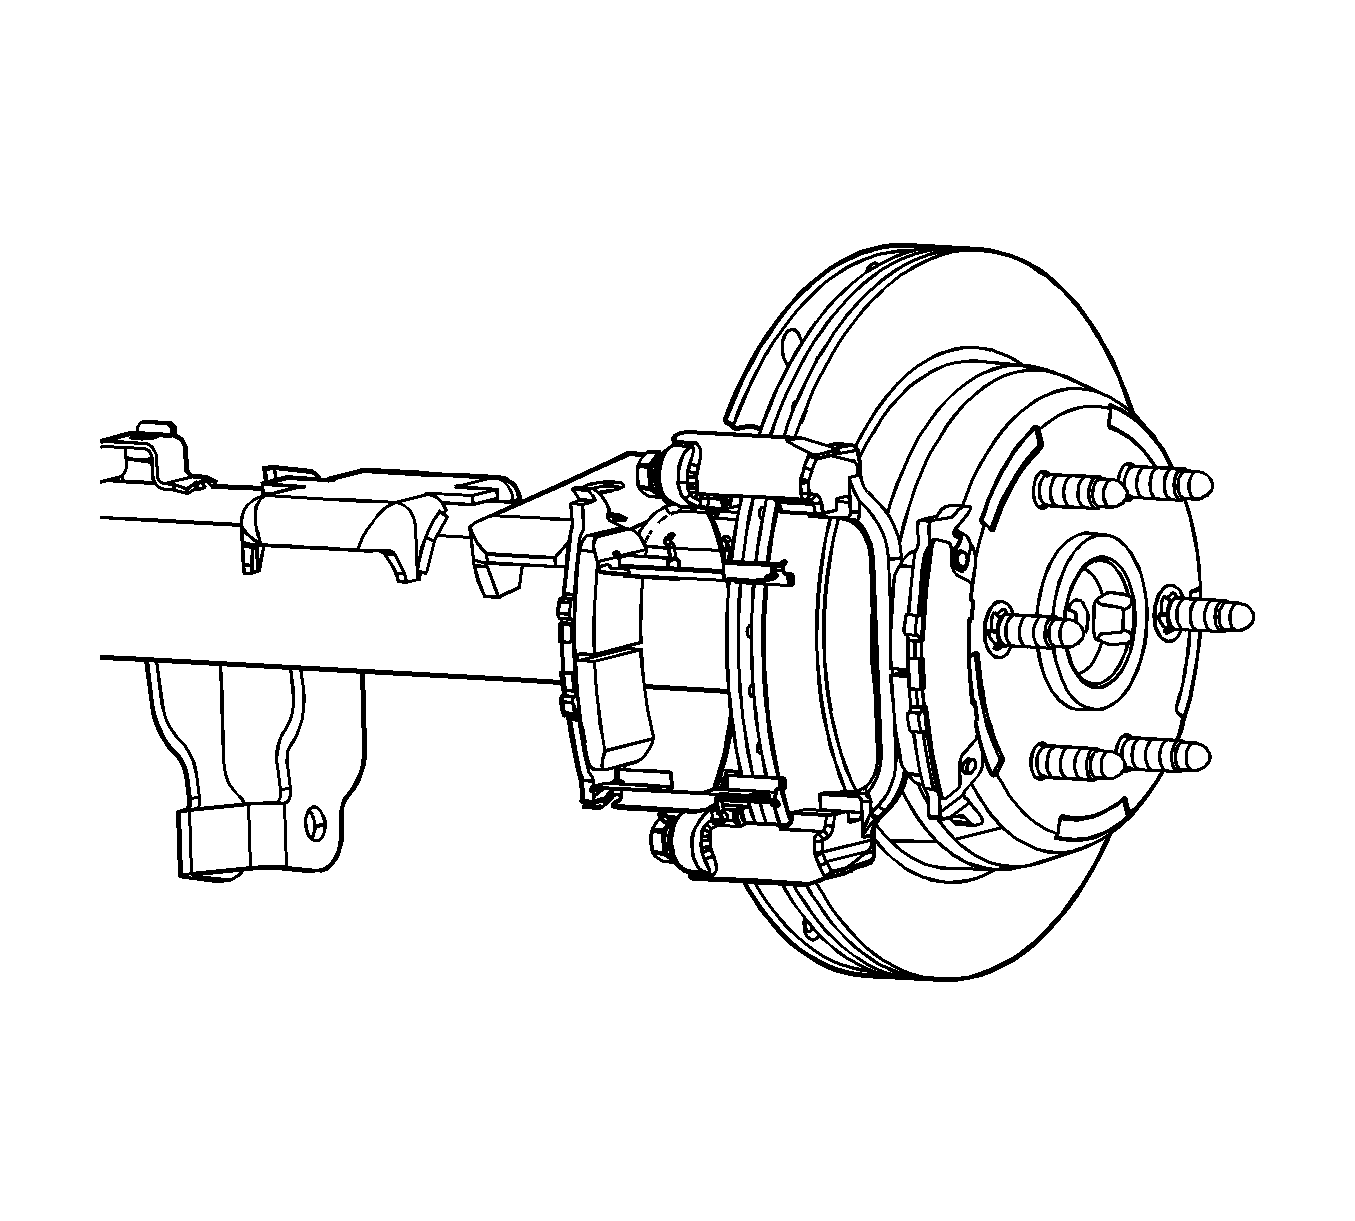
Installation Procedure
- Lubricate the caliper bracket bushings and slide pins with high temperature silicone brake lubricant.
- Install the slide pin boots (4) to the caliper bracket.
- Install the slide pins (5) to the caliper bracket (3).
- If installing NEW brake pads, use a C-clamp (1) in order to compress the piston to the bottom of the caliper bore (3). Use the old brake pad (2), a metal plate or a wooden block across the face of the piston in order to protect the piston and the caliper boot.
- Ensure that the piston boot is below the level of the piston face.
- Install the brake pad retainers to the caliper bracket.
- Install the brake pads.
- Install the brake caliper to the caliper bracket.
- Perform the following procedure before installing the brake caliper bolts.
- Install the brake caliper bolts.
- Install the tire and wheel assembly. Refer to Tire and Wheel Removal and Installation in Tires and Wheels.
- With the engine OFF, gradually apply the brake pedal approximately 2/3 of its travel distance.
- Slowly release the brake pedal.
- Wait 15 seconds, then repeat steps 7-8 until a firm brake pedal is obtained. This will properly seat the caliper pistons and pads.
- Lower the vehicle.
- Fill the master cylinder reservoir to the proper level with clean brake fluid, if necessary. Refer to Master Cylinder Reservoir Filling in Hydraulic Brakes.

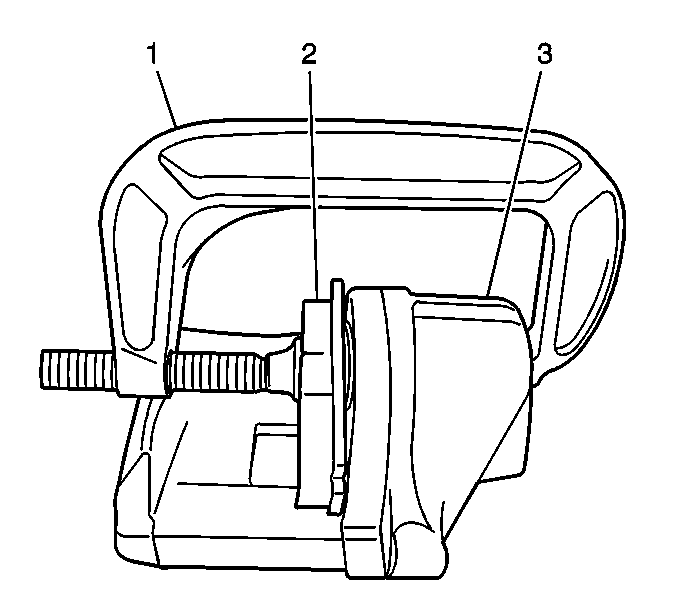
Important: Use denatured alcohol to clean the outside surface of caliper boot before installing new brake pads.
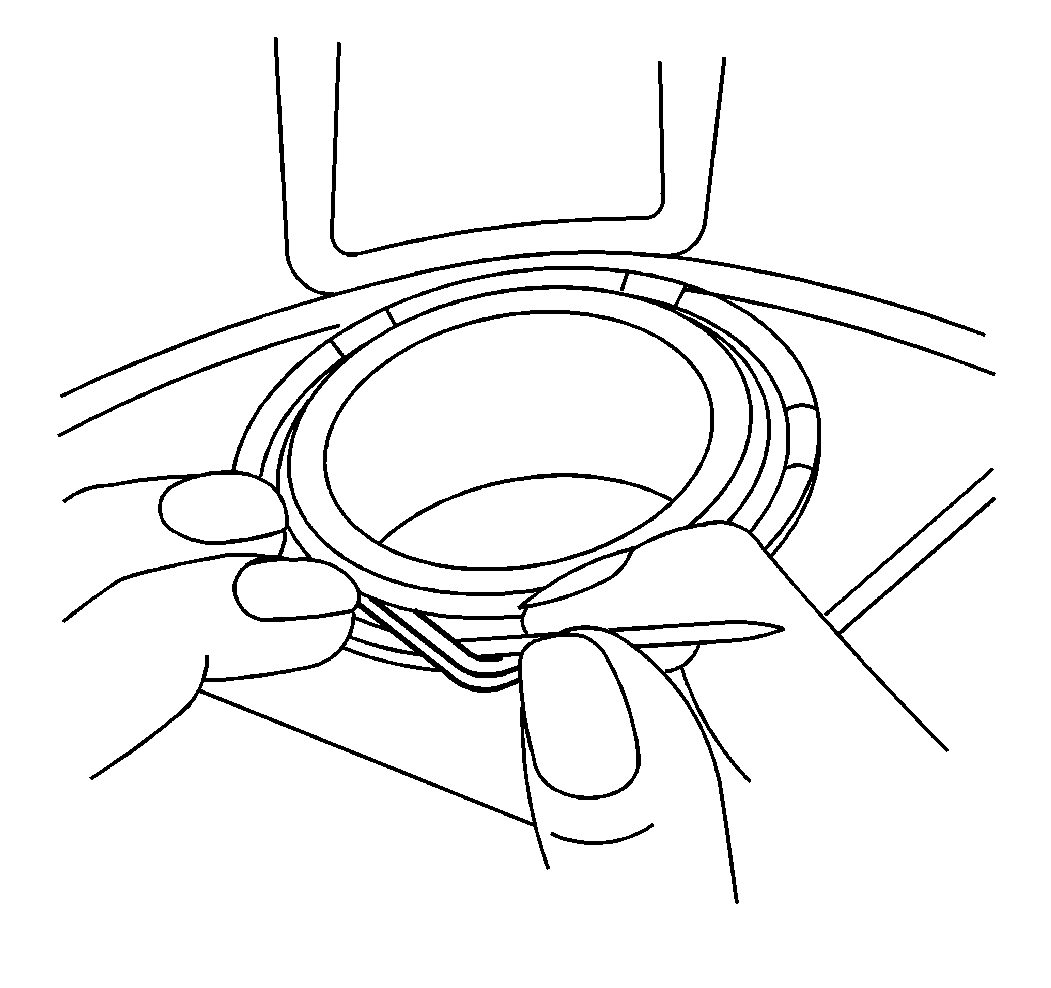
Important: Use a small flat-bladed tool and lift the inner edge caliper boot next to the piston to release any trapped air.


| 9.1. | Remove all traces of the original adhesive patch. |
| 9.2. | Clean the threads of the bolt with brake parts cleaner or the equivalent and allow to dry. |
| 9.3. | Apply Threadlocker GM P/N 12345493 (Canadian P/N 10953488) to the threads of the bolt. |
Notice: Refer to Fastener Notice in the Preface section.
Tighten
Tighten the bolts to 42 N·m (31 lb ft).
Rear Disc Brake Hardware Replacement 1500 Series w/NYS, 25/3500 Series
Caution: Refer to Brake Dust Caution in the Preface section.
Removal Procedure
- Inspect the fluid level in the brake master cylinder reservoir.
- If the fluid level is midway between the maximum - full point, and the minimum allowable level, no fluid needs to be removed from the reservoir before proceeding.
- If the fluid level is higher than midway between the maximum - full point, and the minimum allowable level, remove fluid to the midway point before proceeding.
- Remove the tire and wheel assembly. Refer to Tire and Wheel Removal and Installation in Tires and Wheels.
- Compress the brake caliper pistons.
- Remove the brake caliper bracket bolts.
- Remove the caliper and caliper bracket as an assembly.
- Remove the brake caliper bolts.
- Remove the caliper from the caliper bracket.
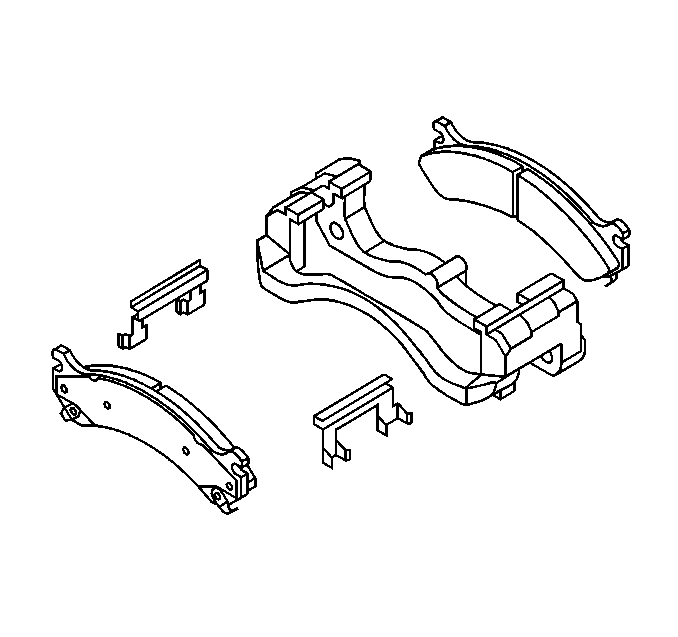
- Remove the brake pads from the caliper bracket.
- Remove the anti-rattle clips.
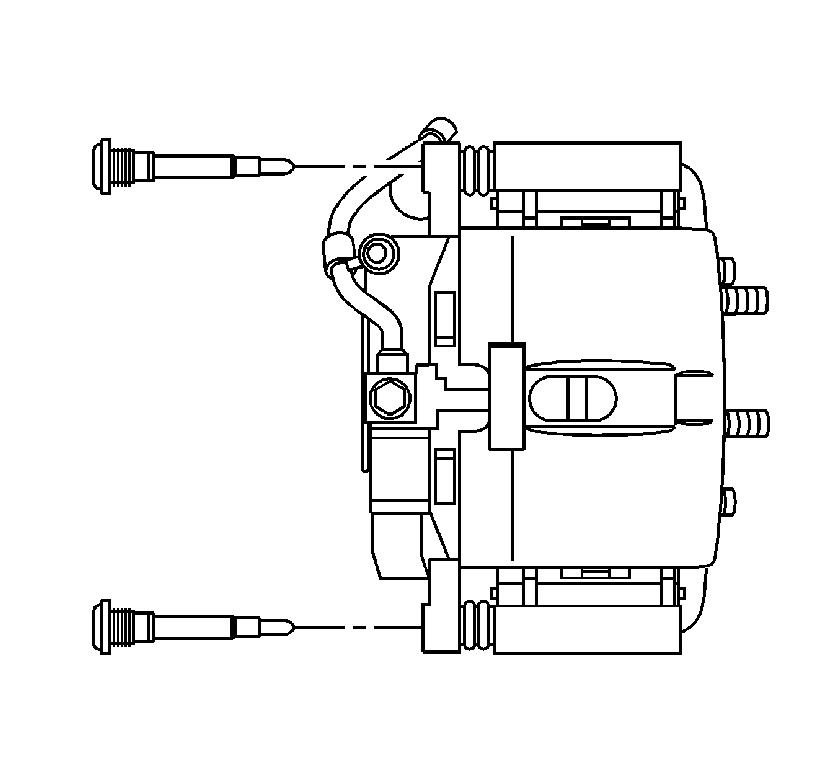
- Remove the slide pins (5) from the caliper bracket (3).
- Remove the slide pin boots (4) from the caliper bracket.
- Inspect the disc brake hardware. Refer to Rear Disc Brake Mounting and Hardware Inspection .
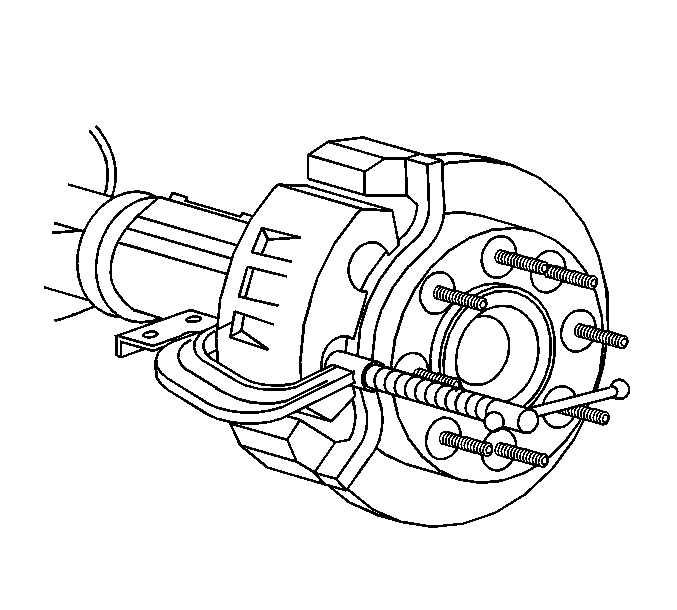
| 5.1. | Install a large C-clamp over the body of the top of the caliper housing and against the back of the outboard pad. |
| 5.2. | Slowly tighten the C-clamp until the pistons are pushed completely into the caliper bores. |
| 5.3. | Remove the C-clamp from the caliper. |
Caution: Do not depress the brake pedal with the brake rotors/calipers and/or the brake drums removed. Damage to the brake system may result. If brake system damage occurs and is not repaired, vehicle damage and/or personal injury or death may result.
Notice: Refer to Brake Caliper Notice in the Preface section.

Installation Procedure
- Lubricate the caliper bracket bushings and the slide pins with high temperature silicone brake lubricant.
- Install the slide pin boots (4) to the caliper bracket.
- Install the slide pins (5) to the caliper bracket (3).
- Install the anti-rattle clips to the caliper bracket.
- Install the brake pads.
- Install the caliper to the caliper bracket.
- Perform the following procedure before installing the caliper bracket bolts and the brake caliper bolts:
- Install the brake caliper bolts. DO NOT tighten.
- Install the brake caliper bracket and caliper as an assembly.
- Install the brake caliper bracket bolts.
- Tighten the brake caliper bolts.
- Install the tire and wheel assembly. Refer to Tire and Wheel Removal and Installation in Tires and Wheels.
- With the engine OFF, gradually apply the brake pedal approximately 2/3 of its travel distance.
- Slowly release the brake pedal.
- Wait 15 seconds, then repeat steps 7-8 until a firm brake pedal is obtained. This will properly seat the brake caliper pistons and brake pads.
- Fill the master cylinder reservoir to the proper level with clean brake fluid, if necessary. Refer to Master Cylinder Reservoir Filling in Hydraulic Brakes.


| 7.1. | Remove all traces of the original adhesive patch. |
| 7.2. | Clean the threads of the bolt with brake parts cleaner or the equivalent and allow to dry. |
| 7.3. | Apply Threadlocker GM P/N 12345493 (Canadian P/N 10953488) to the threads of the bolt. |

Notice: Refer to Fastener Notice in the Preface section.
Tighten
Tighten the bolts to 300 N·m (221 lb ft).
Tighten
Tighten the bolts to 108 N·m (80 lb ft).
