Cooling System Draining and Filling w/RPO HP2
Tools Required
| • |
J 26568
Coolant and Battery Tester |
Draining Procedure
Caution: To avoid being burned, do not remove the radiator cap or surge tank
cap while the engine is hot. The cooling system will release scalding fluid
and steam under pressure if radiator cap or surge tank cap is removed while
the engine and radiator are still hot.
- Follow the steps below in order to remove the surge tank fill cap.
| 1.1. | Slowly rotate the cap counterclockwise. |
| 1.2. | Stop rotating and allow the hissing to stop. |
| 1.3. | After all the hissing stops, continue turning counterclockwise in order to remove the cap. |
- Raise and support the vehicle. Refer to
Lifting and Jacking the Vehicle
.
- Place a drain pan under the lower radiator hose.
- Using the
J 38185
, reposition the lower radiator hose clamp.
- Remove the lower radiator hose from the radiator.
- Drain the cooling system.
- If a complete engine block drain is required, remove the left and right engine
block coolant drain plugs.
- Remove the engine block coolant heater, if equipped. Refer to
Coolant Heater Replacement
.
- Inspect the coolant.
- Follow the appropriate procedure based on the condition of the coolant.
| • | Normal in appearance--Follow the filling procedure. |
| • | Discolored--Follow the flush procedure. Refer to
Flushing
. |
Filling Procedure
Notice: The procedure below must be followed. Improper coolant level could result in
a low or high coolant level condition, causing engine damage.
- Install the lower radiator hose to the radiator.
- Using the
J 38185
reposition the lower radiator hose clamp.
Notice: Refer to Fastener Notice in the Preface section.
- If the left and right engine block coolant drain plugs were removed, perform the following.
| 3.1. | Apply pipe sealer to the drain plugs. |
| 3.2. | Install the drain plugs. |
Tighten
Tighten the drain plugs to 60 N·m (44 lb ft).
- Install the engine block coolant heater, if equipped. Refer to
Coolant Heater Replacement
.
- Lower the vehicle.
- Open the cooling system bleeder screws, if applicable.
Important: Use a 50/50 mixture of DEX-COOL antifreeze and clean, drinkable water.
- Slowly fill the cooling system with a 50/50 coolant mixture. Refer to
Approximate Fluid Capacities
.
- Close the cooling system bleeder screws, if applicable.
- Install the coolant pressure cap.
- Start the engine.
- Run the engine at 2,000-2,500 RPM until the engine reaches normal operating temperature.
- Allow the engine to idle for 3 minutes.
- Perform the following step 4 times:
| 13.1. | Run the engine at 4,000 RPM for 30 seconds. |
| 13.2. | Allow the engine to return to idle for 30 seconds. |
- Shut the engine OFF.
- Allow the engine to cool.
- Top off the coolant as necessary.
- Inspect the concentration of the engine coolant using the
J 26568
.
- Rinse away any excess coolant from the engine and the engine compartment.
Cooling System Draining and Filling Static Fill
Tools Required
| • |
J 26568
Coolant and Battery Tester |
Draining Procedure
Caution: To avoid being burned, do not remove the radiator cap or surge tank
cap while the engine is hot. The cooling system will release scalding fluid
and steam under pressure if radiator cap or surge tank cap is removed while
the engine and radiator are still hot.
- Follow the steps below in order to remove the surge tank fill cap.
| 1.1. | Slowly rotate the cap counterclockwise. |
| 1.2. | Stop rotating and allow the hissing to stop. |
| 1.3. | After all the hissing stops, continue turning counterclockwise in order to remove the cap. |
- Raise and support the vehicle. Refer to
Lifting and Jacking the Vehicle
.
- Place a drain pan under the lower radiator hose.
- Using the
J 38185
, reposition the lower radiator hose clamp.
- Remove the lower radiator hose from the radiator.
- Drain the cooling system.
- If a complete engine block drain is required, remove the left and right engine
block coolant drain plugs.
- Remove the engine block coolant heater, if equipped. Refer to
Coolant Heater Replacement
.
- Inspect the coolant.
- Follow the appropriate procedure based on the condition of the coolant.
| • | Normal in appearance--Follow the filling procedure. |
| • | Discolored--Follow the flush procedure. Refer to
Flushing
. |
Filling Procedure
Notice: The procedure below must be followed. Improper coolant level could result in
a low or high coolant level condition, causing engine damage.
- Install the lower radiator hose to the radiator.
- Using the
J 38185
reposition the lower radiator hose clamp.
- If the left and right engine block coolant drain plugs were removed, perform the following.
| 3.1. | Apply pipe sealer to the drain plugs. |
Notice: Refer to Fastener Notice in the Preface section.
| 3.2. | Install the drain plugs. |
Tighten
Tighten the drain plugs to 60 N·m (44 lb ft).
- Install the engine block coolant heater, if equipped. Refer to
Coolant Heater Replacement
.
- Lower the vehicle.
- Open the cooling system bleeder screws, if equipped.
Important: Use a 50/50 mixture of DEX-COOL antifreeze and clean, drinkable water.
- Slowly fill the cooling system with a 50/50 coolant mixture. Refer to
Approximate Fluid Capacities
.
- Close the cooling system bleeder screws, if equipped.
- Install the coolant pressure cap.
- Start the engine.
- Run the engine at 2,000-2,500 RPM until the engine reaches normal operating temperature.
- Allow the engine to idle for 3 minutes.
- Shut the engine OFF.
- Allow the engine to cool.
- Top off the coolant as necessary.
- Inspect the concentration of the engine coolant using the
J 26568
.
- Rinse away any excess coolant from the engine and the engine compartment.
Cooling System Draining and Filling Ambulance Body
Tools Required
| • |
J 26568
Coolant and Battery Tester |
Draining Procedure
Caution: To avoid being burned, do not remove the radiator cap or surge tank
cap while the engine is hot. The cooling system will release scalding fluid
and steam under pressure if radiator cap or surge tank cap is removed while
the engine and radiator are still hot.
- Follow the steps below in order to remove the surge tank fill cap.
| 1.1. | Slowly rotate the cap counterclockwise. |
| 1.2. | Stop rotating and allow the hissing to stop. |
| 1.3. | After all the hissing stops, continue turning counterclockwise in order to remove the cap. |
Caution: Refer to Vehicle Lifting Caution in the Preface section.
- Raise and support the vehicle. Refer to
Lifting and Jacking the Vehicle
in General Information in 2005 C/K Truck Service Manual.
- Place a drain pan under the lower radiator hose.
- Using the
J 38185
, reposition the lower radiator hose clamp.
- Remove the lower radiator hose from the radiator.
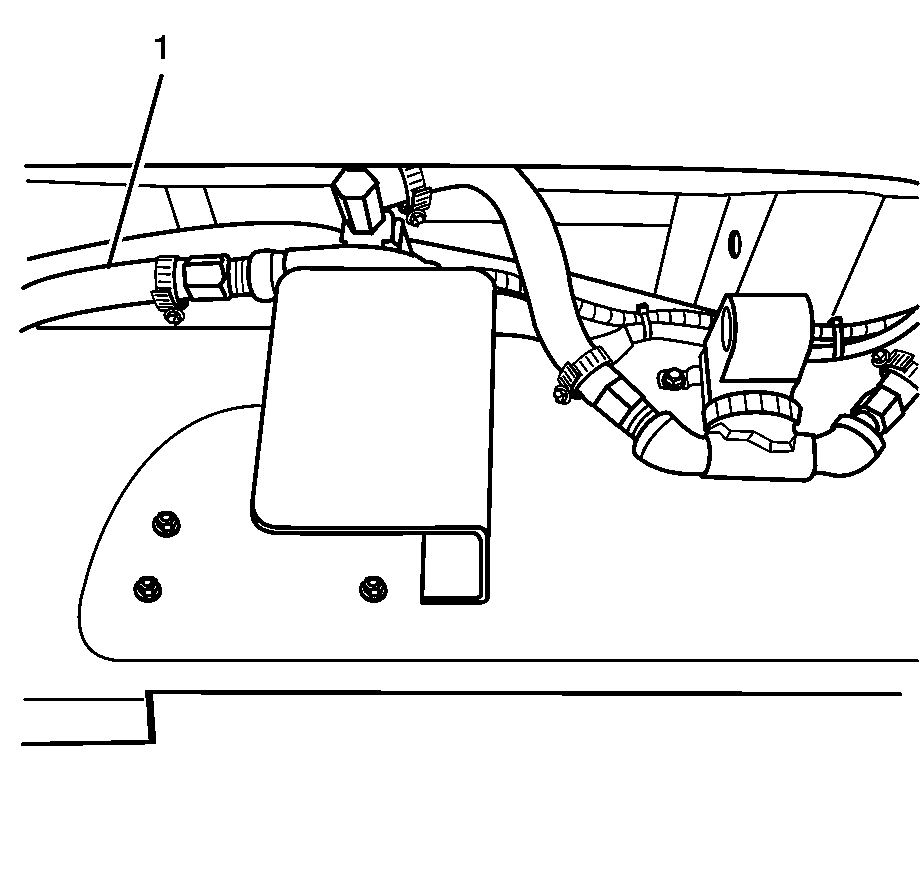
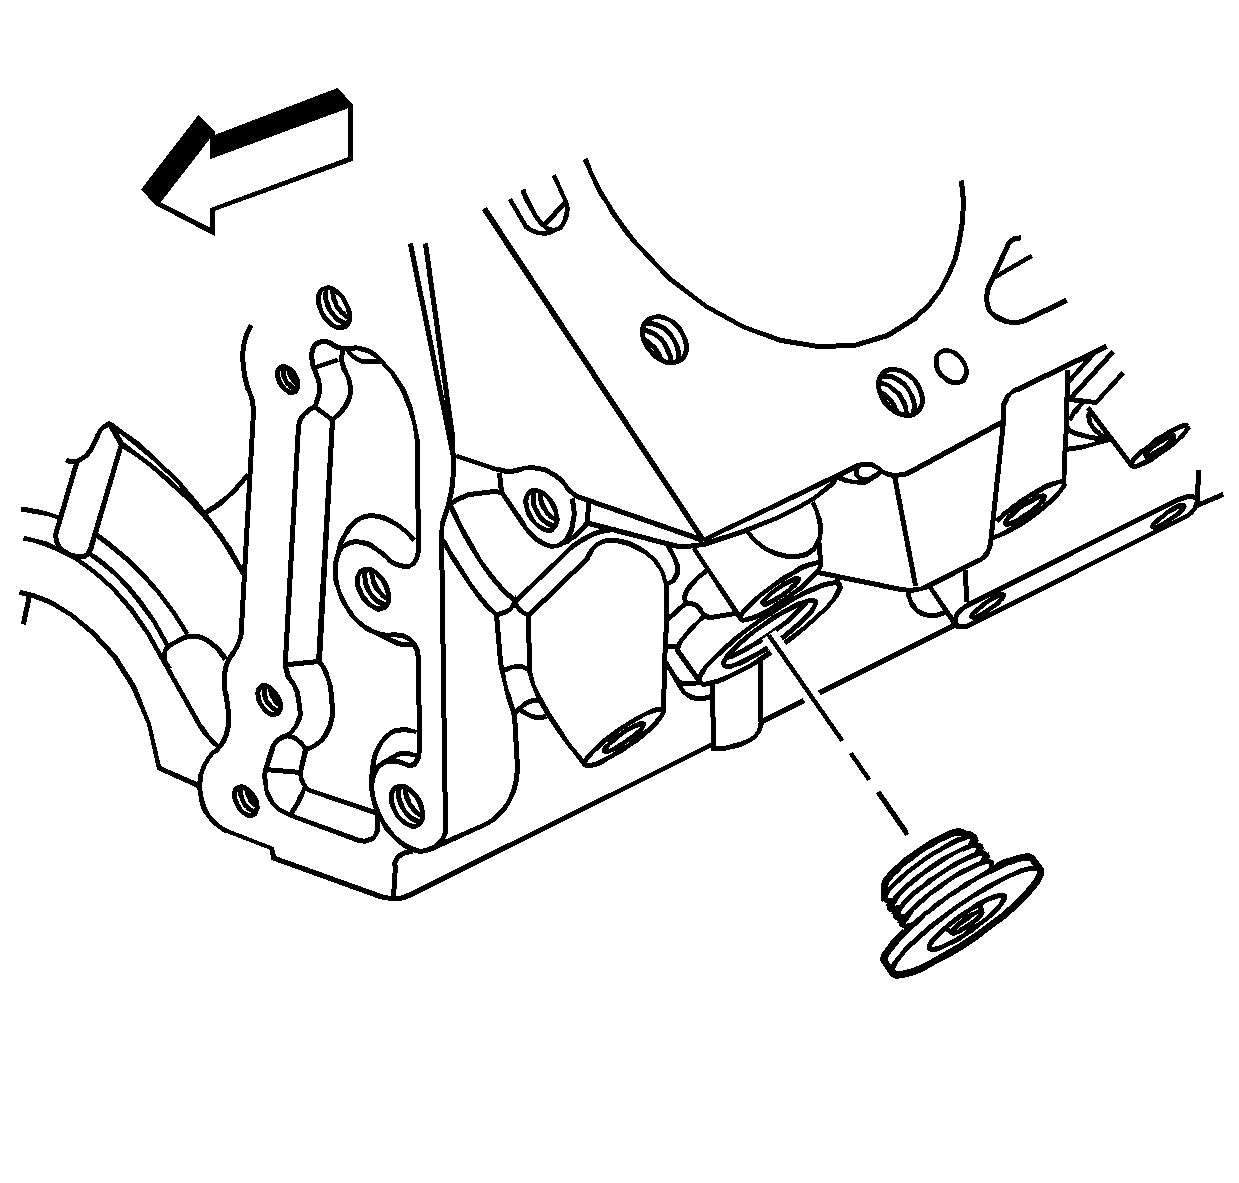
- Remove the supply hose (1) at the rear of the coolant booster pump.
- Drain the cooling system.
- If a complete engine block drain is required, remove the left and right engine
block coolant drain plugs.
- Remove the engine block coolant heater, if equipped. Refer to
Coolant Heater Replacement
.
- Inspect the coolant.
- Follow the appropriate procedure based on the condition of the coolant.
| • | Normal in appearance--Follow the filling procedure. |
| • | Discolored--Follow the flush procedure. Refer to
Flushing
in Engine Cooling in 2005 C/K Truck Service Manual. |
Filling Procedure
Notice: The procedure below must be followed. Improper coolant level could result in
a low or high coolant level condition, causing engine damage.
- Install the lower radiator hose to the radiator.
- Using the
J 38185
reposition the lower radiator hose clamp.
- If the left and right engine block coolant drain plugs were removed, perform the
following.
| 3.1. | Apply pipe sealer to the drain plugs. |
Notice: Refer to Fastener Notice in the Preface section.
| 3.2. | Install the drain plugs. |
Tighten
Tighten the drain plugs to 60 N·m (44 lb ft).
- Install the engine block coolant heater, if equipped. Refer to
Coolant Heater Replacement
.
- Install the supply hose (1) at the rear of the coolant booster pump.
- Lower the vehicle.
- Open the cooling system bleeder screws.
Important: Use a 50/50 mixture of DEX-COOL antifreeze and clean, drinkable water.
- Slowly fill the cooling system with a 50/50 coolant mixture. Refer to
Approximate Fluid Capacities
in Maintenance and Lubrication.
- Close the cooling system bleeder screws.
- Remove the return hose at the heater core of the rear HVAC and insert a funnel into the hose.
- Add coolant until full and activate pump until coolant starts to flow out of the heater core.
- Deactivate the pump and install return hose at the core.
- Install the coolant pressure cap.
- Start the engine.
- Run the engine at 2,000-2,500 RPM until the engine reaches normal operating temperature.
- Allow the engine to idle for 3 minutes.
- Shut the engine OFF.
- Allow the engine to cool.
- Top off the coolant as necessary.
- Turn on the rear HVAC and set in the full heat position.
- Start the engine.
- Run the engine at 2,000-2,500 RPM until the engine reaches normal operating temperature.
- Allow the engine to idle for 3 minutes.
- Shut the engine OFF.
- Allow the engine to cool.
- Top off the coolant as necessary.
- Inspect the concentration of the engine coolant using the
J 26568
.
- Rinse away any excess coolant from the engine, engine compartment and the rear HVAC compartment.
