Removal Procedure
Important: Clean all the fuel pipe connections and surrounding areas before disconnecting
the pipes in order to avoid possible fuel system contamination.
- Remove the air cleaner outlet duct. Refer
to
Air Cleaner Outlet Resonator Replacement
.
- Relieve the fuel system pressure. Refer to
Fuel Pressure Relief
.
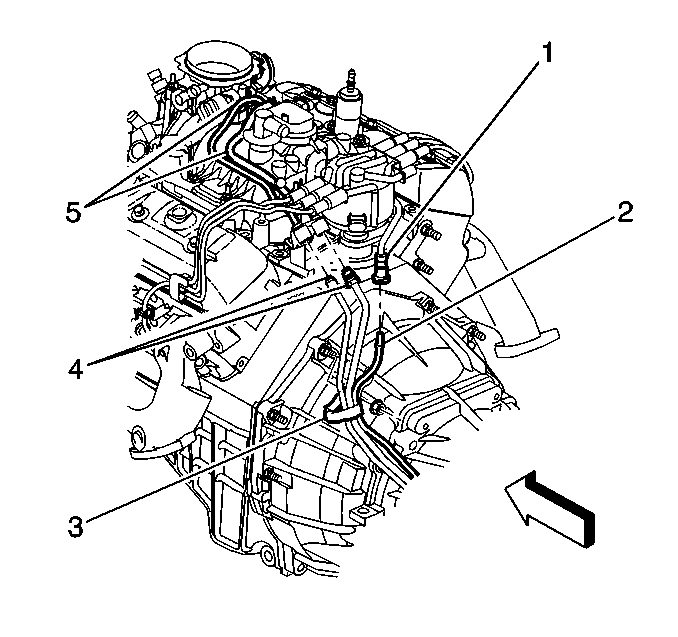
- Disconnect the fuel feed/return pipes (4) from the engine compartment
pipes (5).
- Discard the O-ring seals from fuel feed/return pipes.
- Cap the fuel pipes in order to prevent possible fuel system contamination.
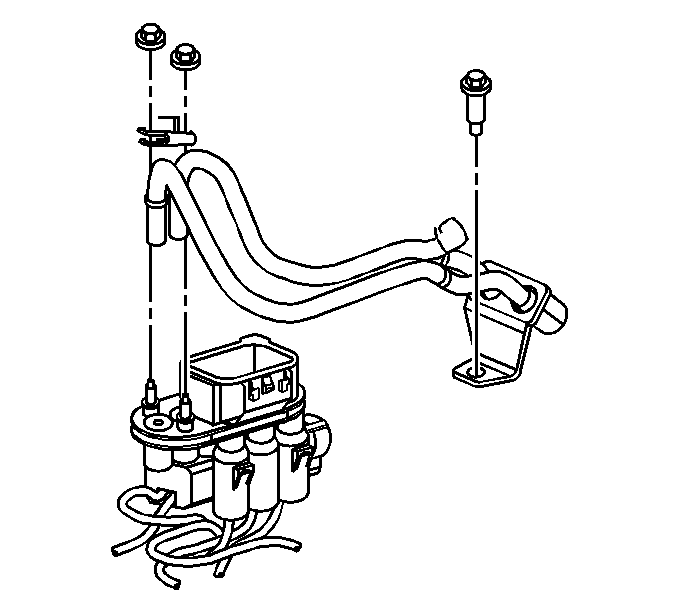
- Remove the fuel feed/return pipe bracket
nuts.
- Remove the fuel feed/return pipe bracket.
- Remove the fuel feed/return pipe bolt.
- Pull straight up on the pipes in order to remove the pipes from the fuel
meter body.
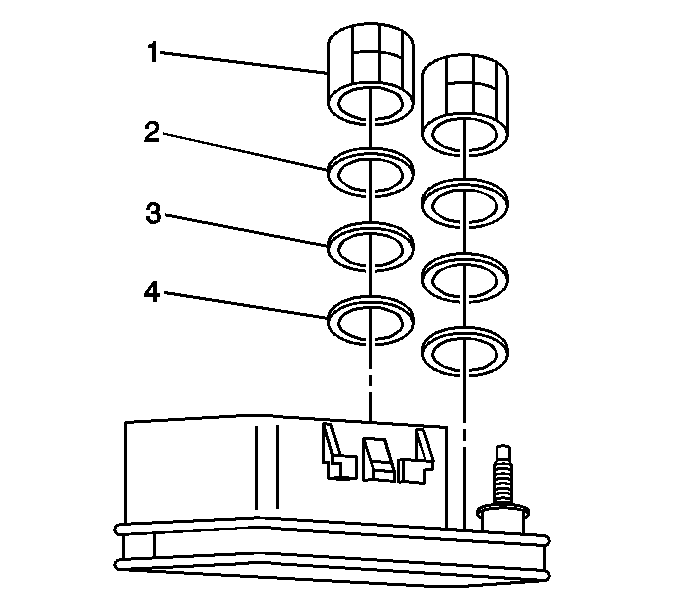
- Remove and discard the following components
from the fuel meter body:
| • | Fuel seal retainers (1) |
Installation Procedure
- Install the following NEW components to
the fuel meter body:
| • | Fuel seal retainers (1) |
Caution: Always apply a few drops of clean engine oil to the male pipe ends before
connecting the fuel pipe fittings in order to reduce the risk
of fire and personal injury. This will ensure proper reconnection and prevent
a possible fuel leak. During normal operation, the O-rings located in the
female connector will swell and may prevent proper reconnection if not lubricated.
- Apply a few drops of clean engine oil to the fuel feed/return
pipe ends.
- Install the fuel feed/return pipes to the fuel meter body.
- Install the fuel feed/return pipe bracket.
- Install the fuel feed/return pipe bracket nuts.
Notice: Use the correct fastener in the correct location. Replacement fasteners
must be the correct part number for that application. Fasteners requiring
replacement or fasteners requiring the use of thread locking compound or sealant
are identified in the service procedure. Do not use paints, lubricants, or
corrosion inhibitors on fasteners or fastener joint surfaces unless specified.
These coatings affect fastener torque and joint clamping force and may damage
the fastener. Use the correct tightening sequence and specifications when
installing fasteners in order to avoid damage to parts and systems.
- Install the fuel feed/return pipe bolt.
Tighten
- Tighten the bolt to 6 N·m (53 lb in).
- Tighten the nuts to 3 N·m (27 lb in).
- Remove the cap from the fuel pipes.
- Install NEW O-rings on the fuel feed/return pipes.
- Connect the fuel feed/return pipes (4) to the engine compartment pipes
(5).
Tighten
Tighten the fittings to 28 N·m (21 lb ft).
- Test the system for leaks using the following procedure:
| 10.1. | Turn the ignition ON, with the engine OFF for 2 seconds. |
| 10.2. | Turn the ignition OFF for 10 seconds. |
| 10.3. | Turn the ignition ON, with the engine OFF. |
| 10.4. | Inspect for fuel leaks. |
- Install the air cleaner outlet duct. Refer to
Air Cleaner Outlet Resonator Replacement
.
